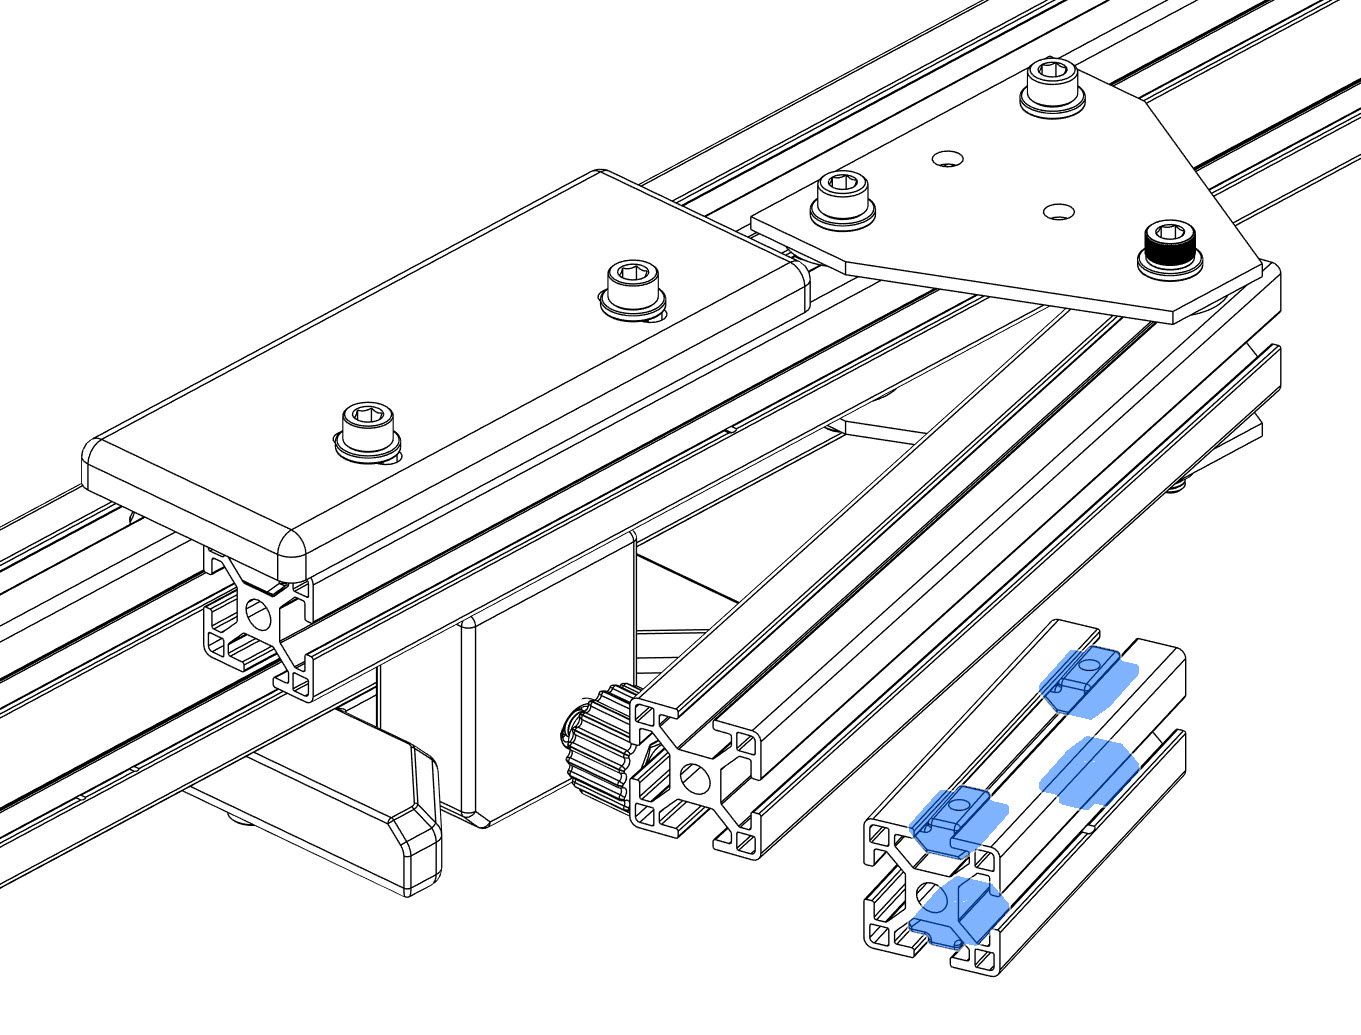
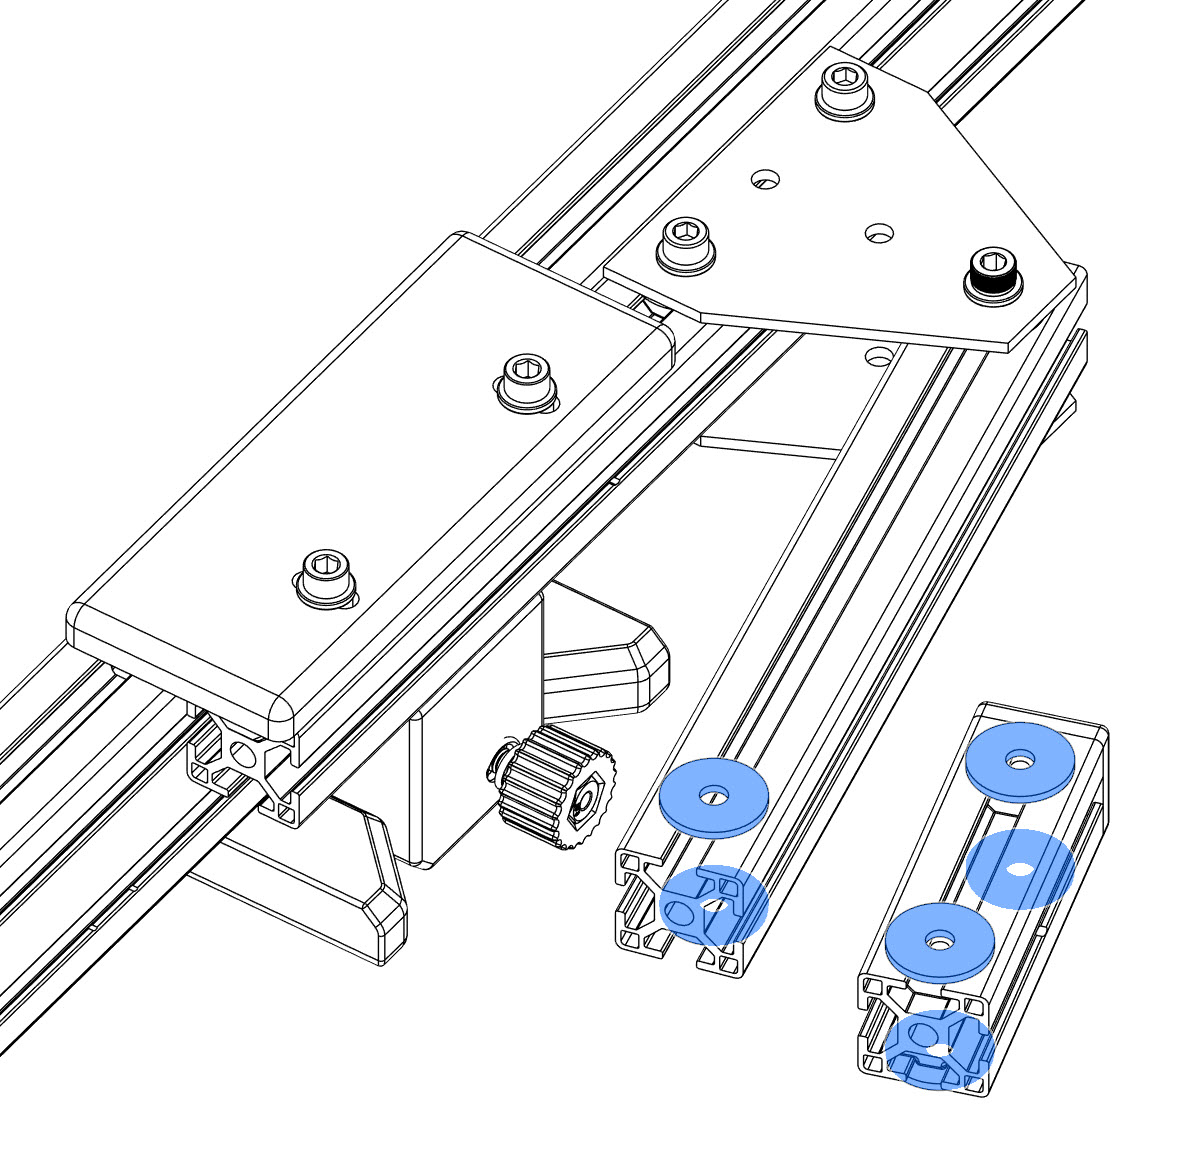
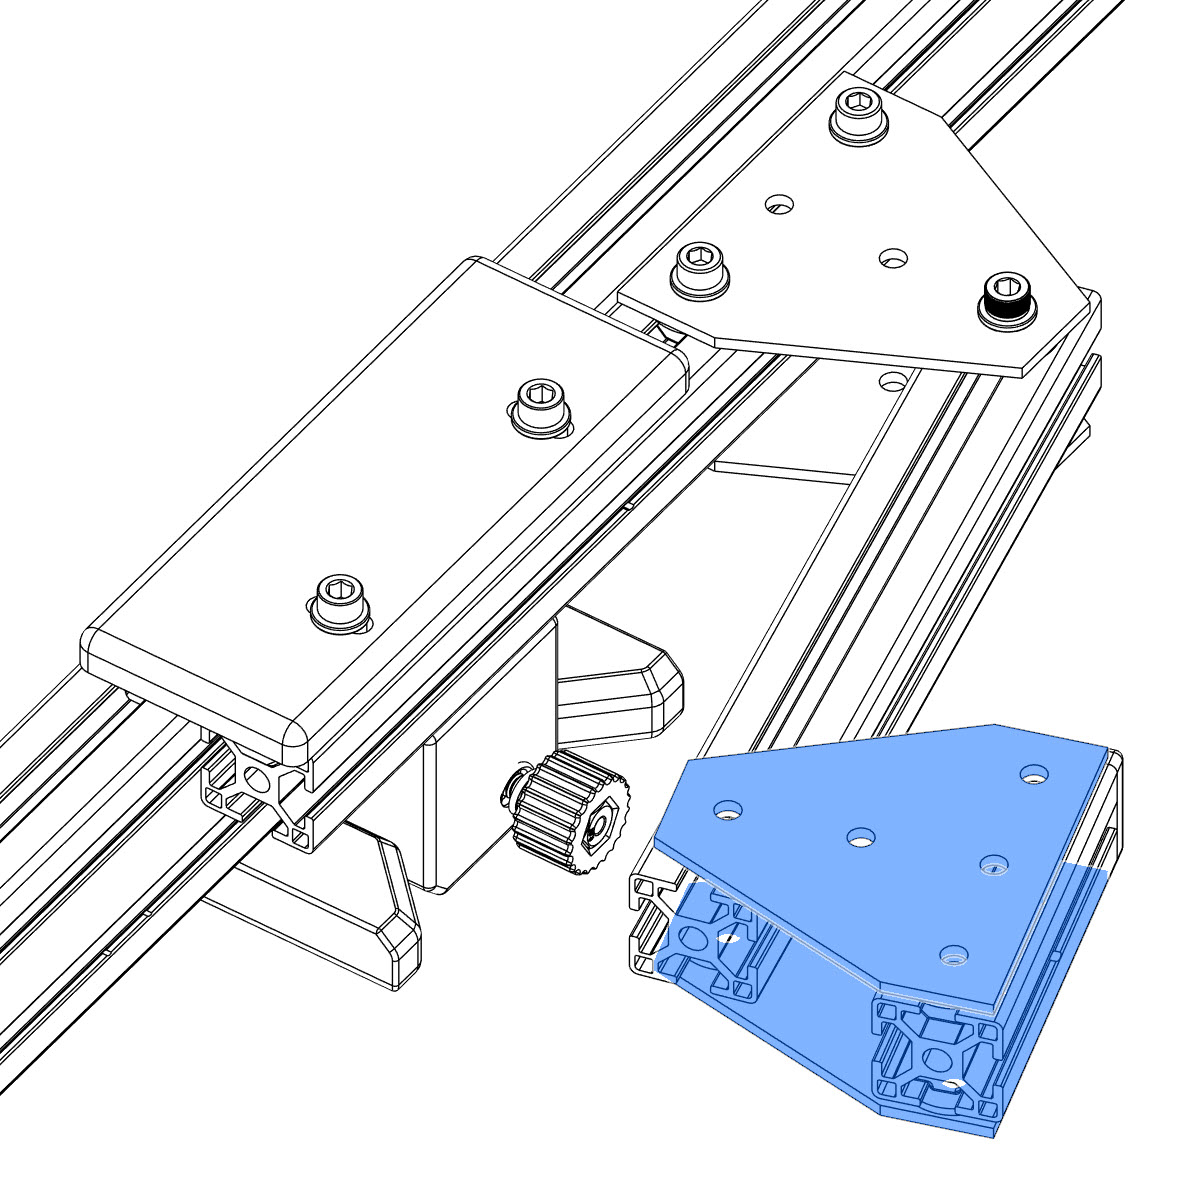
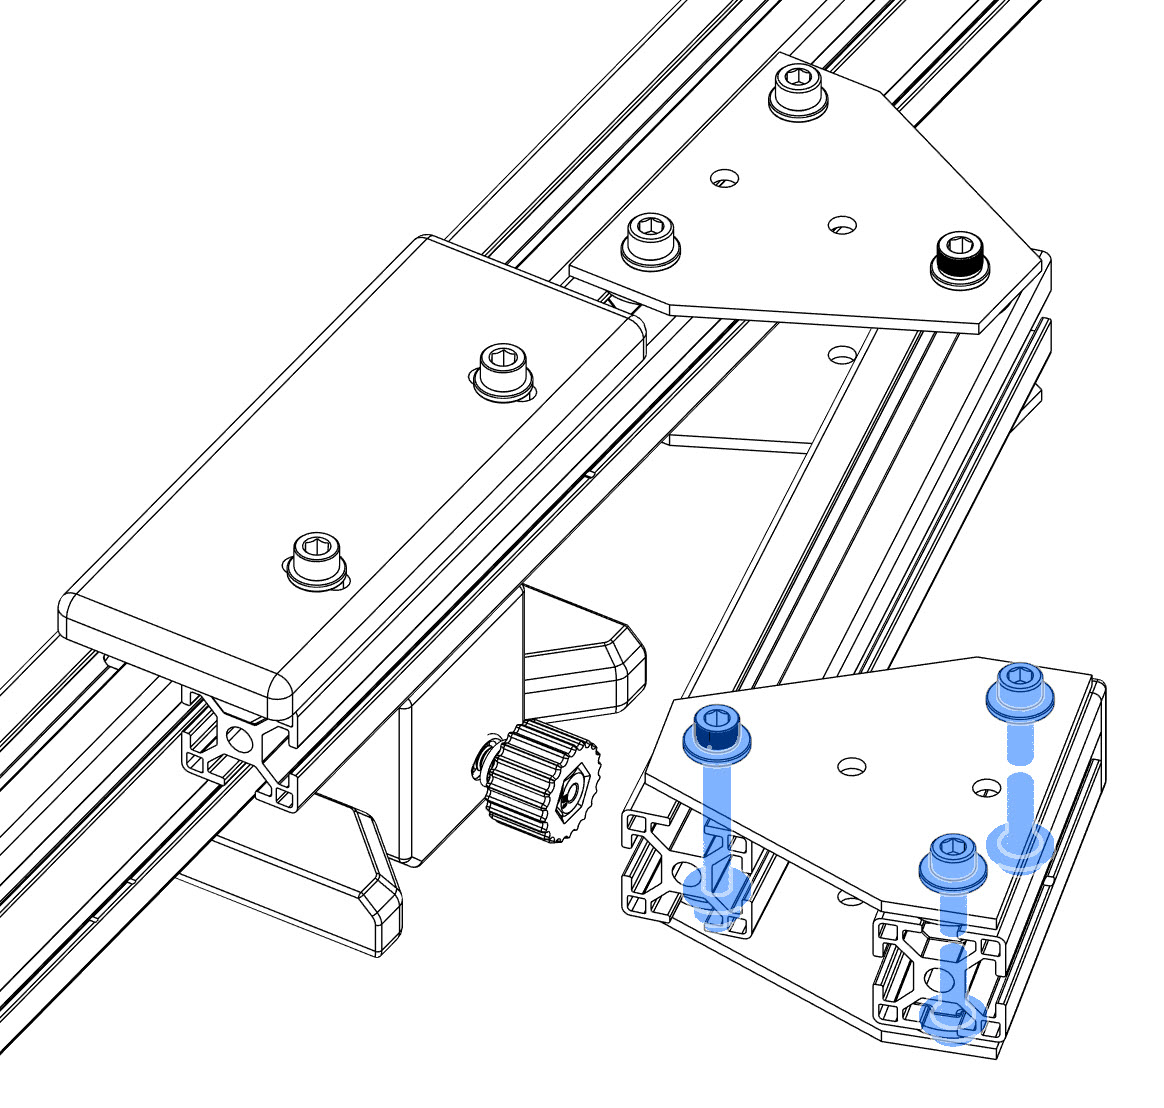
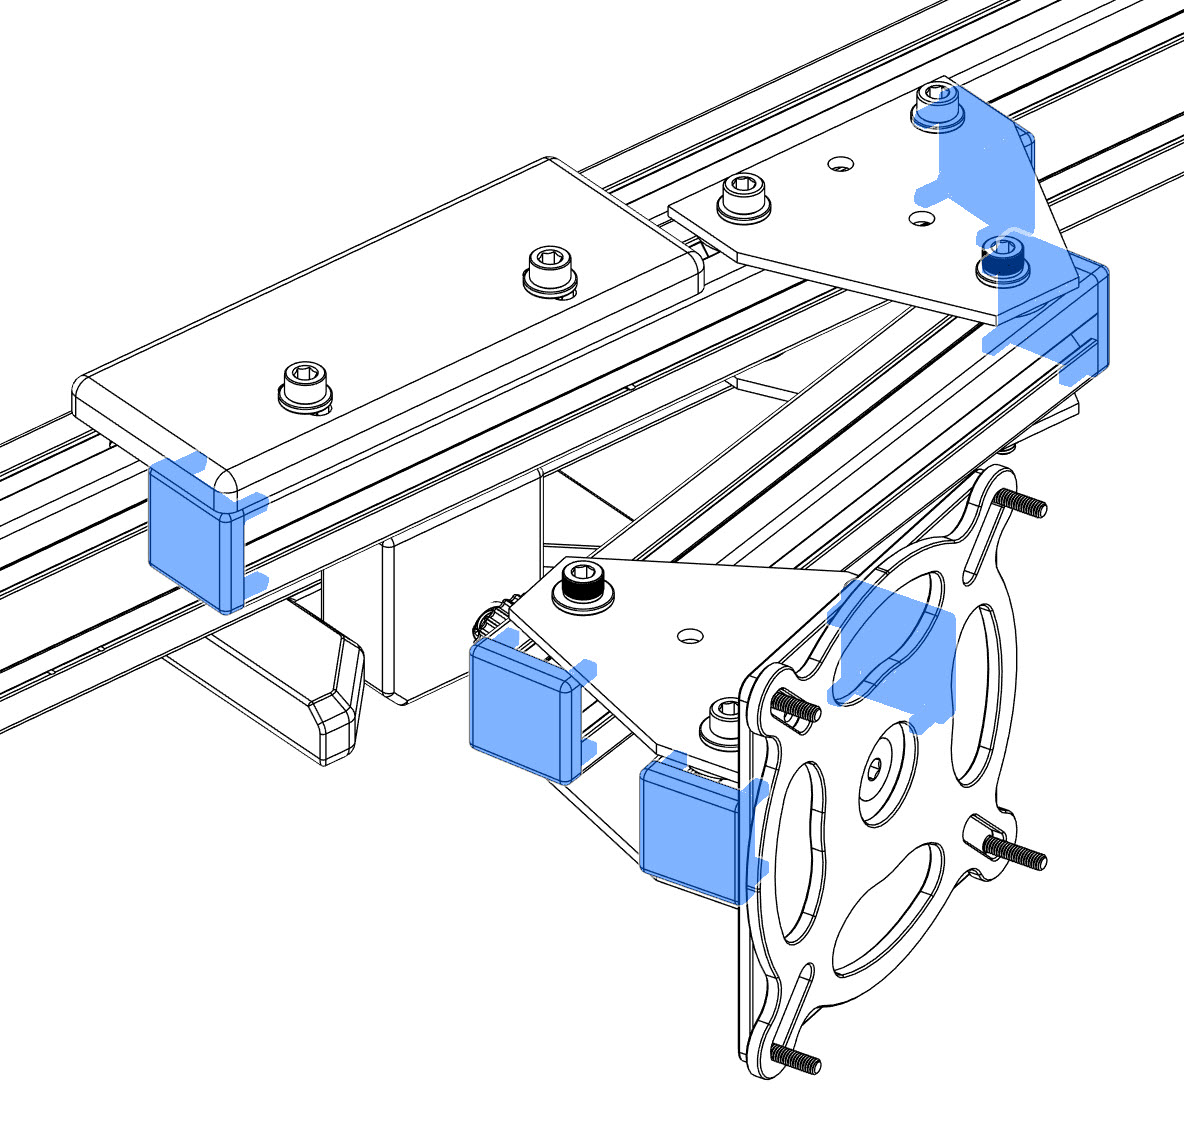
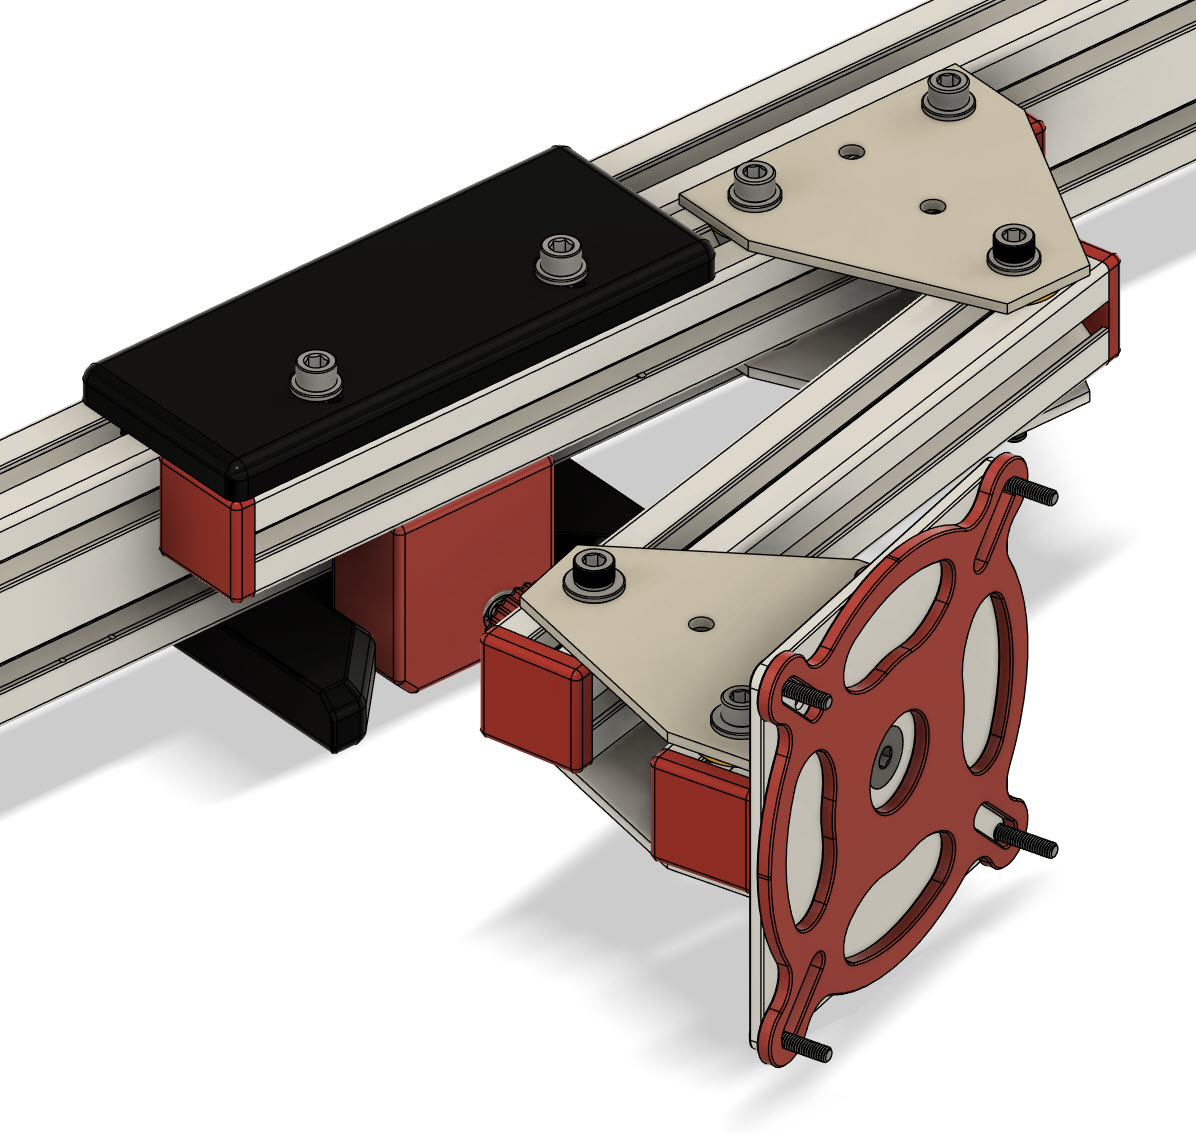
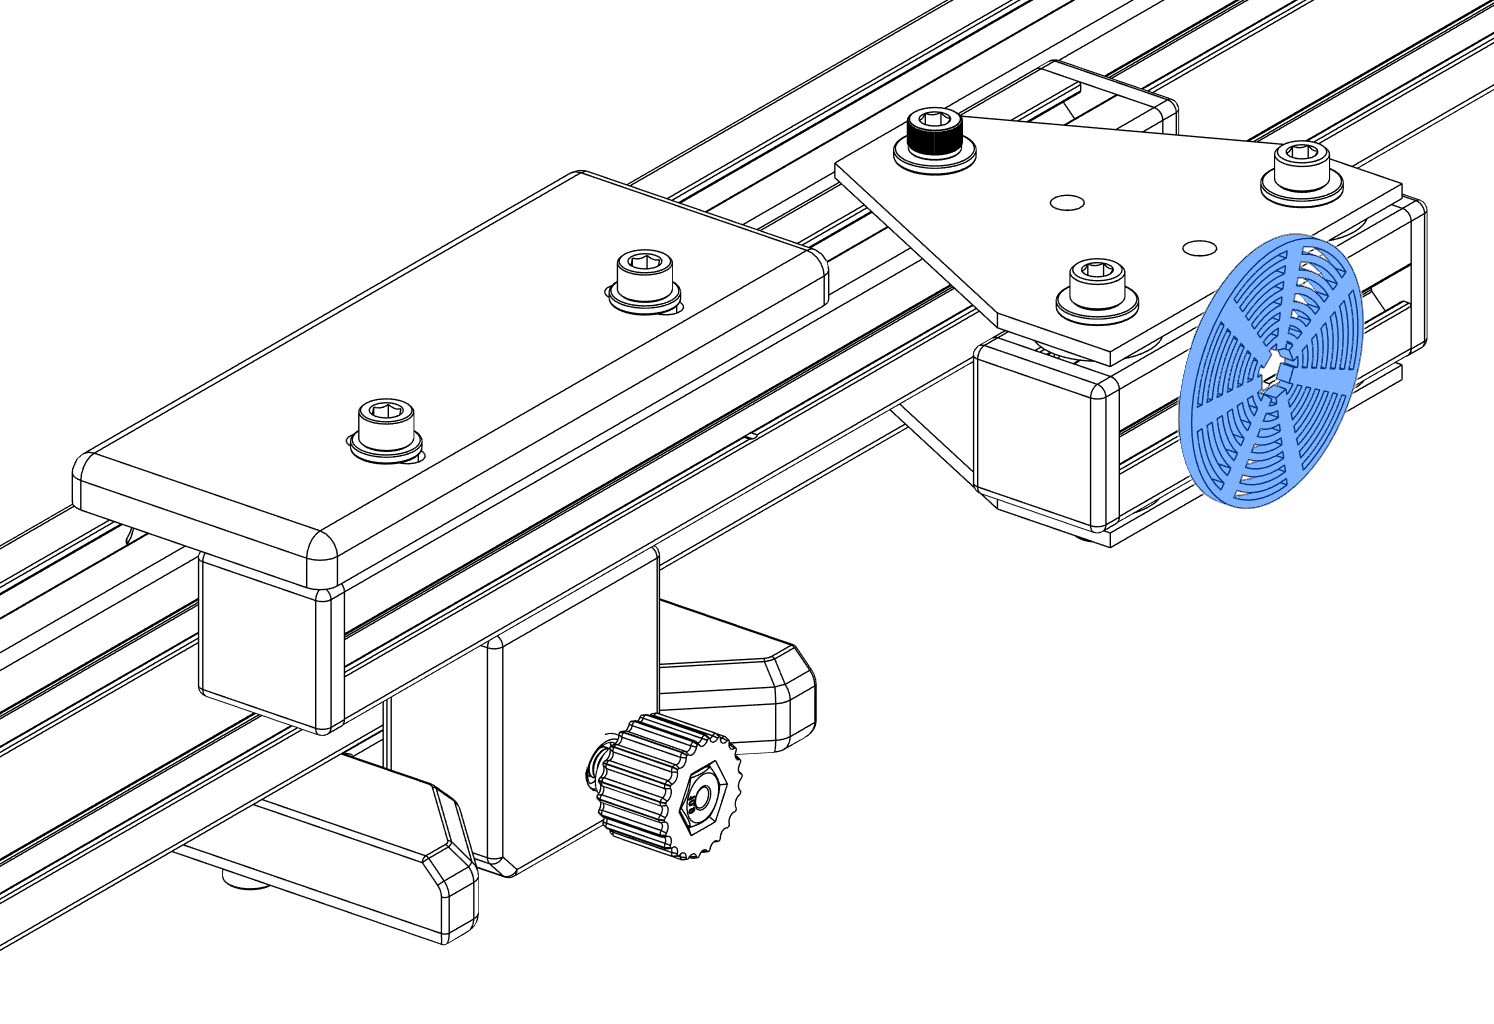
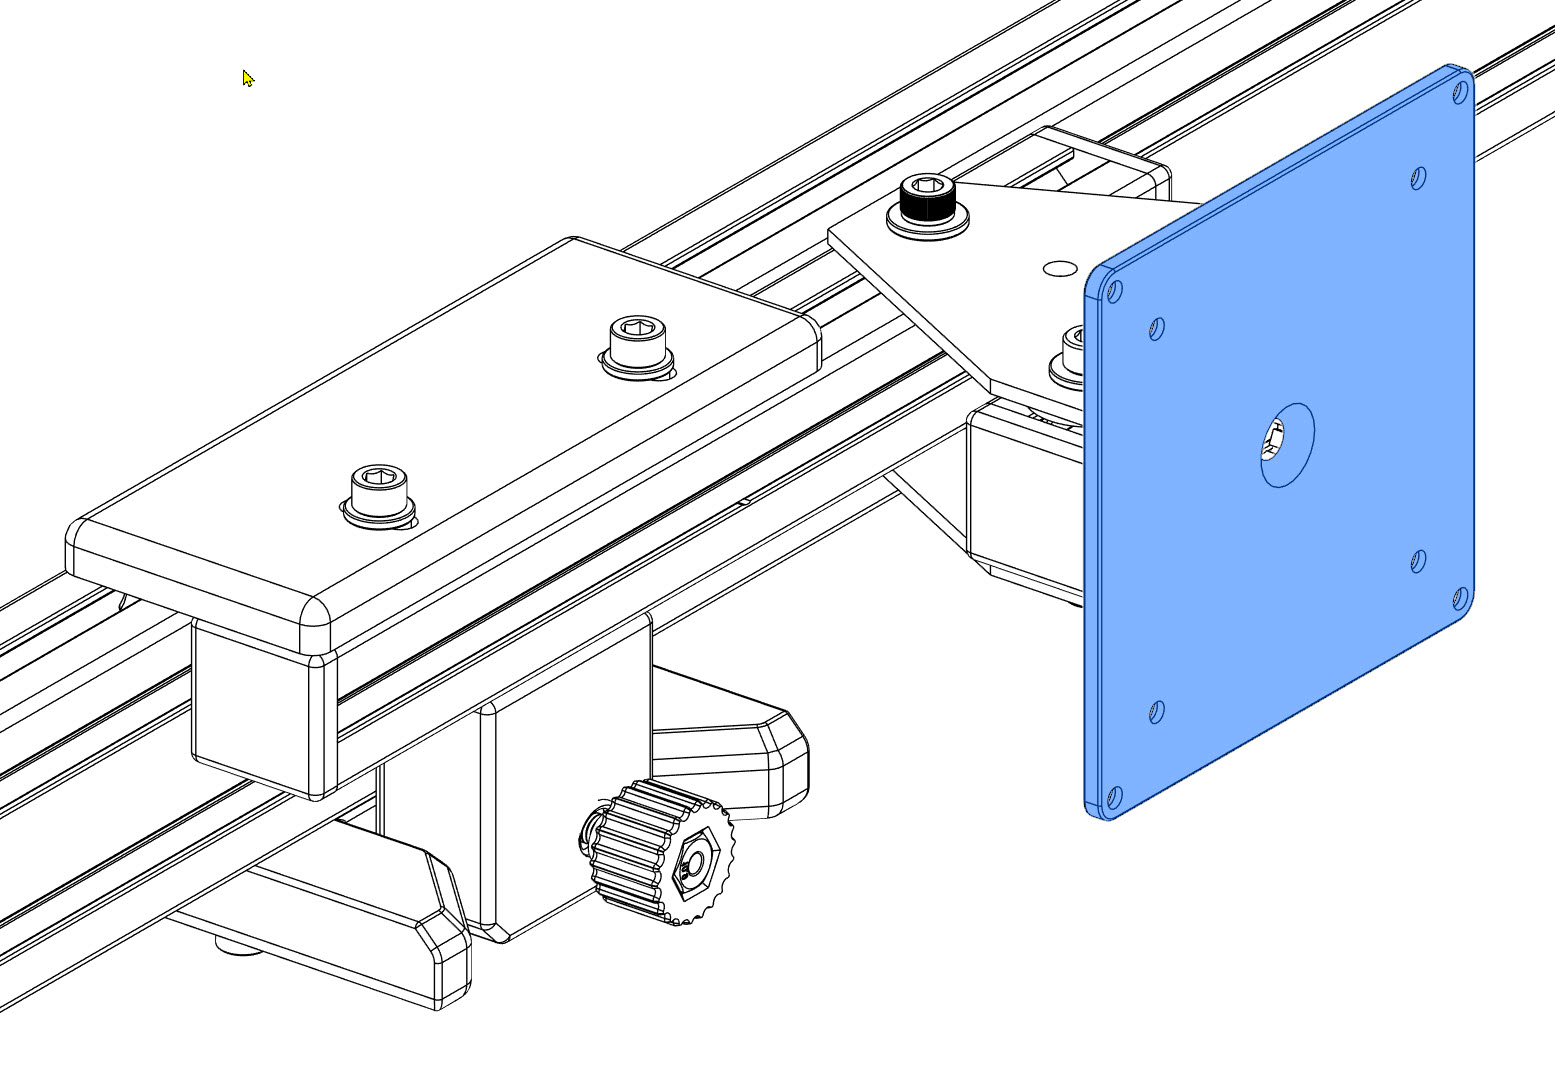
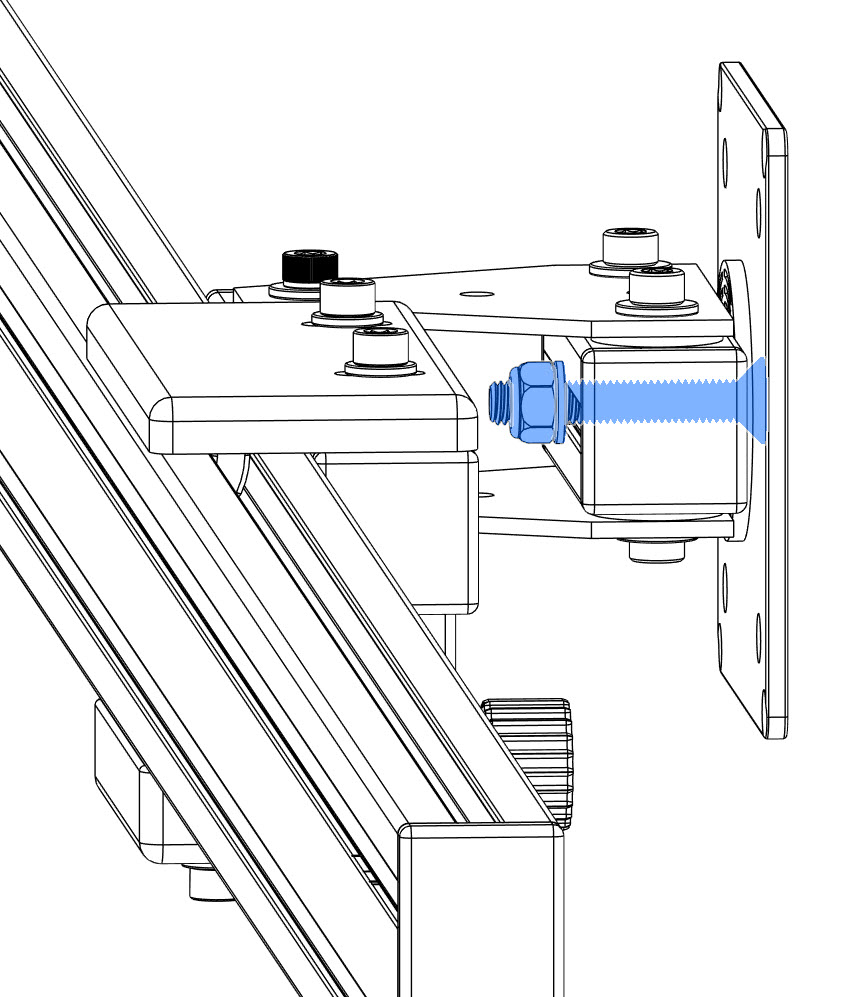
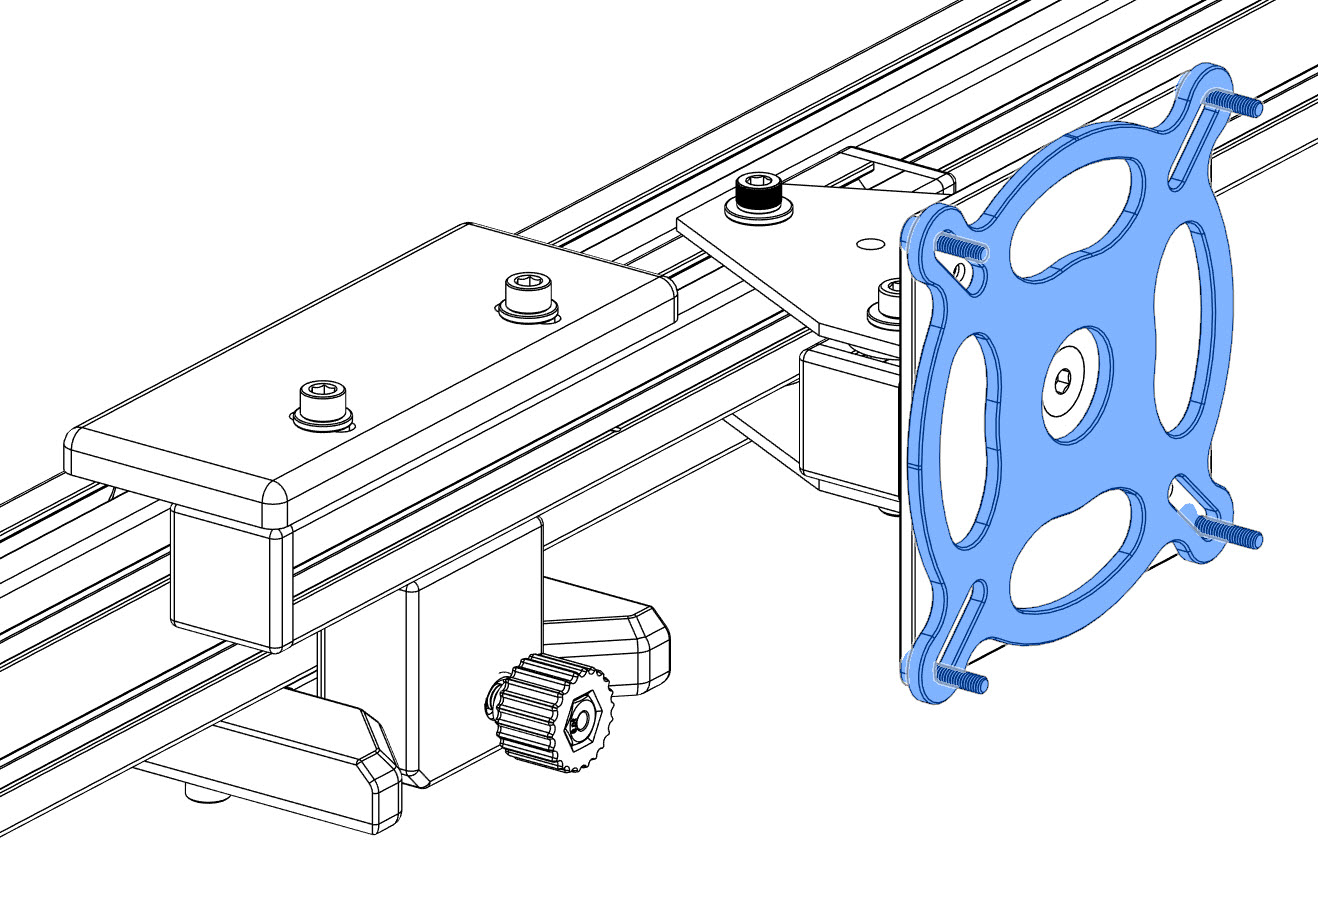
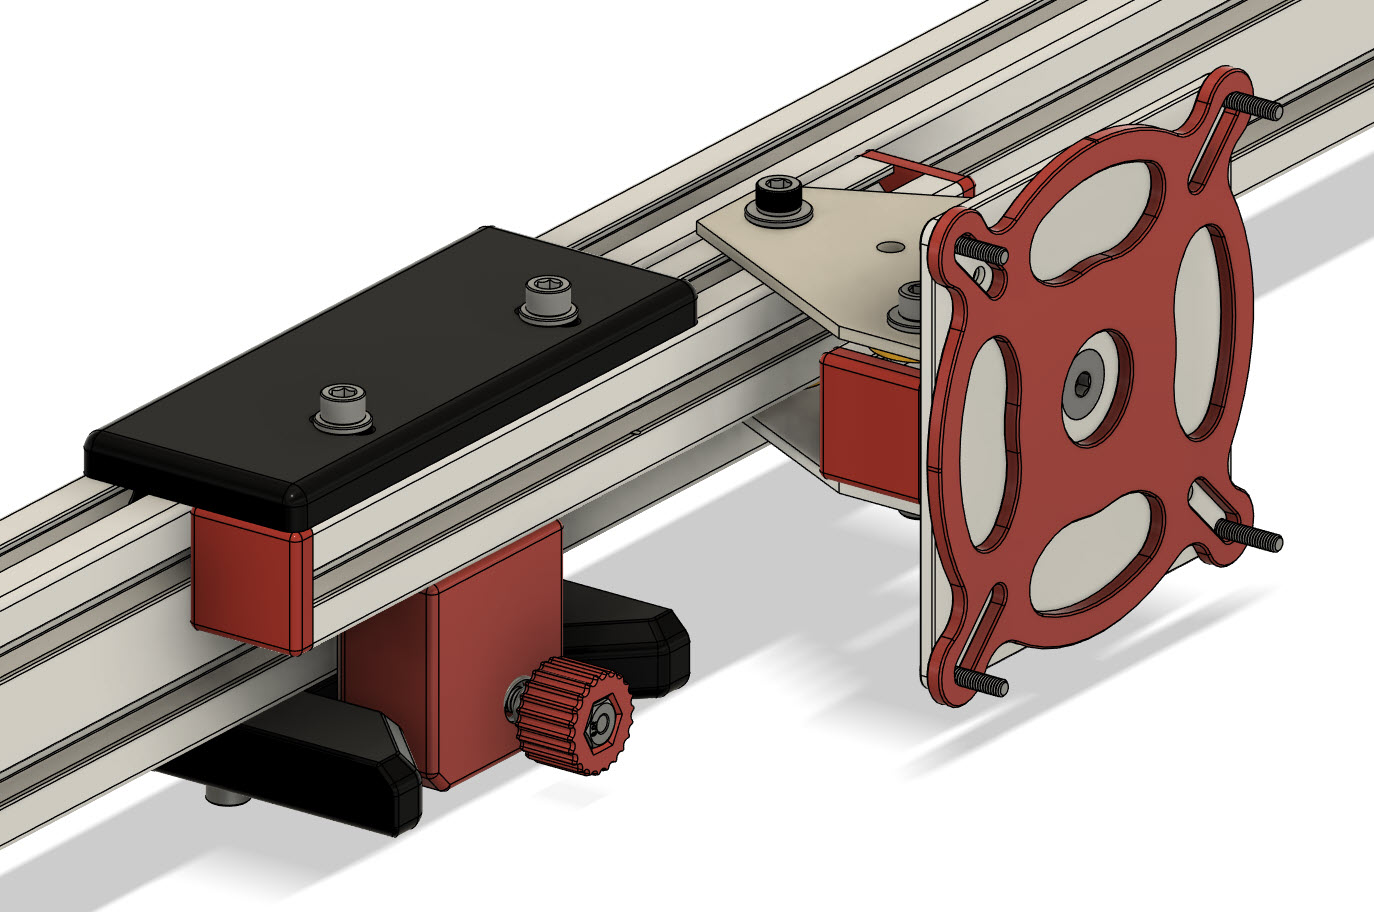
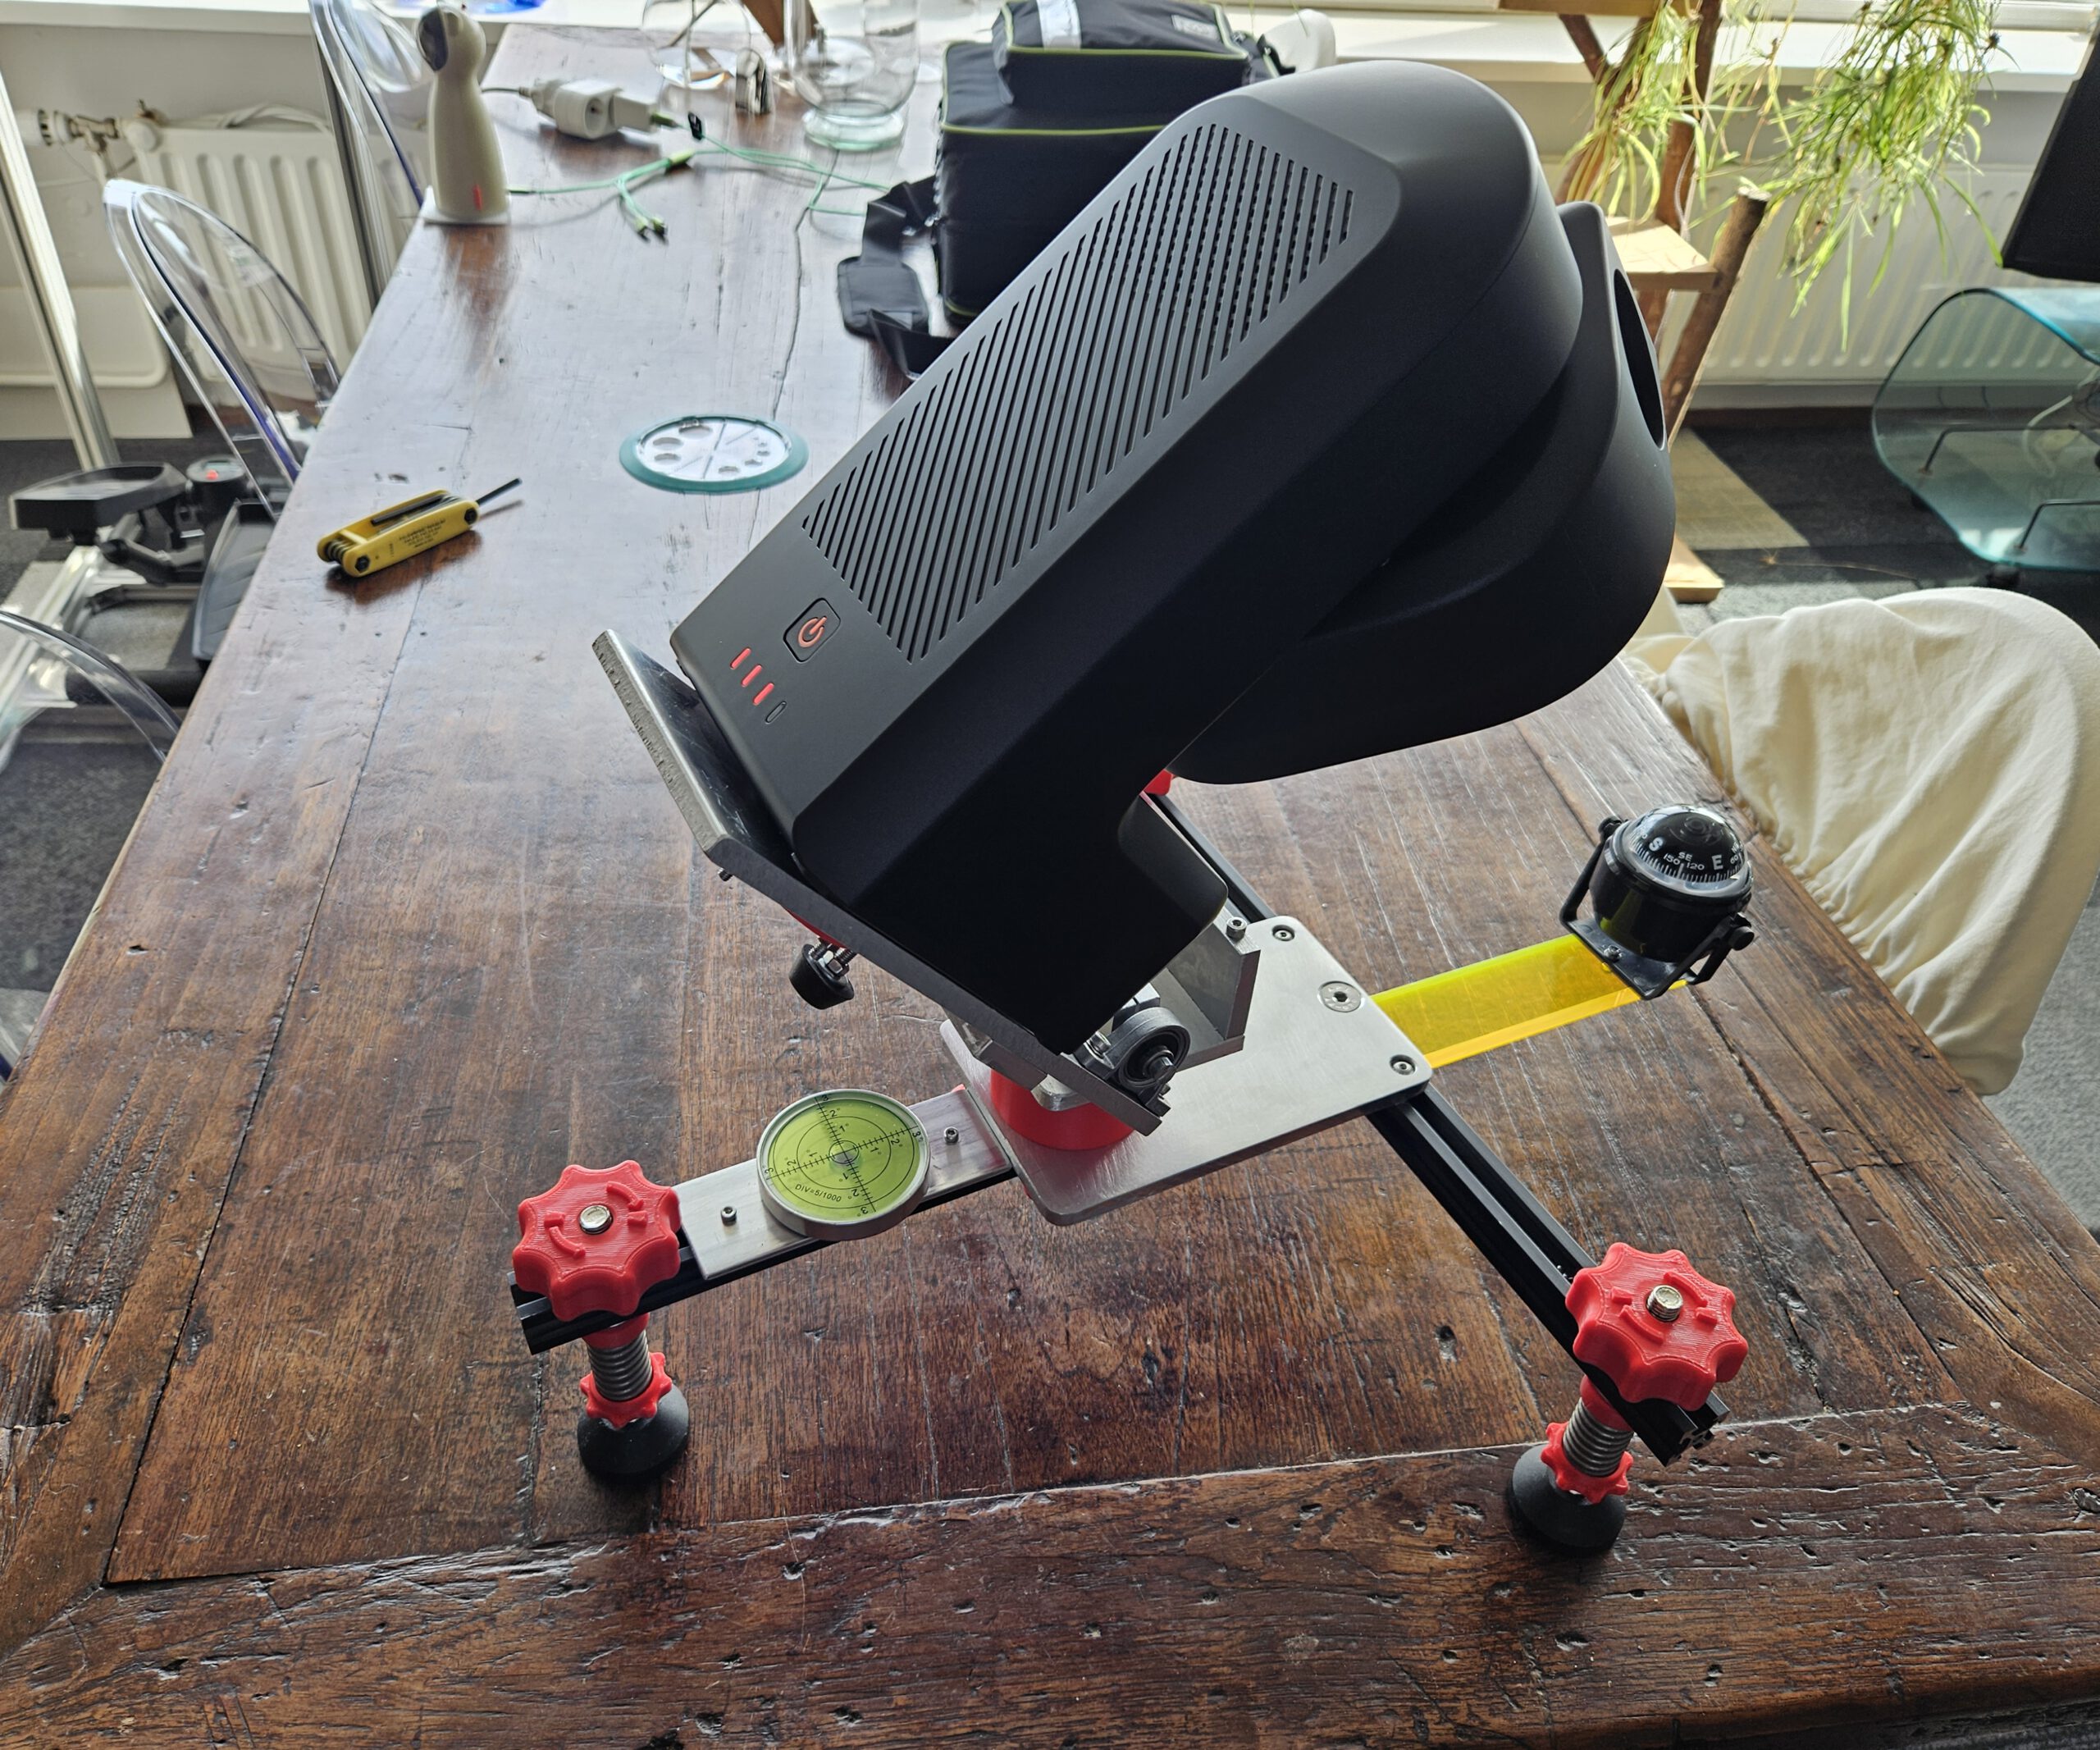
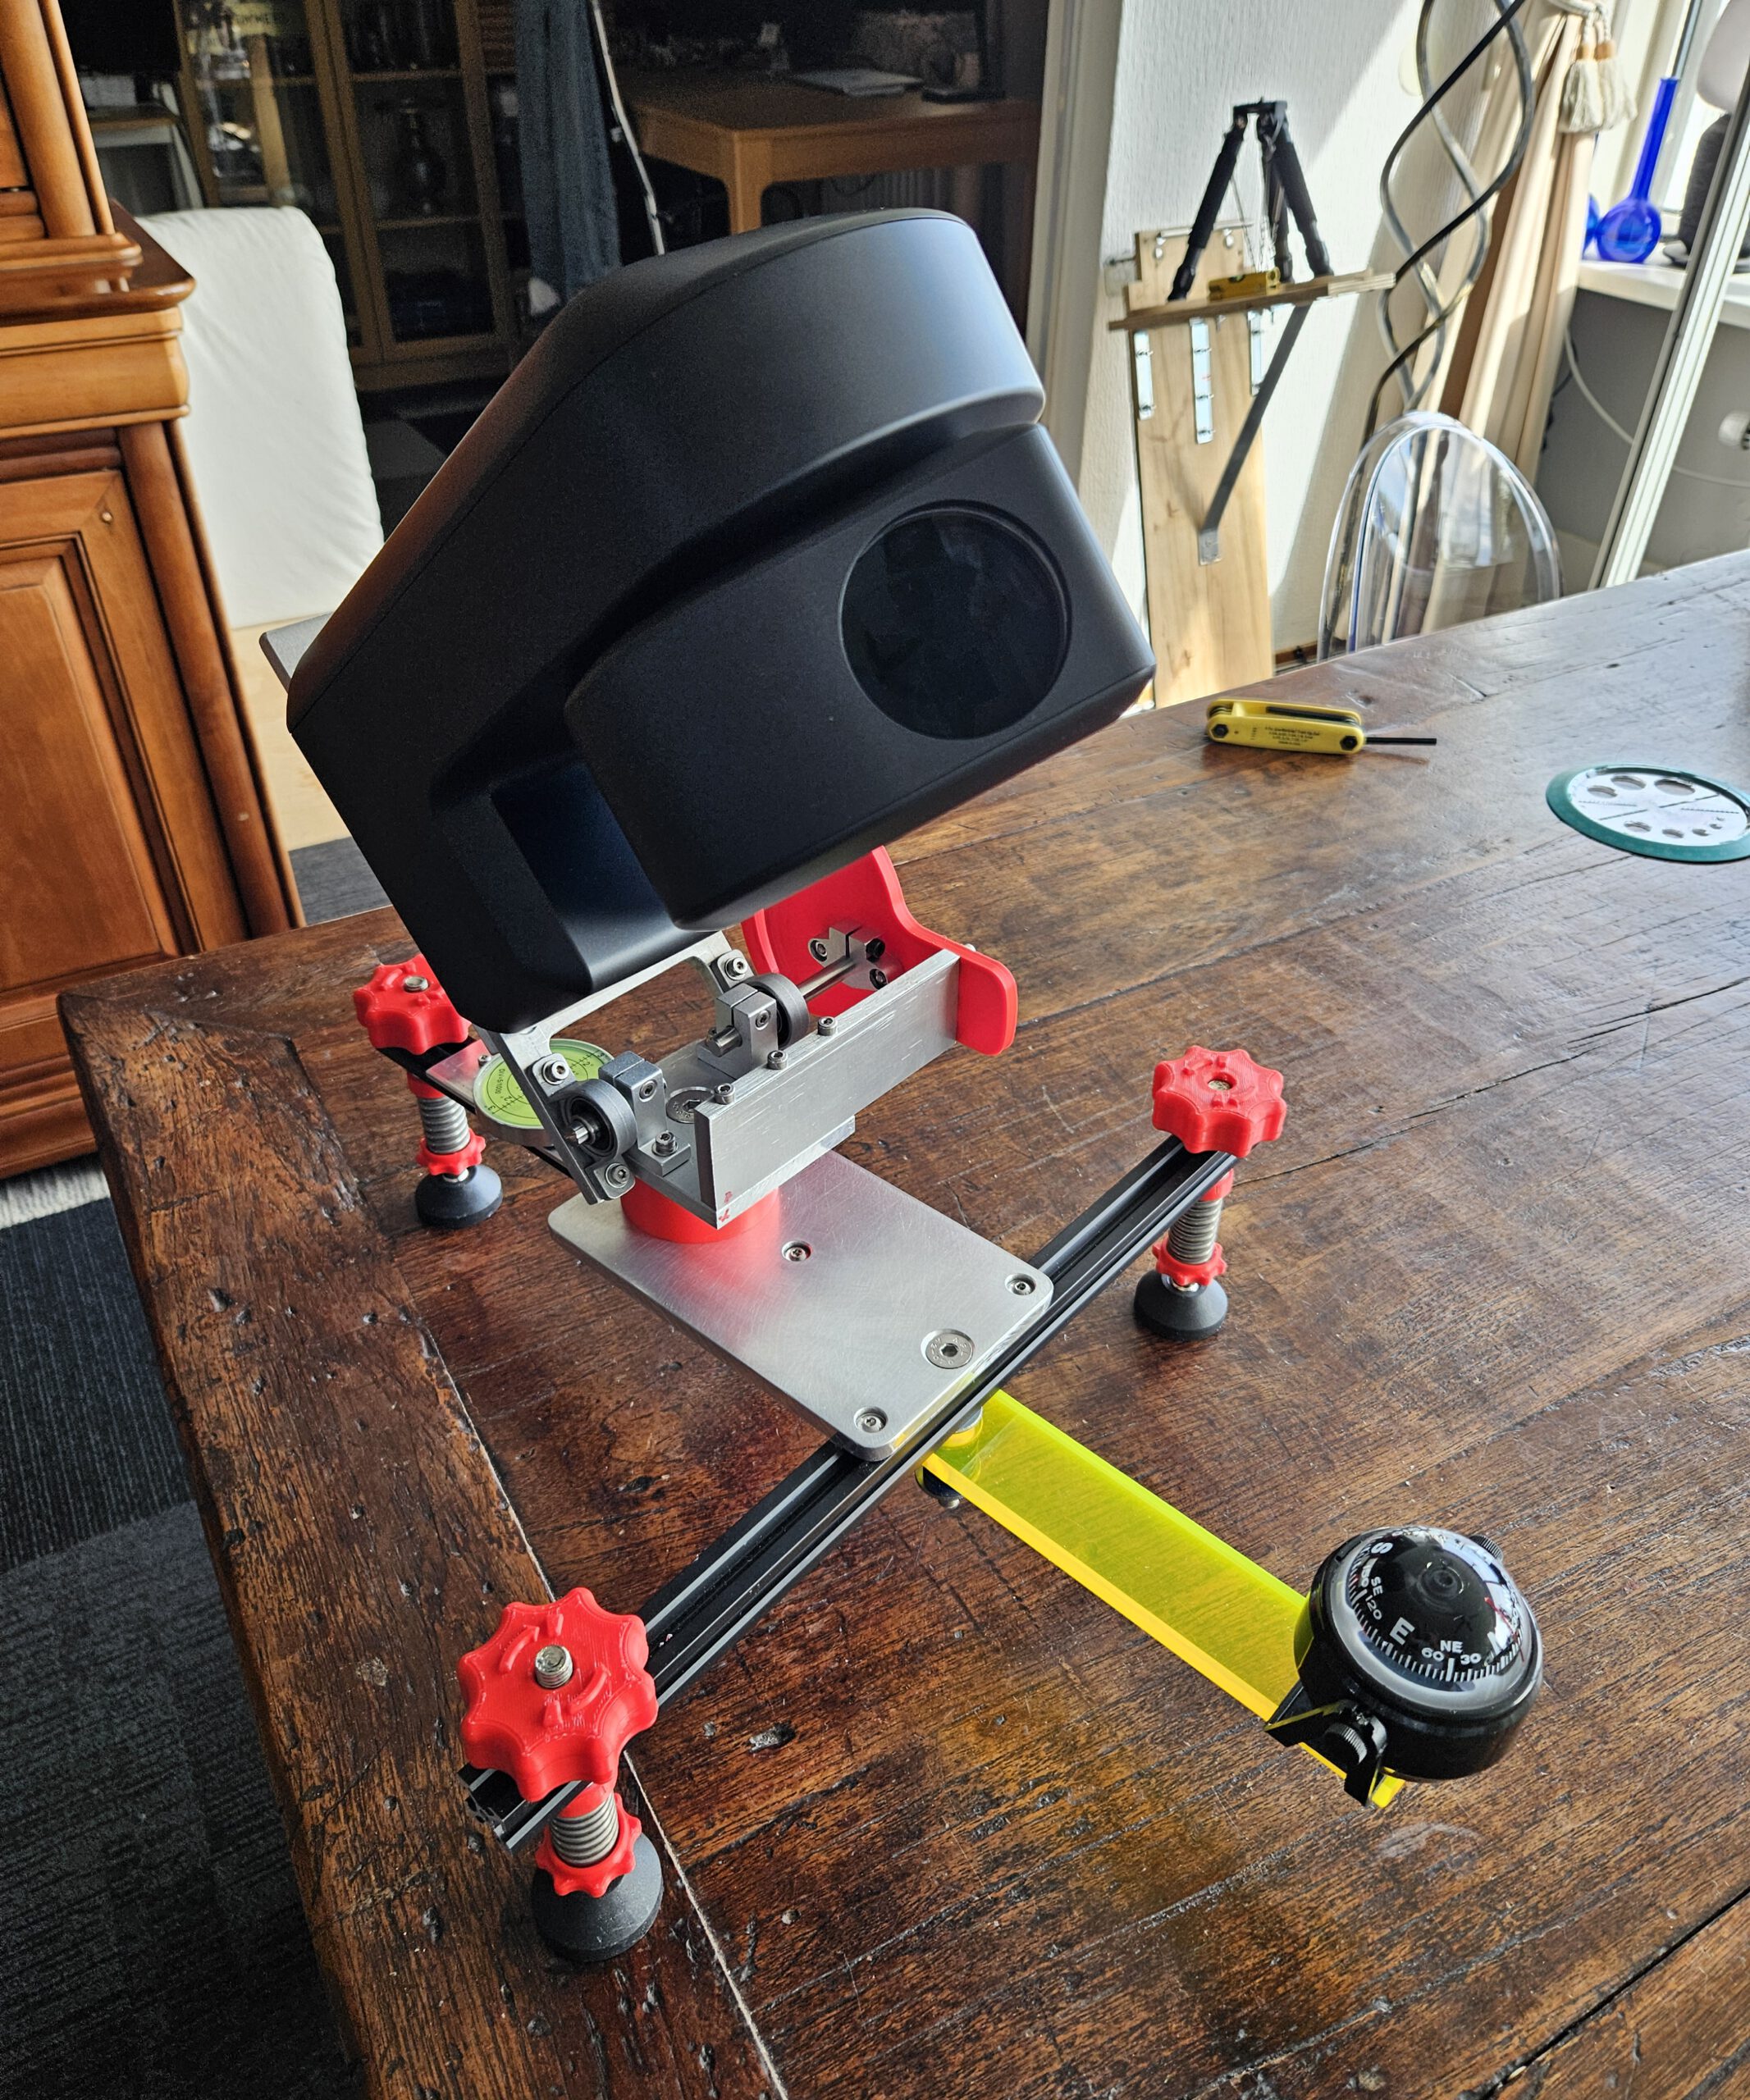
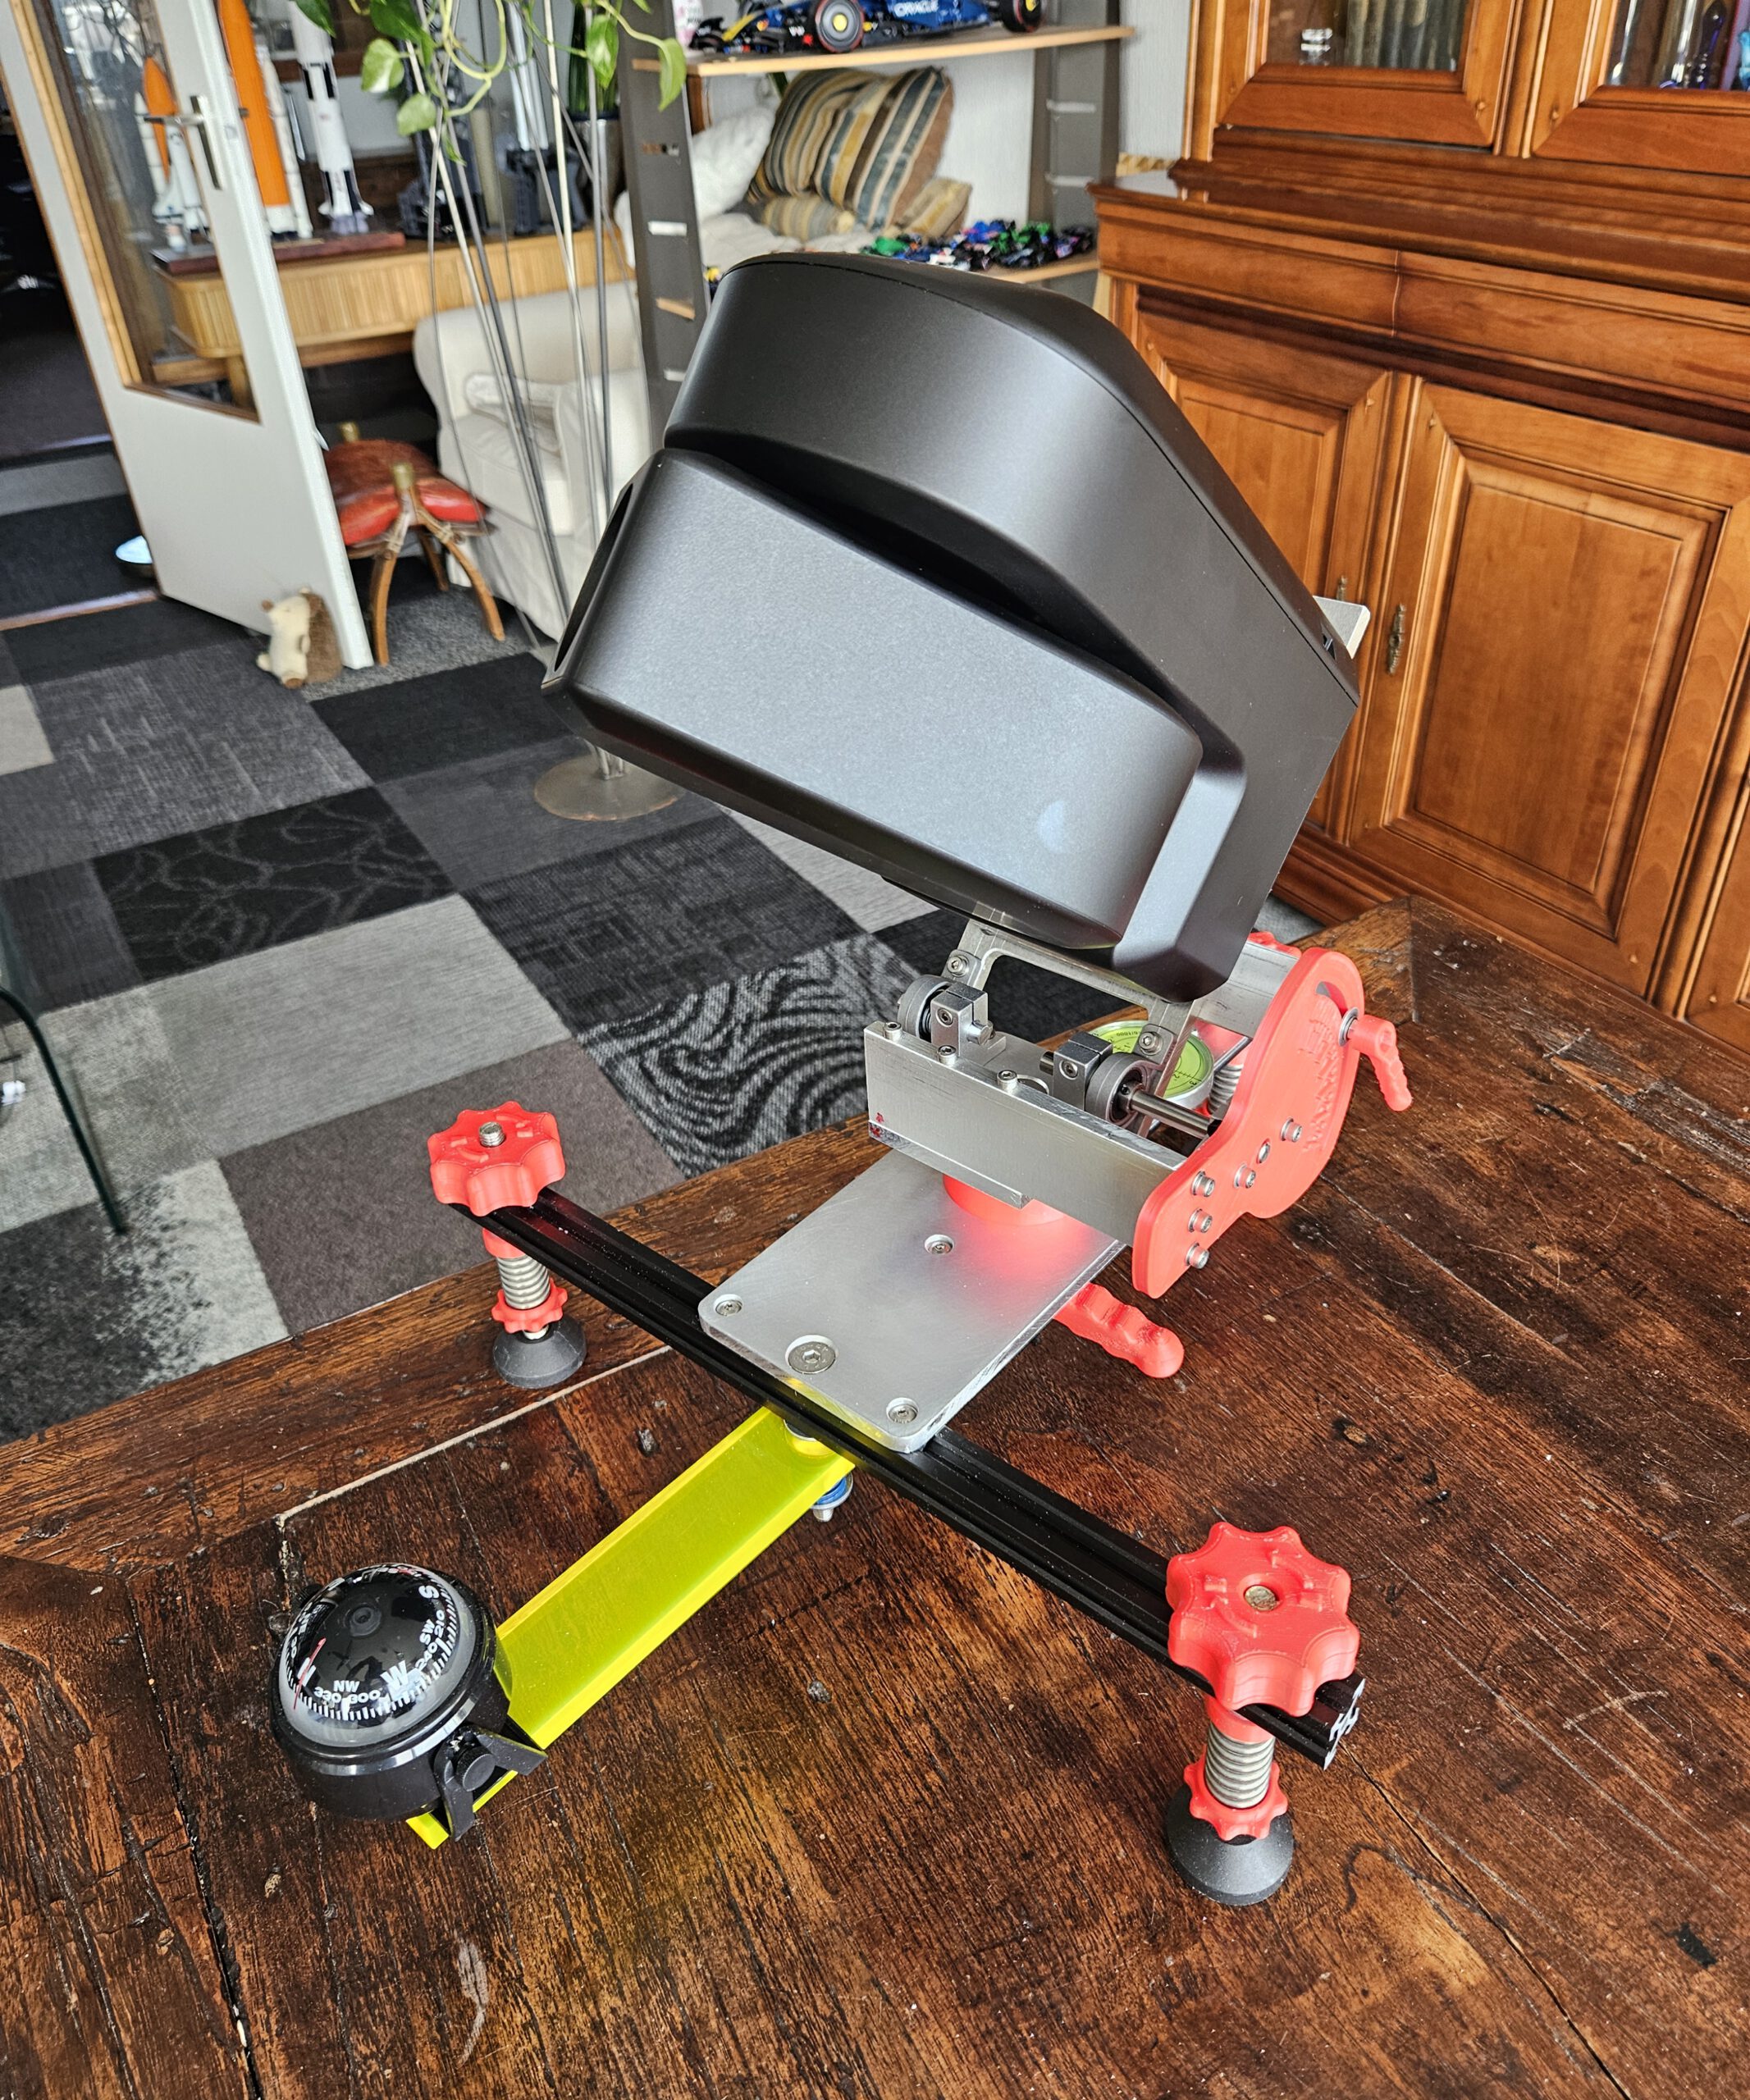
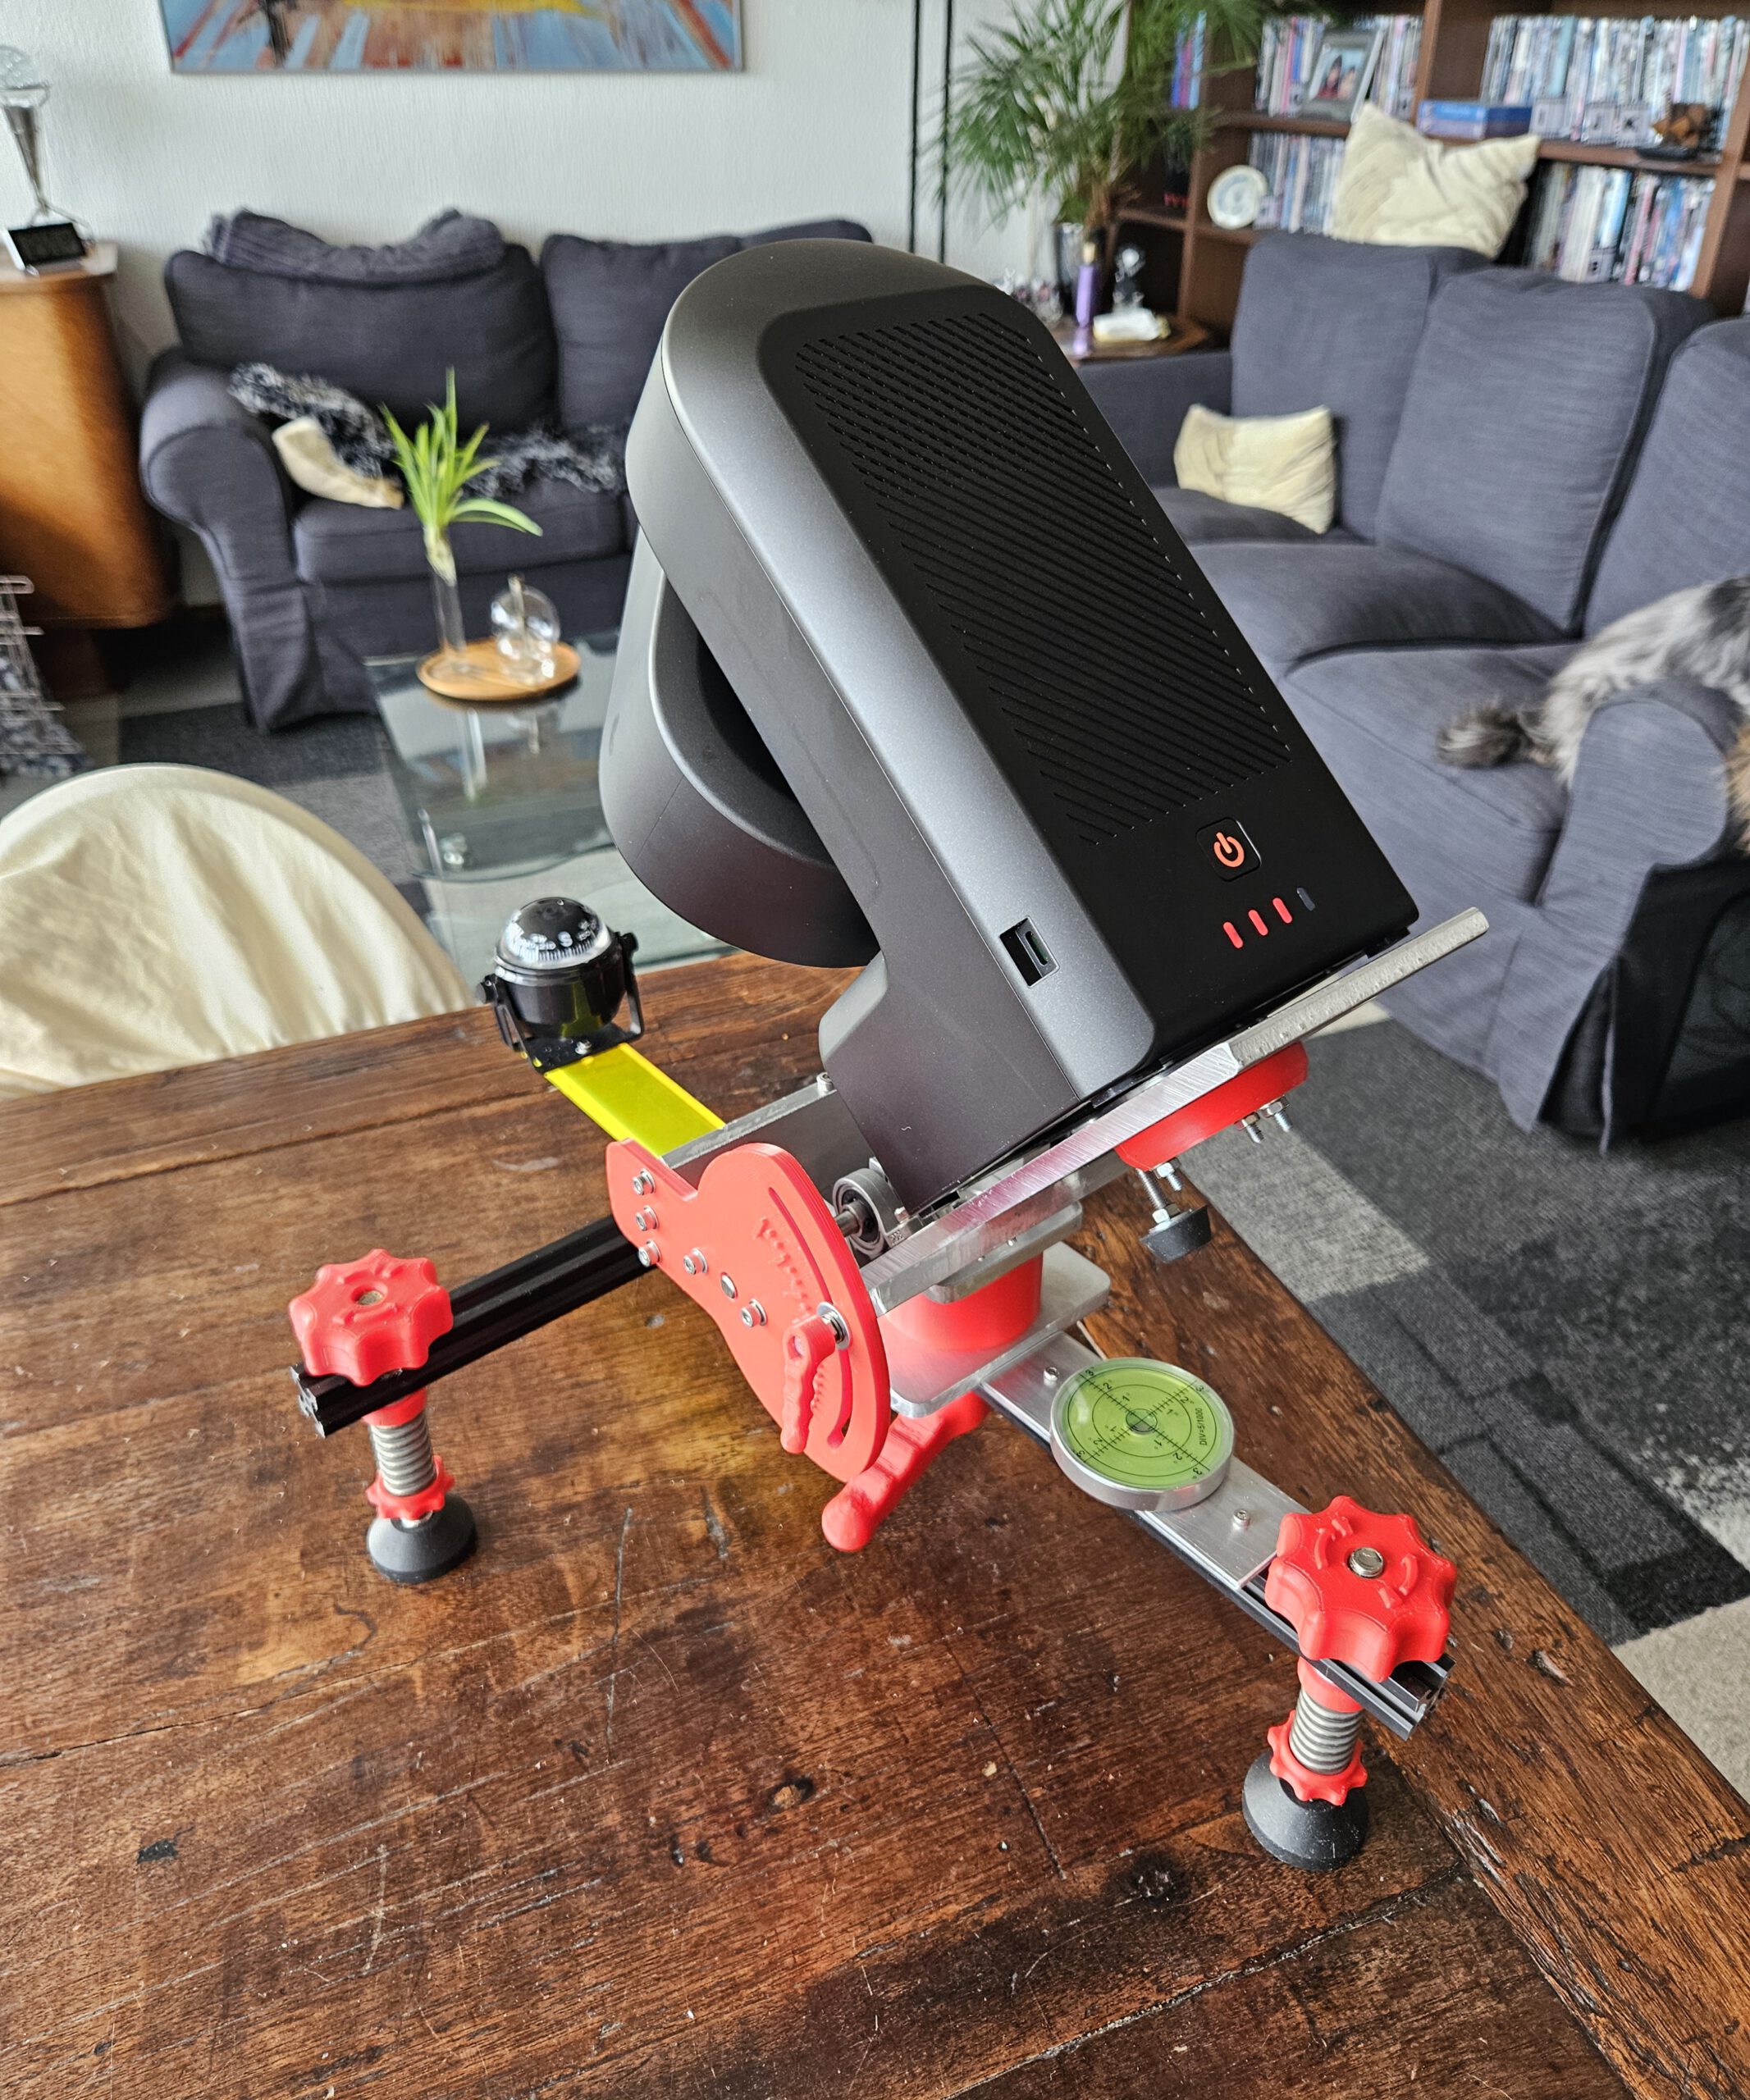
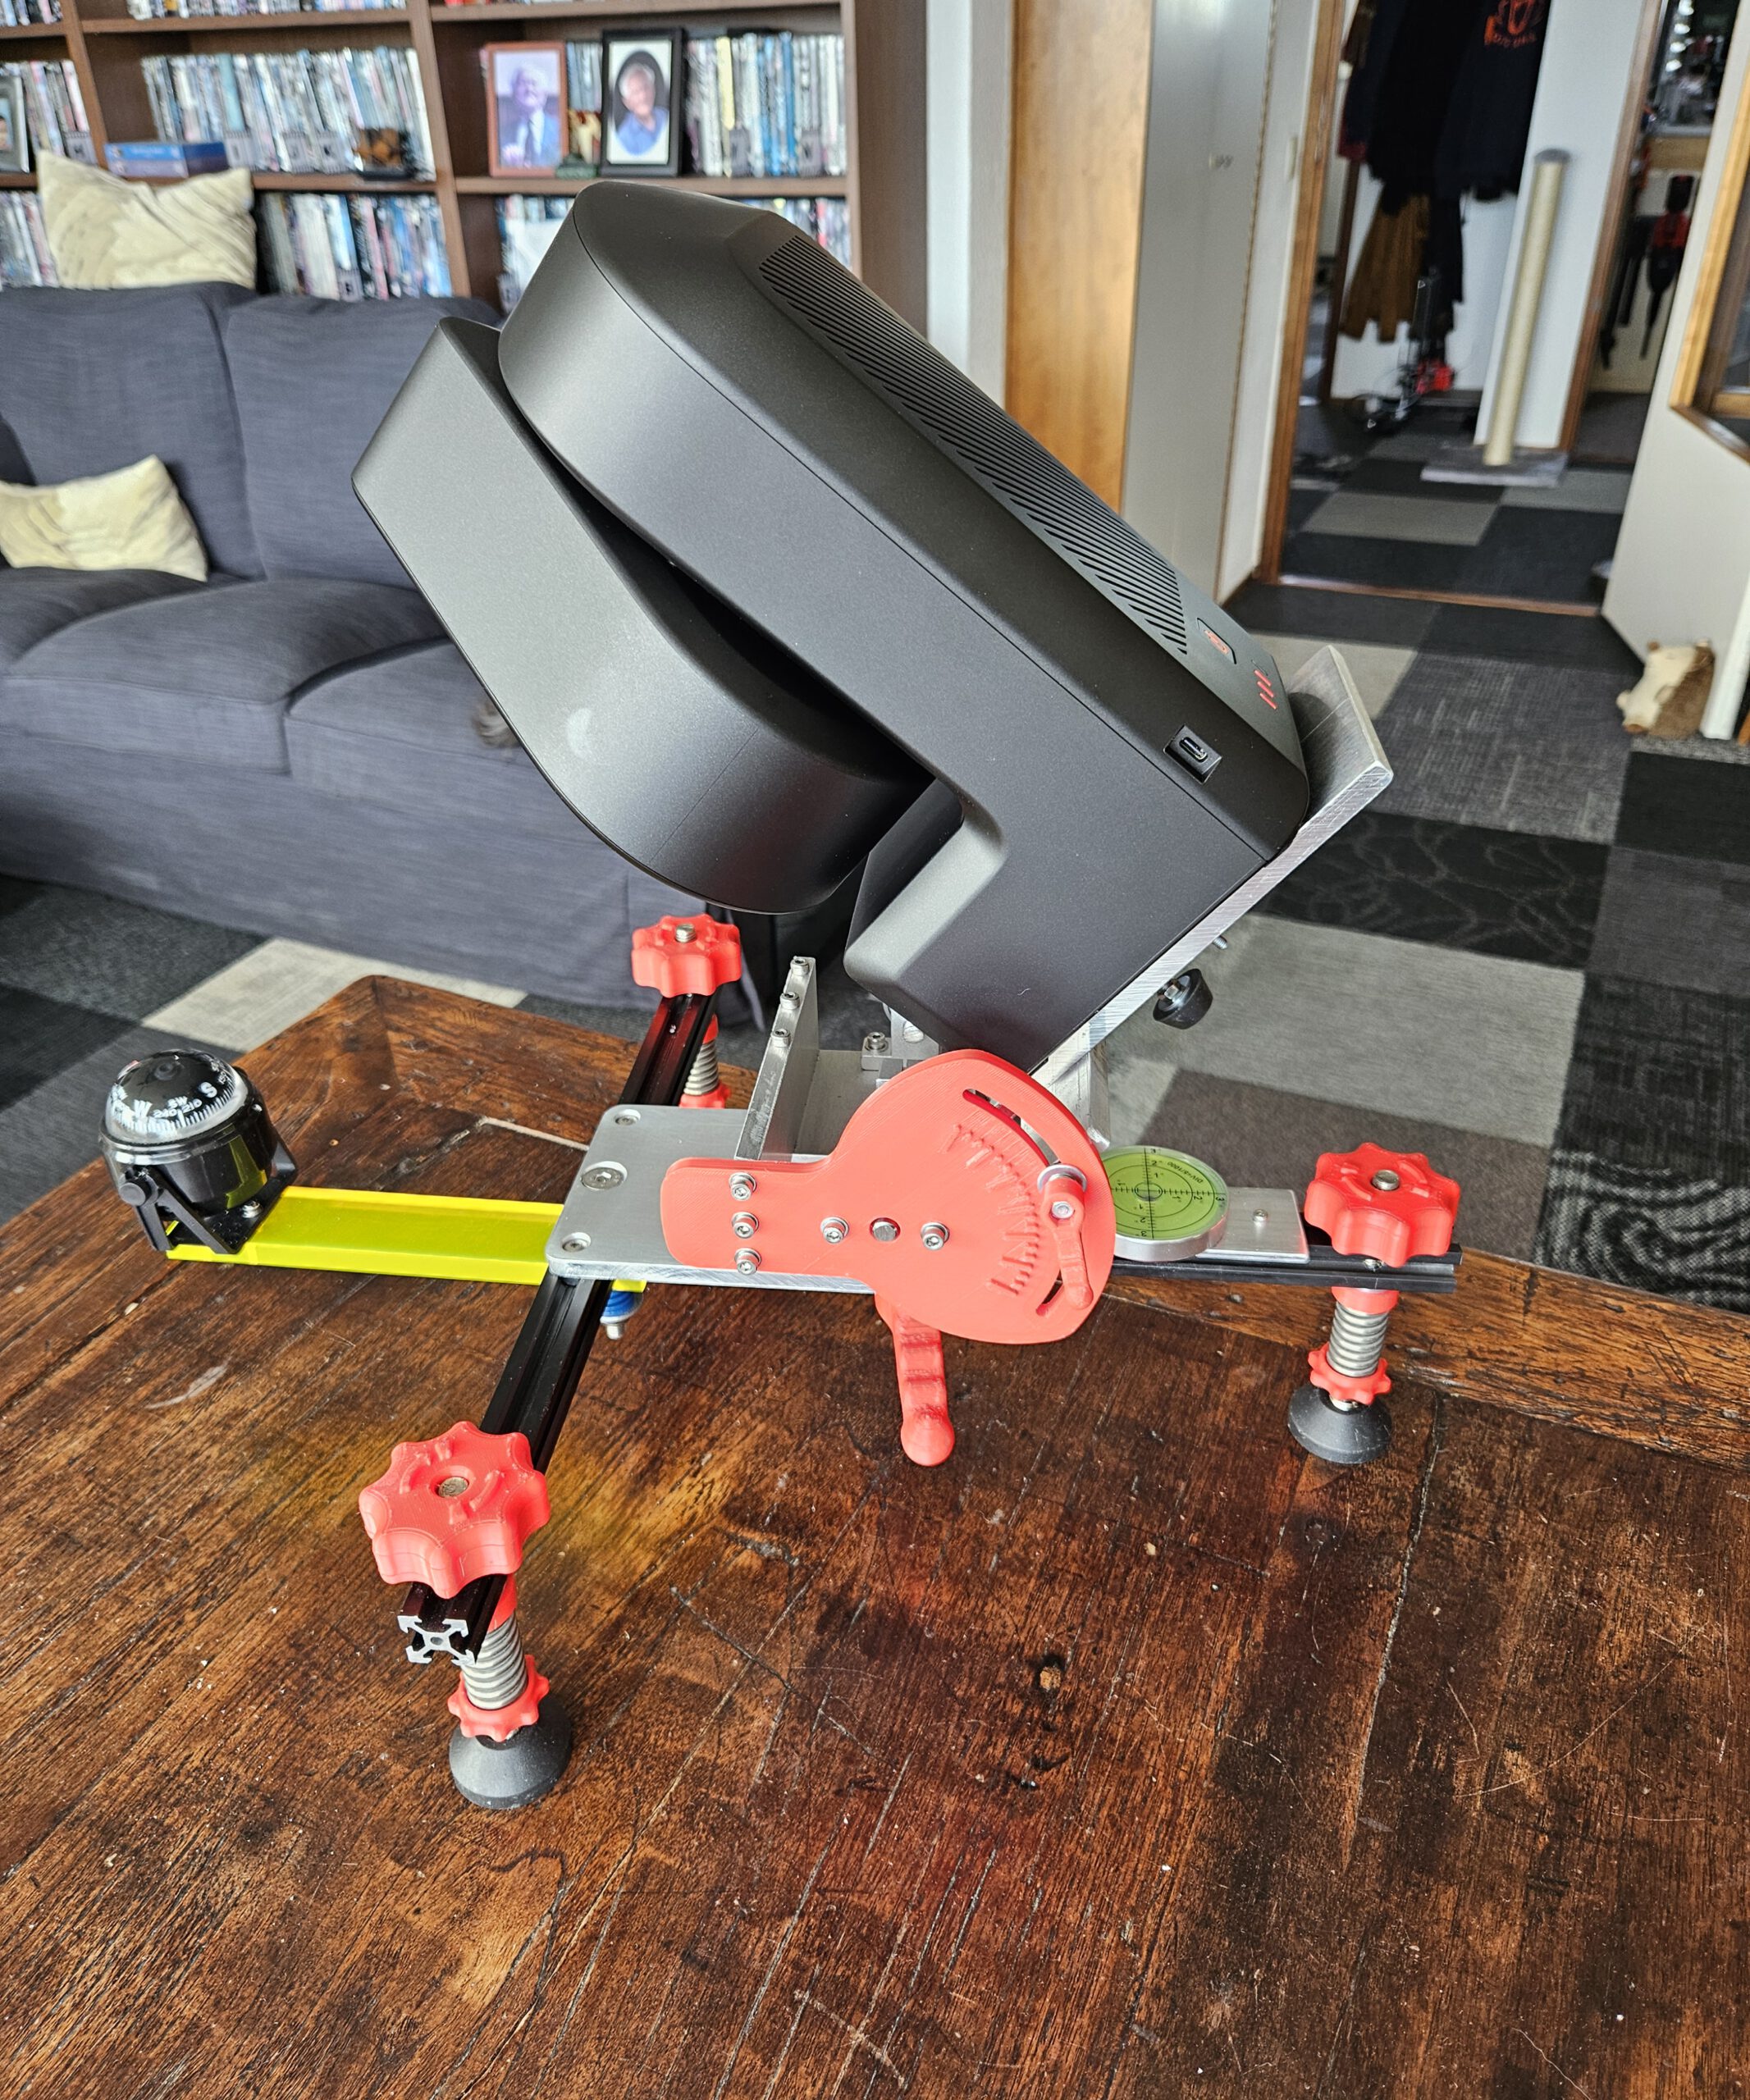
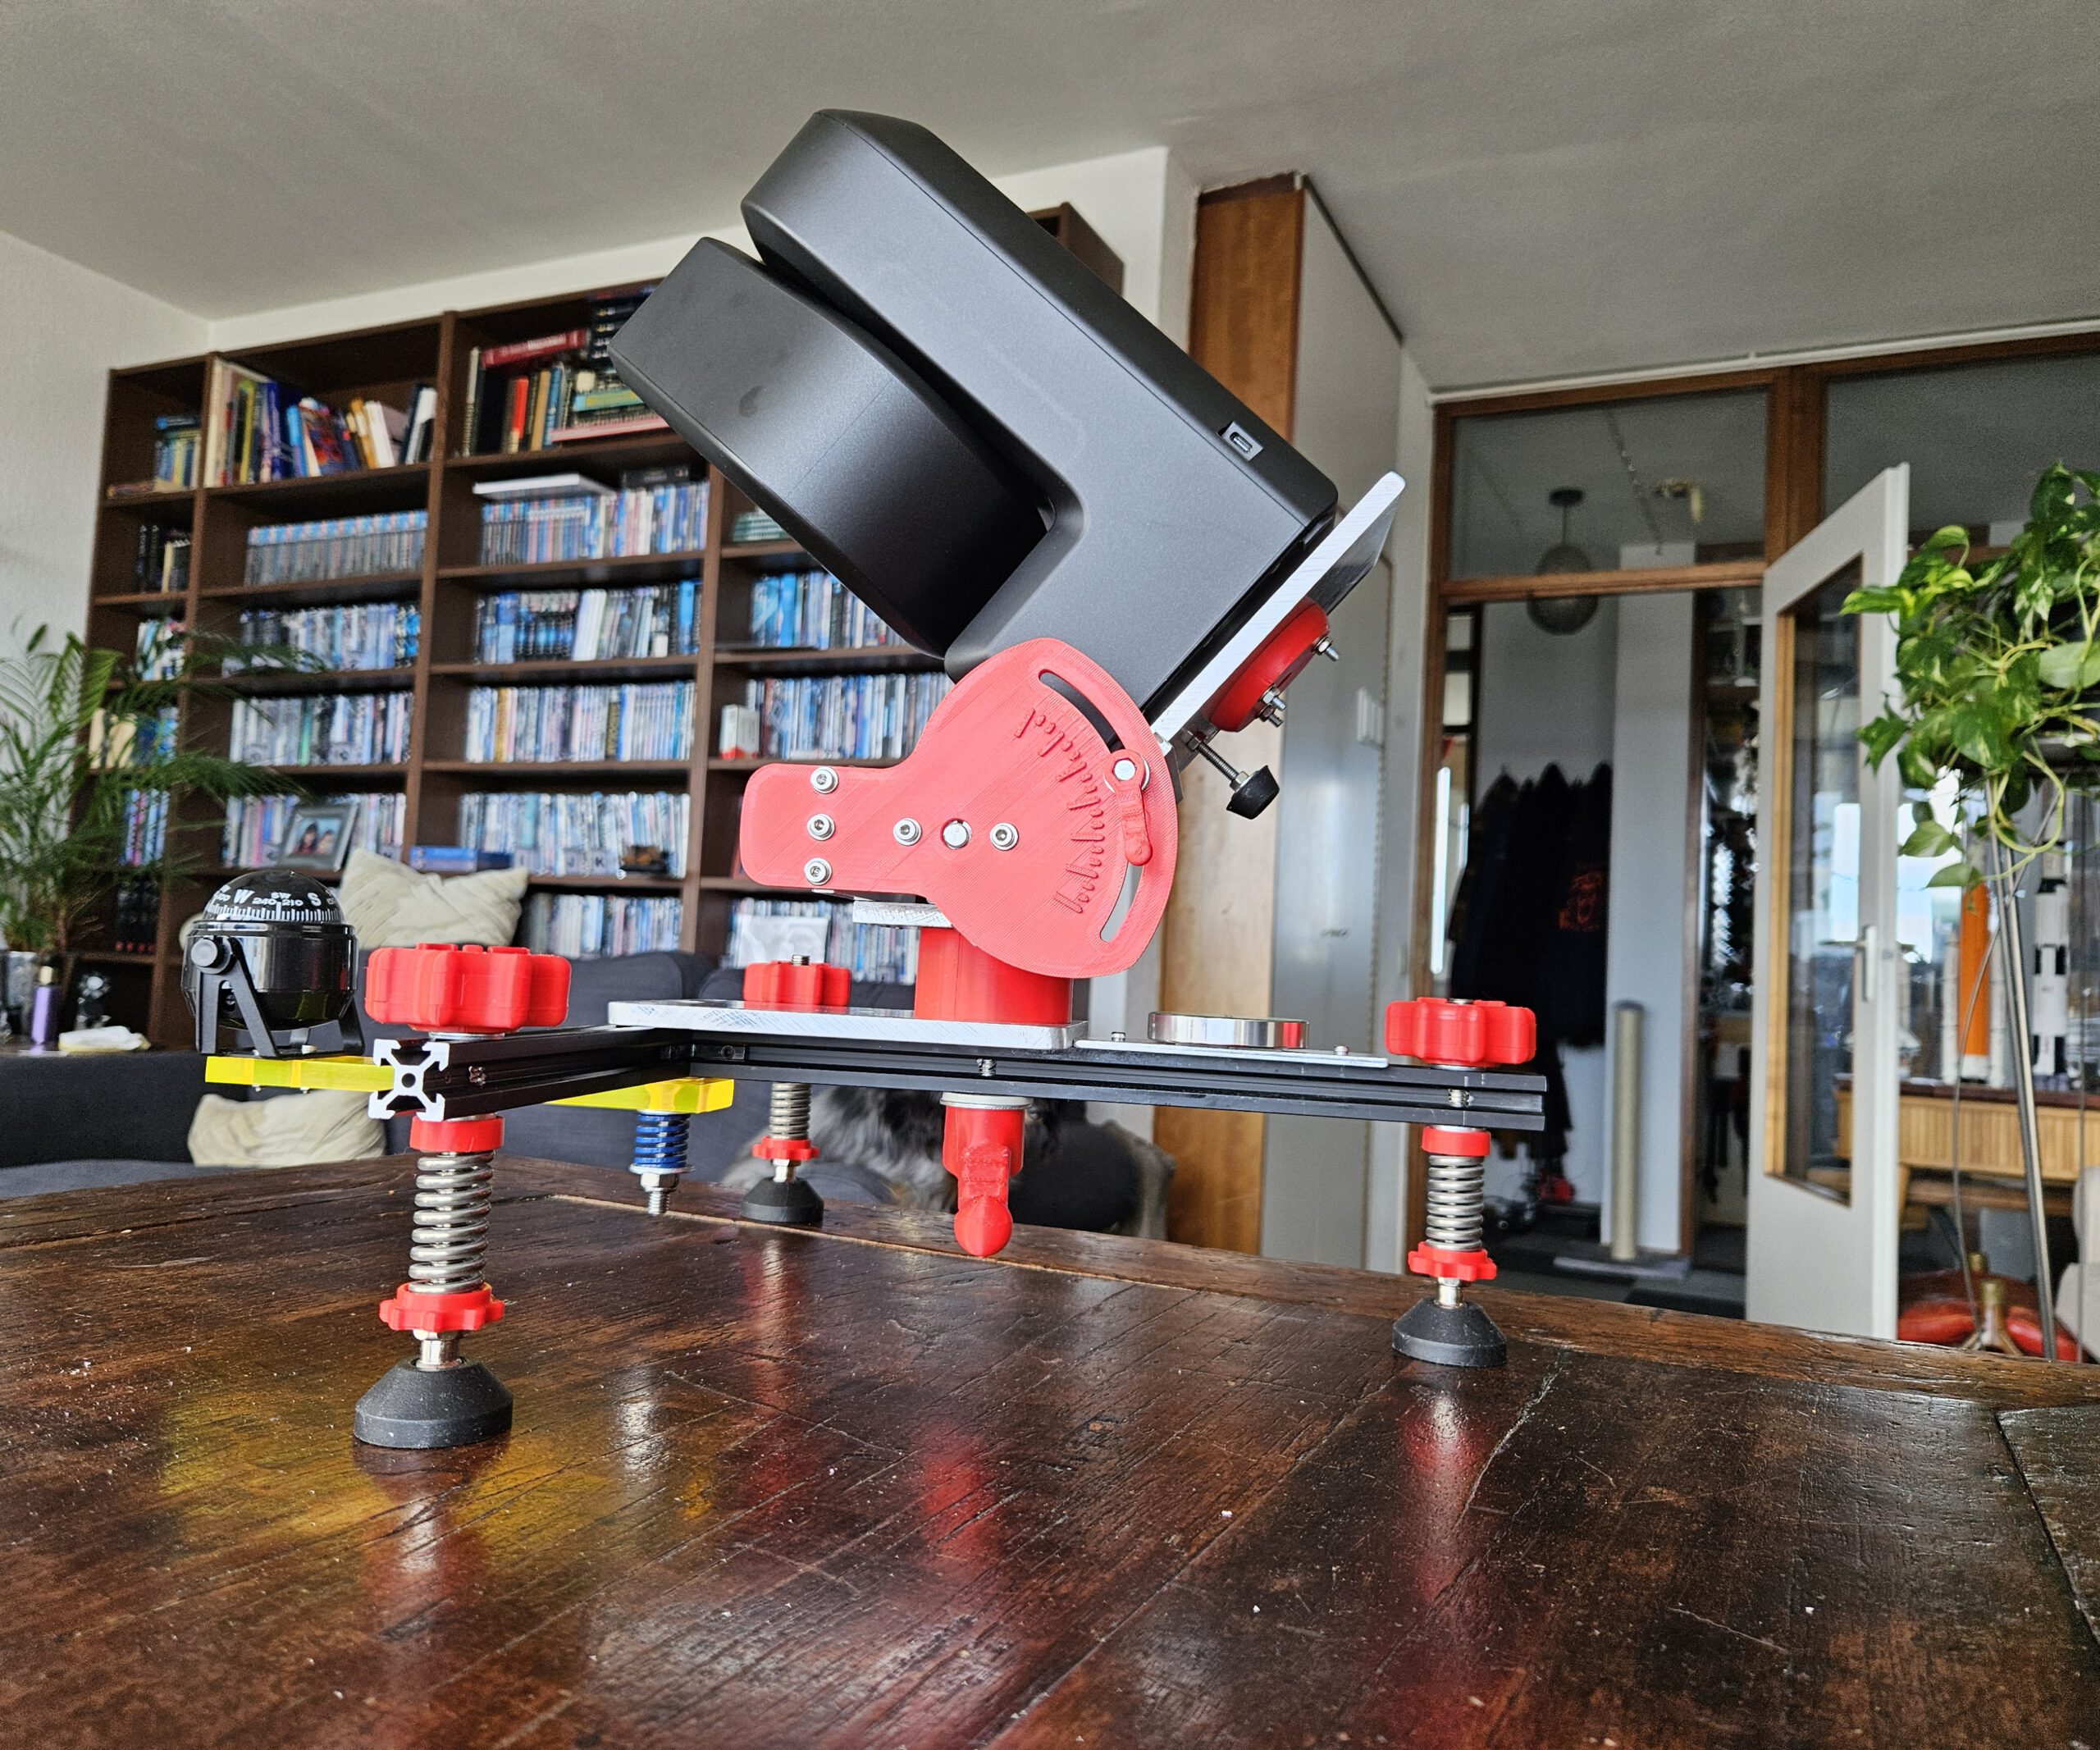
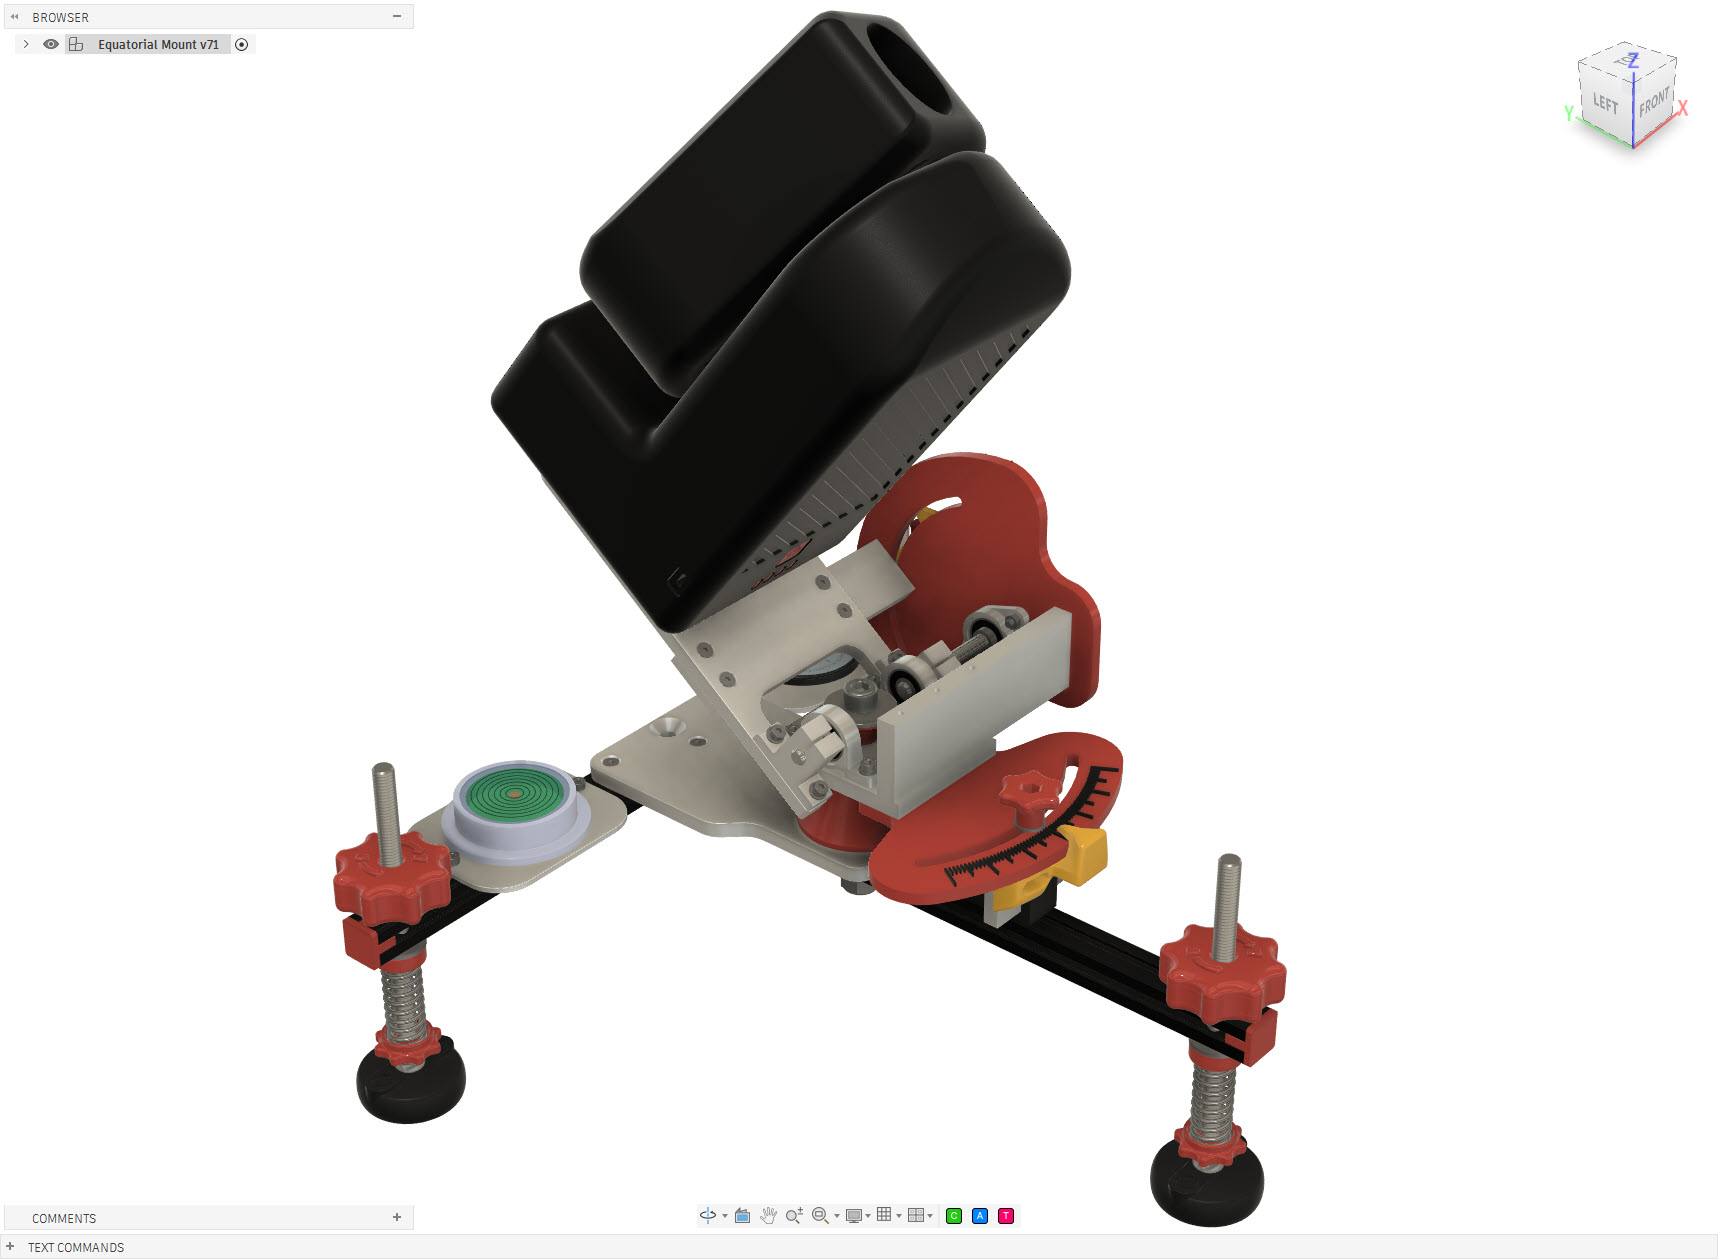
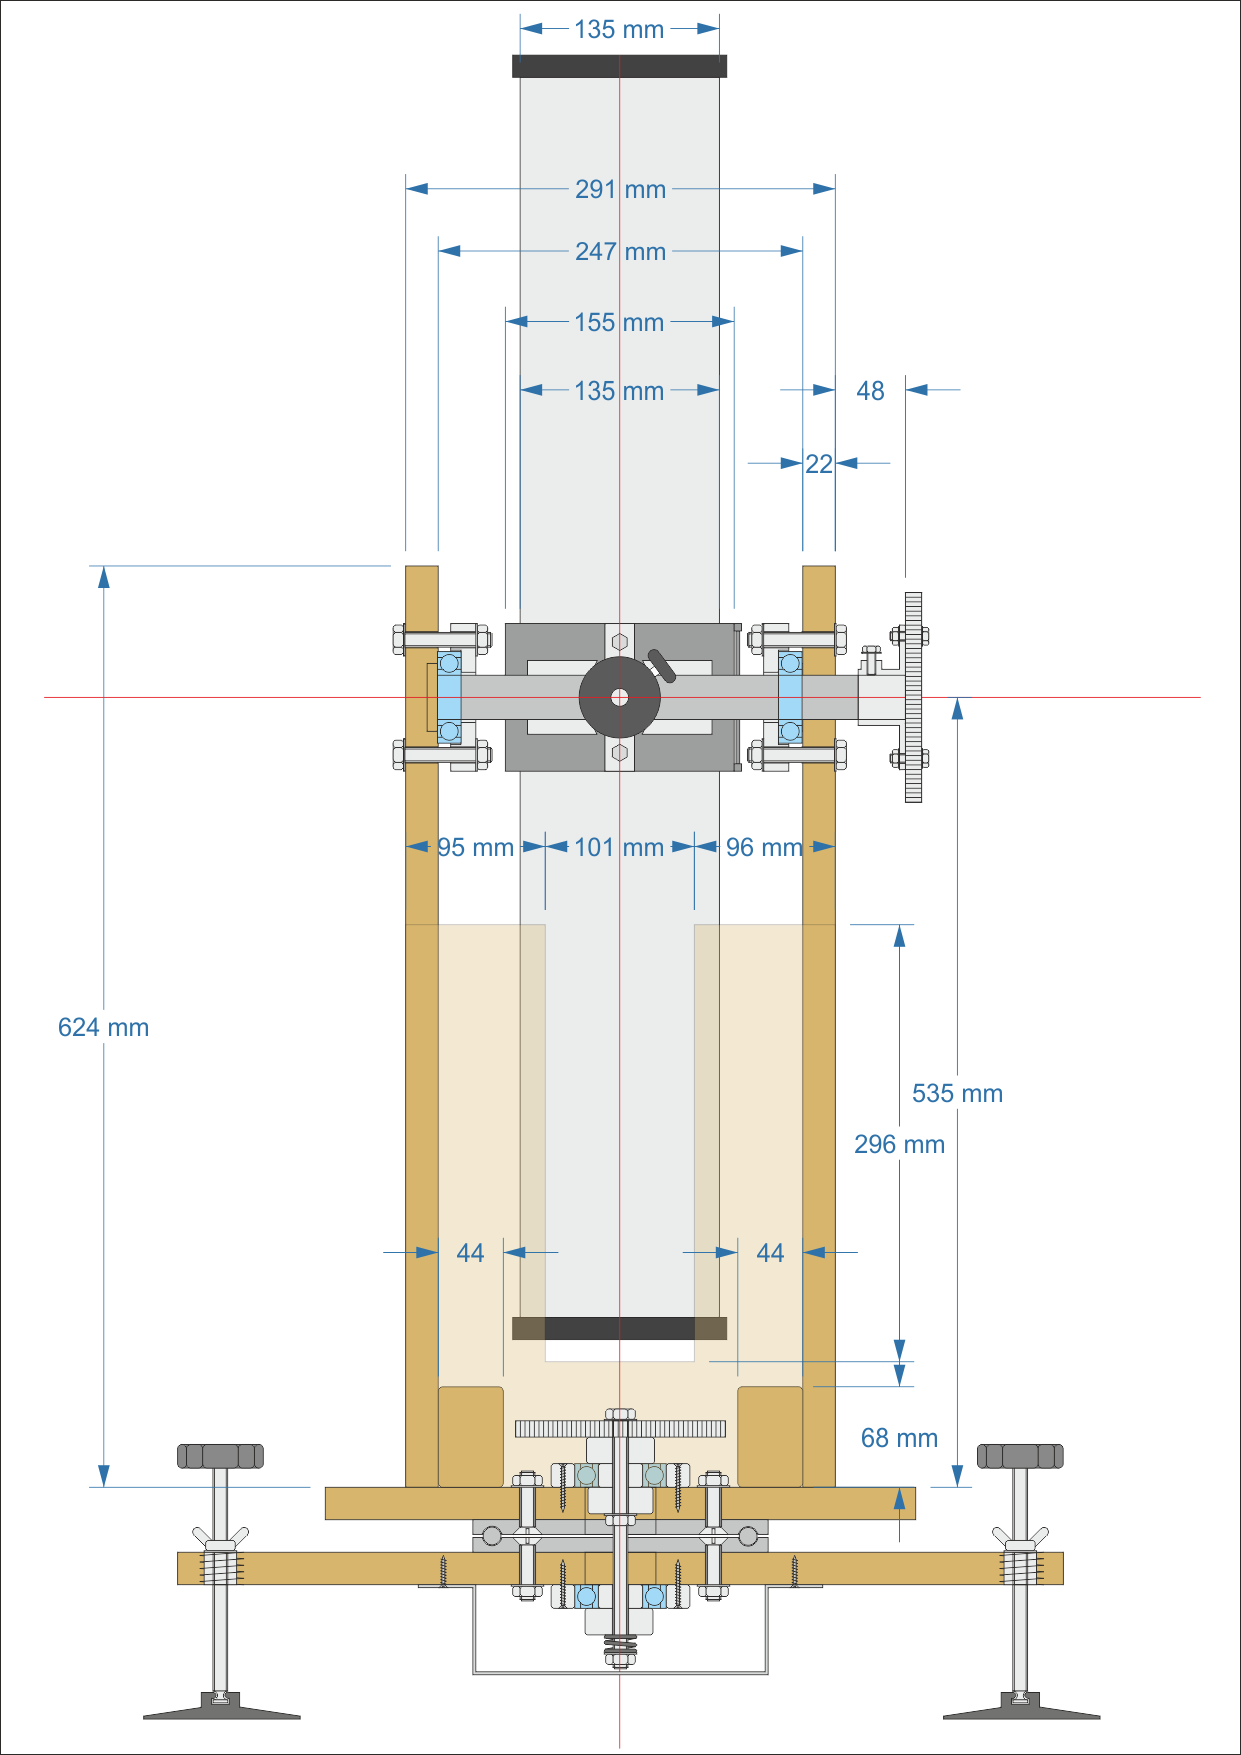
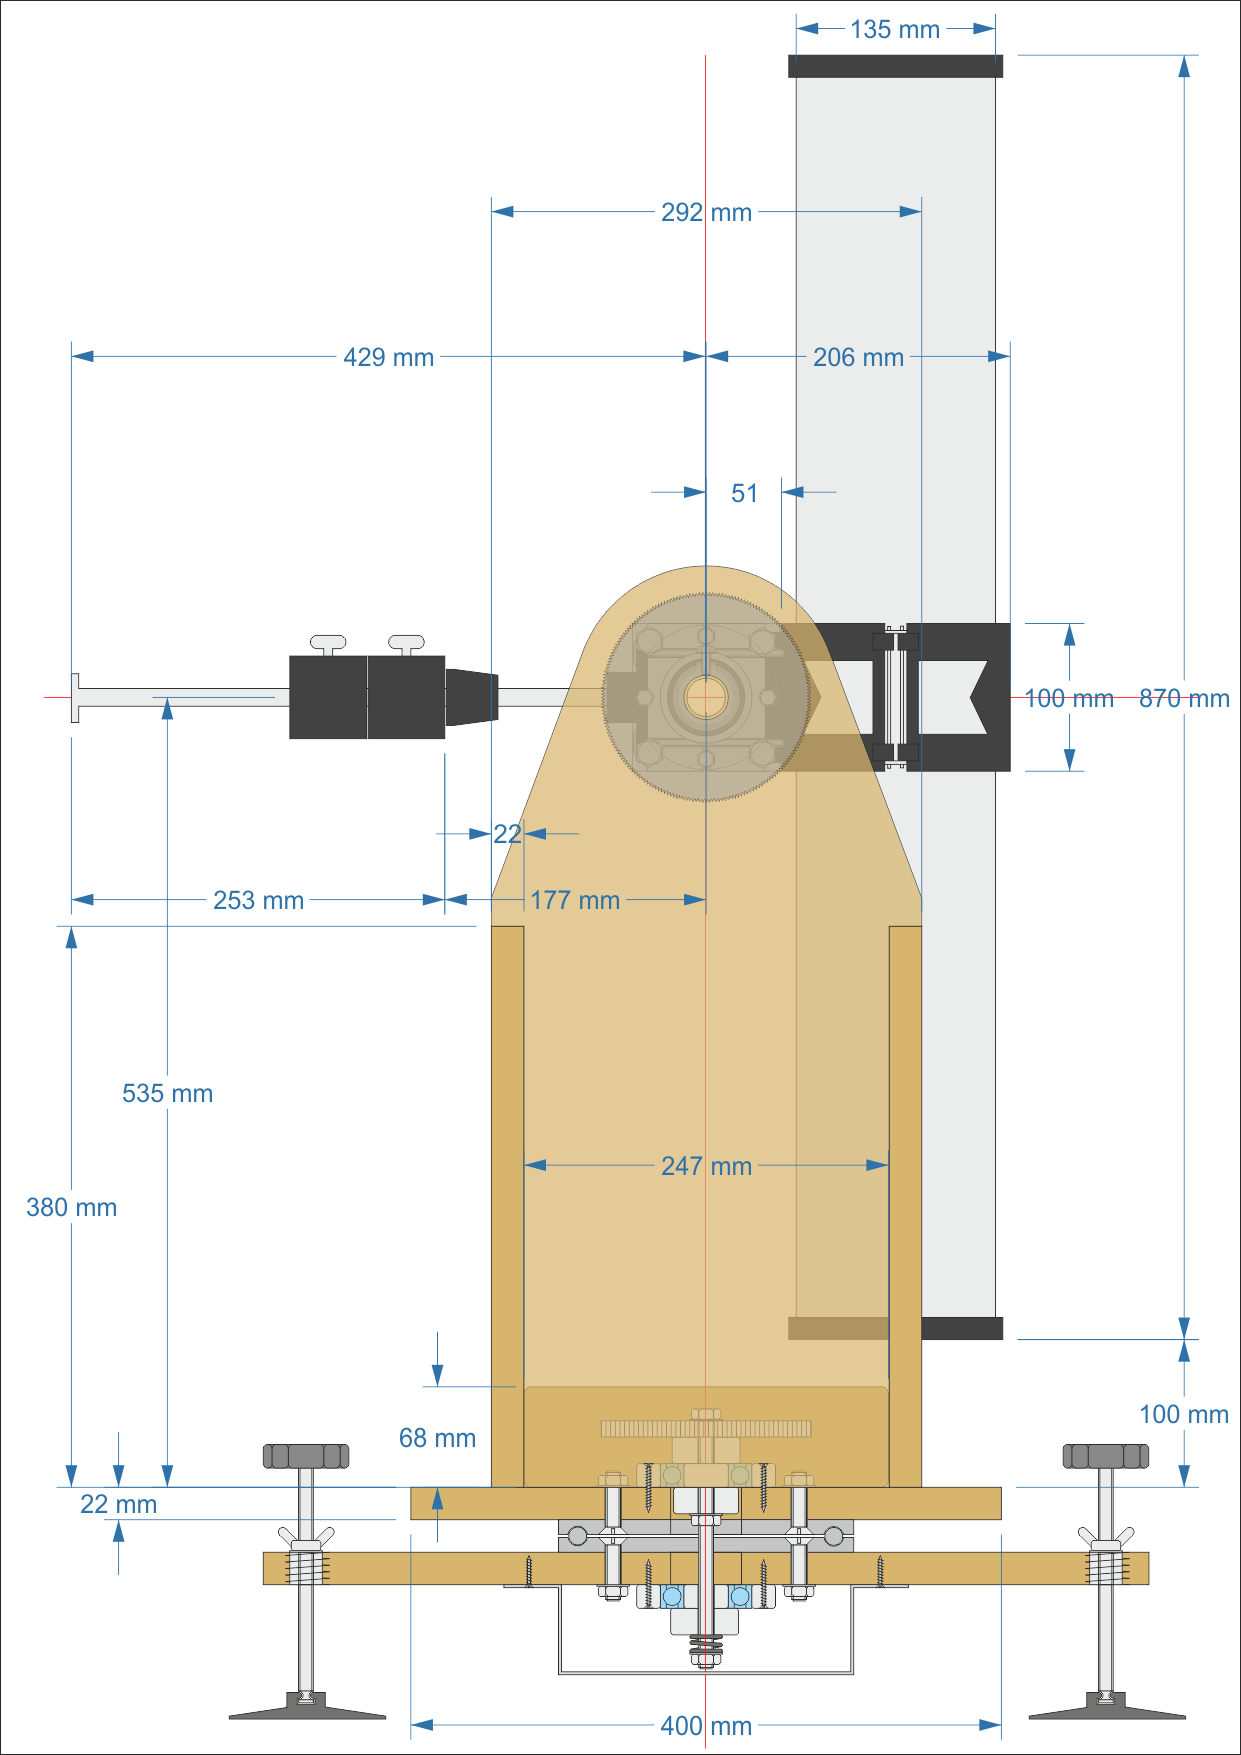
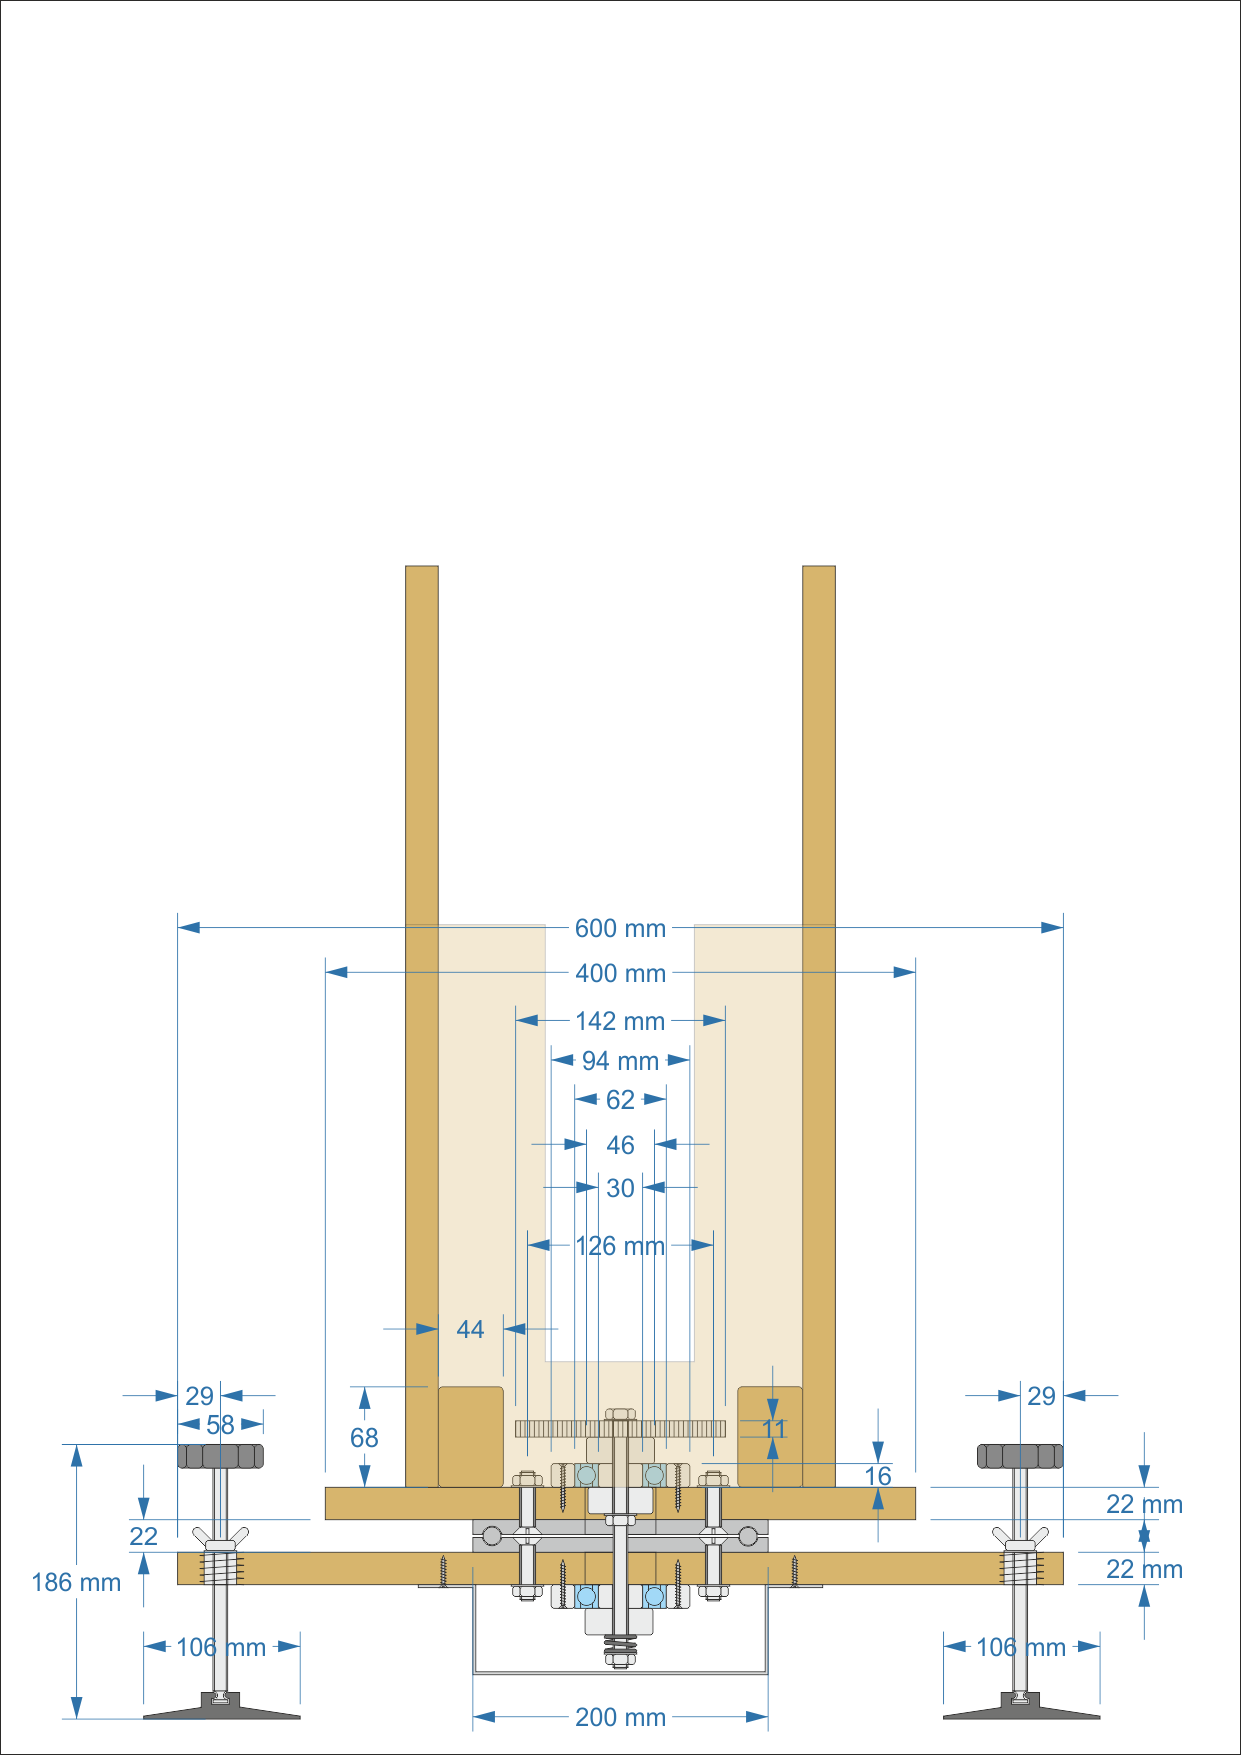
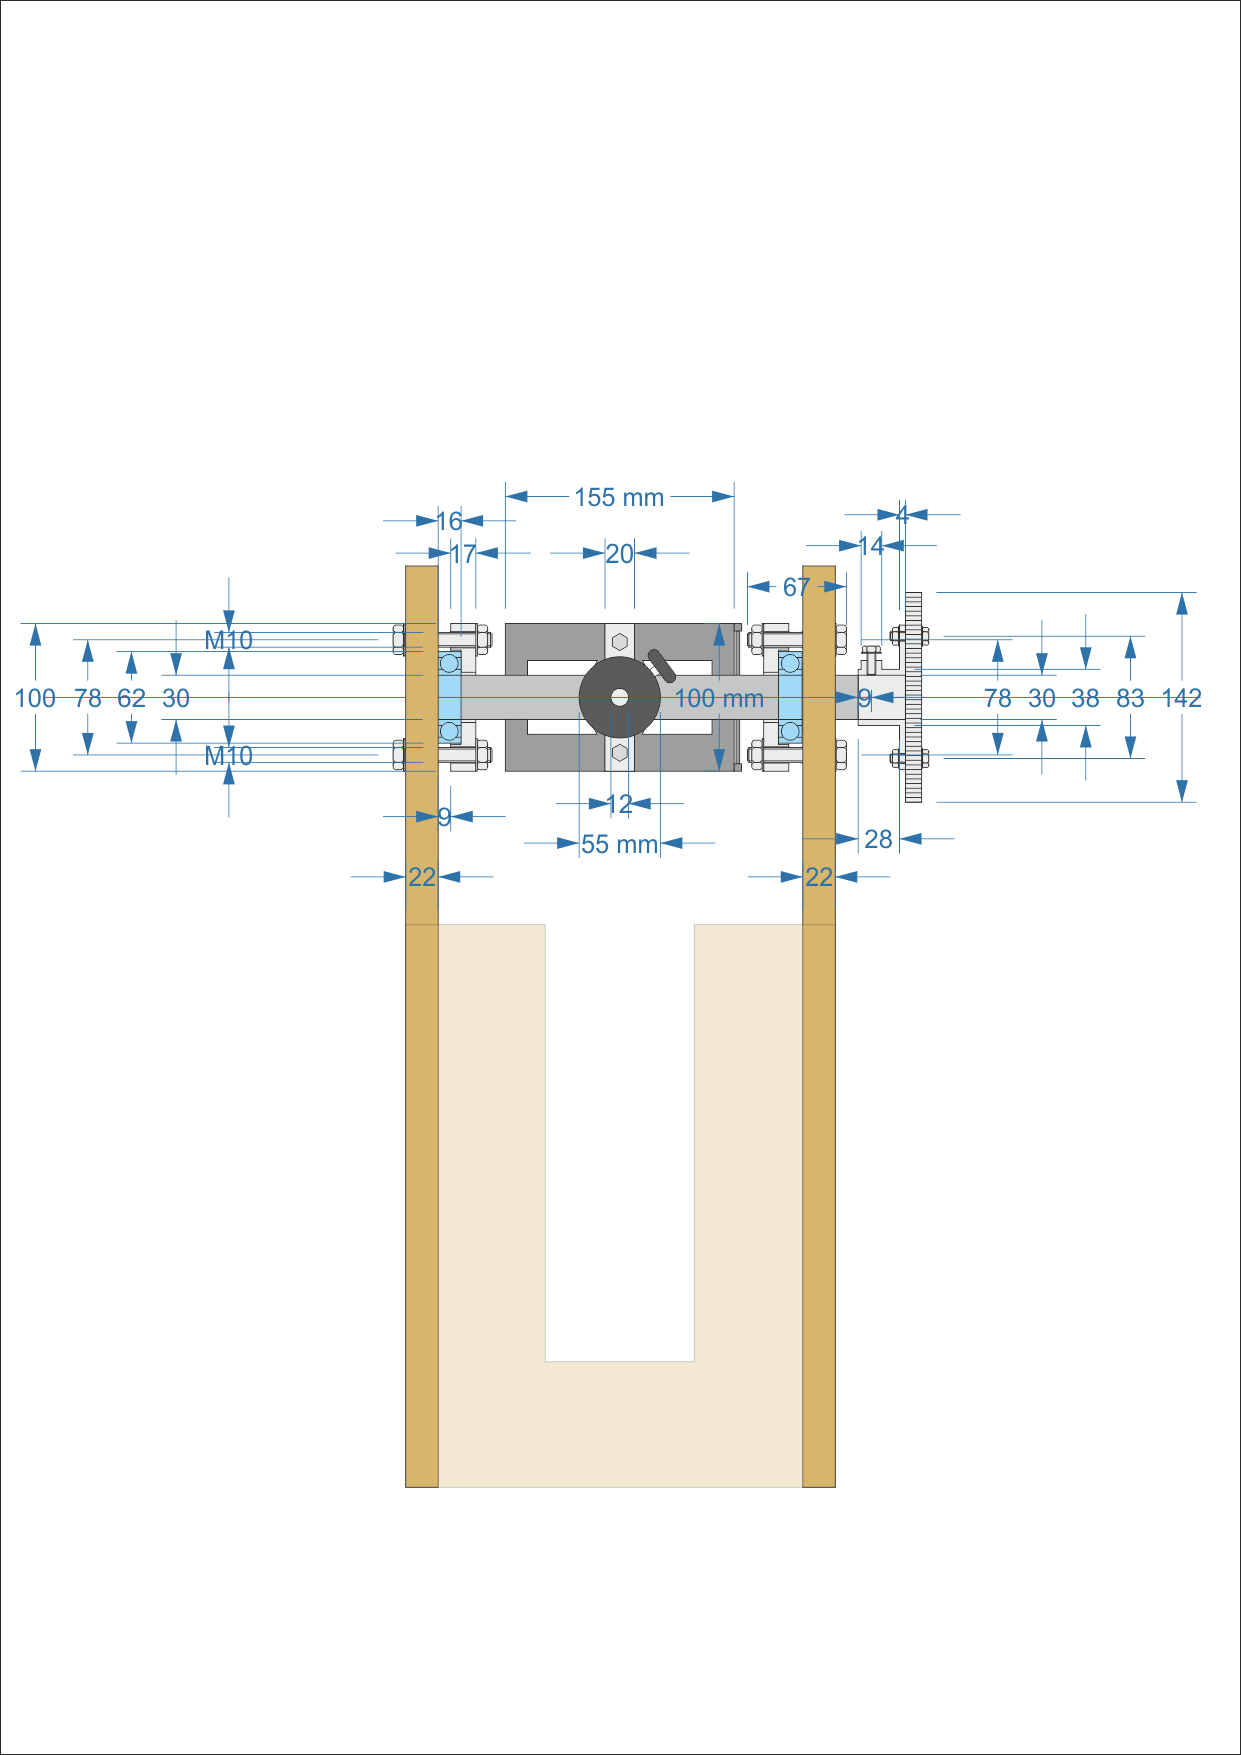
Equatorial Mount for the ZWO Seestar S50 telescope. Giving a smart telescope a different way to follow the sky.
The Seestar S50 is a compact smart telescope capable of automatically locating and tracking objects in the night sky. In its standard configuration it operates as an alt-azimuth telescope, tracking an object by moving in both altitude and azimuth. That works remarkably well, but the Earth still has an annoying habit of rotating. For longer observations and astrophotography, an equatorial setup has an important advantage: instead of continuously correcting two axes, the telescope’s primary rotation axis is aligned parallel to the Earth’s rotational axis. Tracking the apparent motion of the sky can then essentially be reduced to rotation around a single axis. So rather than buying an equatorial wedge or mount, I decided to design and build one specifically for my Seestar S50.
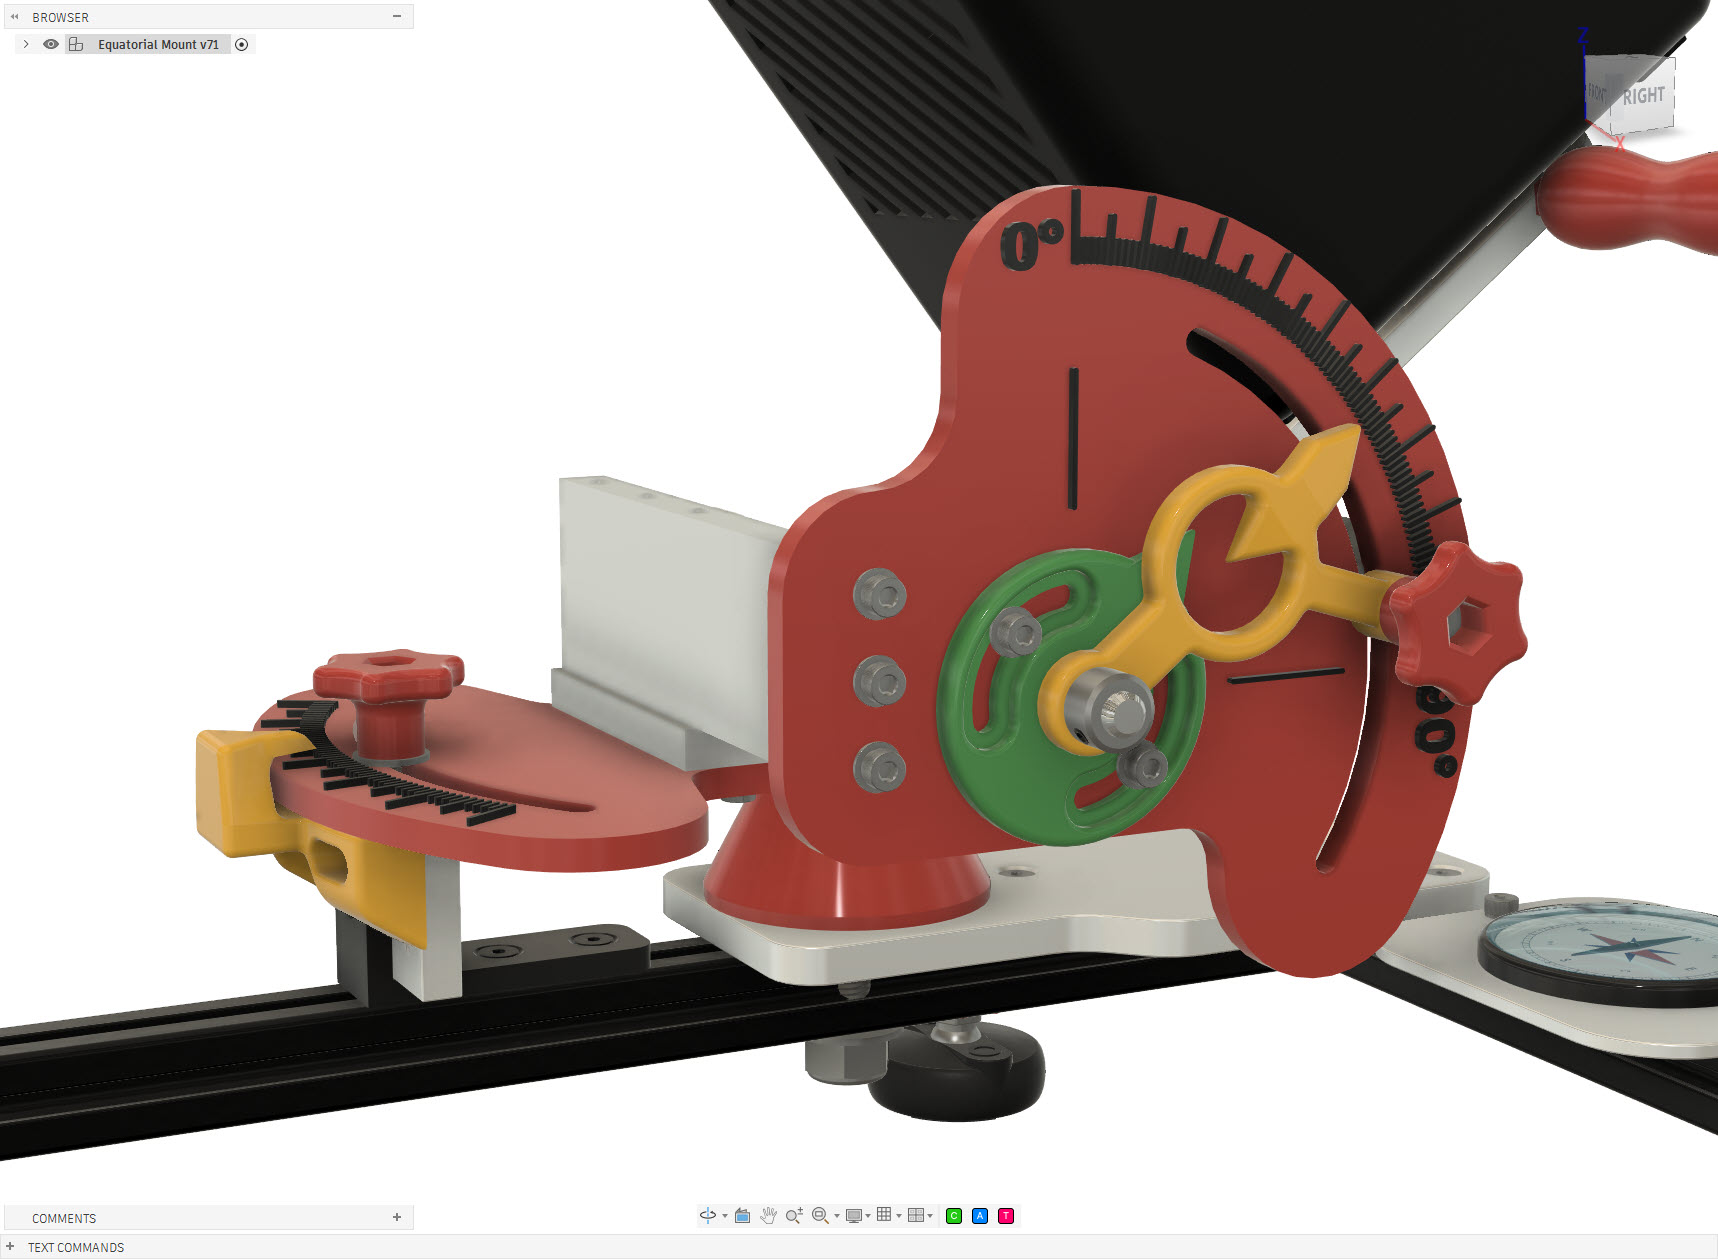
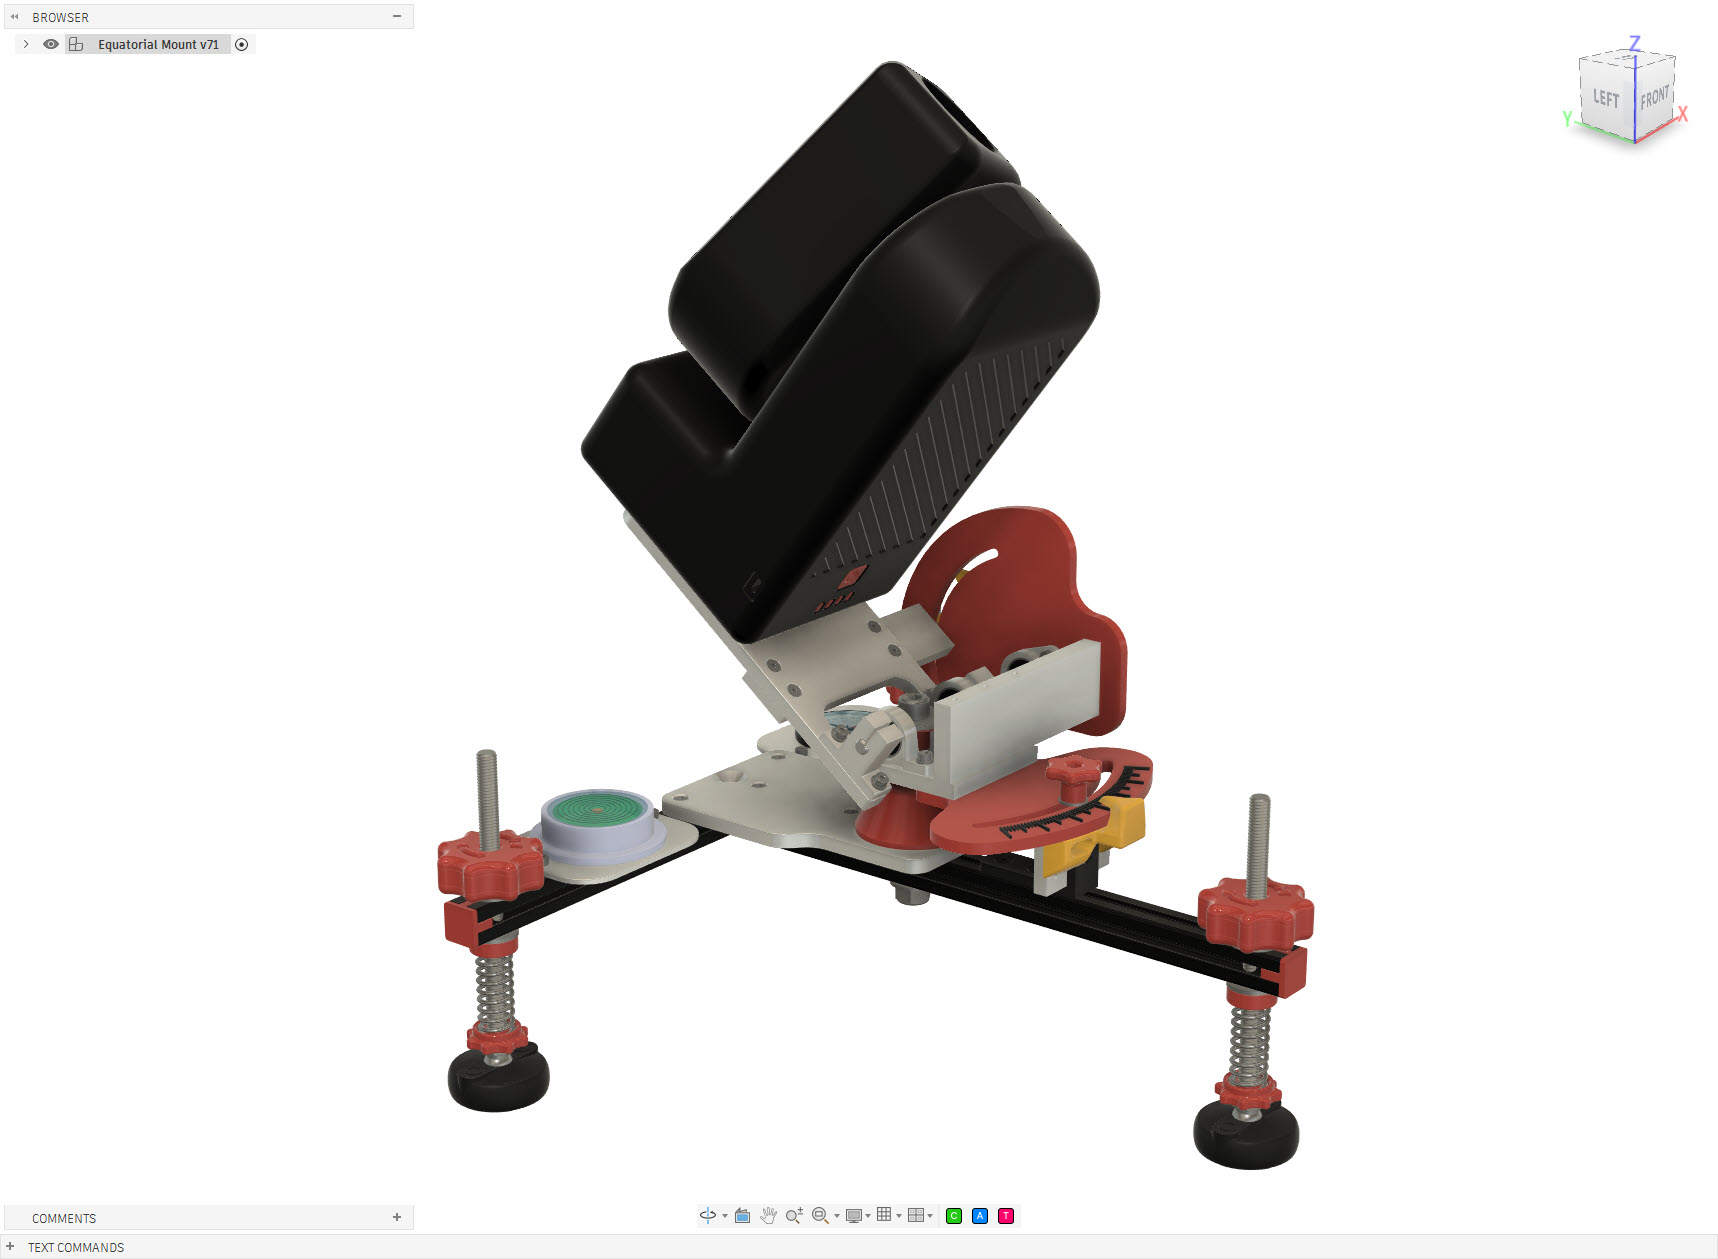
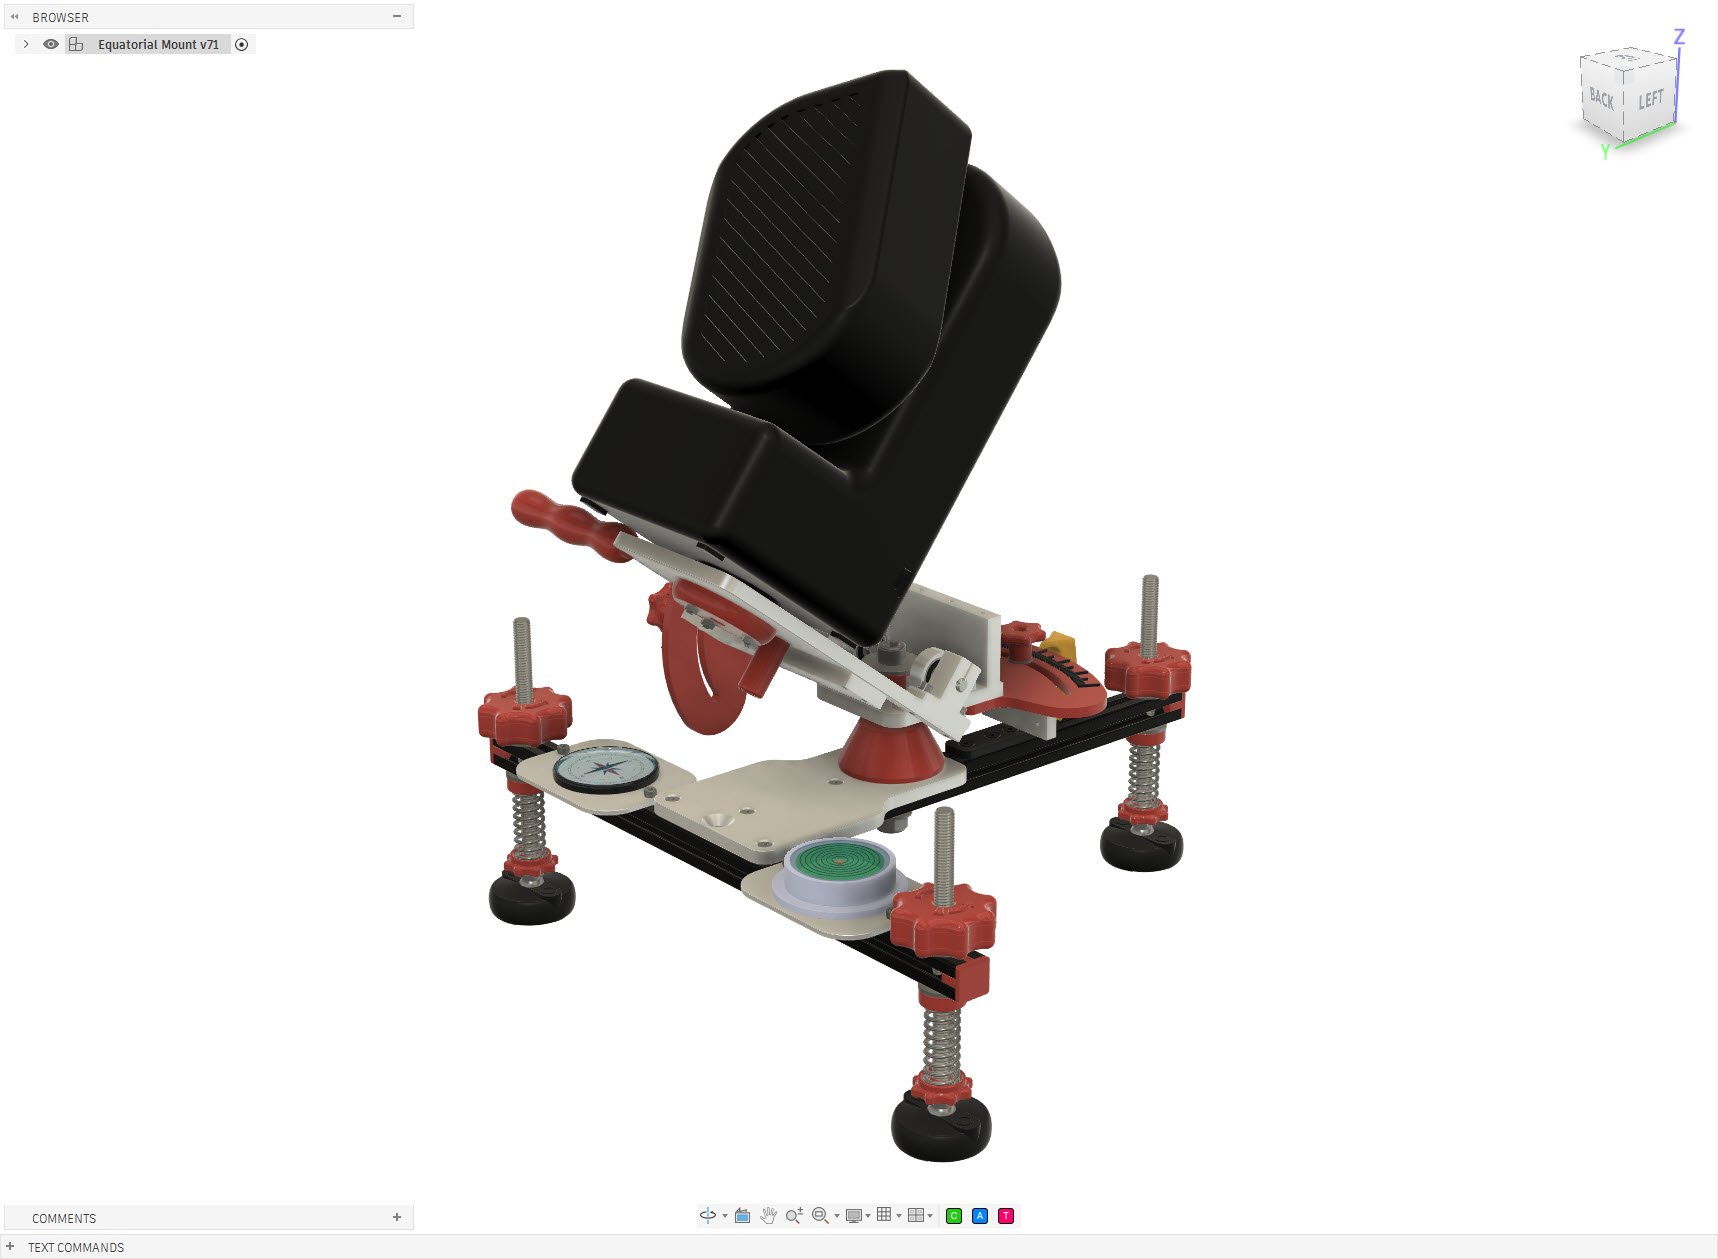
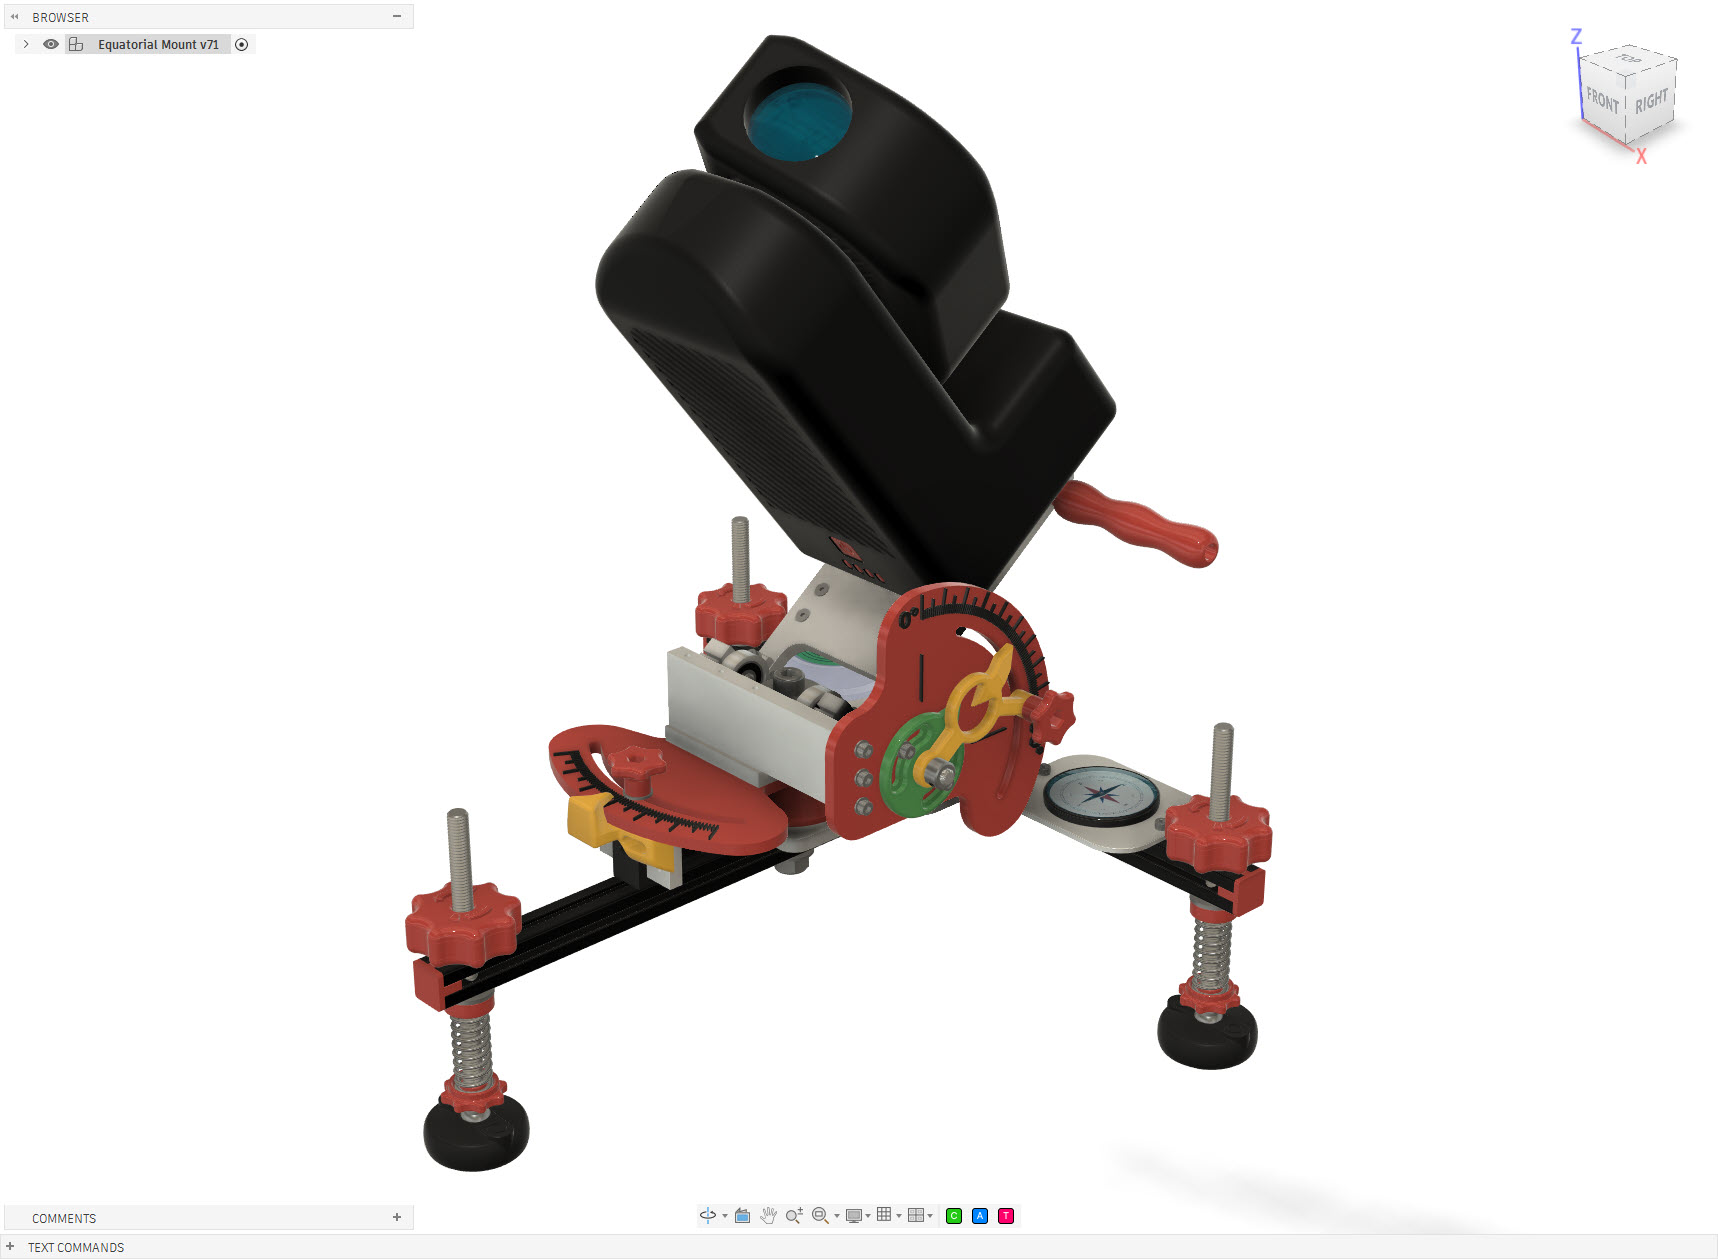
Seestar S50 Equatorial Mount
Seestar S50 Equatorial Mount
Seestar S50 Equatorial Mount
Seestar S50 Equatorial Mount
Seestar S50 Equatorial Mount
Seestar S50 Equatorial Mount
Seestar S50 Equatorial Mount
Seestar S50 Equatorial Mount
Seestar S50 Equatorial Mount
Seestar S50 Equatorial Mount
How does it work
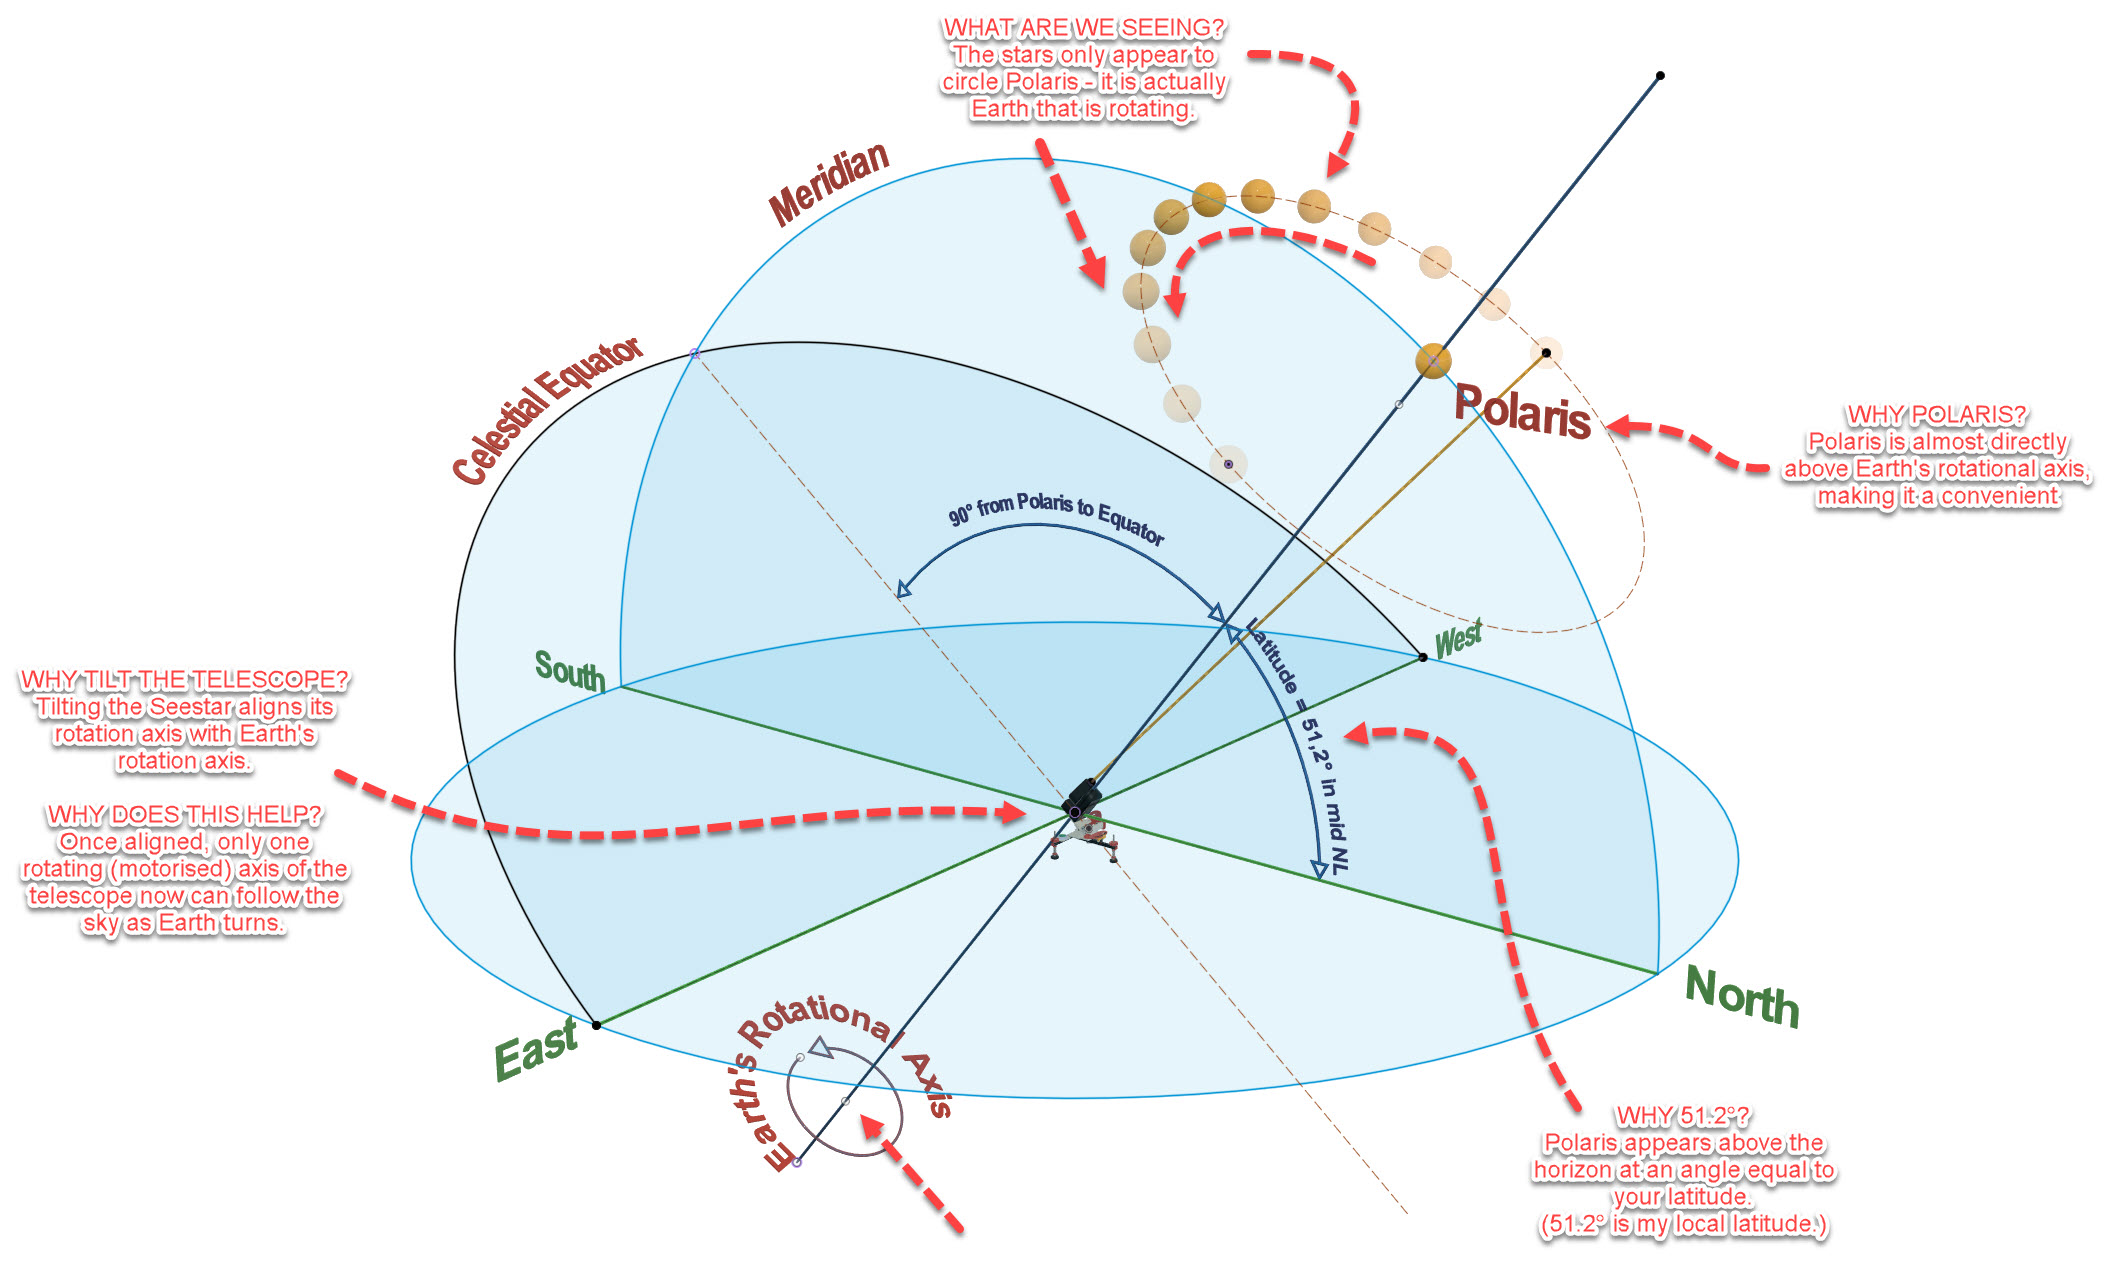
The stars appear to move across the night sky because the Earth rotates. Polaris lies very close to the Earth’s rotational axis and therefore appears almost stationary while the other stars seem to circle around it.
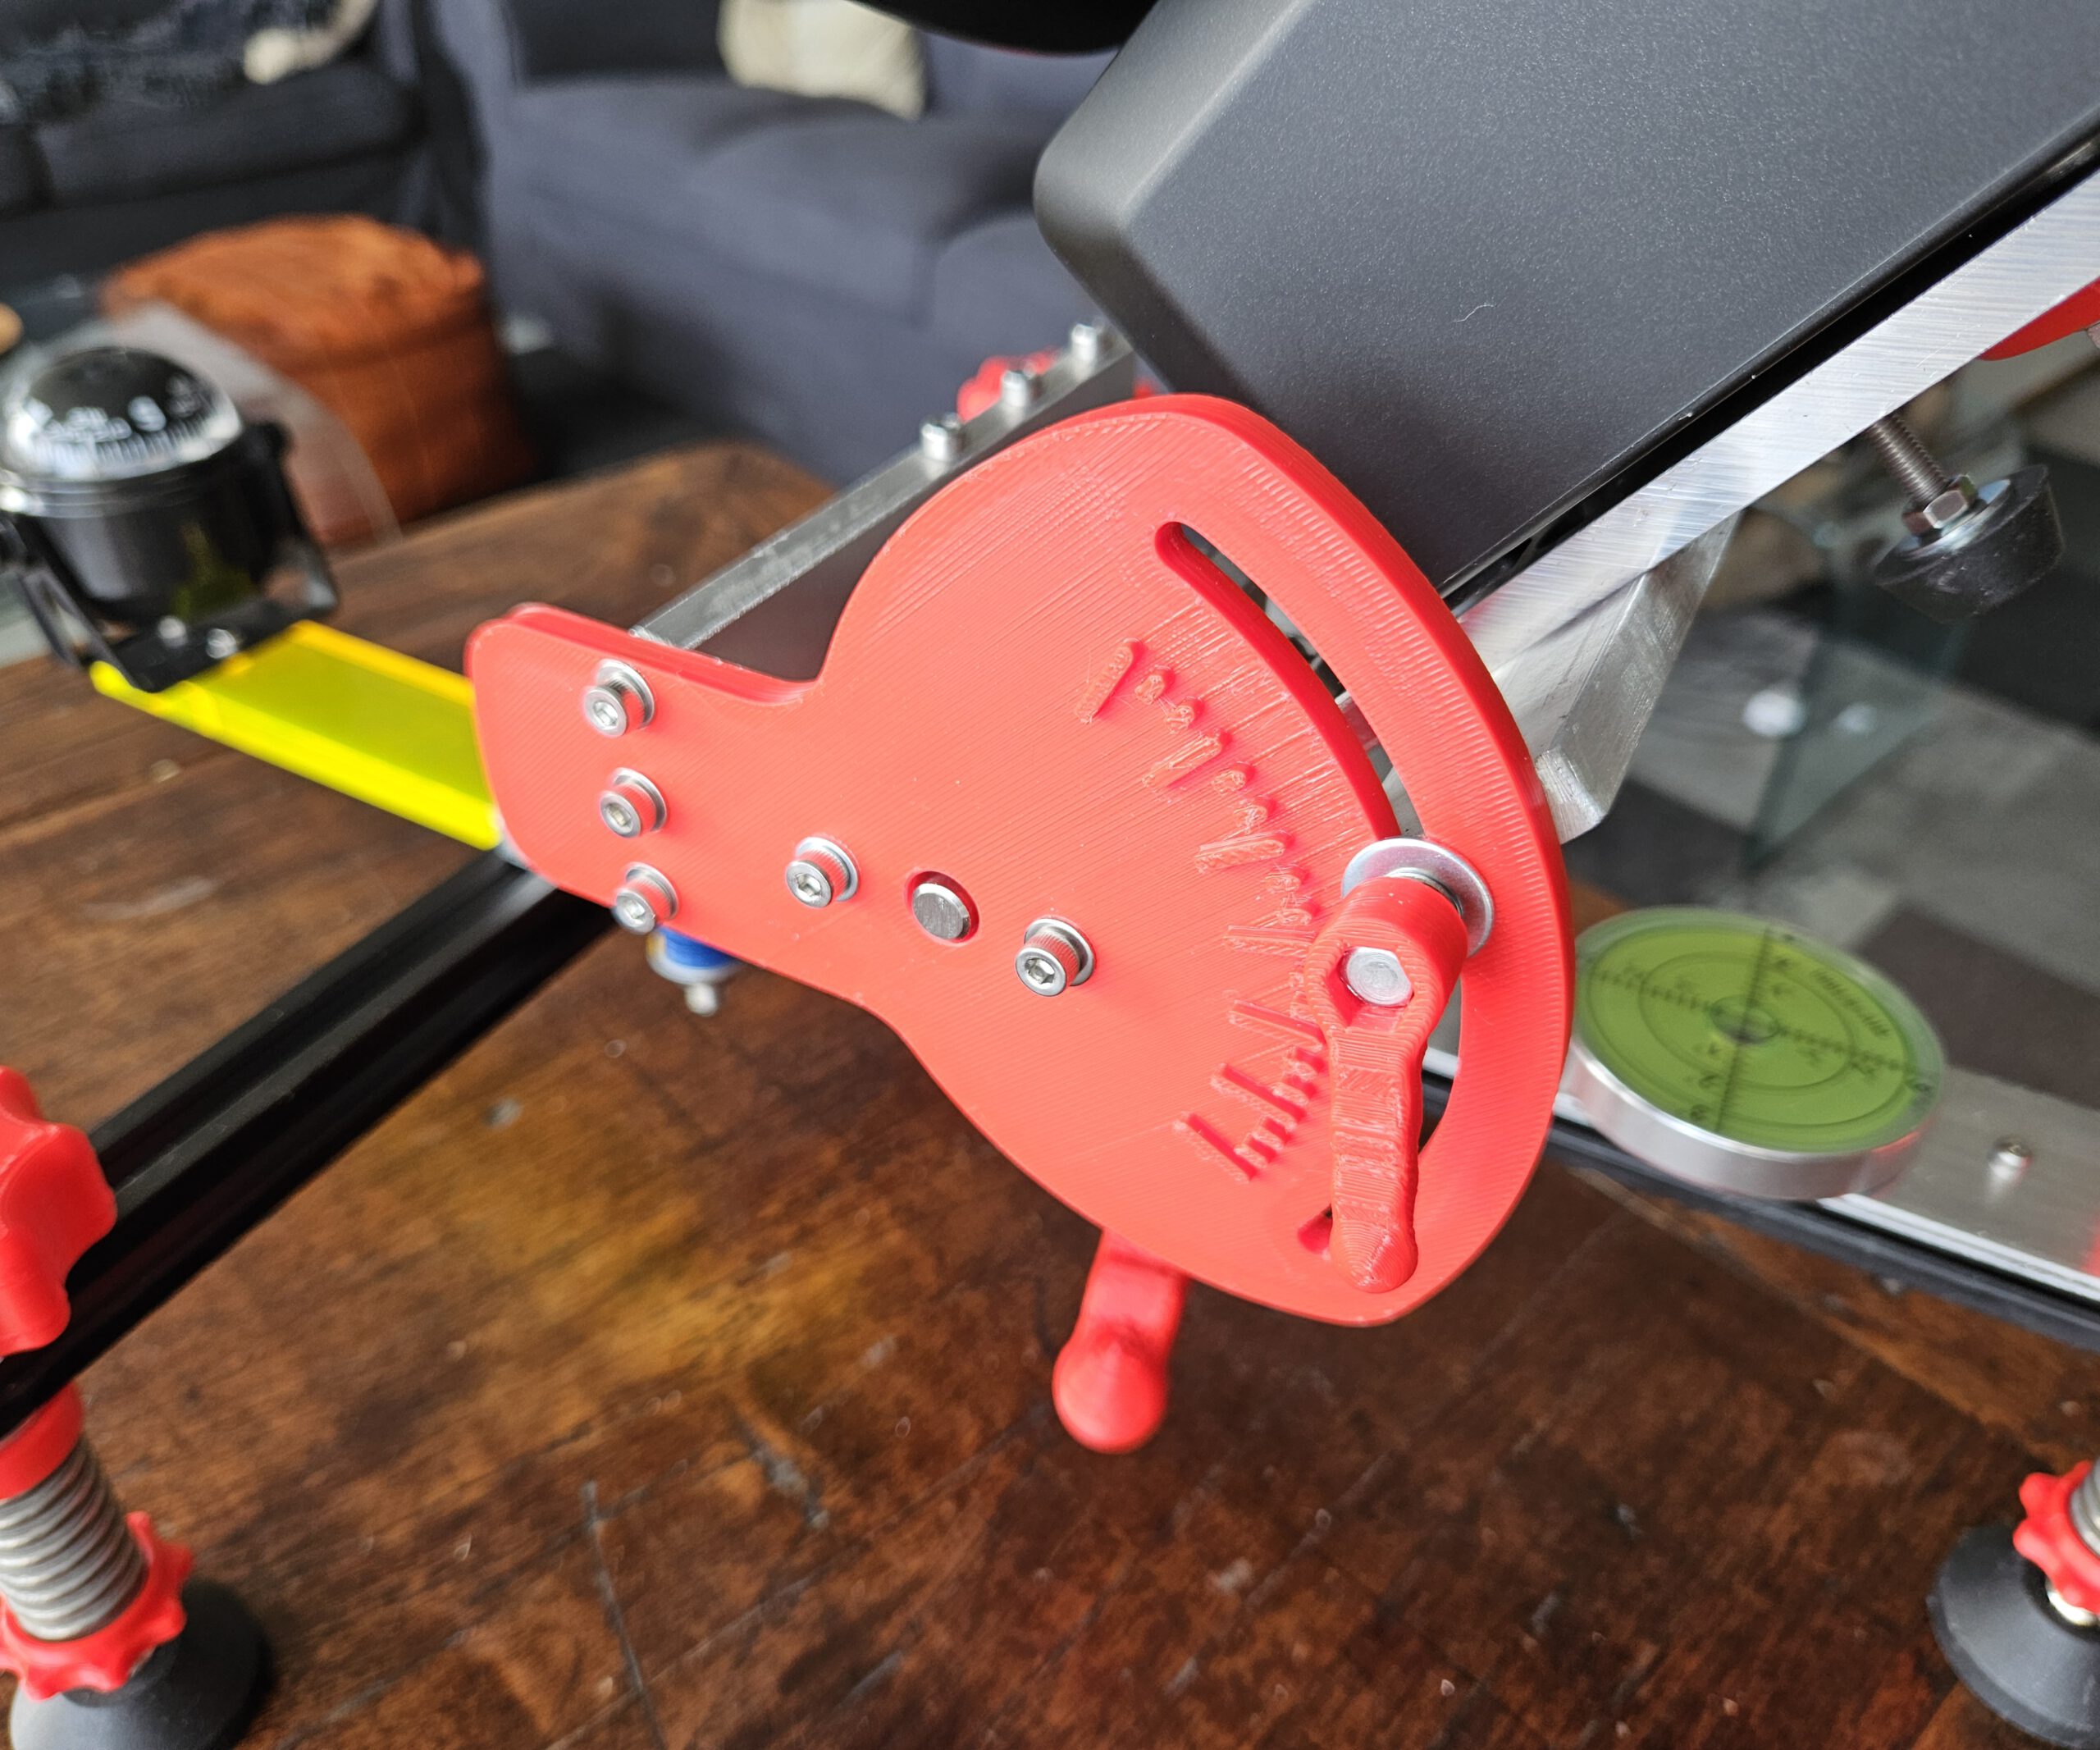
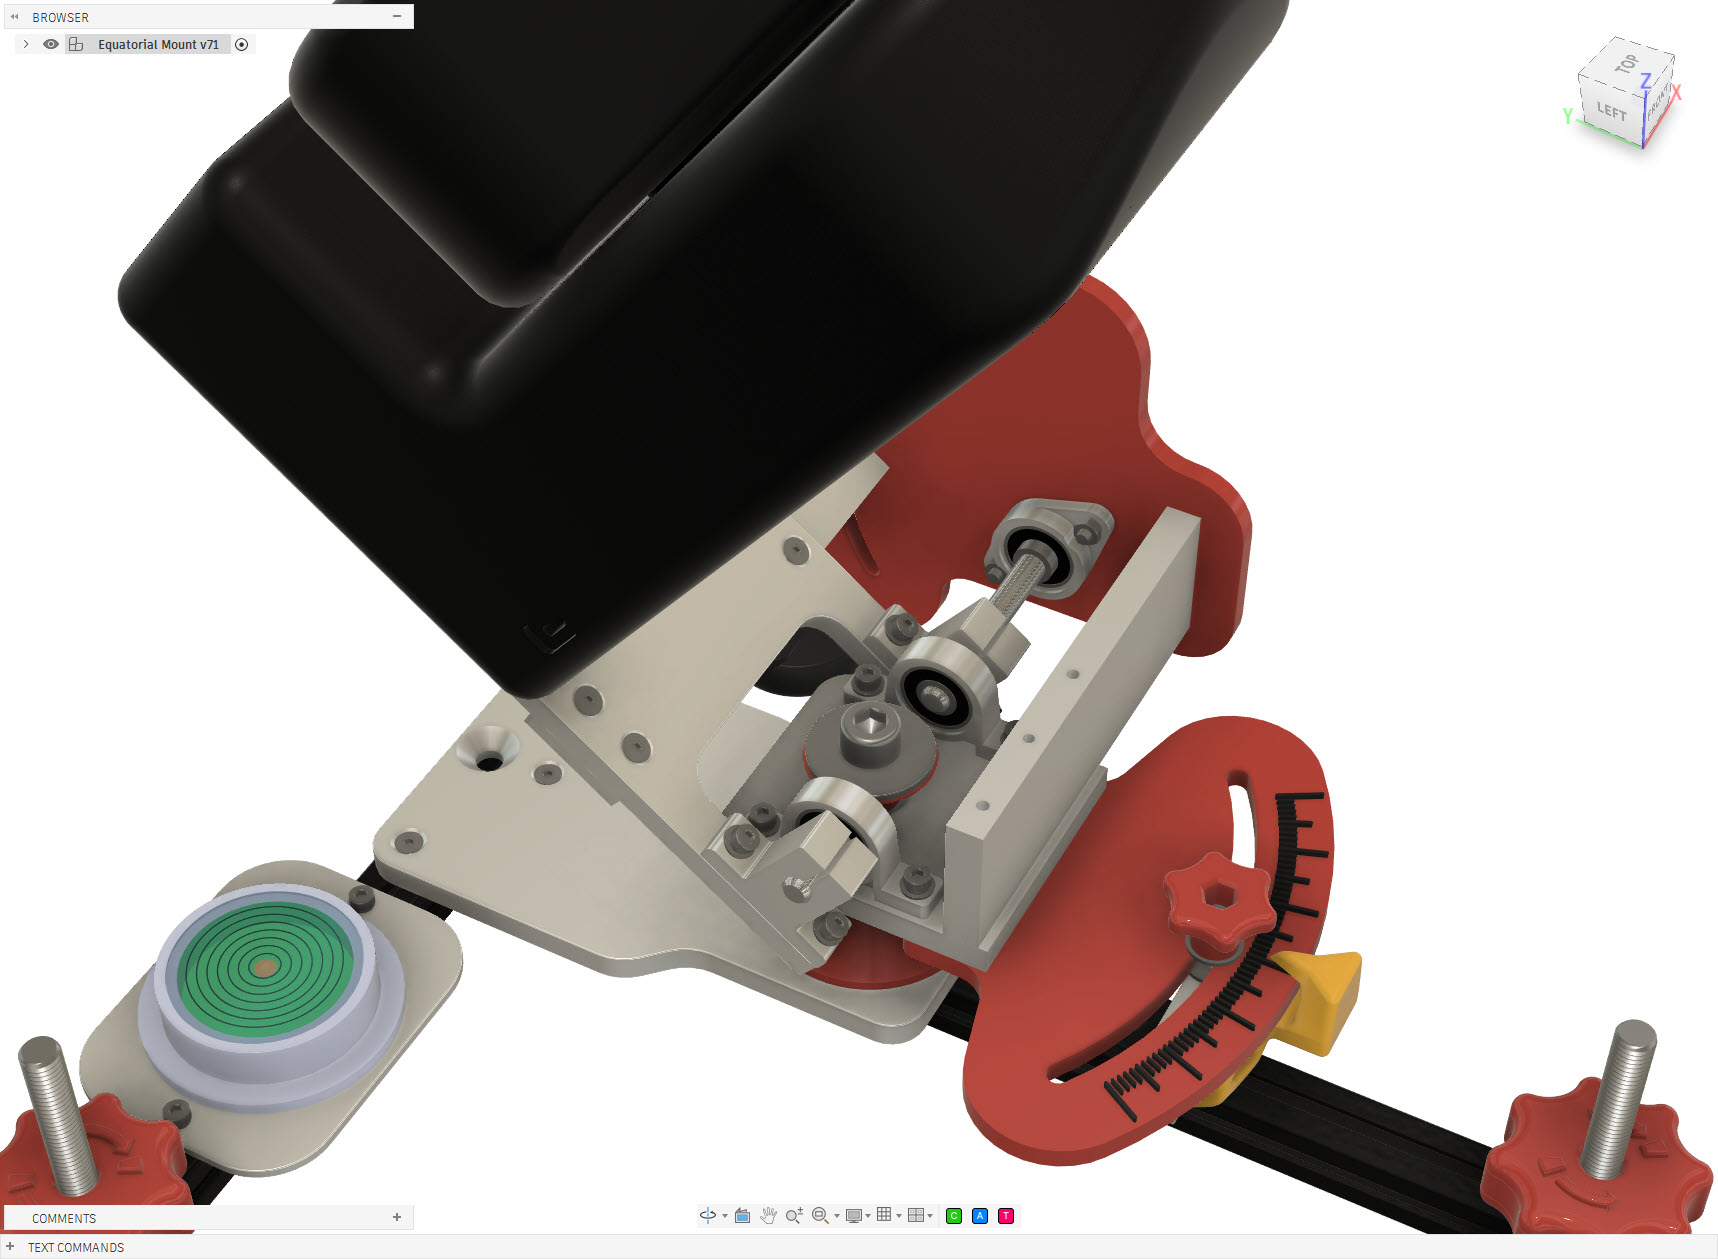
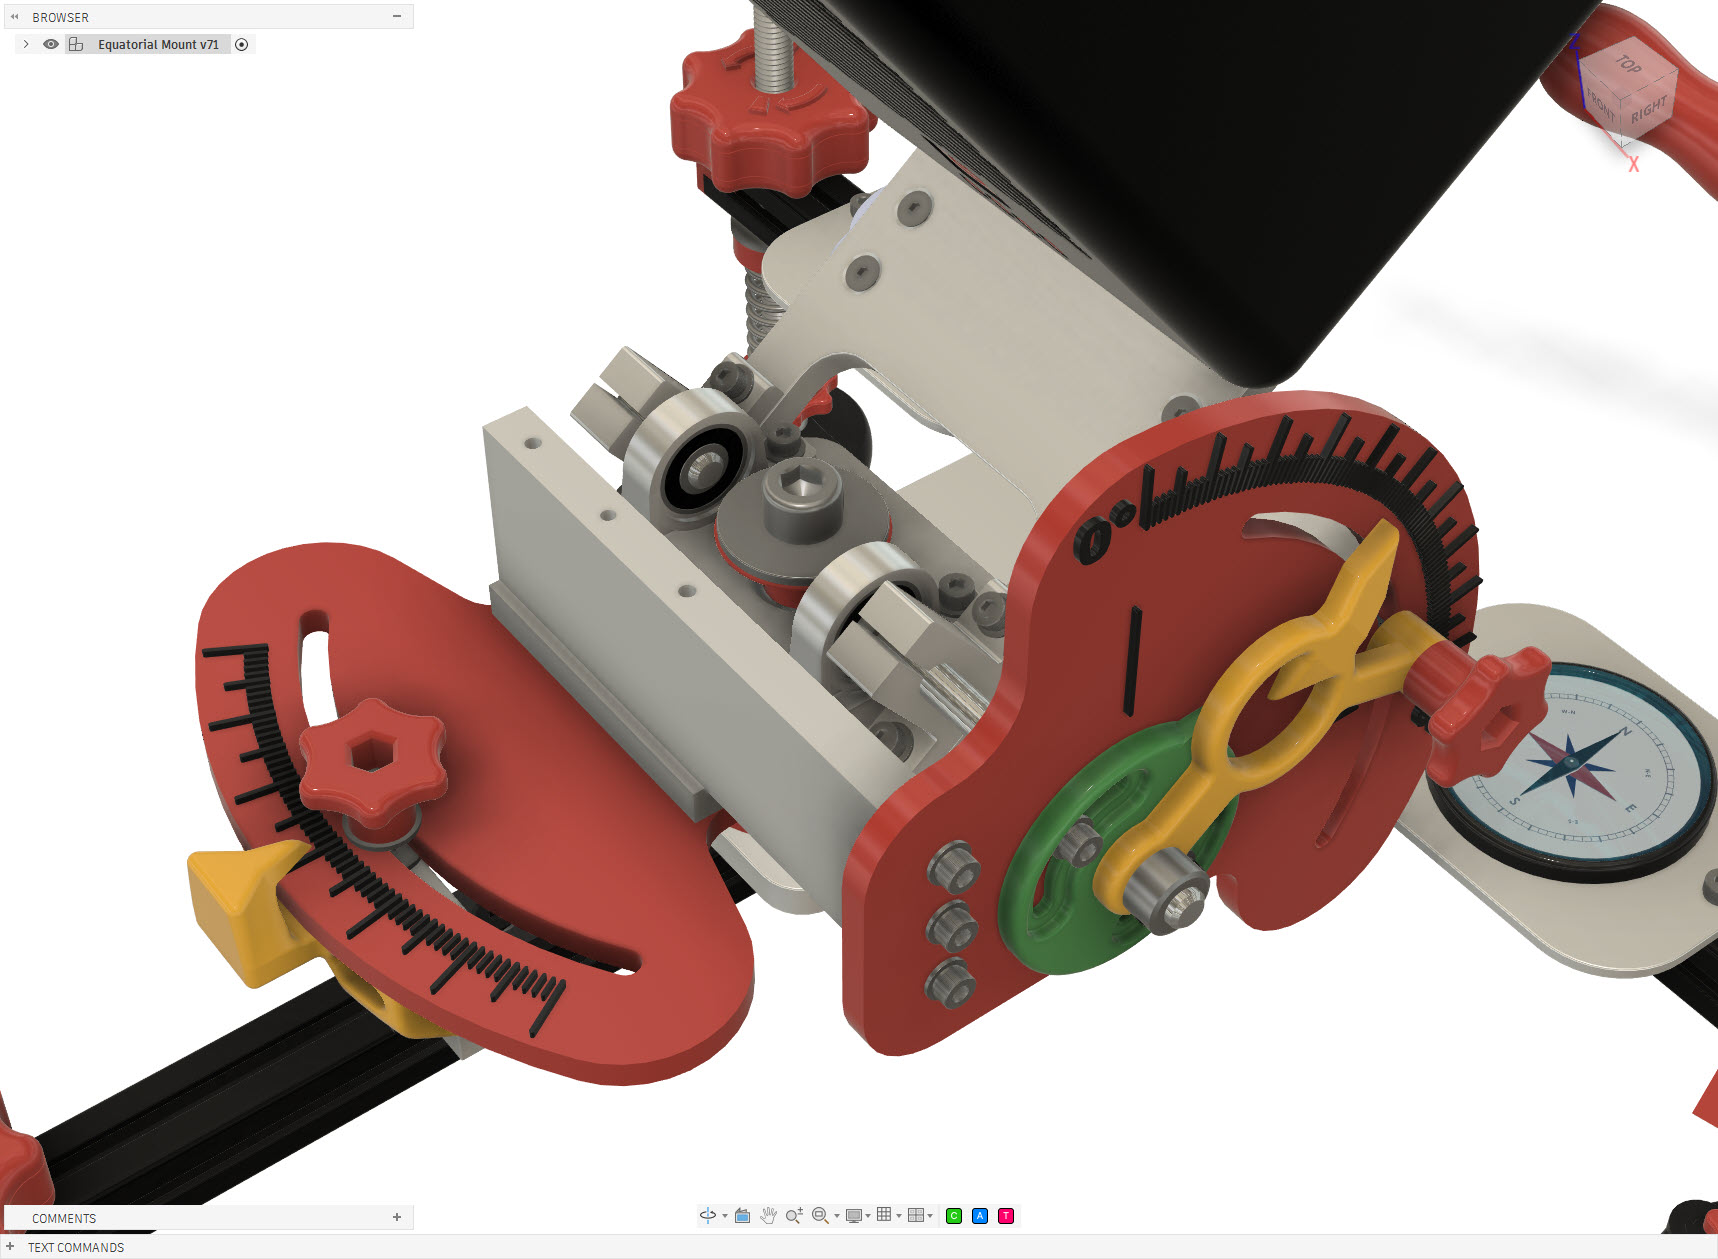
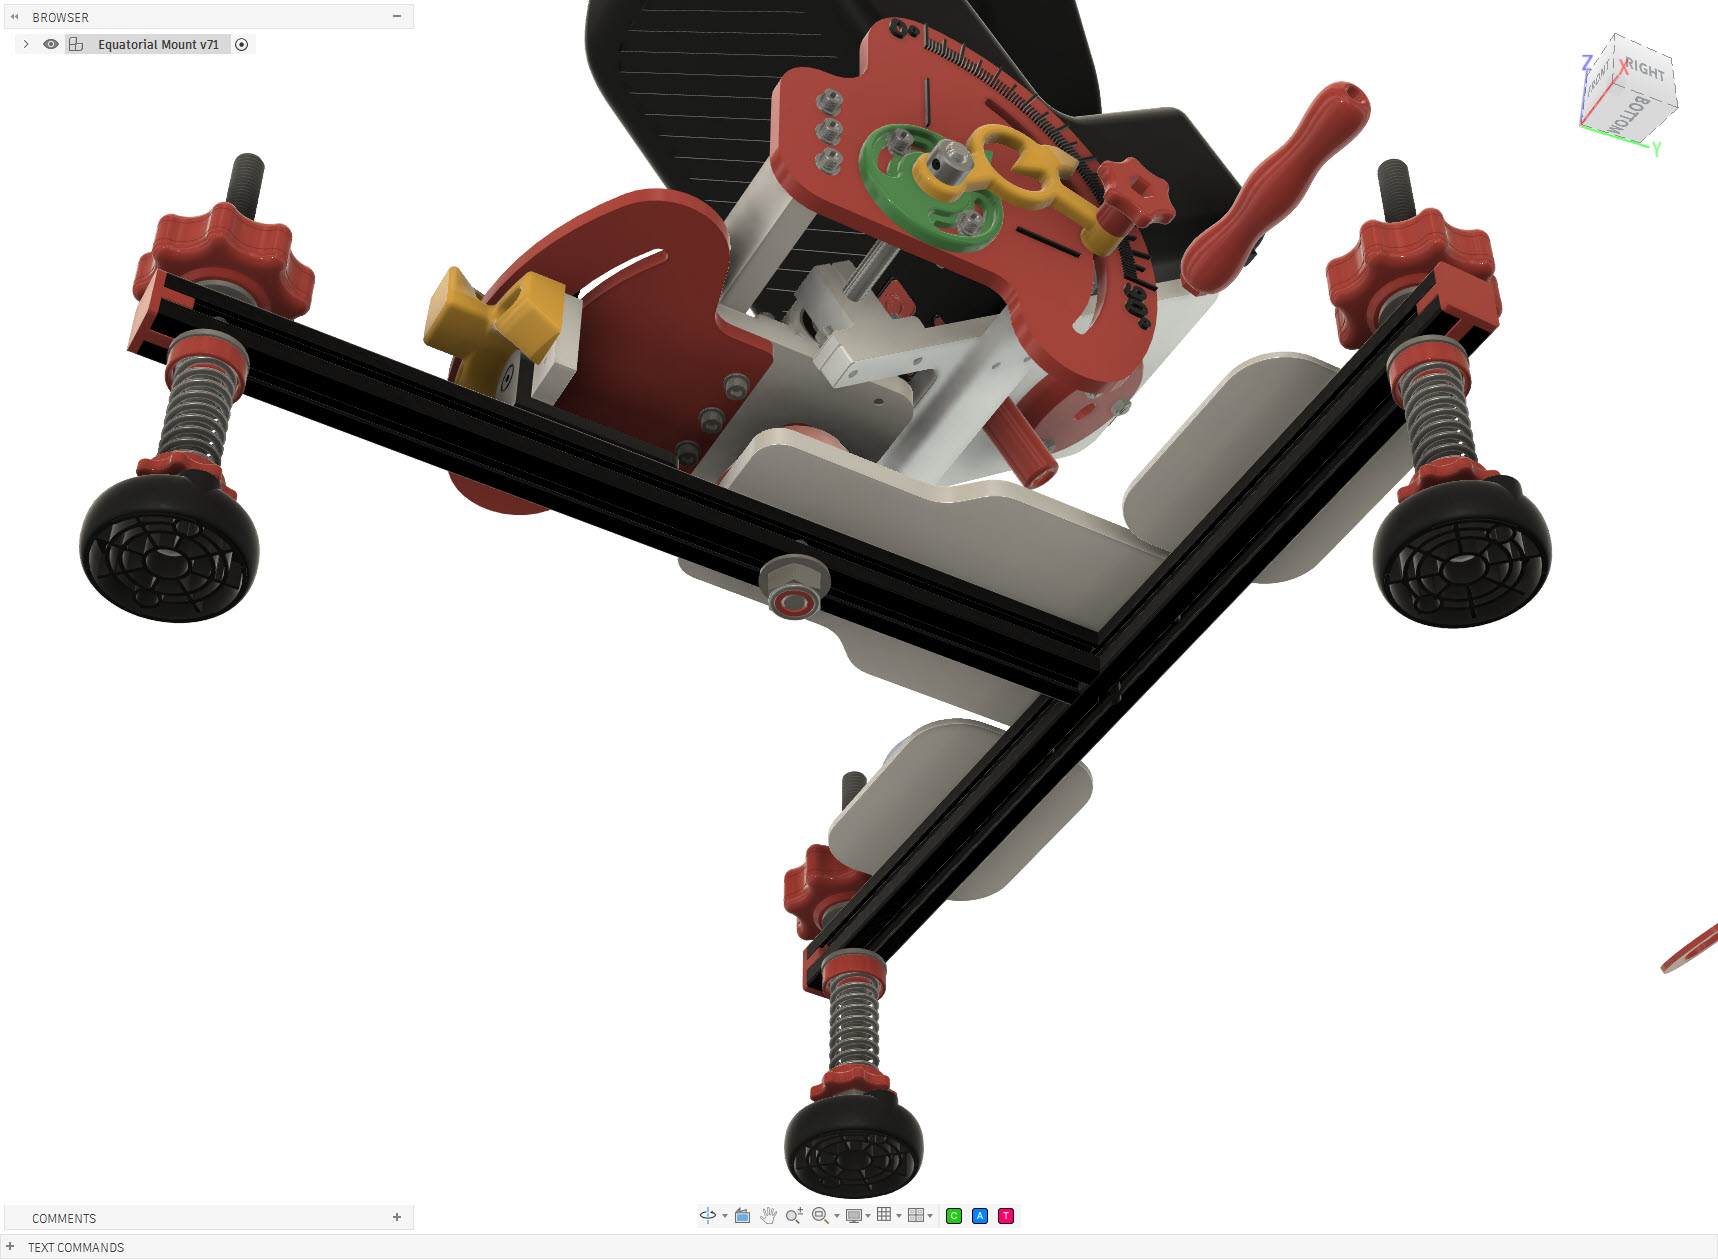
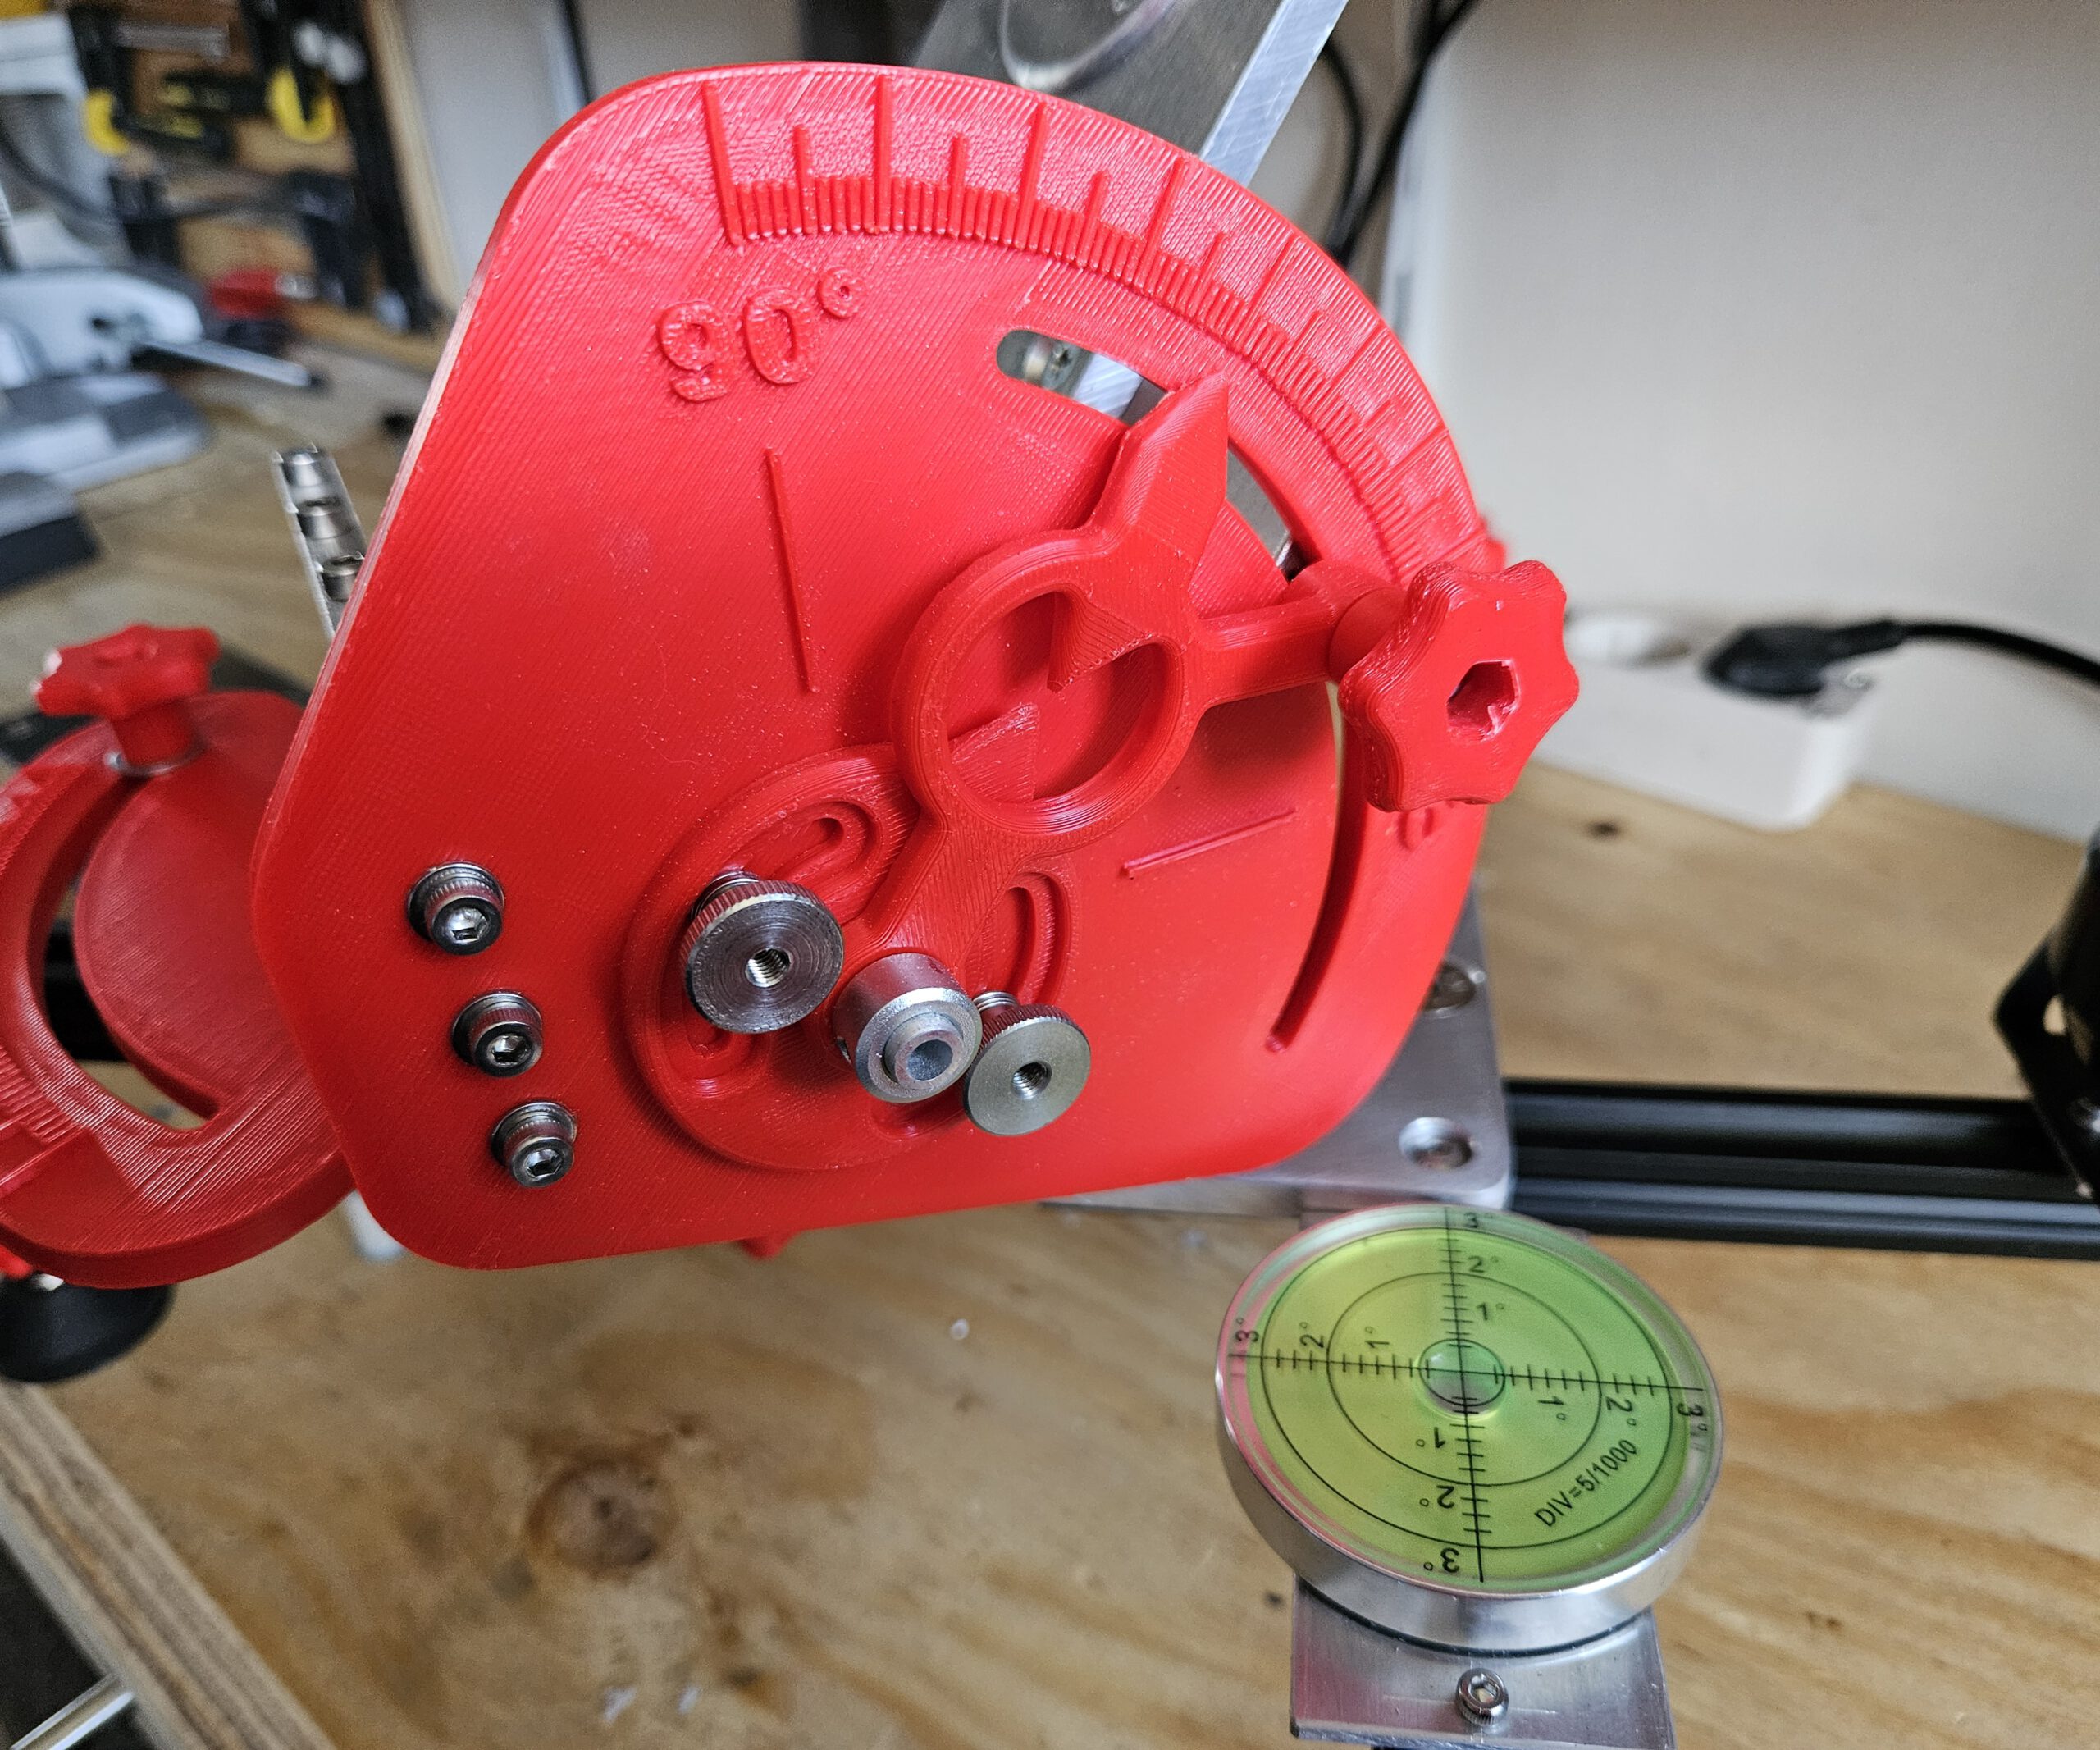
For equatorial tracking, the Seestar’s rotation axis must be aligned parallel to the Earth’s axis. My mount therefore provides adjustment in two directions: altitude sets the angle of the axis to match the local latitude, while azimuth allows the axis to be aimed precisely towards Polaris.
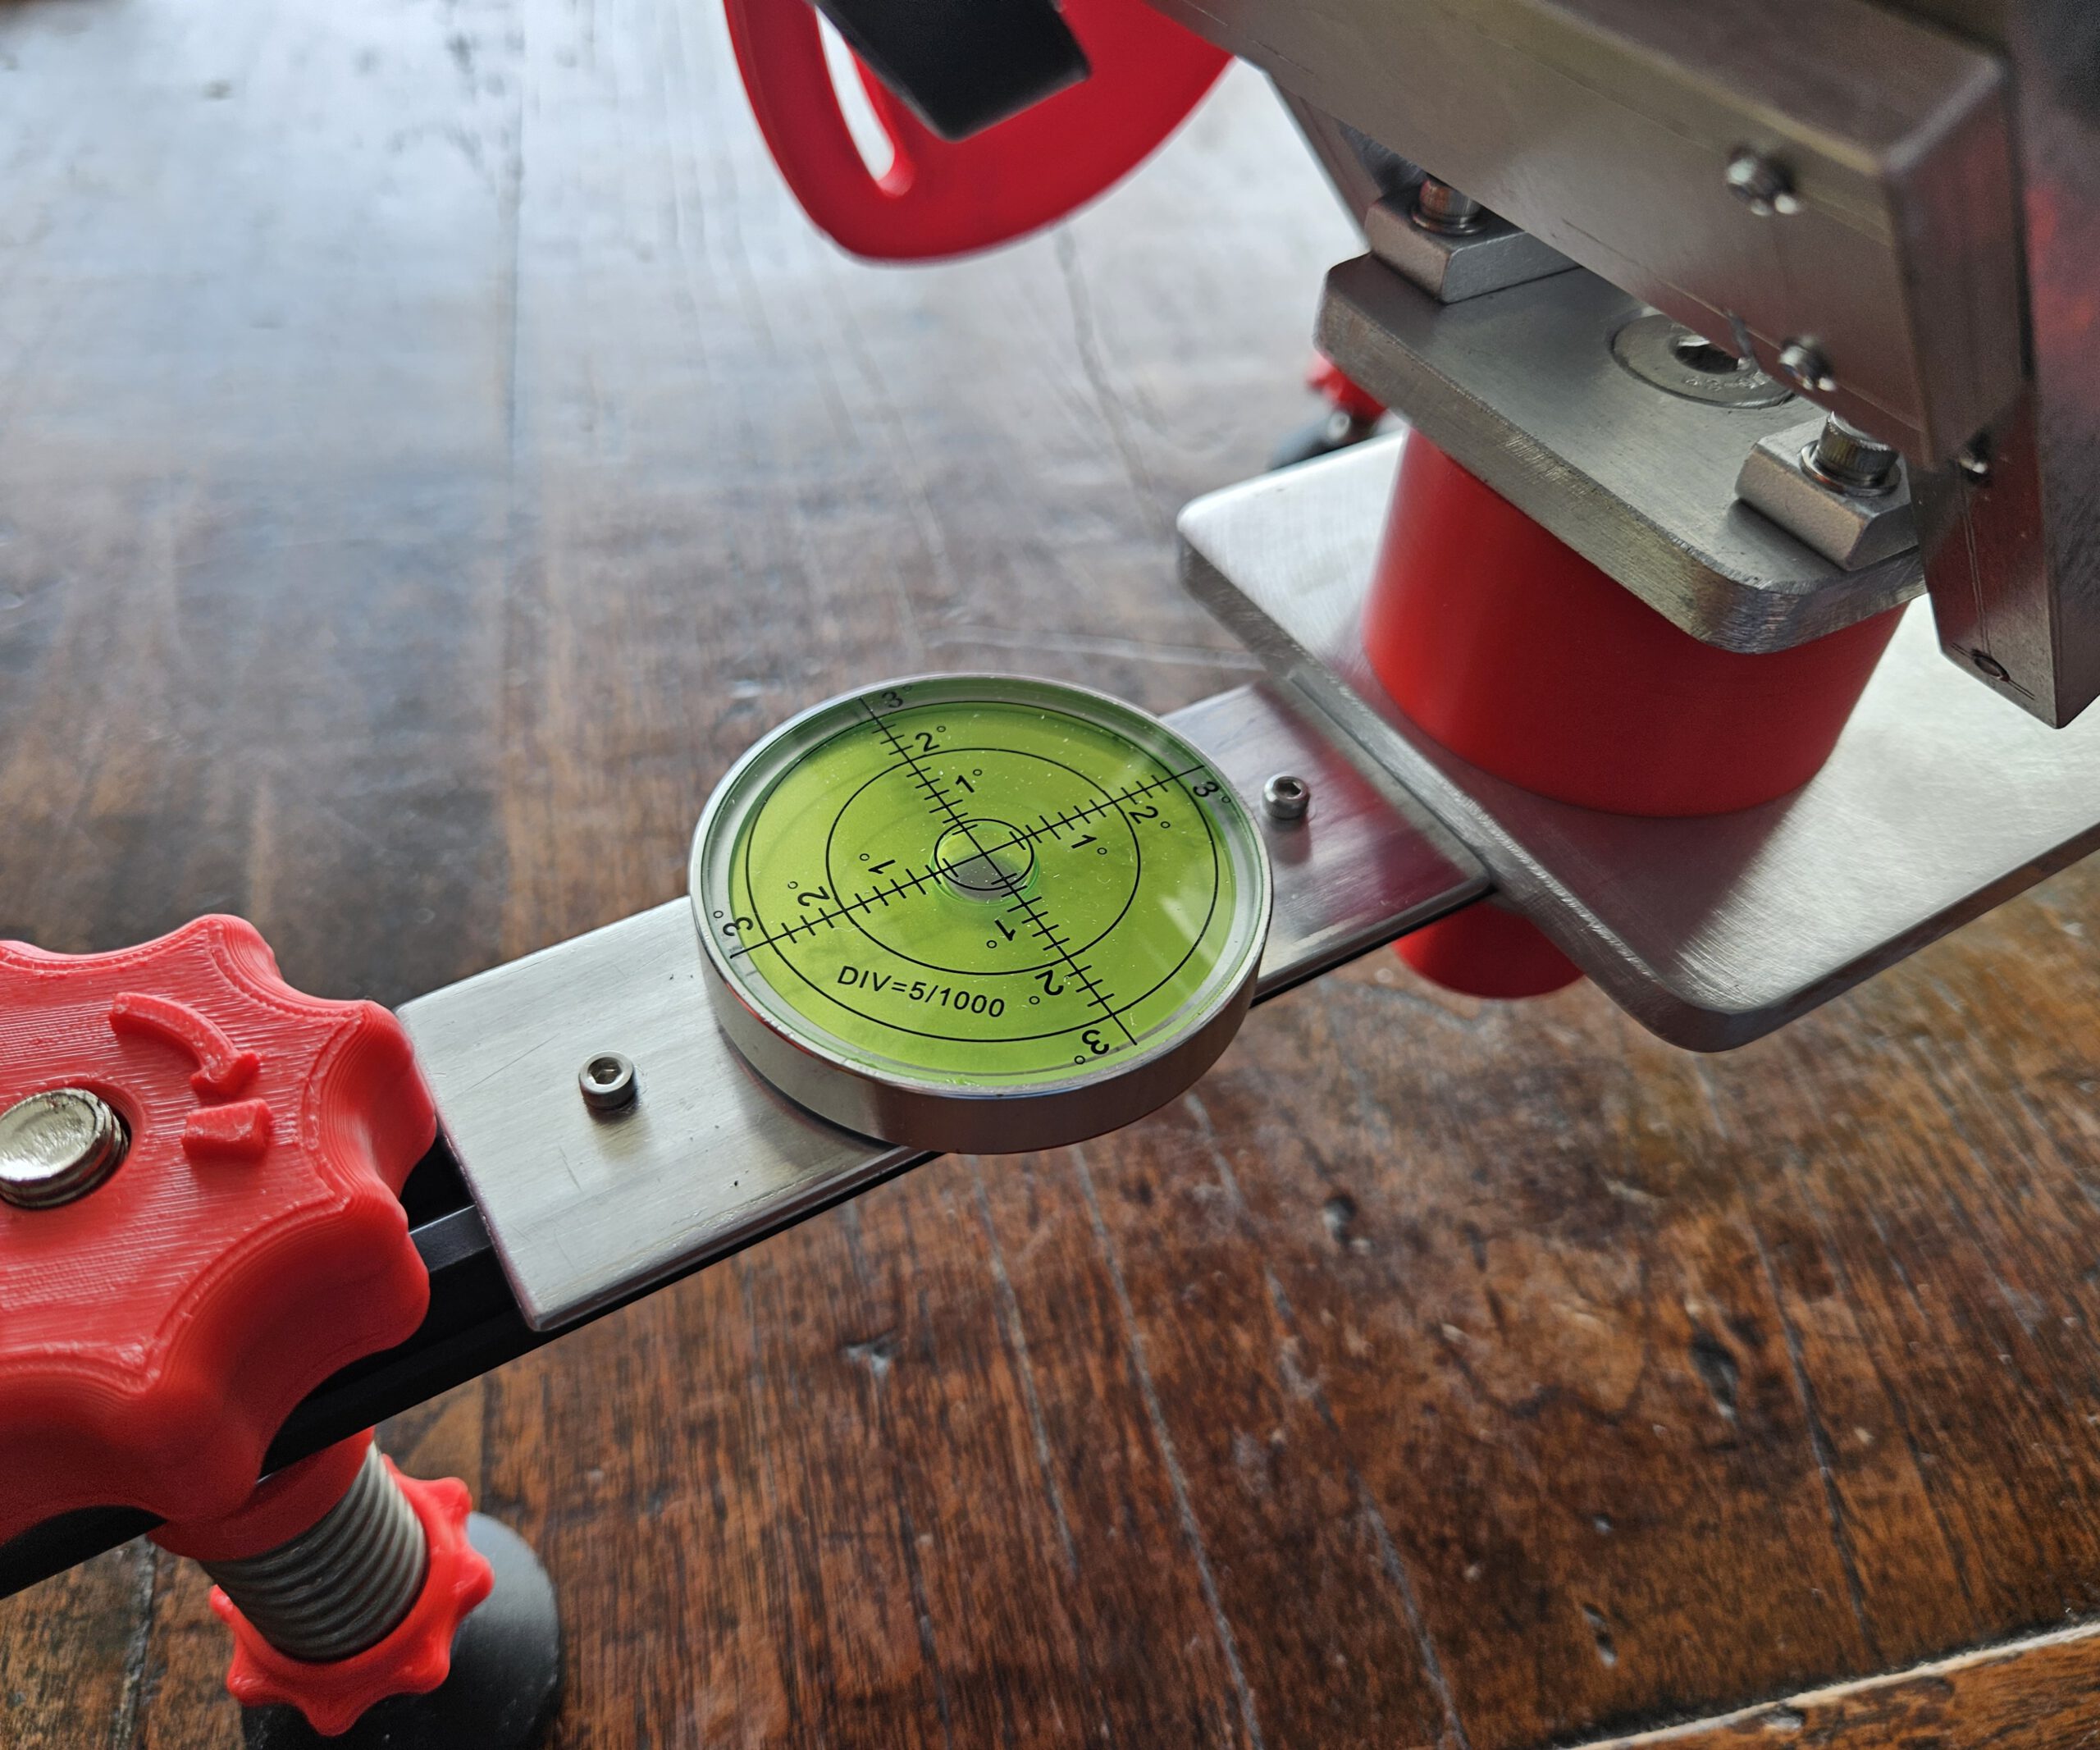
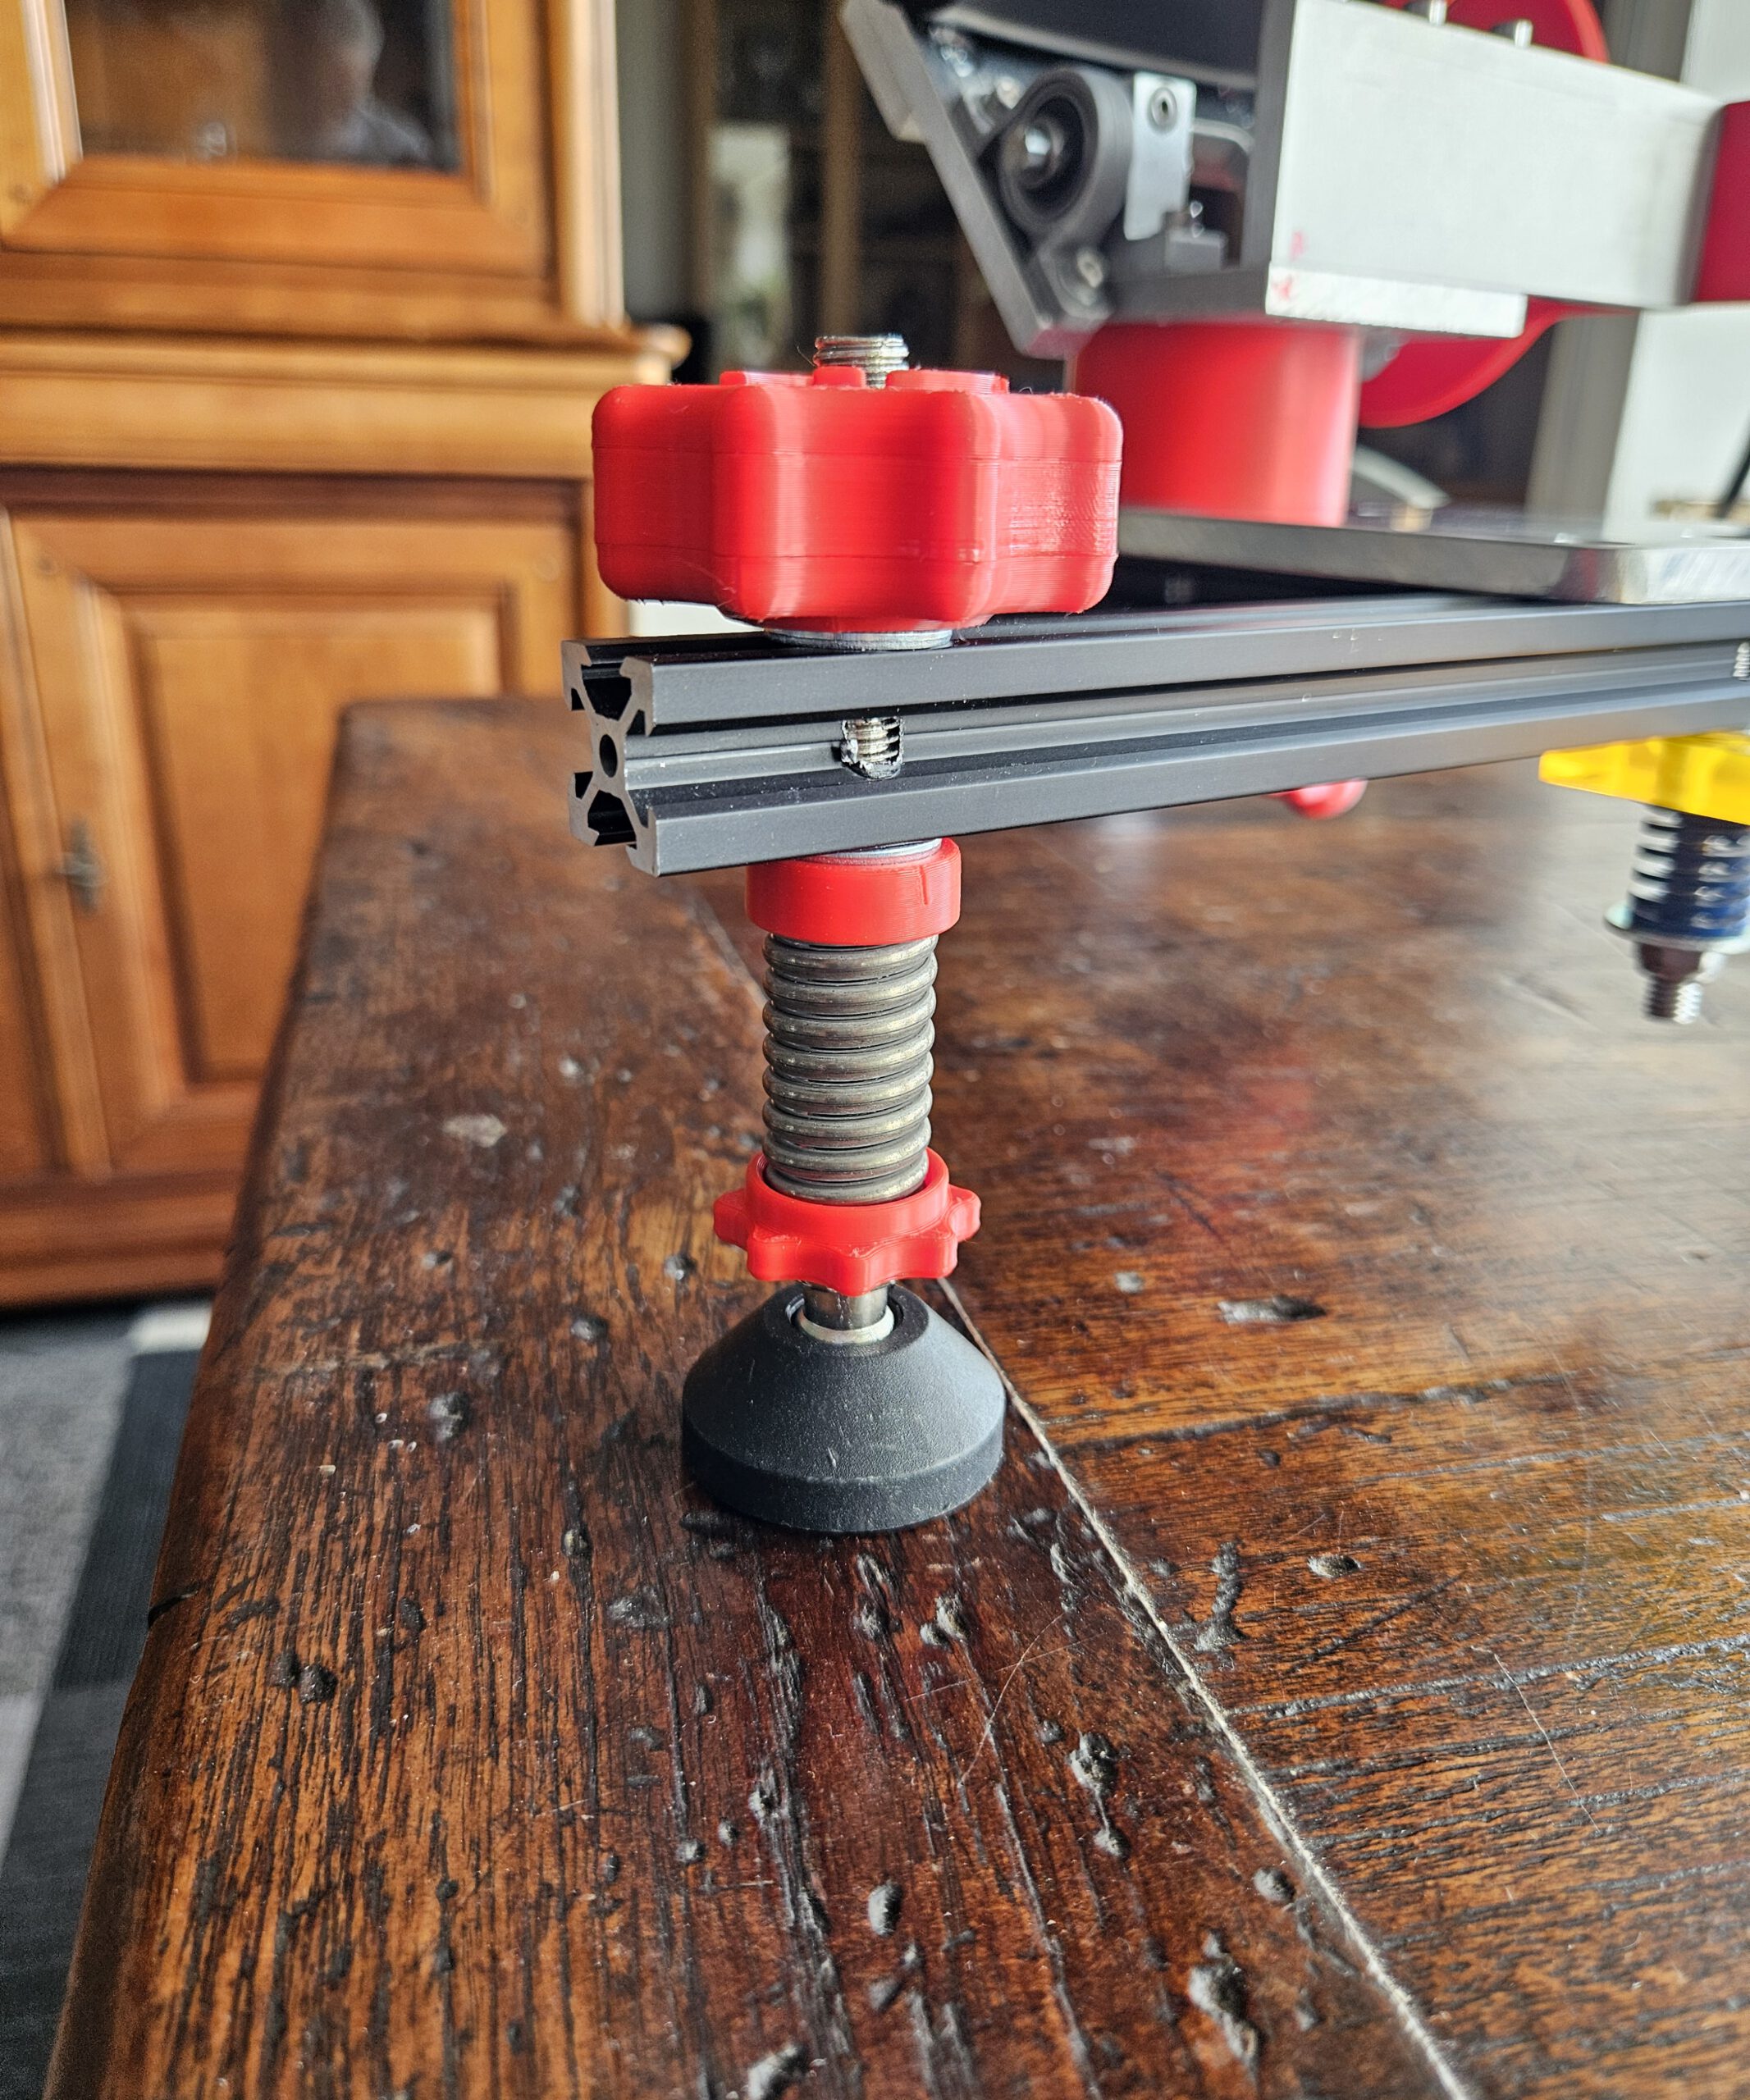
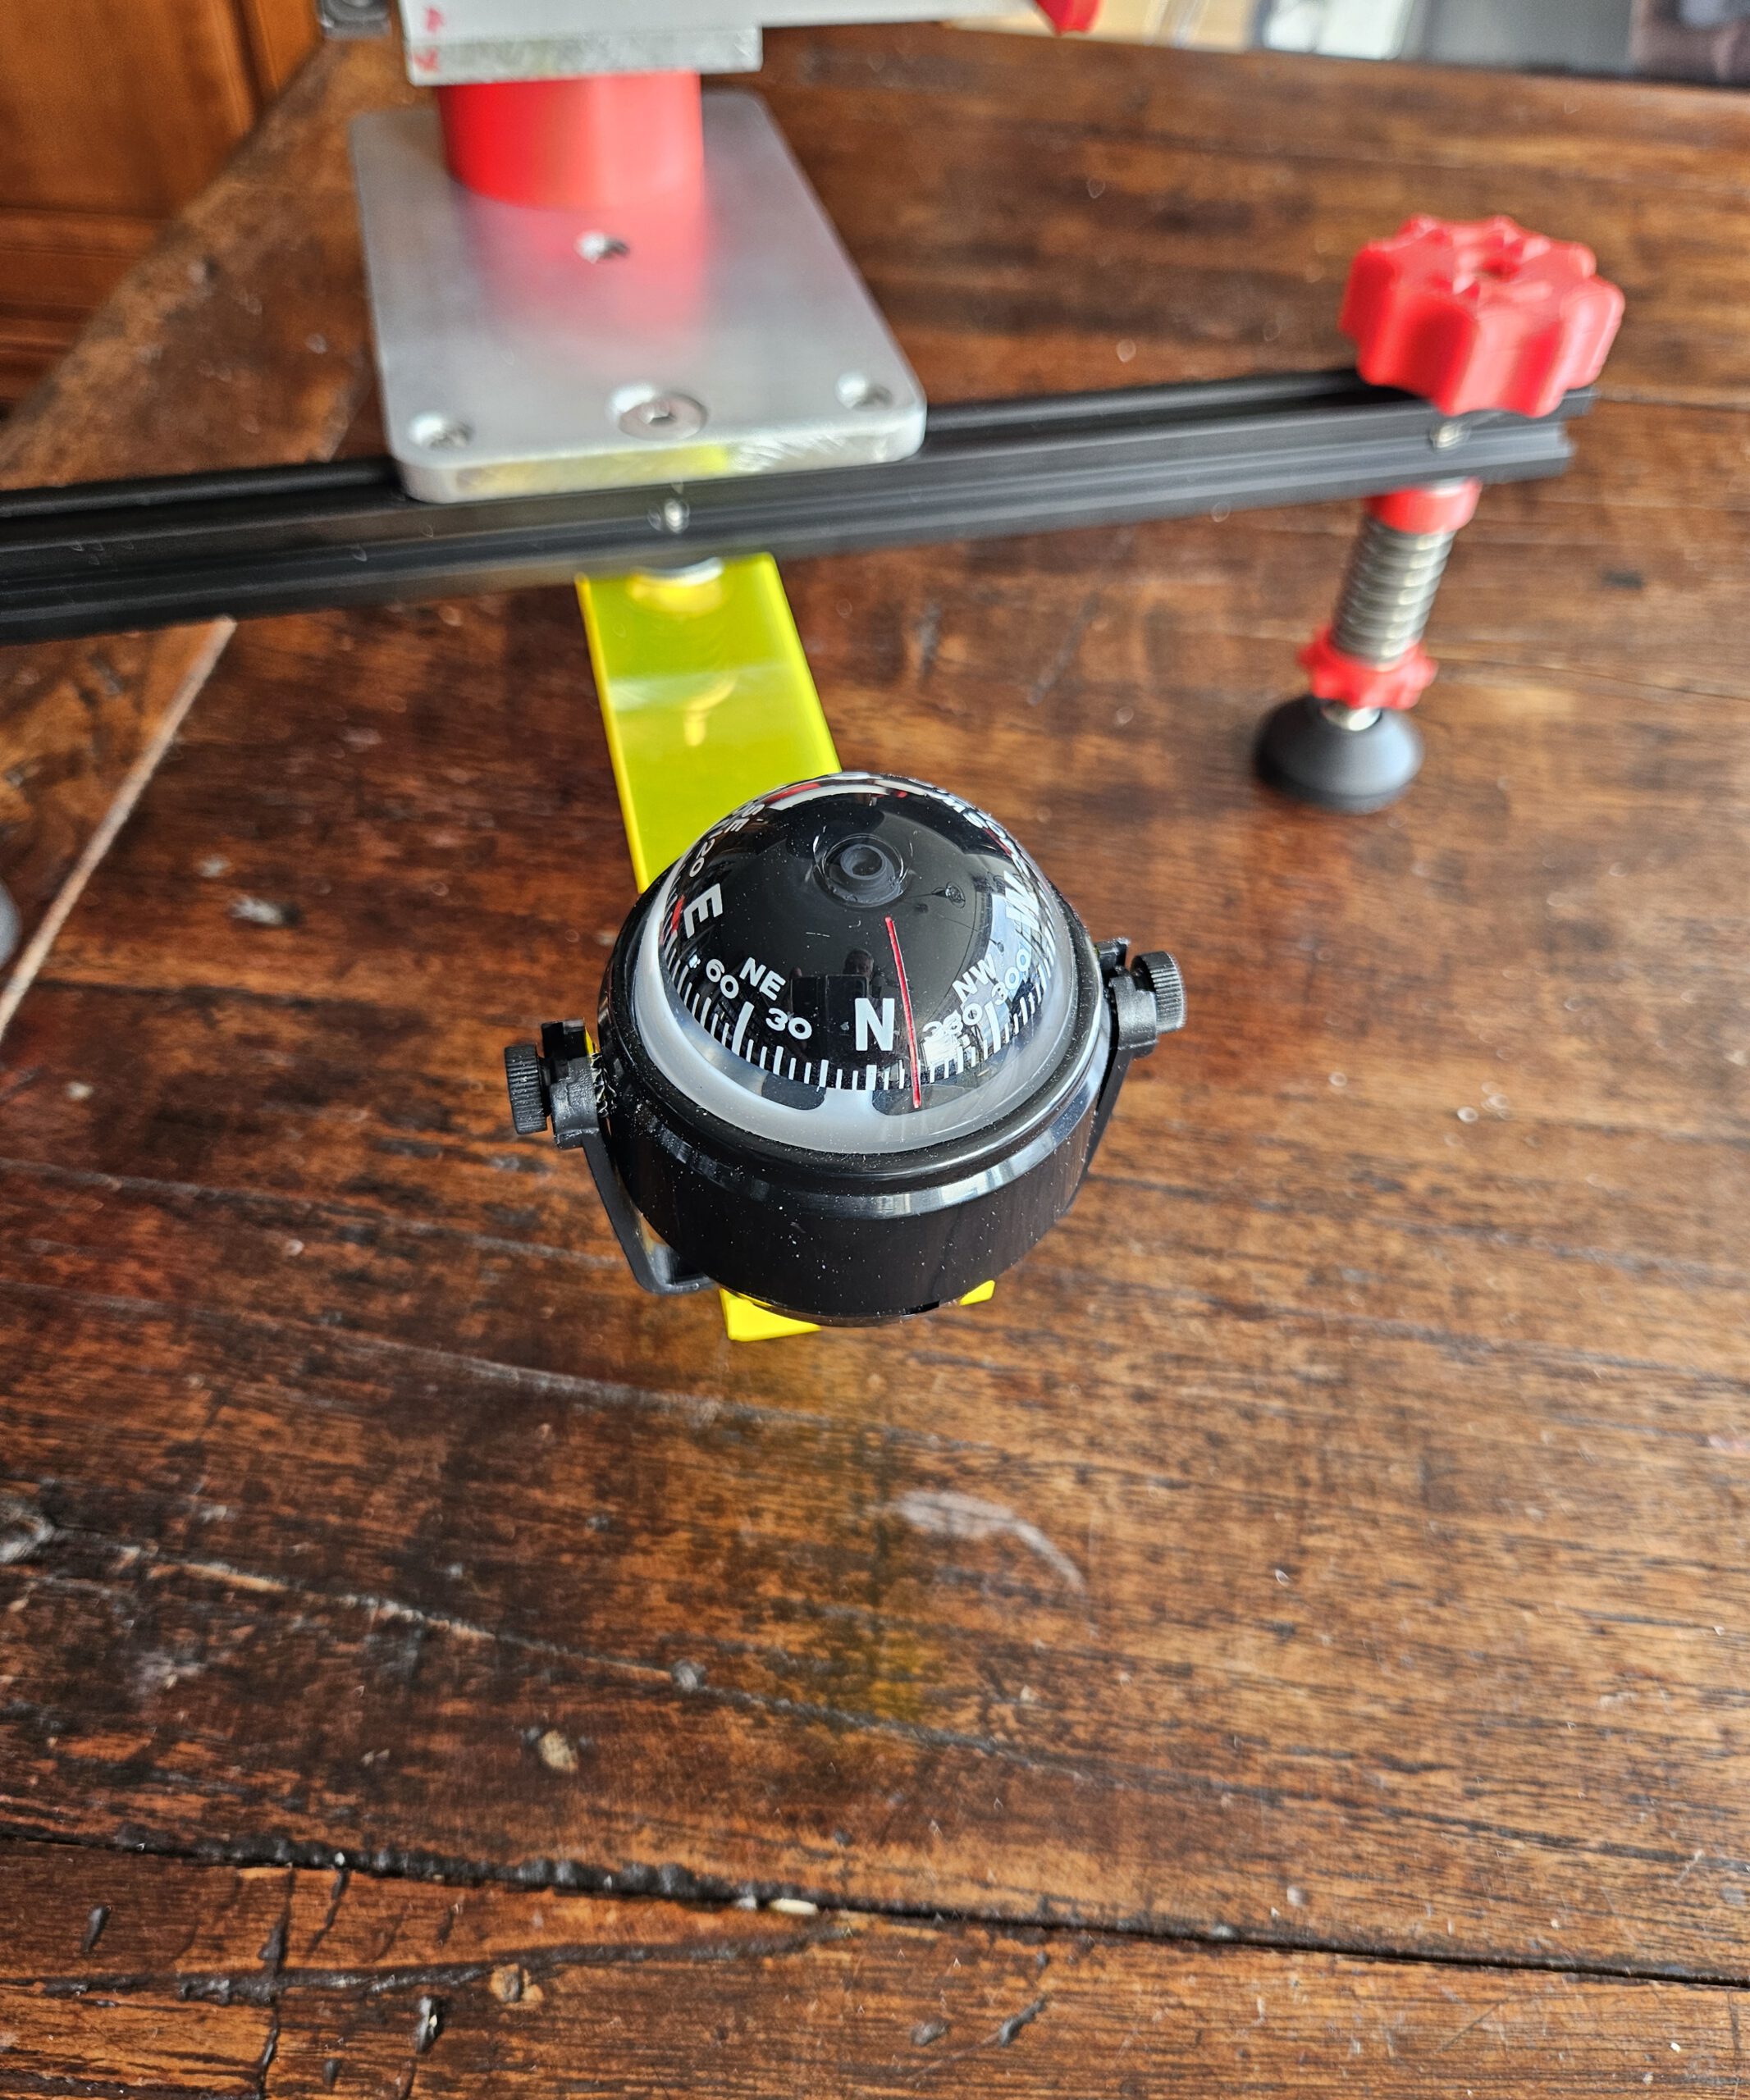
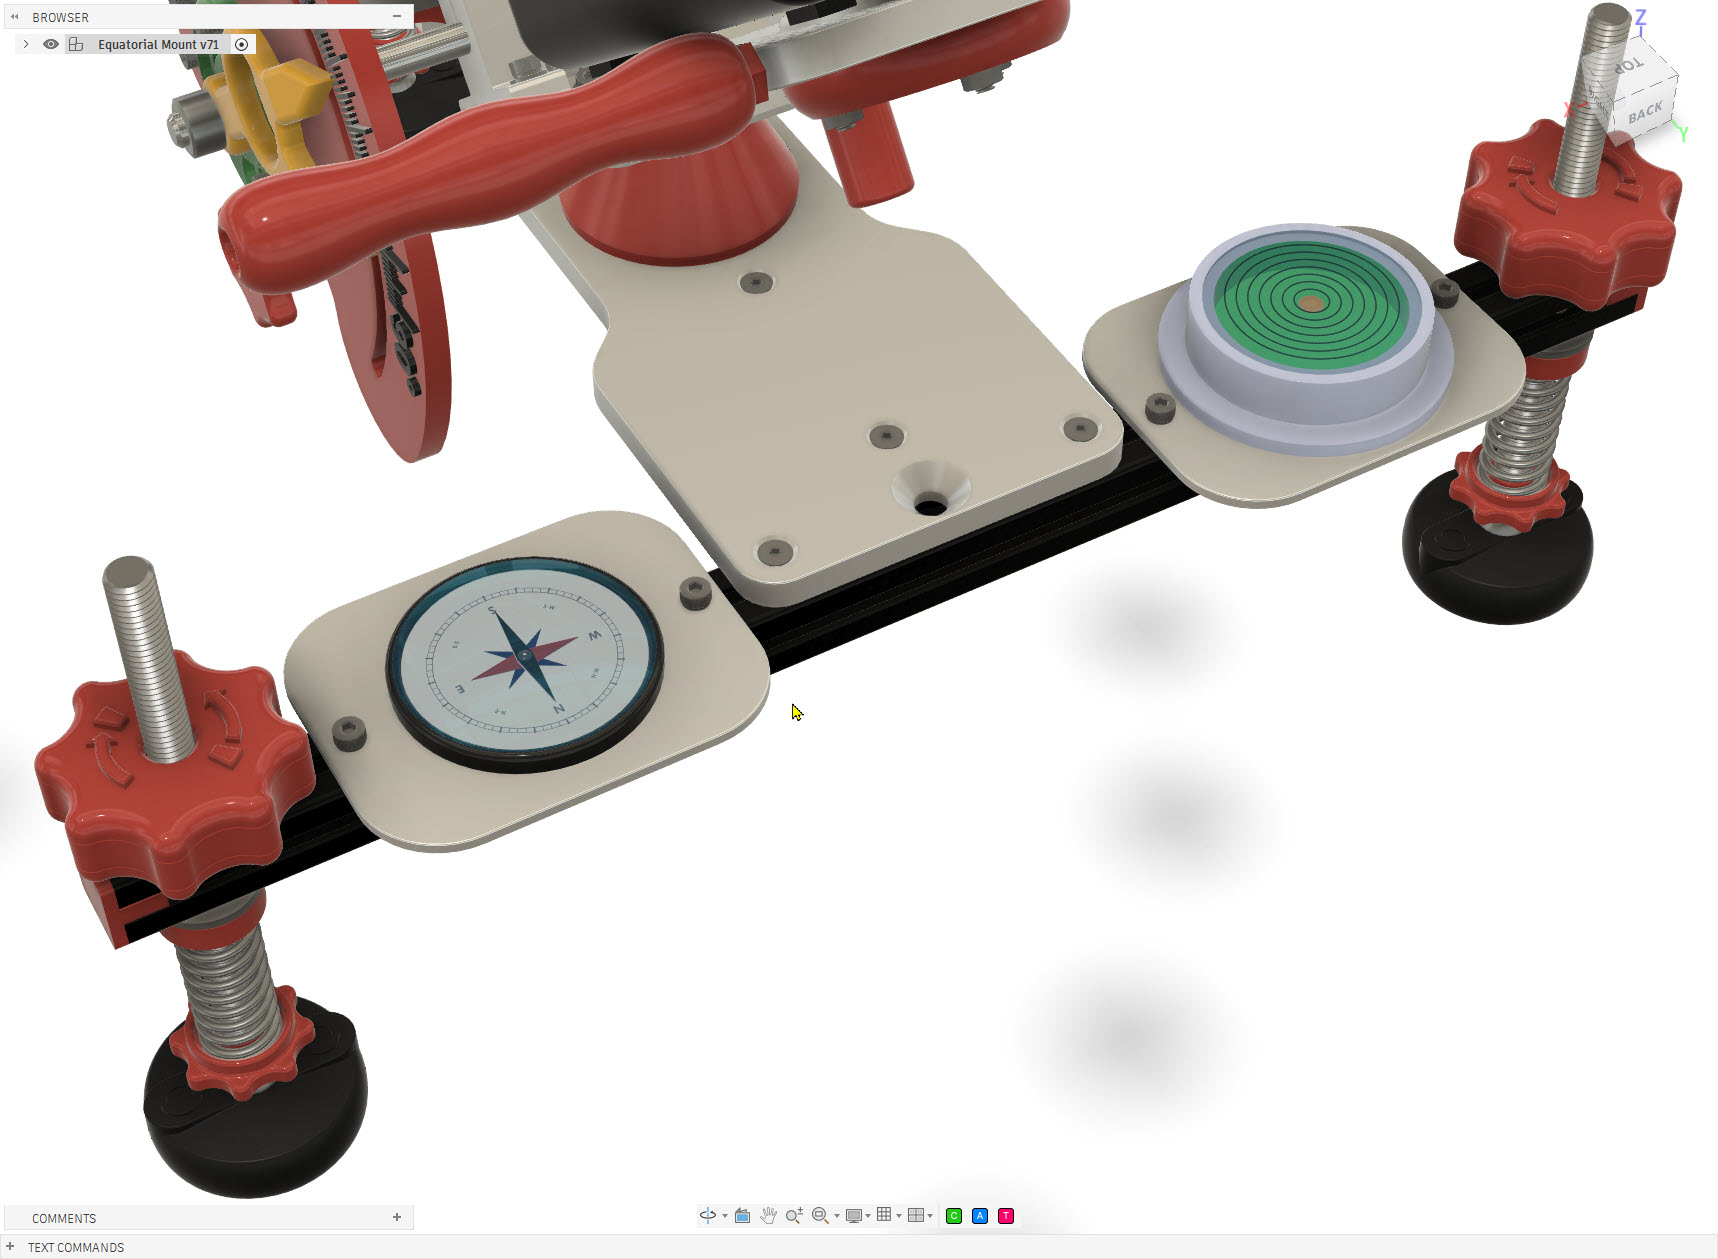
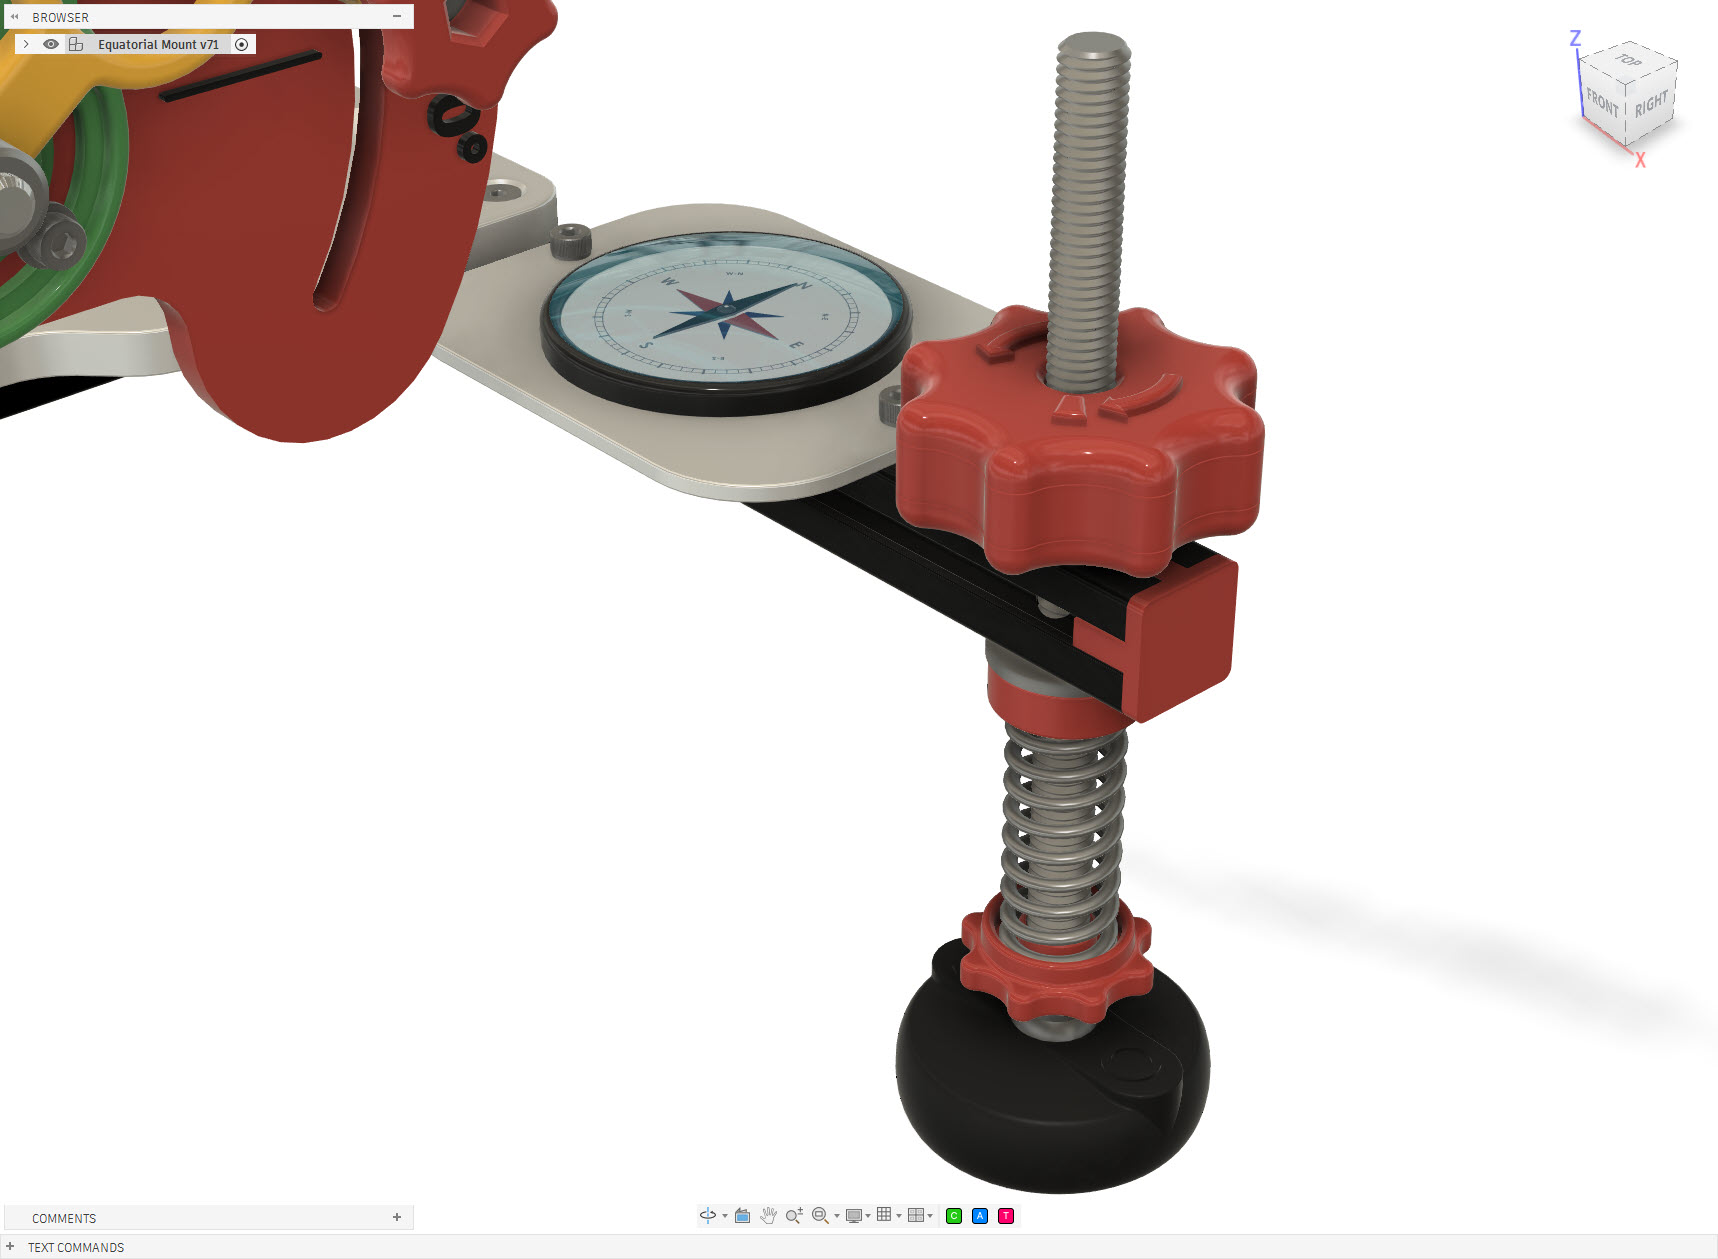
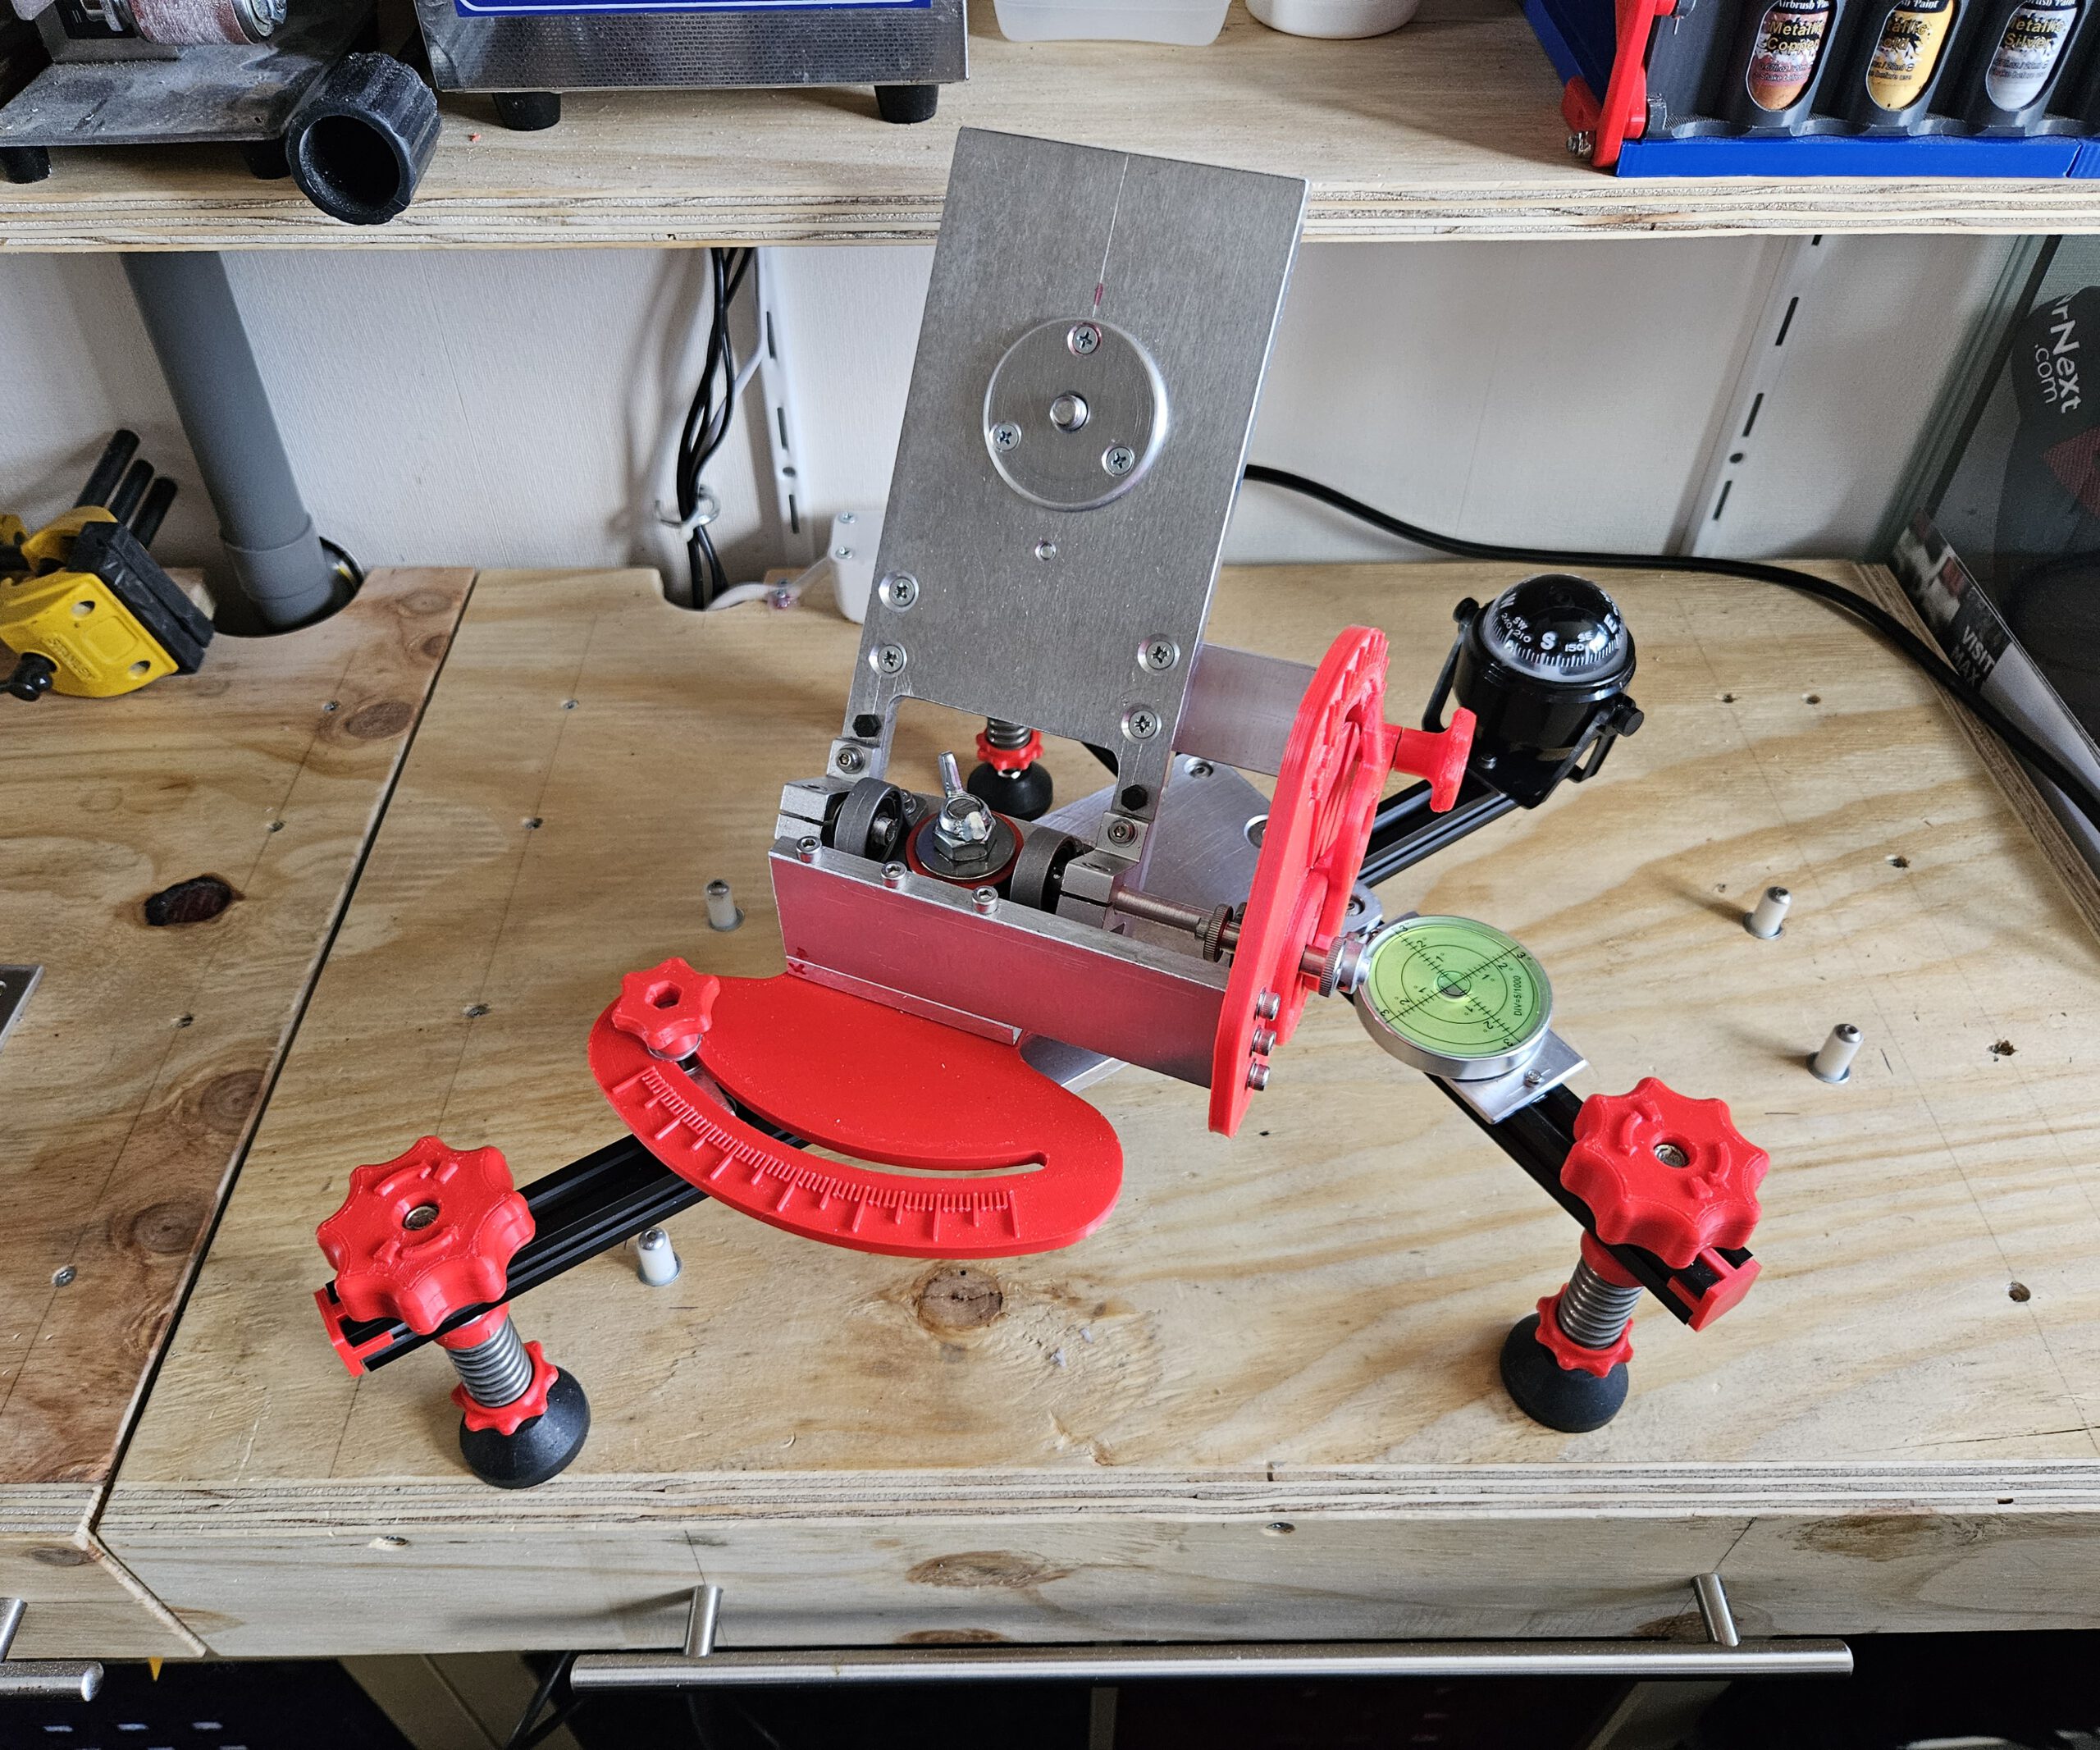
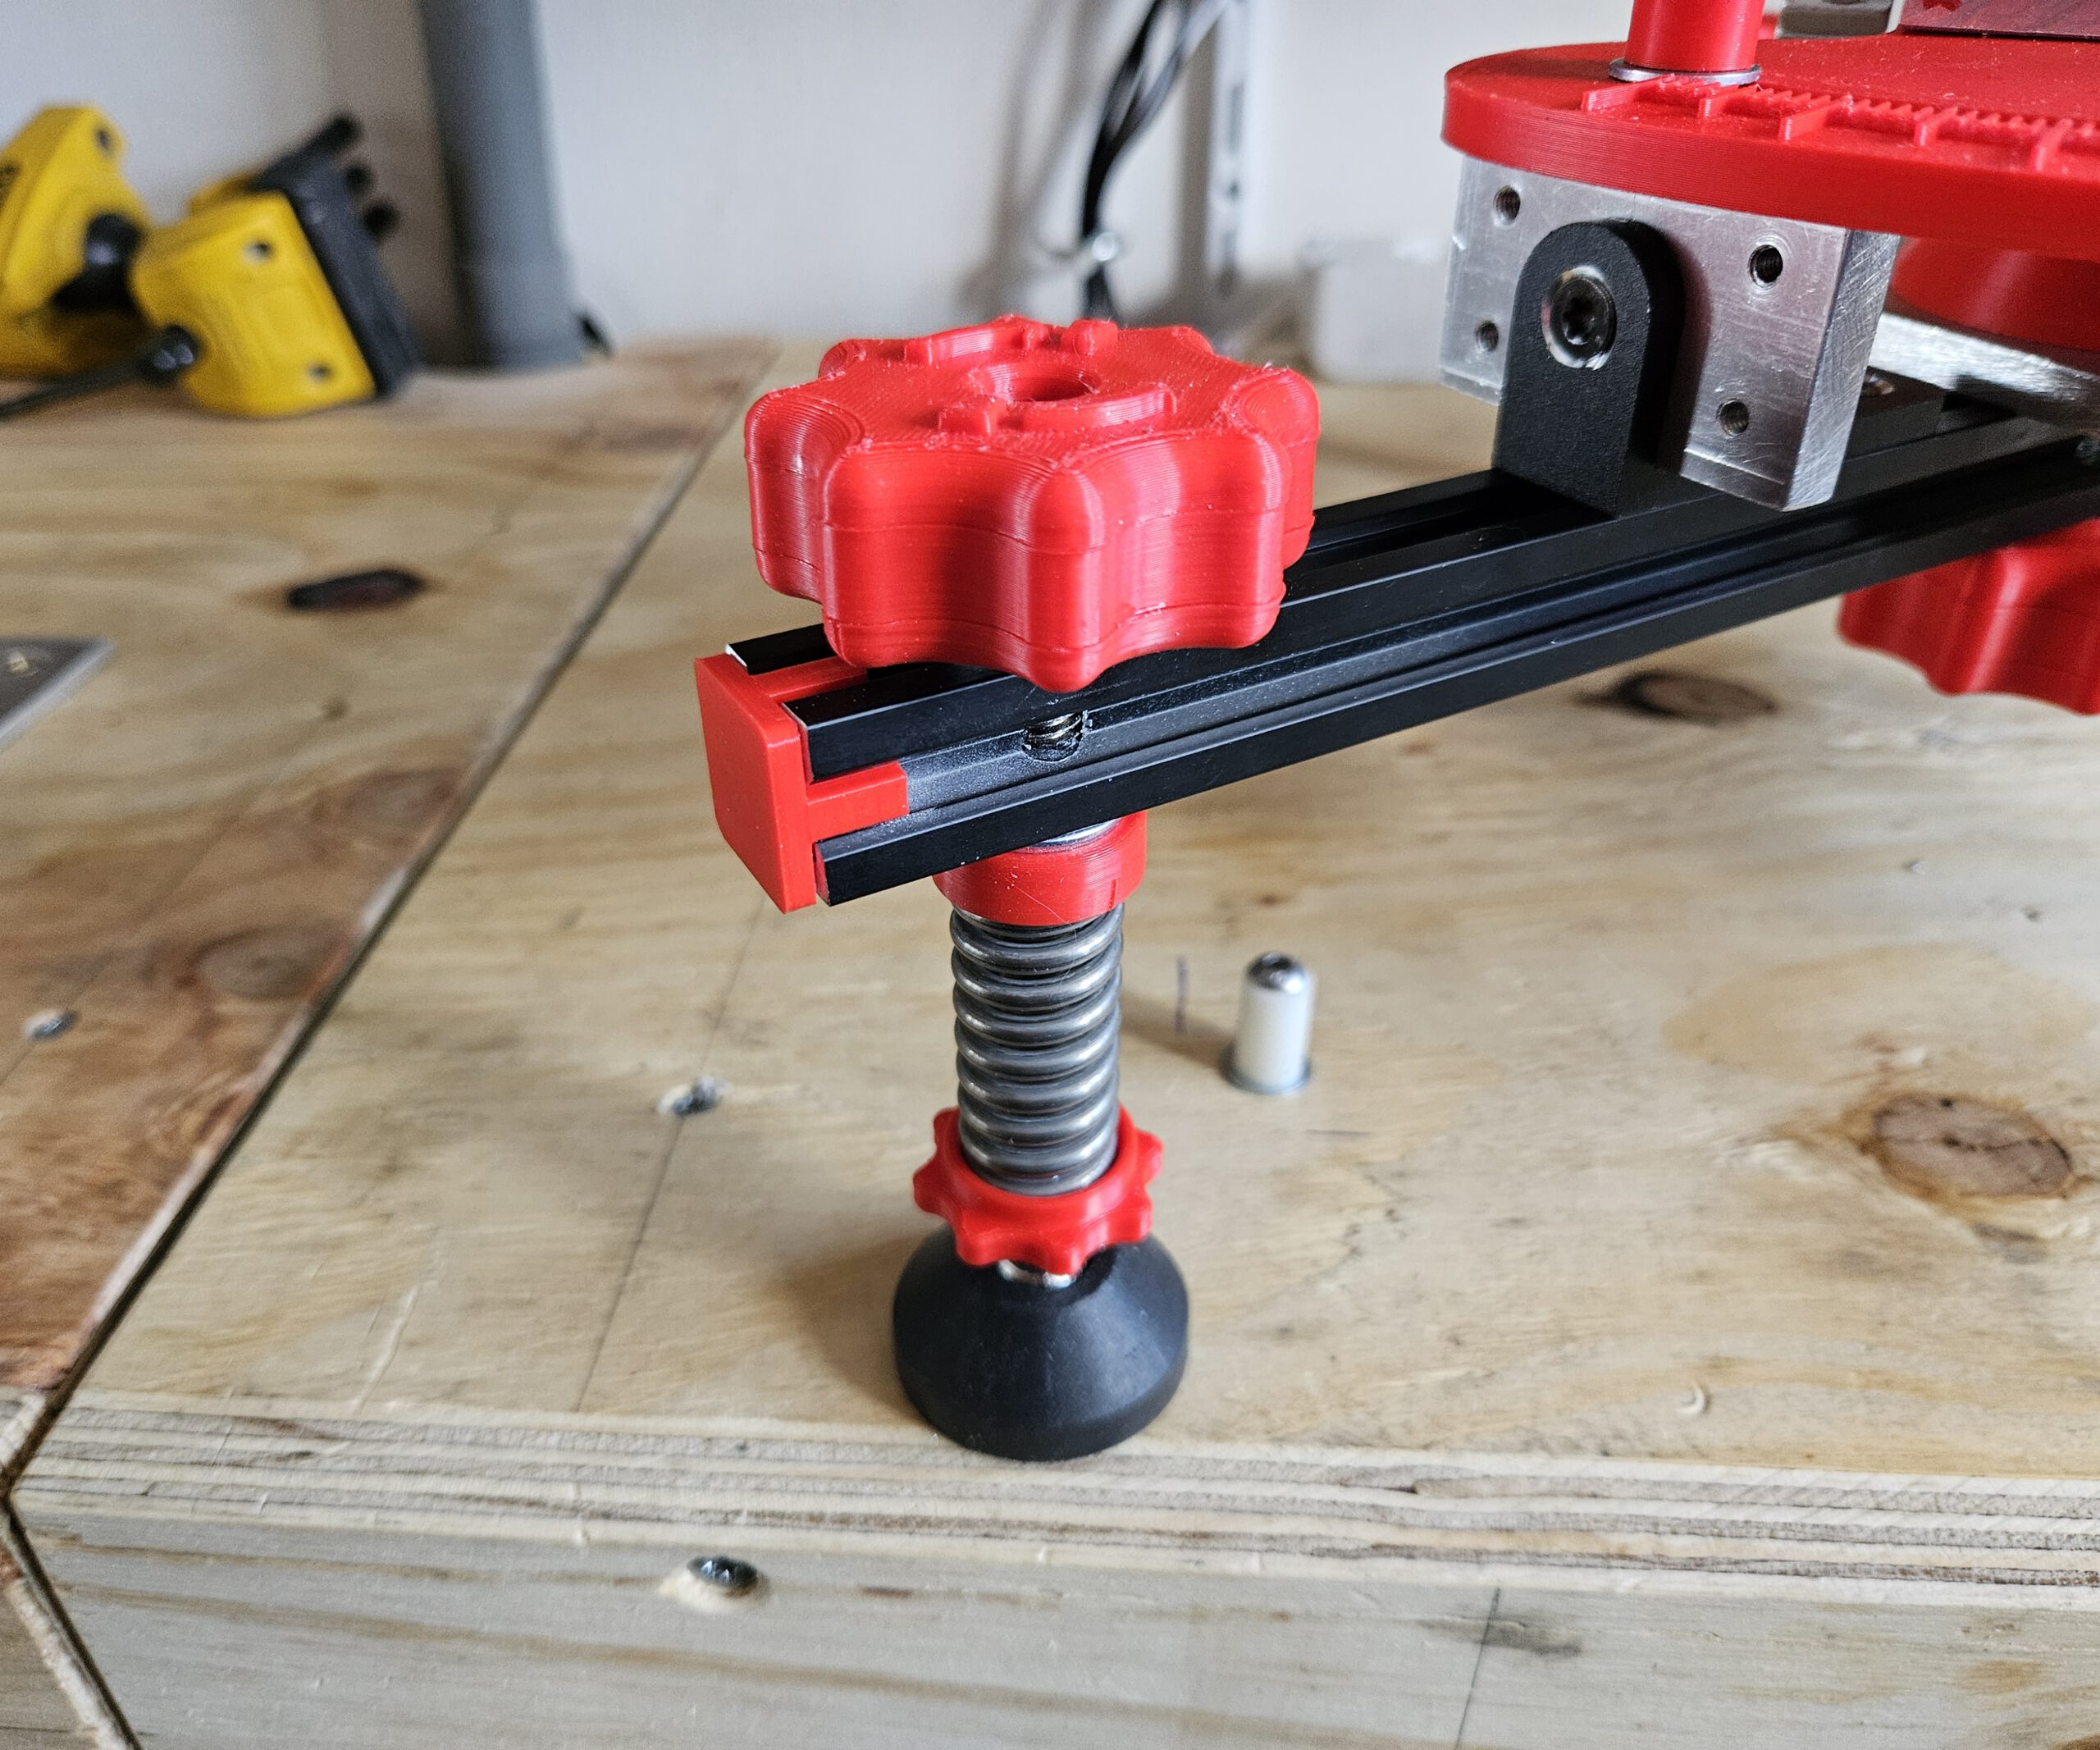
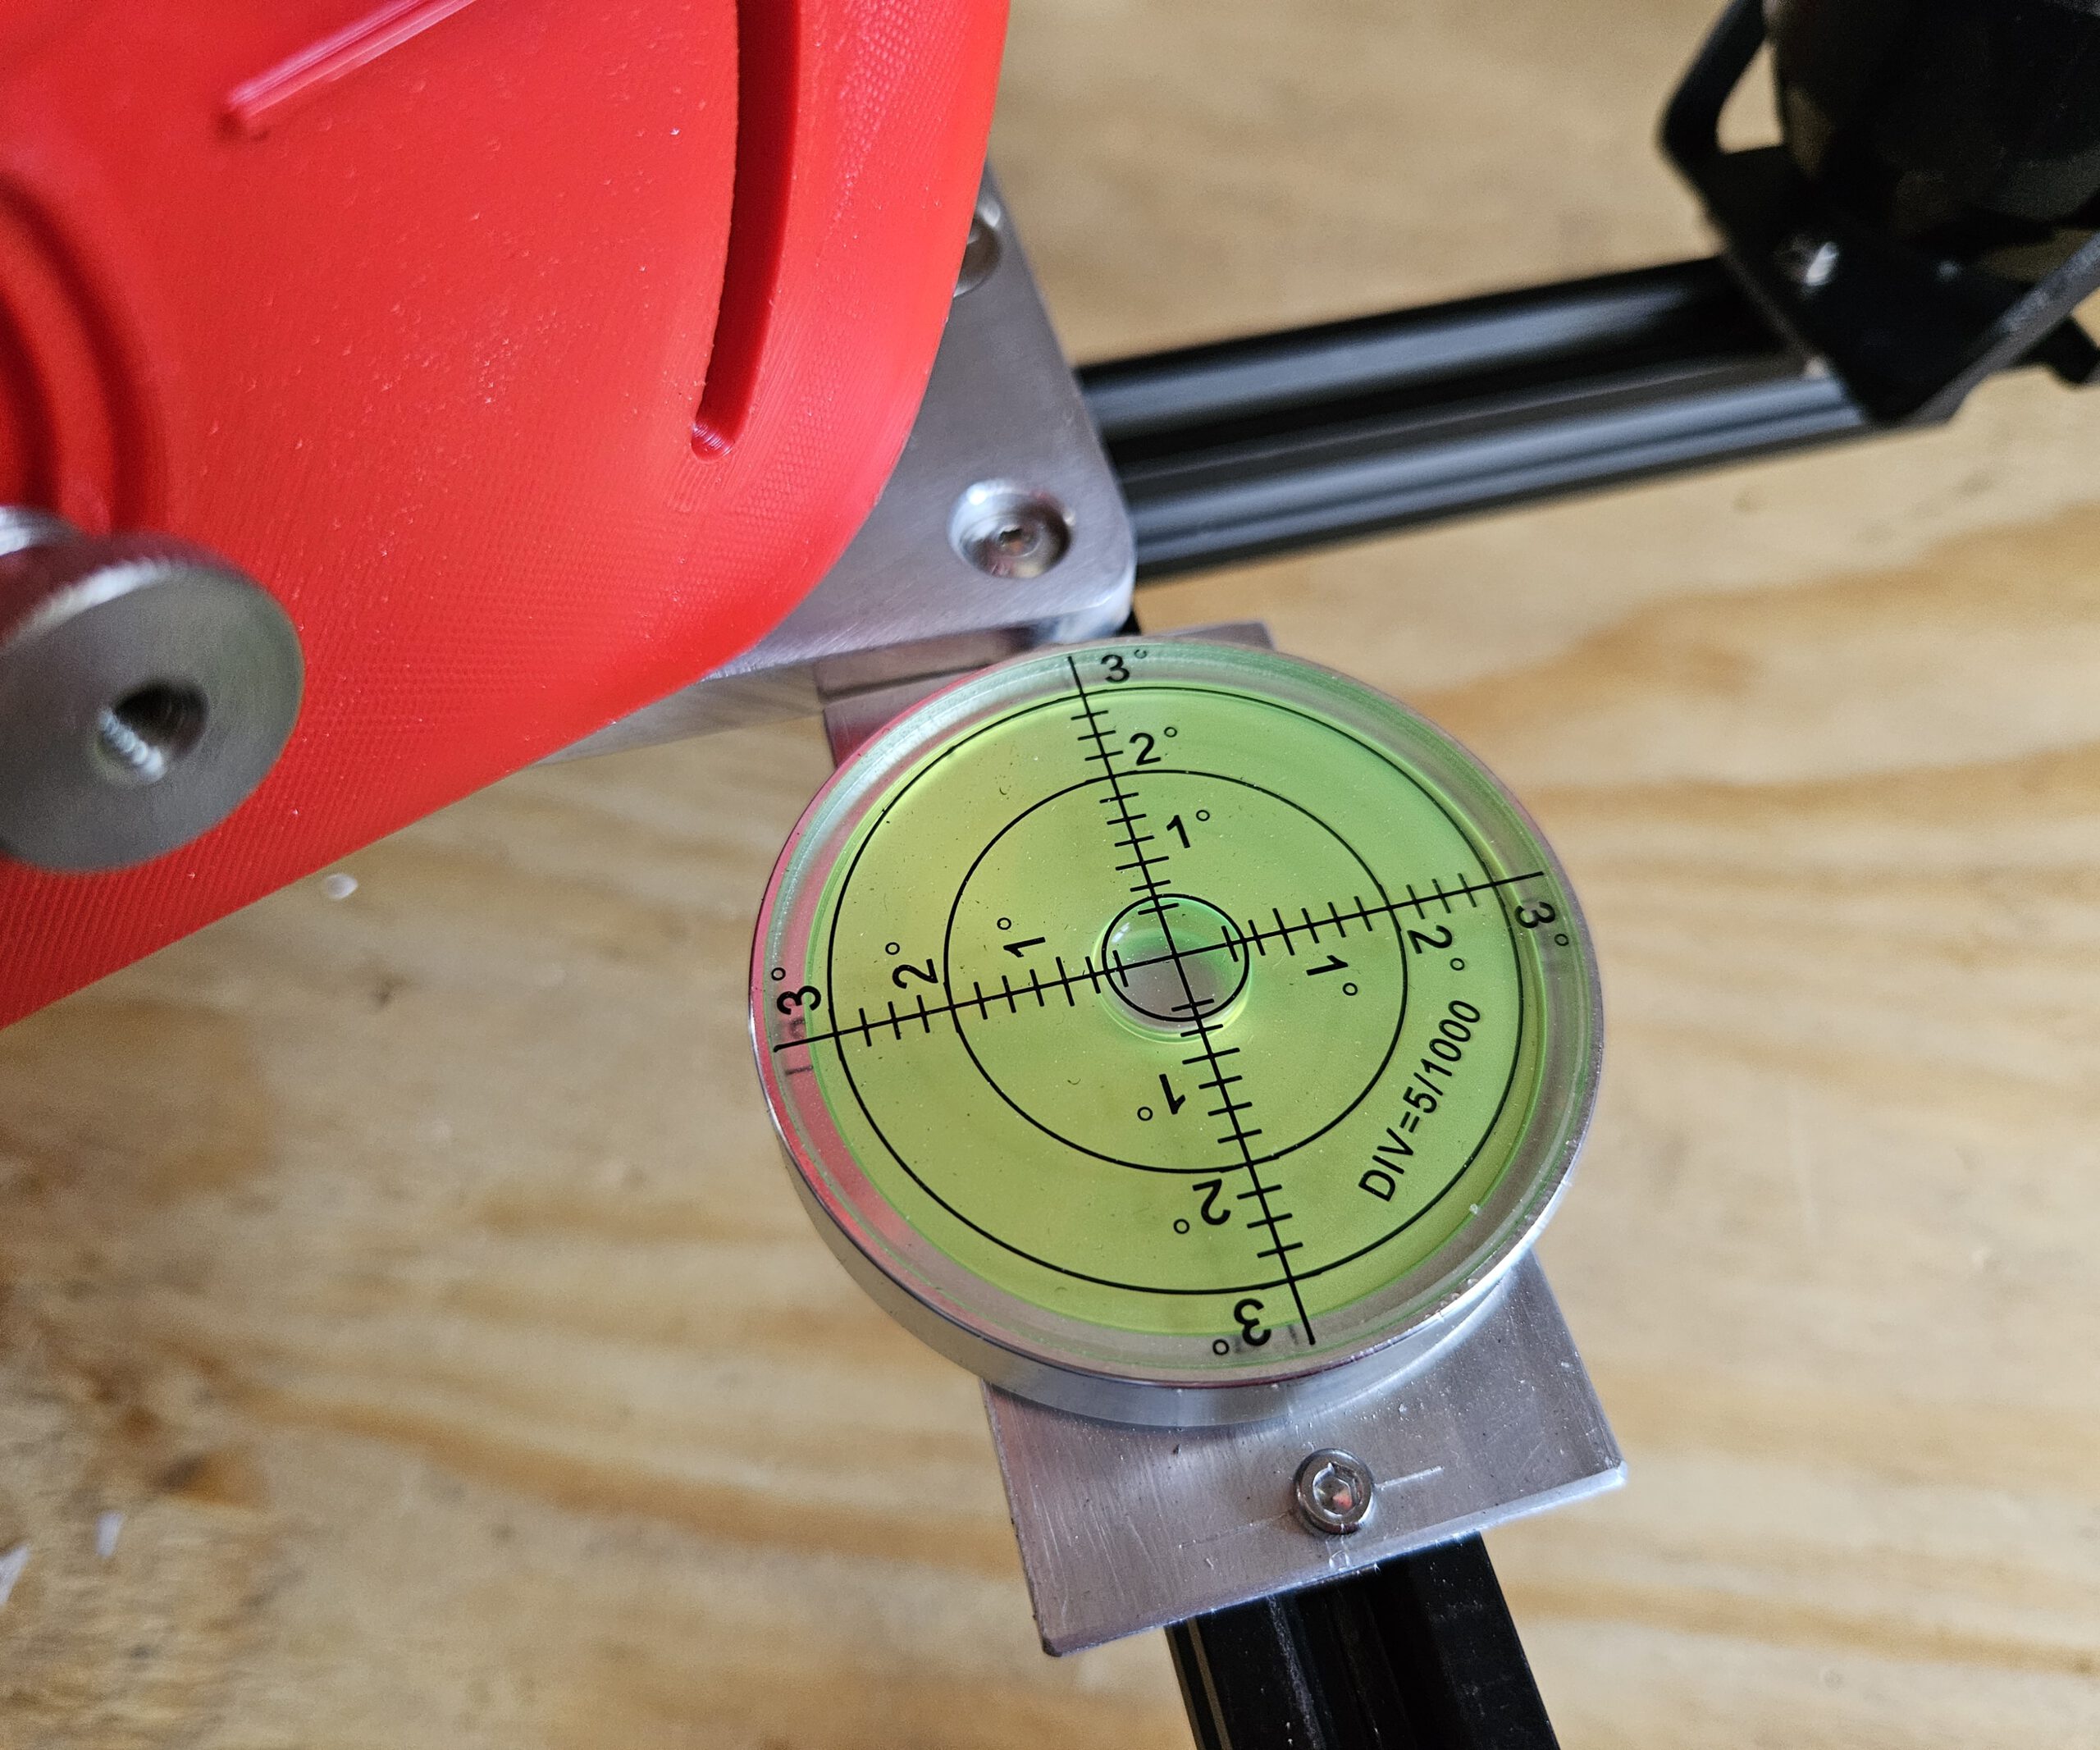
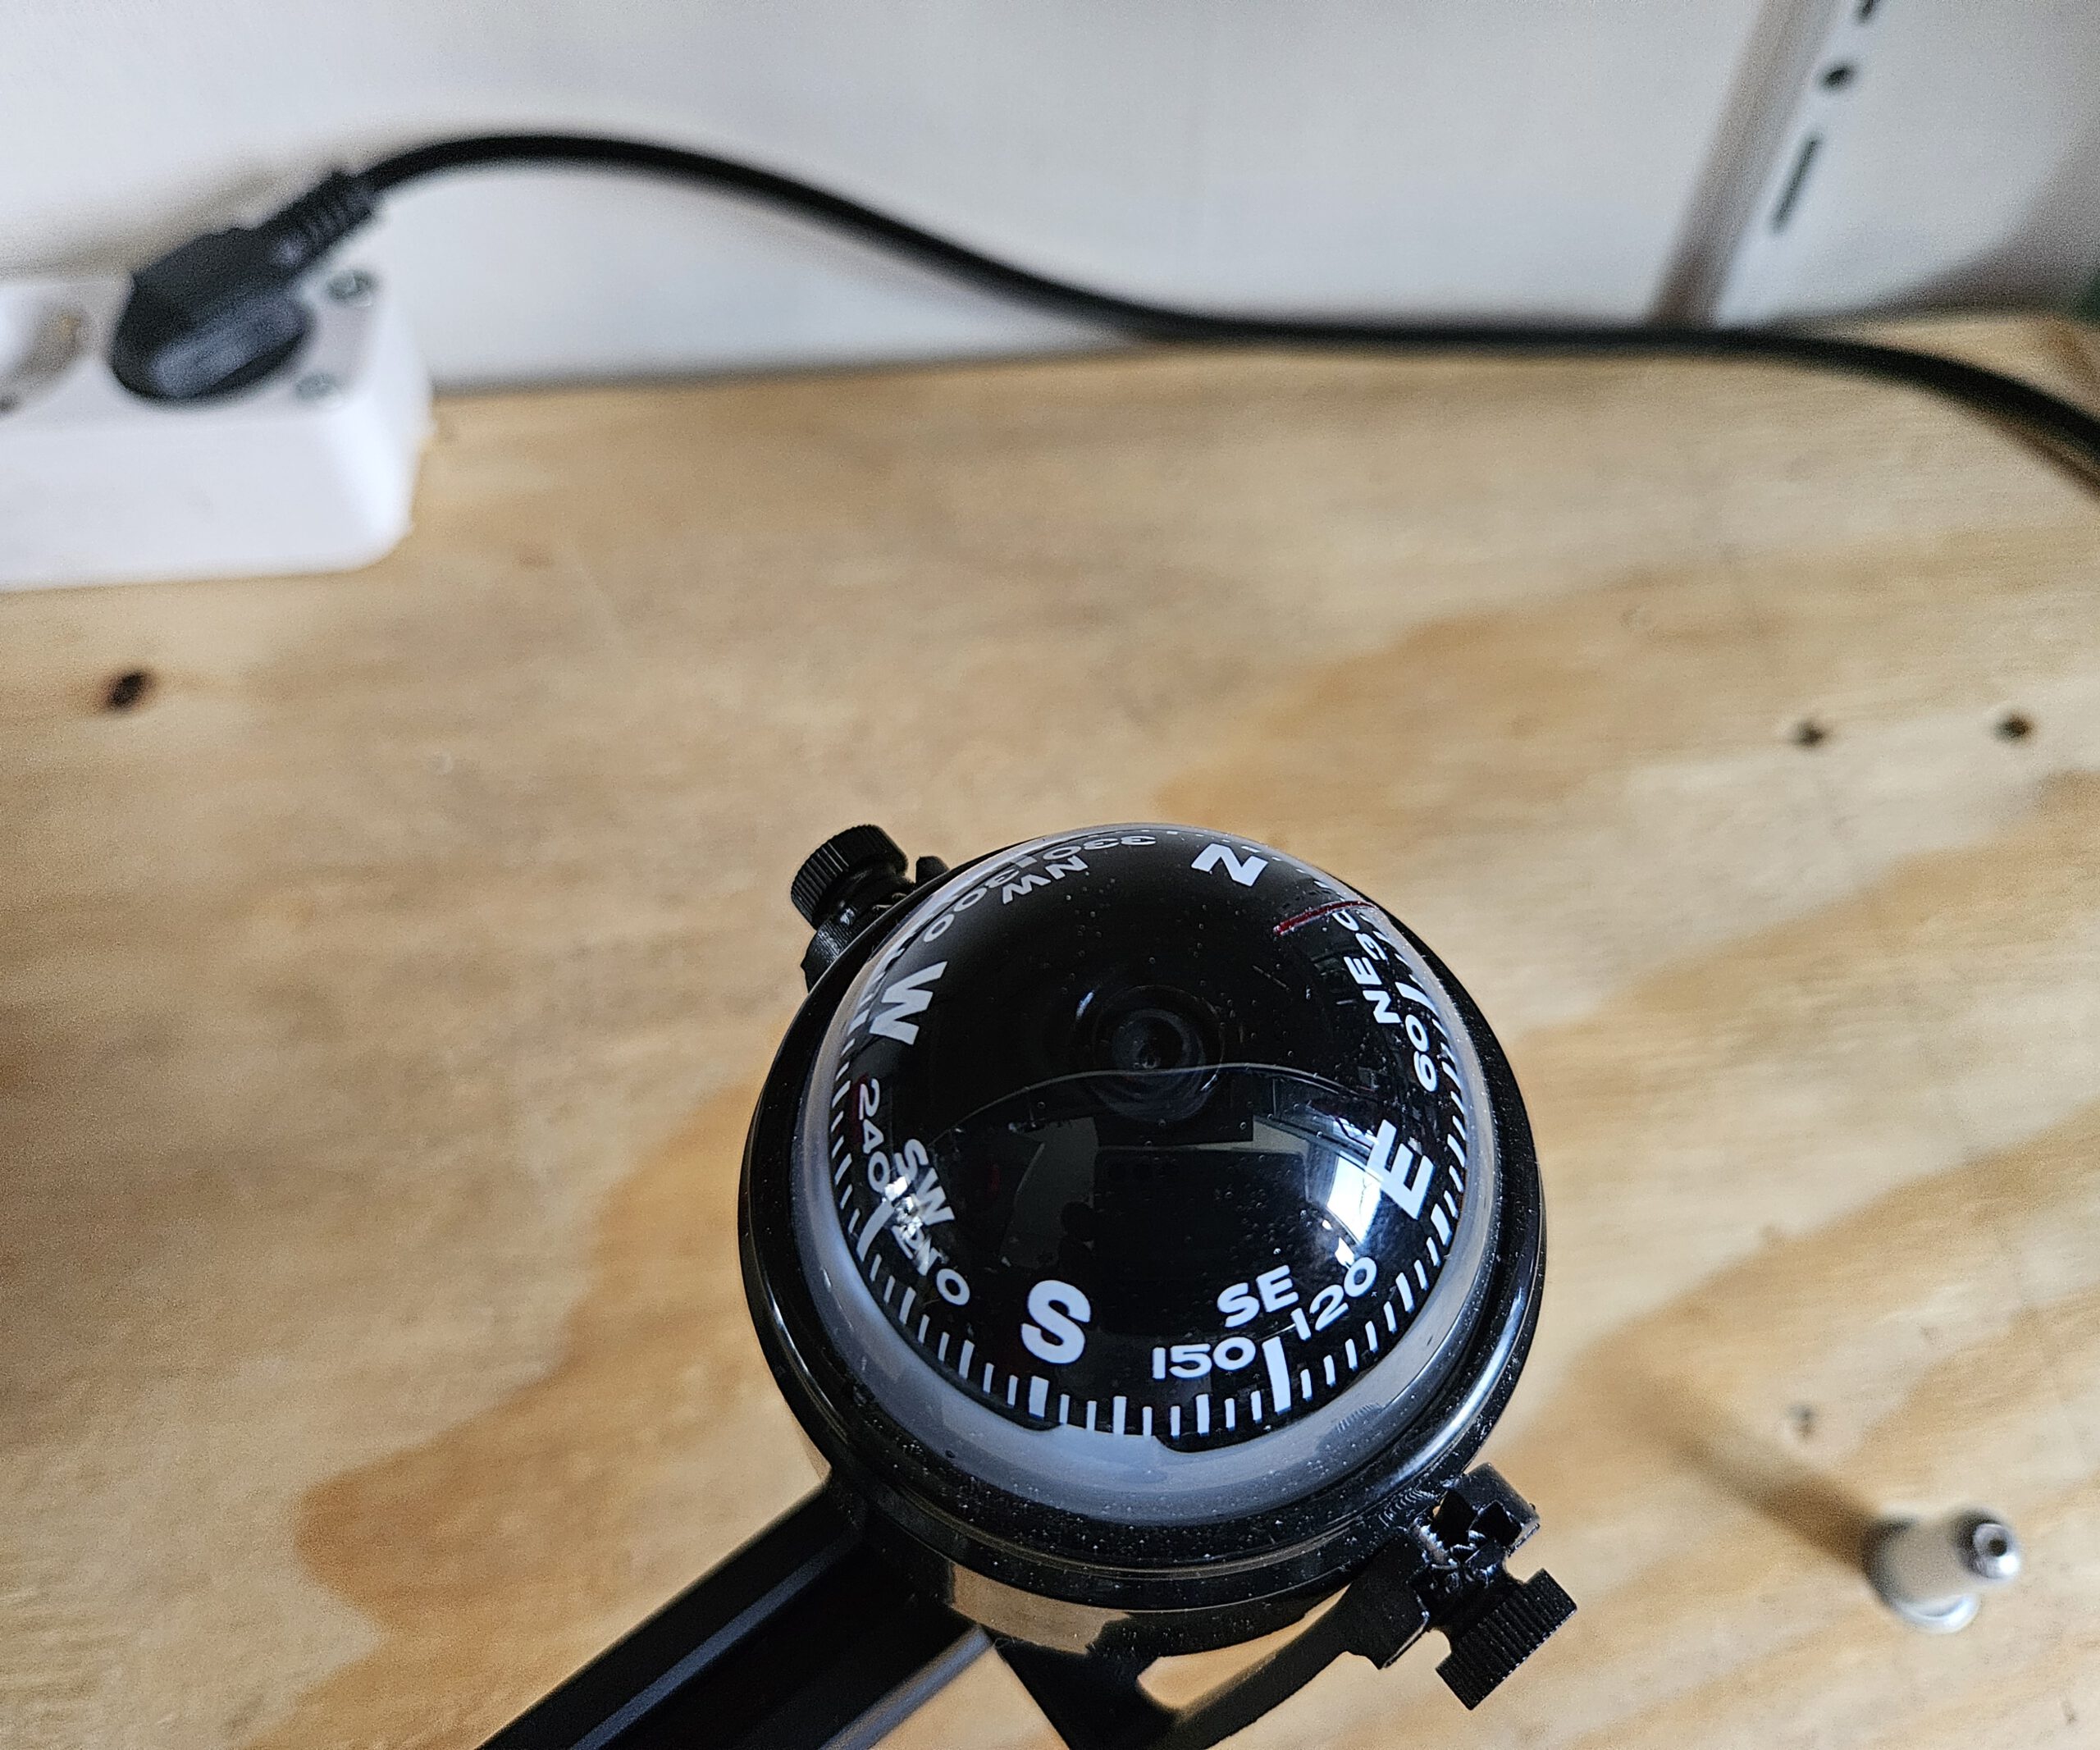
The three adjustable feet are used to level the mount first. A built-in compass and spirit level help with the initial setup, after which the altitude and azimuth controls provide the finer alignment.
Once aligned, the Seestar’s own rotation mechanism can follow the apparent movement of the sky around this axis.
Click the image for a larger version
WHY POLARIS? Polaris is almost directly above Earth’s rotational axis, making it a convenient alignment point.
WHY 51.2°? Polaris appears above the horizon at an angle equal to your latitude.
WHY TILT THE TELESCOPE? Tilting the Seestar aligns its rotation axis with Earth’s rotation axis.
WHY DOES THIS HELP? Once aligned, one rotating axis can follow the sky as Earth turns.
En eventueel bij het rijtje sterren bovenaan, omdat dát volgens mij voor een leek de grootste aha oplevert:
WHAT ARE WE SEEING? The stars only appear to circle Polaris — it is actually Earth that is rotating.
Pictures of the design
Seestar S50 Equatorial Mount
Seestar S50 Equatorial Mount
Seestar S50 Equatorial Mount
Seestar S50 Equatorial Mount
Seestar S50 Equatorial Mount
Seestar S50 Equatorial Mount
Seestar S50 Equatorial Mount
Seestar S50 Equatorial Mount
Seestar S50 Equatorial Mount
Seestar S50 Equatorial Mount
Seestar S50 Equatorial Mount
Seestar S50 Equatorial Mount
Seestar S50 Equatorial Mount
Seestar S50 Equatorial Mount
Seestar S50 Equatorial Mount
Seestar S50 Equatorial Mount
Seestar S50 Equatorial Mount
1/1
Design drawings for the Aluminium parts
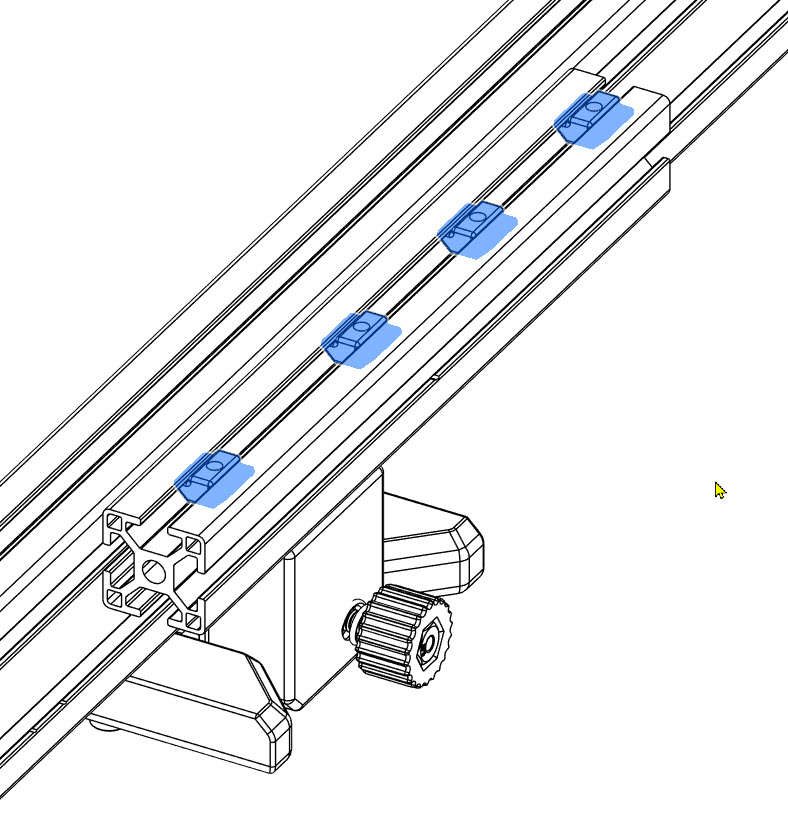
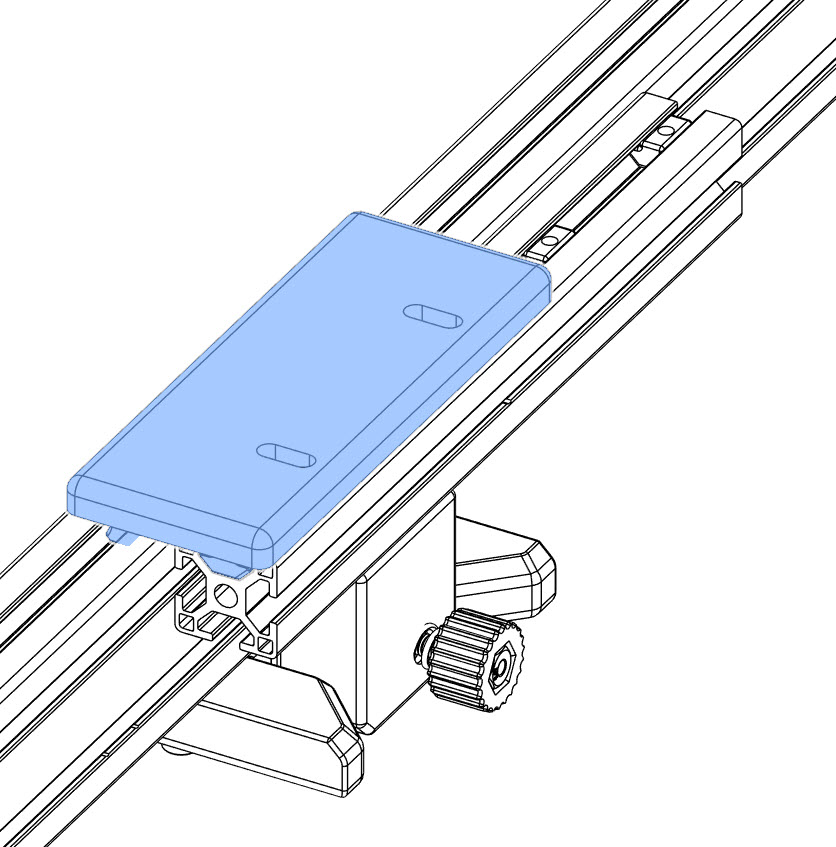
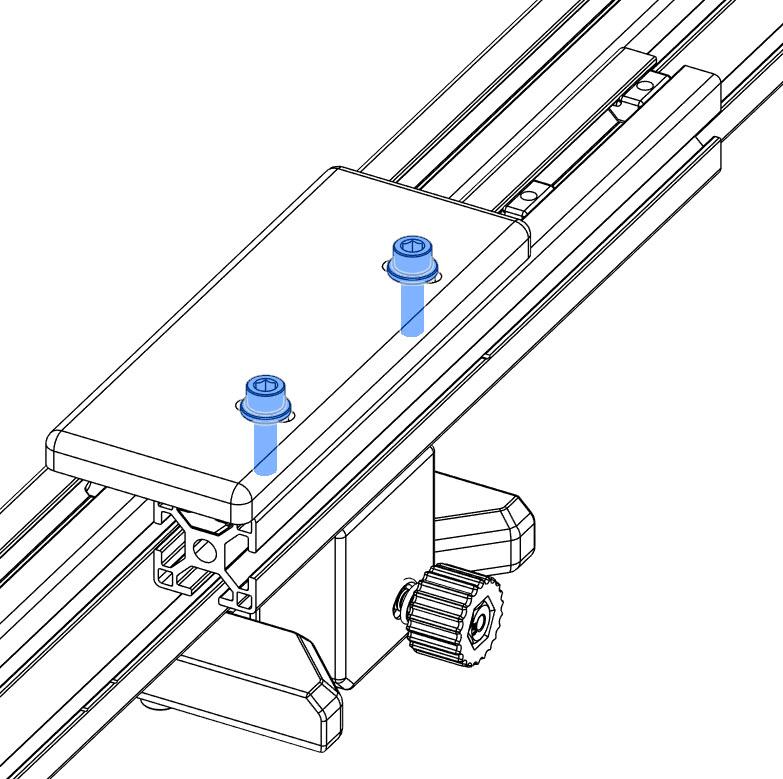
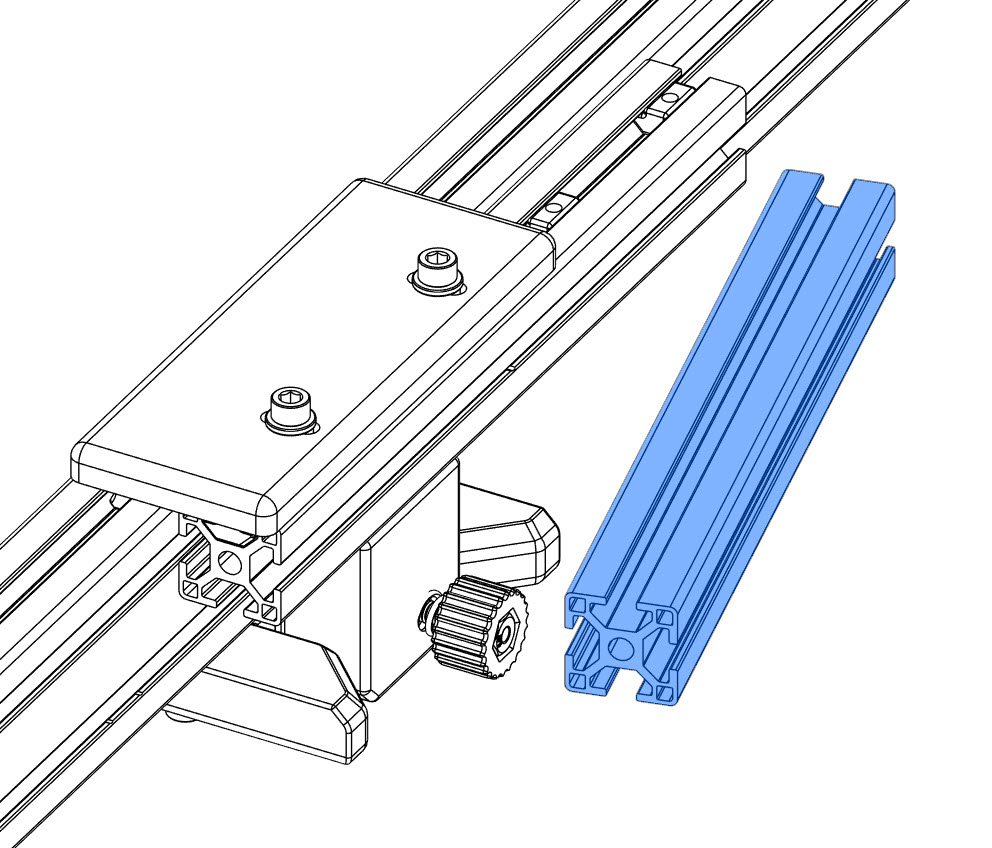
The scales can be printed, but please use ABS or Nylon for stability. The other parts:
Azimuth Platform
Equatorial Mount
Rotaton Plate
Must be made from metal for stability. I used easy to work thick Aluminium plates. Back then I worked it by hand and hand tools. Nowadays I woult put it in mij CNC milling machine. But some old fashion workmanship will do too.
Quantities shown are for one tripod leg. Three identical legs are required for the complete mount.
Base Platform BOM
Qty
Component
Specification / Notes
3D printed
1
Aluminium Plate
220 × 100 × 8 mm
n/a
1
Washer
M10
n/a
1
Locknut
M10
n/a
5
Flat Head Hex Bolt
M4 × 30
n/a
1
Socket Head Bolt
M10 × 120
n/a
1
APS Lock
n/a
ABS/Nylon
1
Top Azimuth Support
n/a
ABS/Nylon
1
Bottom Azimuth Support
n/a
XABS/Nylon
Altitude Platform BOM
Qty
Component
Specification / Notes
3D printed
1
Aluminium Plate
205.2 × 100 × 8 mm
n/a
1
Lens Head Bolt
3/8″-16 × 3/4″
n/a
1
External-Tooth Lock Washer
3/4″
n/a
2
Flat Head Hex Bolt
M4 × 30
n/a
4
Flat Head Hex Bolt
M4 × 14
n/a
1
Hex Bolt
M4 × 15
n/a
1
Hex Bolt
M4 × 40
n/a
1
Socket Head Bolt
M4 × 30
n/a
4
Socket Head Bolt
M4 × 13
n/a
3
Hex Nut
M4
n/a
15
Washer
M4
n/a
1
Steel Axle
Ø8 mm × 100 mm
n/a
1
Steel Axle
Ø8 mm × 30 mm
n/a
1
Shaft Collar
ID 8 mm, OD 14 mm, H 8 mm
n/a
1
Cup Point Hex Set Screw
M4 × 3
n/a
2
SK8 Axle Support
42 × 32 × 14 mm, ID 8 mm
n/a
1
Adjustable Handle Block Alt
n/a
ABS/Nylon
1
Alt Grip
n/a
ABS/Nylon
1
Aluminium Turning Base
n/a
ABS/Nylon
1
Alt Platform 0 Degree Support
n/a
ABS/Nylon
1
Scale Pointer
n/a
Any
1
Thumb Screw
n/a
Any
1
Placeholder for Lens Head Bolt
n/a
Any
Azimuth Platform BOM
Qty
Component
Specification / Notes
3D printed
4
Flat Head Bolt
M4 × 20
n/a
3
Roll Bearing Block
42 × 32 × 14 mm, ID 8 mm
n/a
8
Socket Head Bolt
M4 × 13
n/a
8
Washer
M4
n/a
2
Socket Head Bolt
M4 × 13, additional hardware
n/a
2
Nut
M3
n/a
2
SKF 51203 Thrust Bearing
51203 / S1203 XC
n/a
1
Azimuth Scale & Lock
n/a
ABS/Nylon
1
Altitude Lock Plate V5
n/a
ABS Nylon
1
Lockable Home Altitude Pointer
n/a
Any
1
Adjustable Handle Block Azi
n/a
ABS/Nylon
And then came the ultimate field test: a solar eclipse.
With the mount polar-aligned and the Seestar tracking the Sun, I could leave the telescope to follow the event instead of repeatedly repositioning it by hand. The result was a complete time-lapse of the eclipse — and, more importantly from a maker’s perspective, proof that the design actually worked outside Fusion 360.
Towards the end of the solar eclipse clip, the image starts to shift. This happened because the telescope eventually ran into the window frame without me noticing. A bit unfortunate, but it is what it is. Apart from that, the recording was successful and the mount did exactly what it was supposed to do.
Making a great dog wheelchair work better for a very small dog
Sometimes you buy a well-designed product, use it for a while, and discover that for your particular situation it could use just a little improvement.
And sometimes “a little improvement” somehow turns into recreating half the thing in CAD, designing a suspension system, adding ball bearings, printing custom parts and rebuilding the rear end.
This was one of those times.
Our dachshund suffered a herniated disc that left his left hind leg almost completely paralyzed and significantly reduced the control of his other hind leg. Indoors he adapted remarkably well and could get around mostly using three legs. Outside, however, that only worked for short distances.
To give him more freedom, we bought a Walkin’ Pets Dog Wheelchair. Pls see https://walkinpets.com/. It is a solid, well-made product and gave him the opportunity to walk outside again.
But because he is a small dachshund — with a long back that had already been injured — I soon noticed a few things that could be improved specifically for him.
The problems
The first problem was rolling resistance.
For a larger dog, the resistance of the original wheels probably isn’t particularly significant. For a small dachshund, however, every bit of additional resistance matters. He had to work noticeably harder to pull the wheelchair along.
The second problem was rigidity.
The original construction keeps the wheels firmly positioned relative to the frame. That’s normally exactly what you want, but in his case bumps, uneven pavement and stepping off a curb transferred movement directly through the wheelchair.
Because of his back injury, he compensated for this by walking rather stiffly.
The third problem appeared around doorways and other obstacles.
Take a corner just a little too tightly and a wheel can catch the door frame. Instead of sliding past the obstacle, the wheelchair suddenly stops or jerks sideways.
Again: not particularly pleasant when the passenger happens to have a bad back.
So…
CAD time.
Rebuilding the wheel assembly
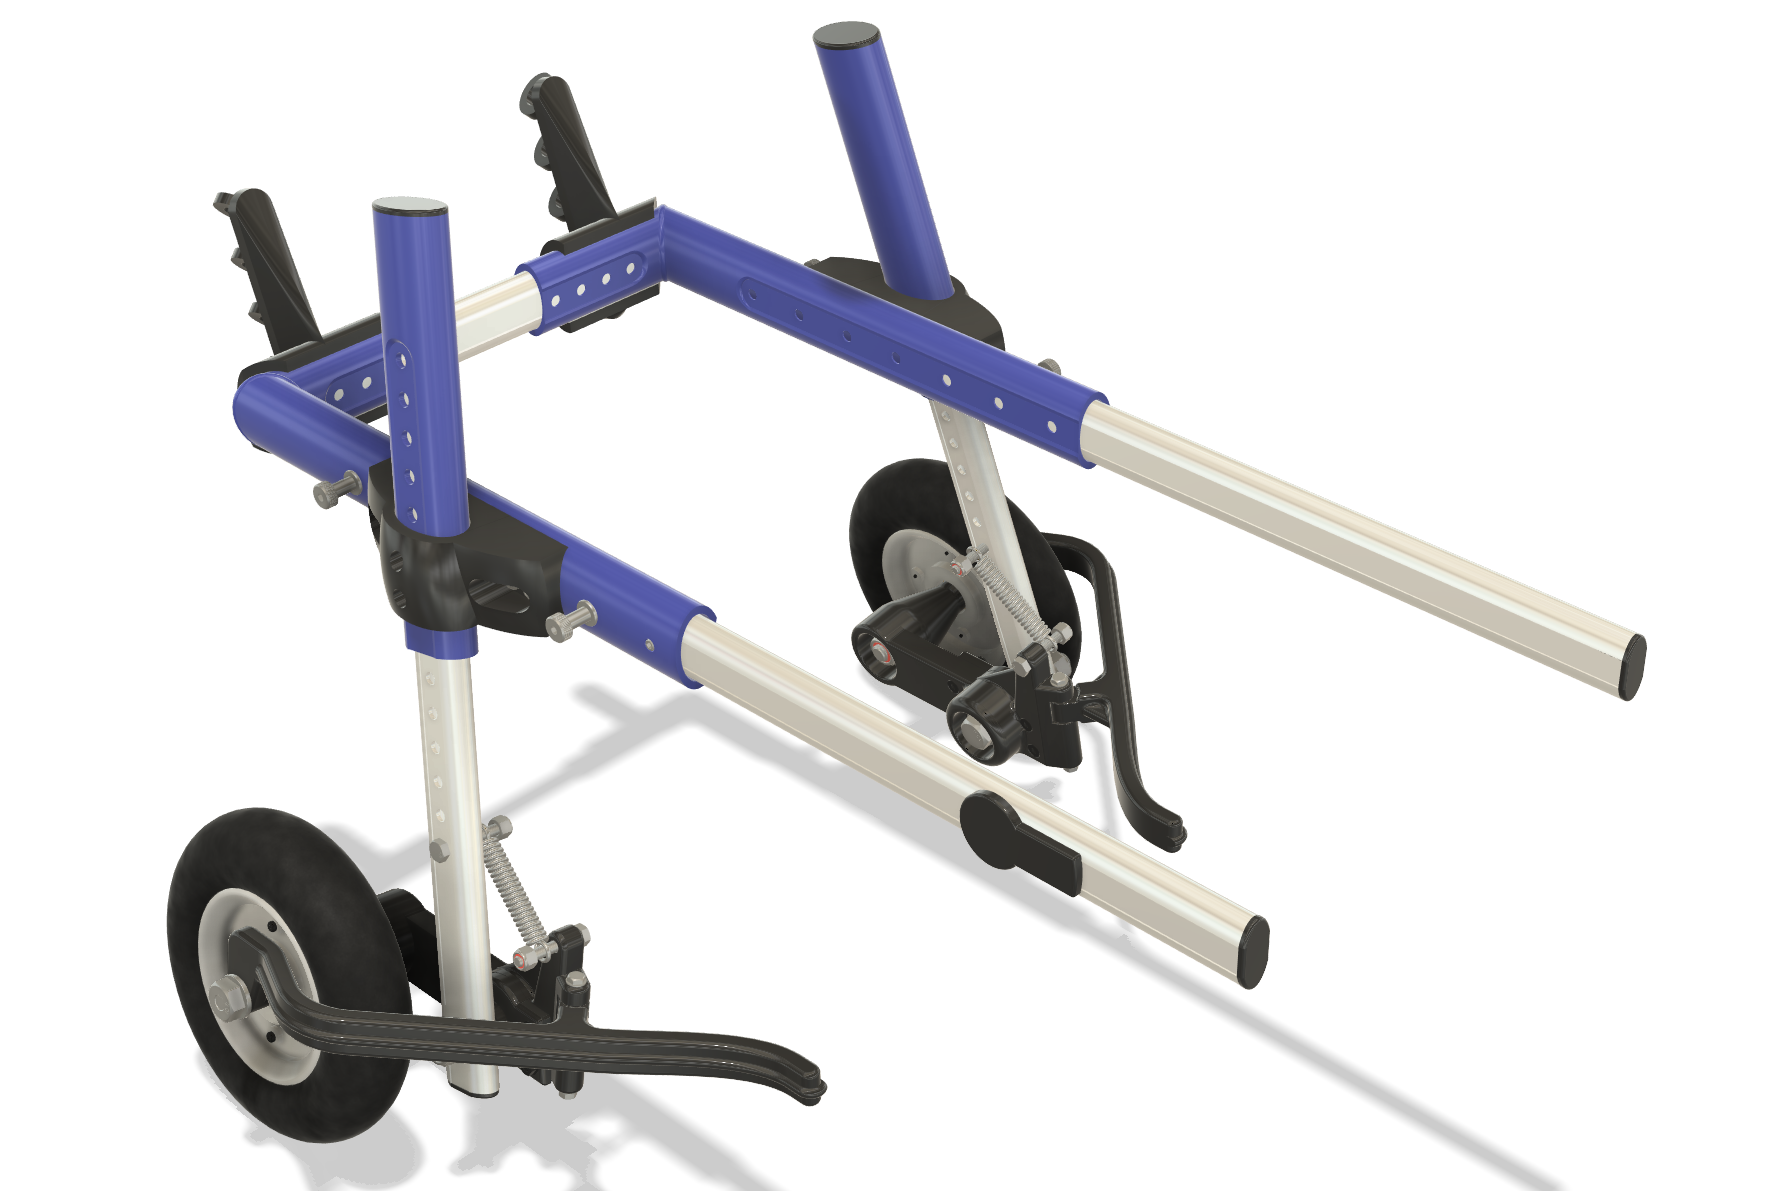
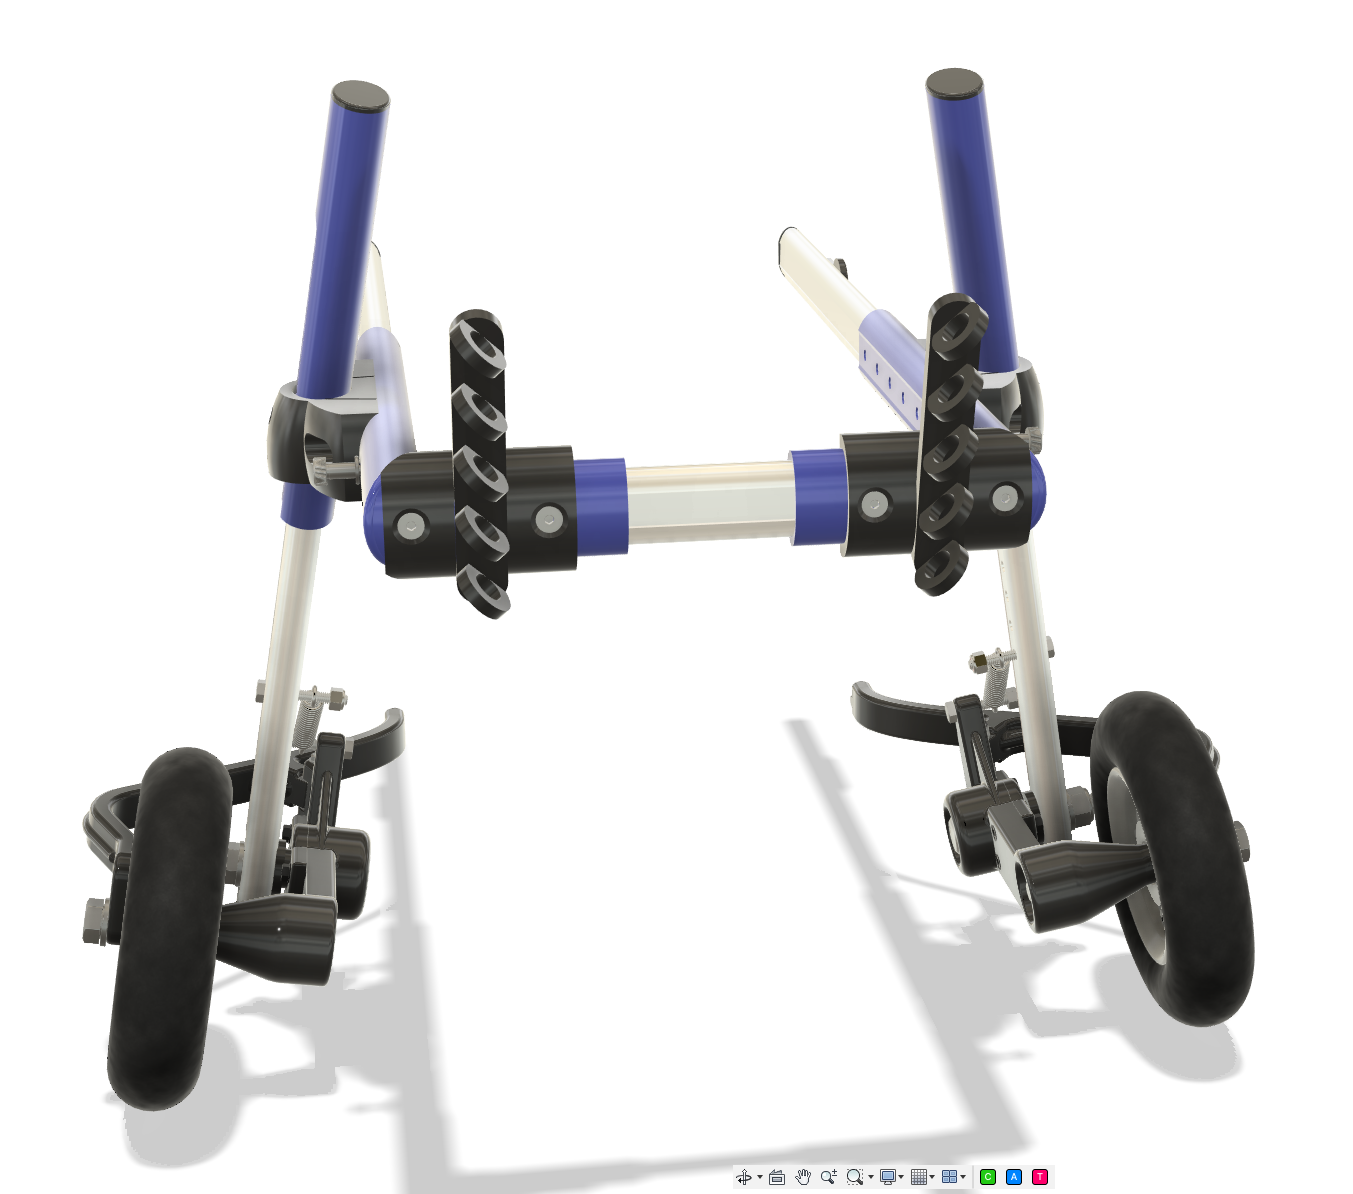
I recreated the relevant parts of the wheelchair in 3D and started experimenting with alternative wheel assemblies.
The eventual design combines three modifications:
Ball-bearing wheels
The original wheels were modified to run on proper ball bearings.
This considerably reduced the rolling resistance. For a small dog this makes a surprisingly large difference: less effort is needed simply to keep the wheelchair moving.
The improvement was immediately noticeable during walks.
Independent trailing-arm suspension
This became the largest part of the modification.
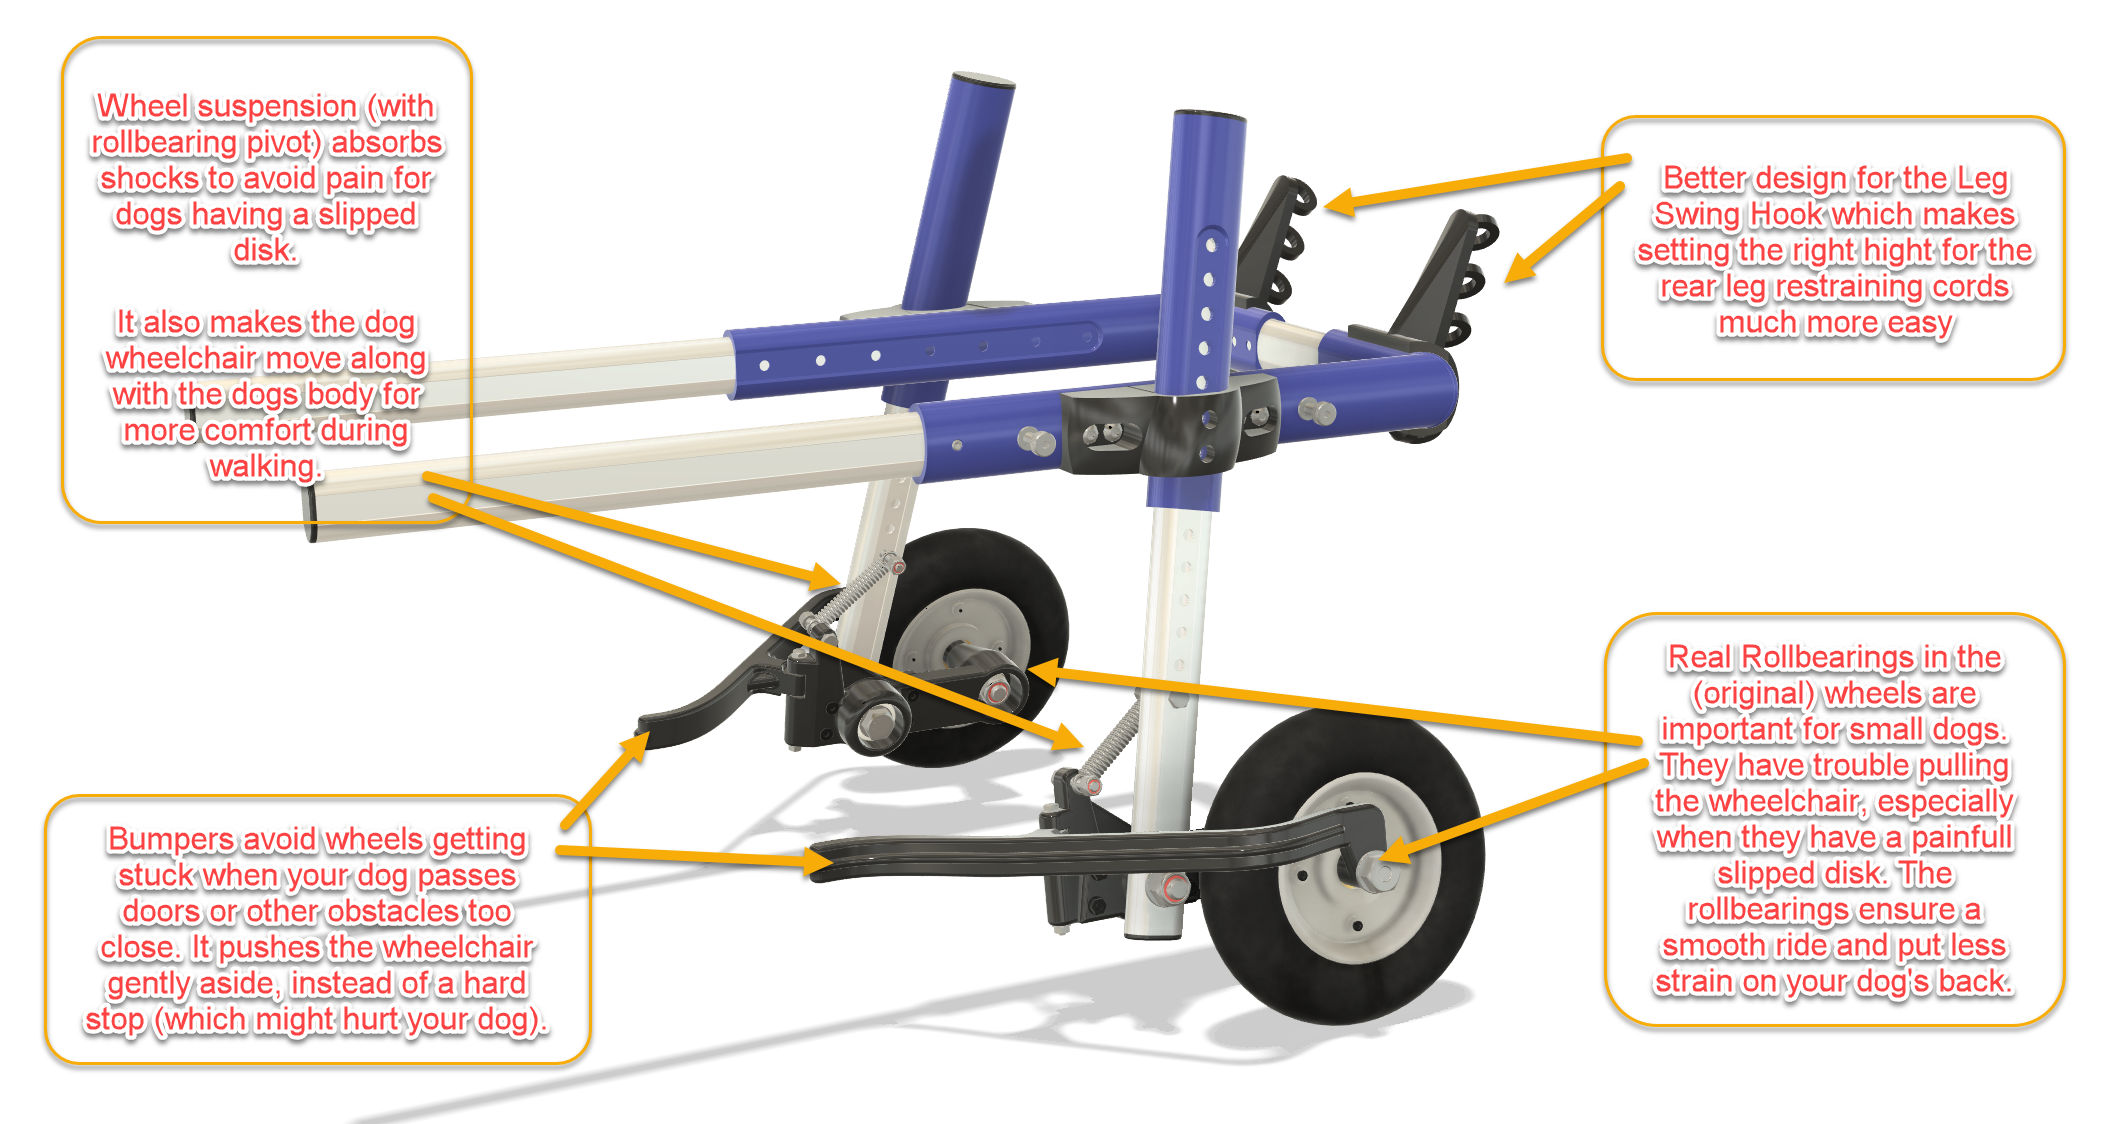
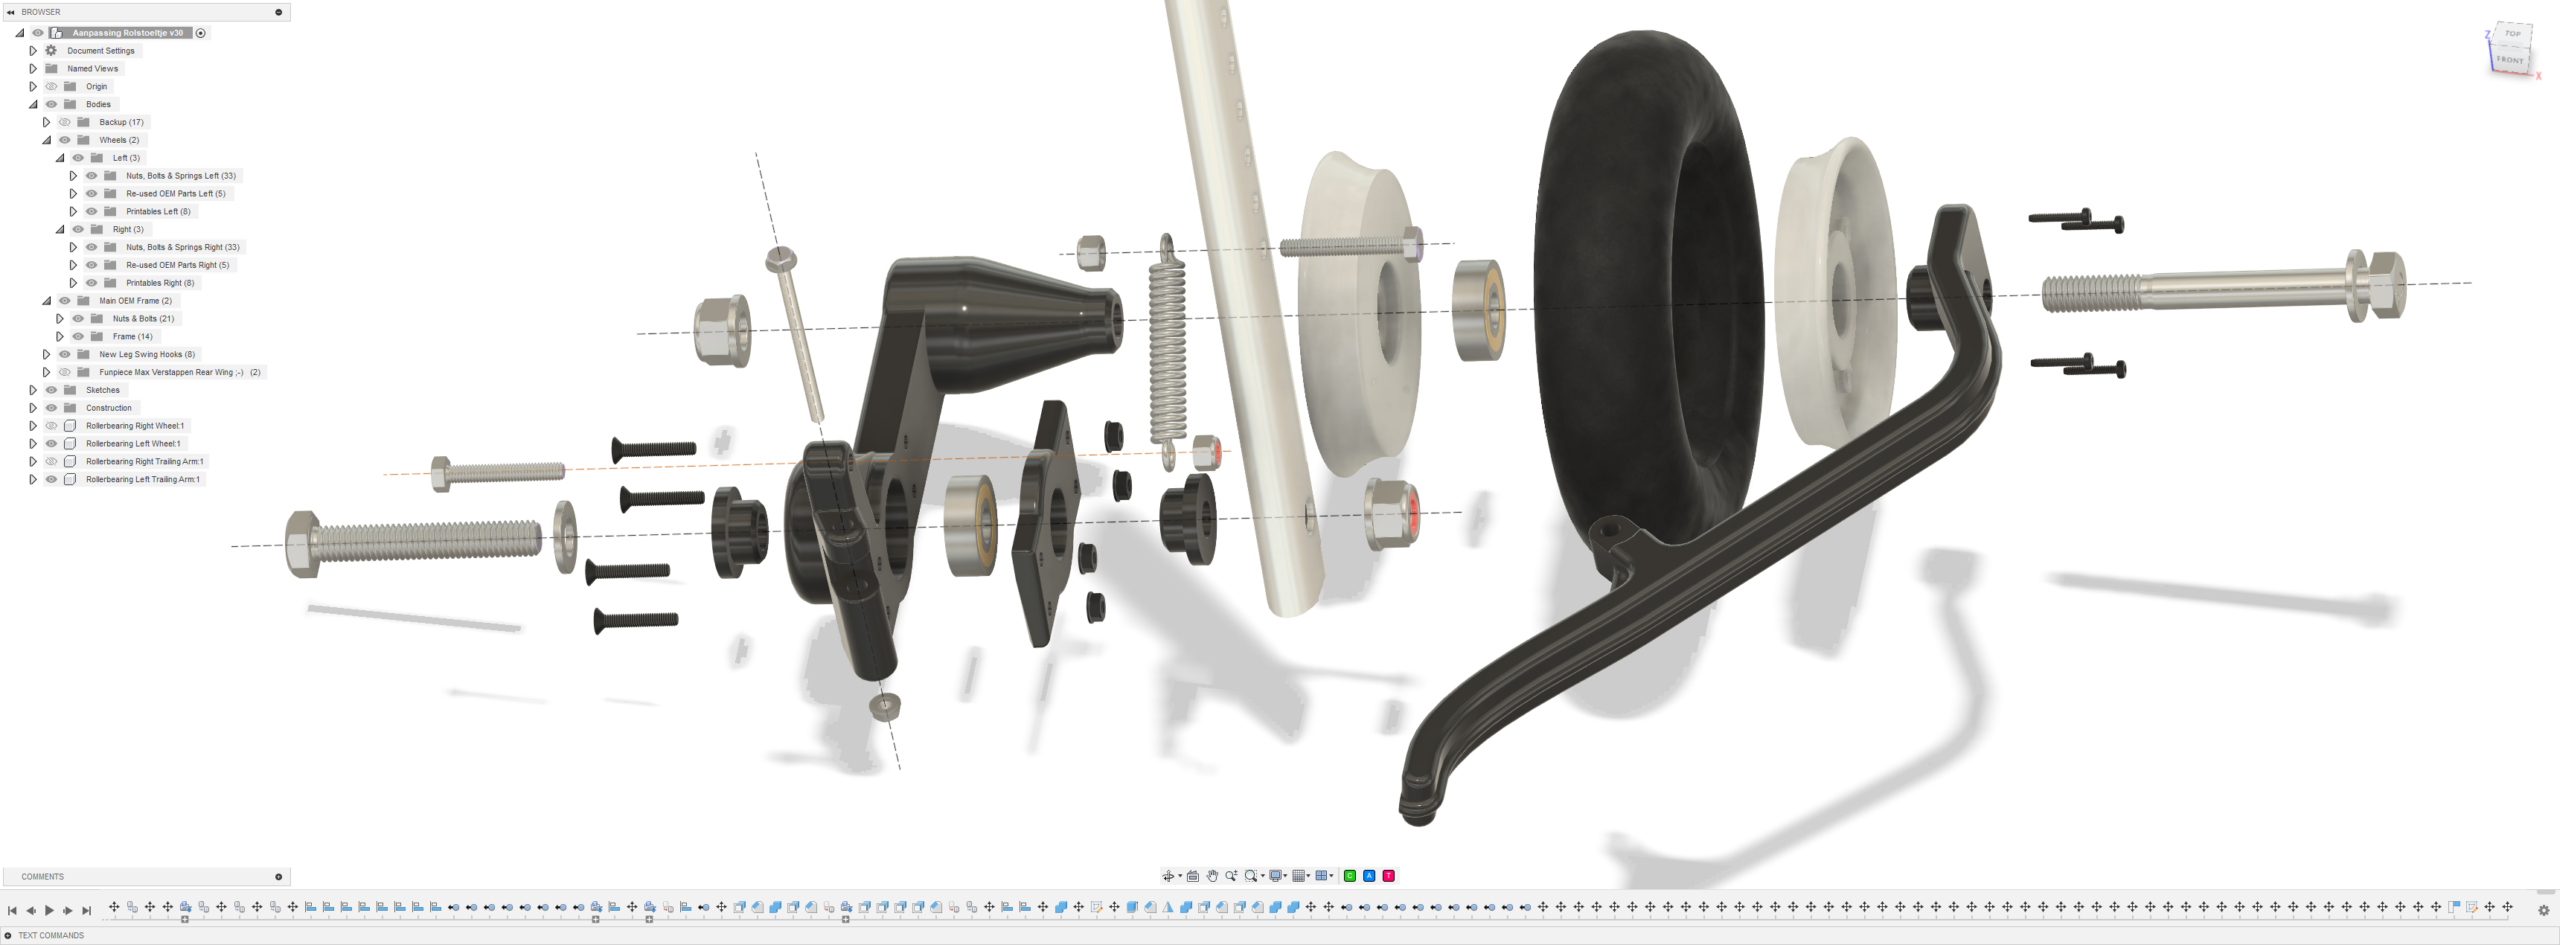
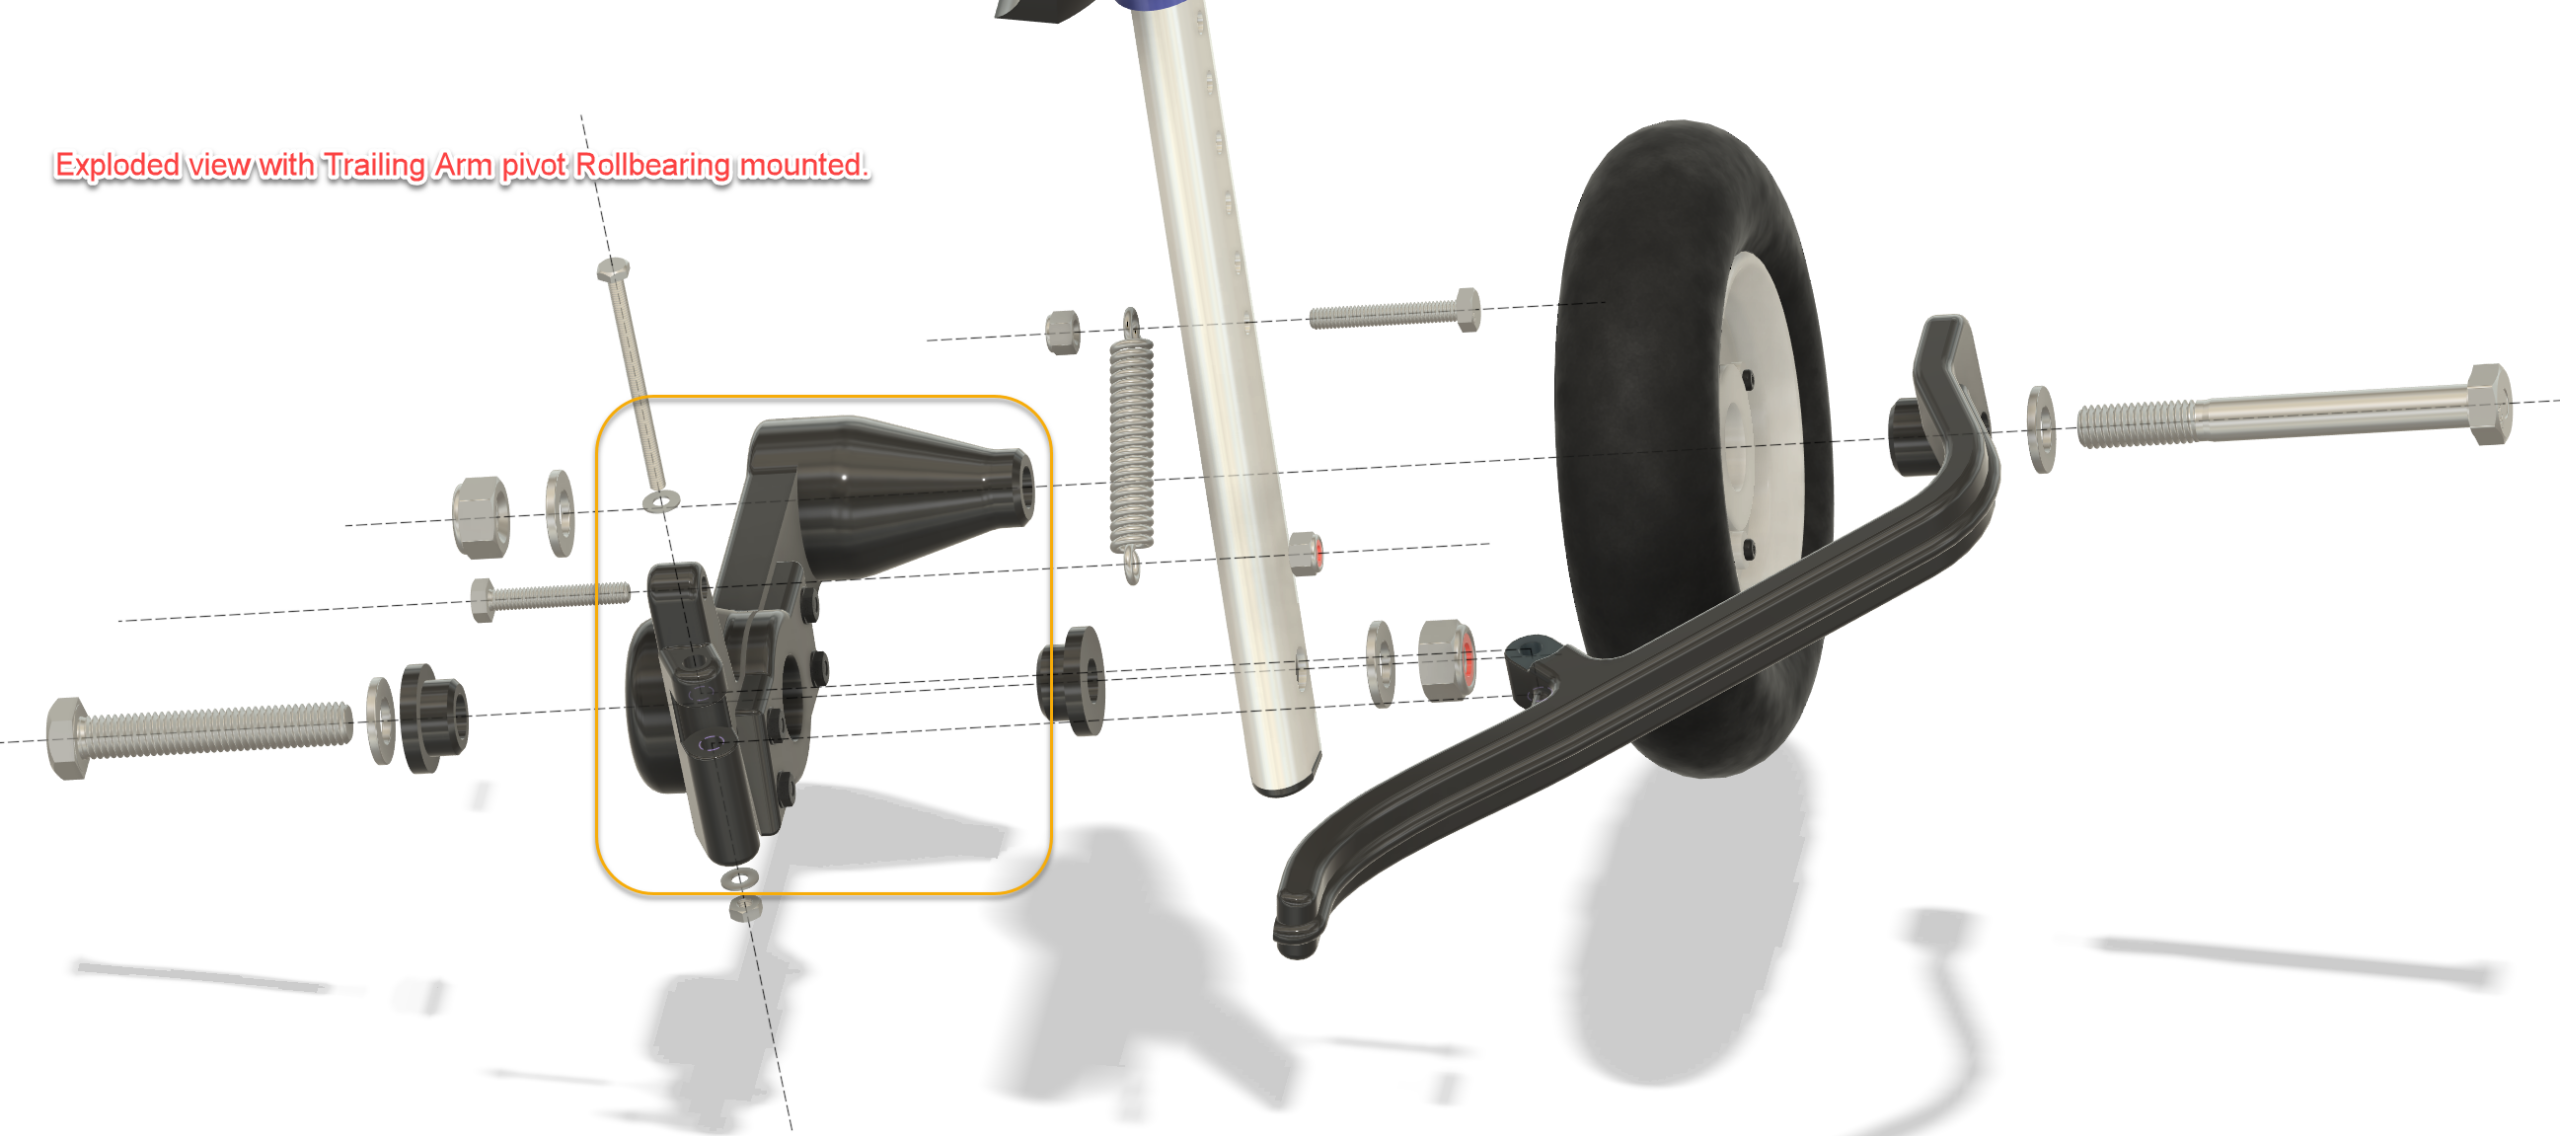
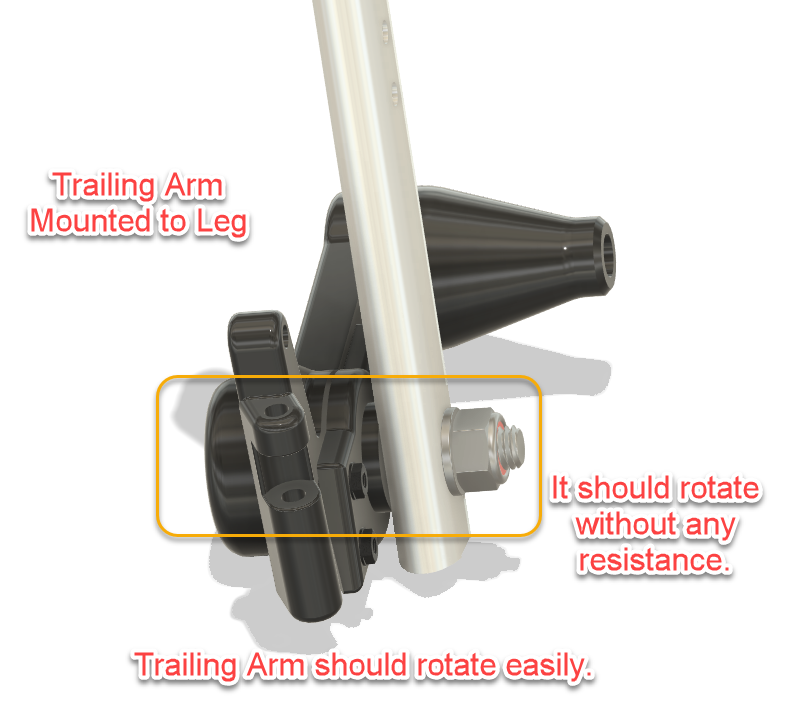
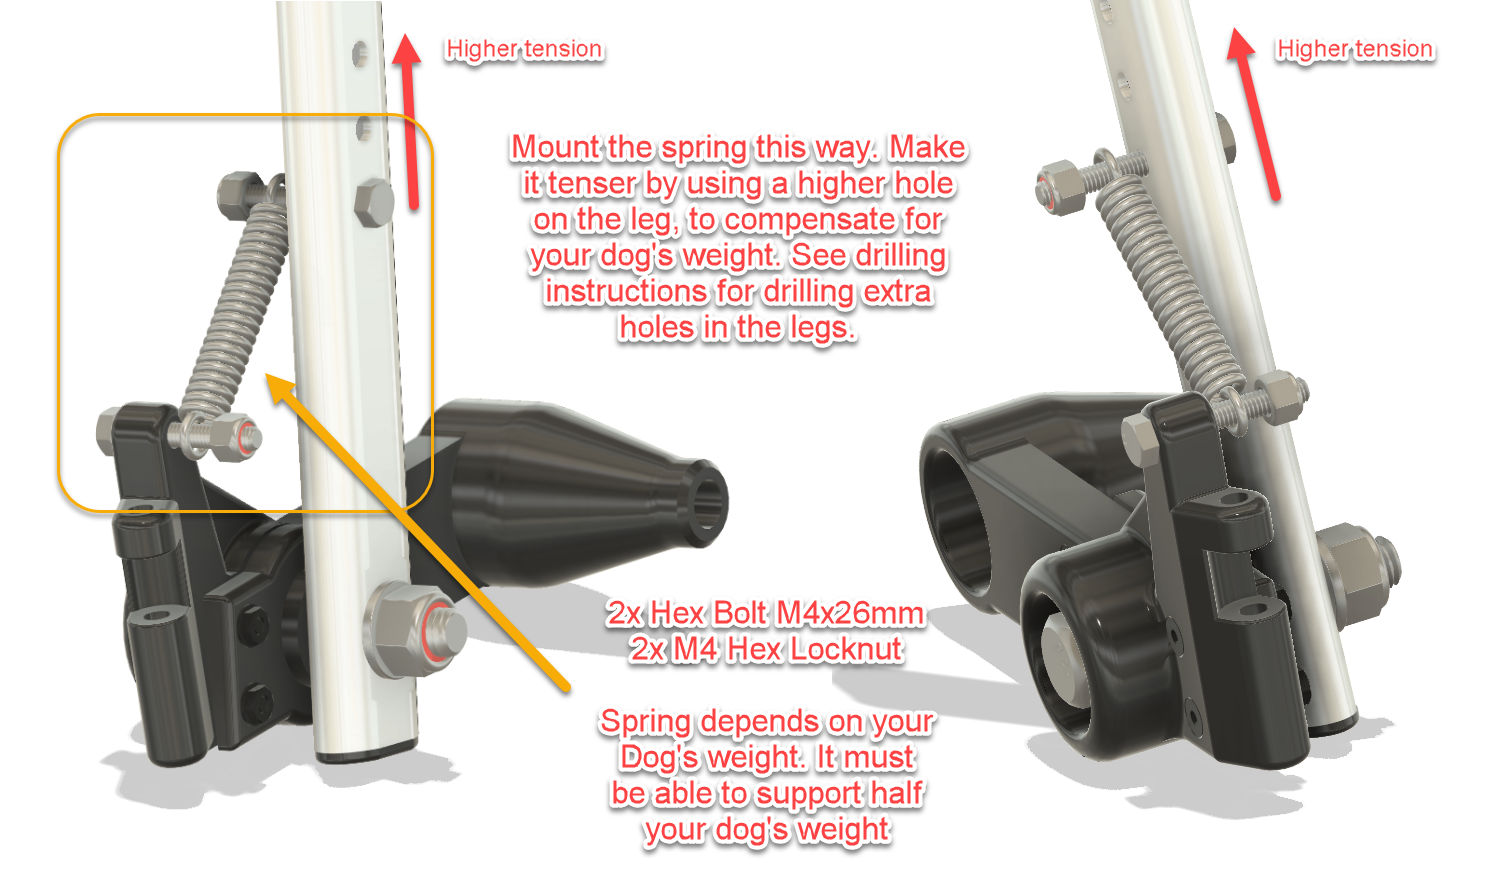
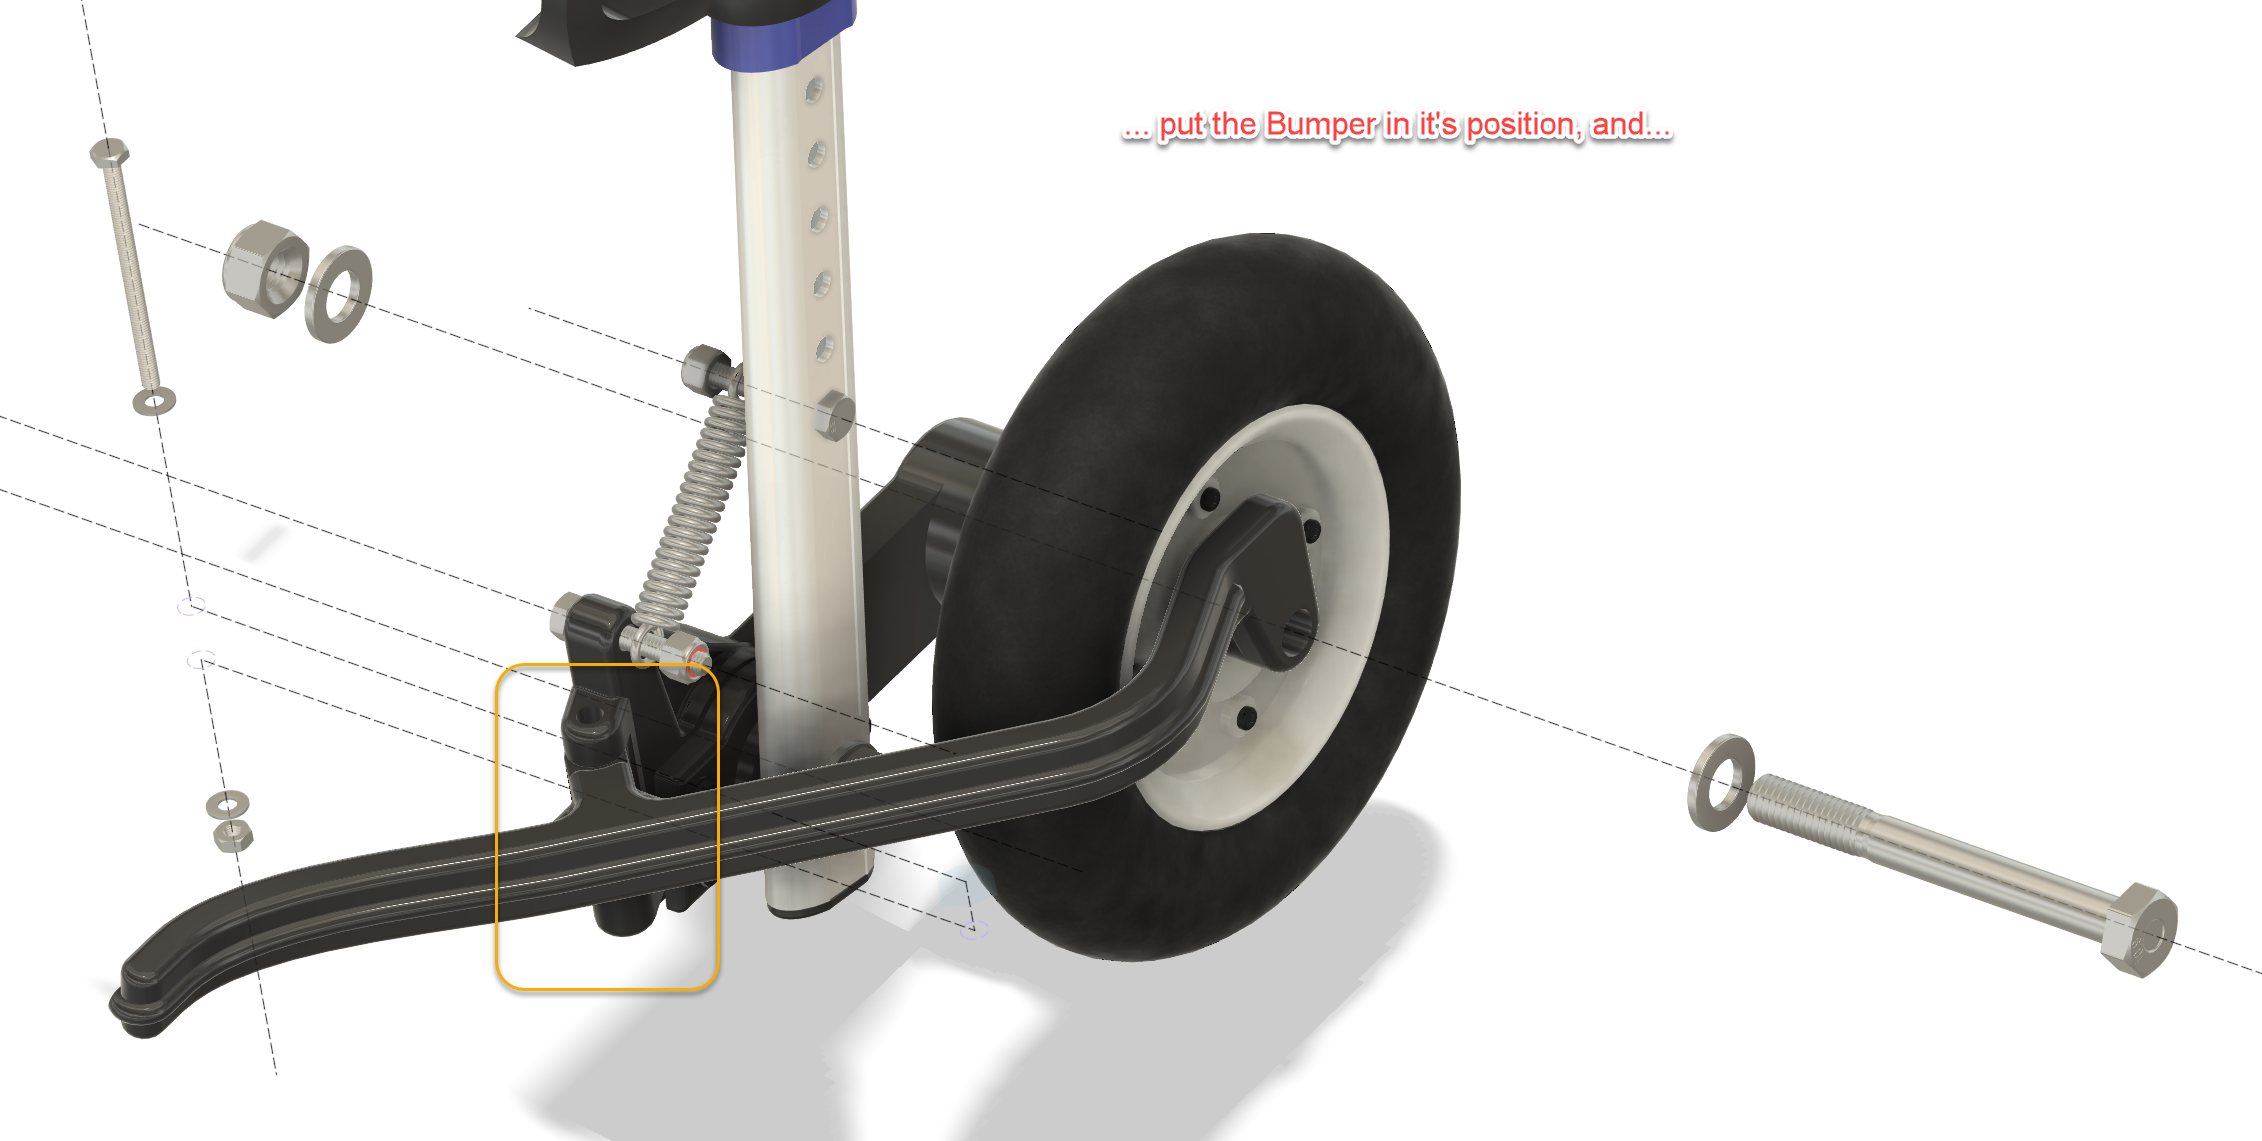
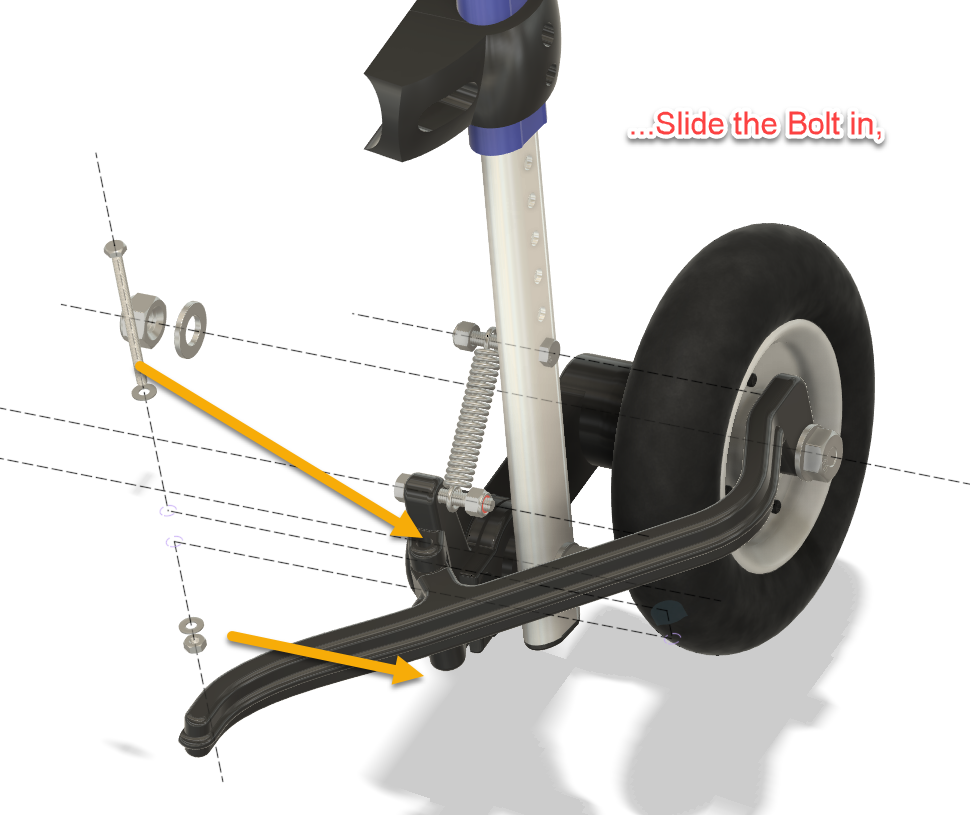
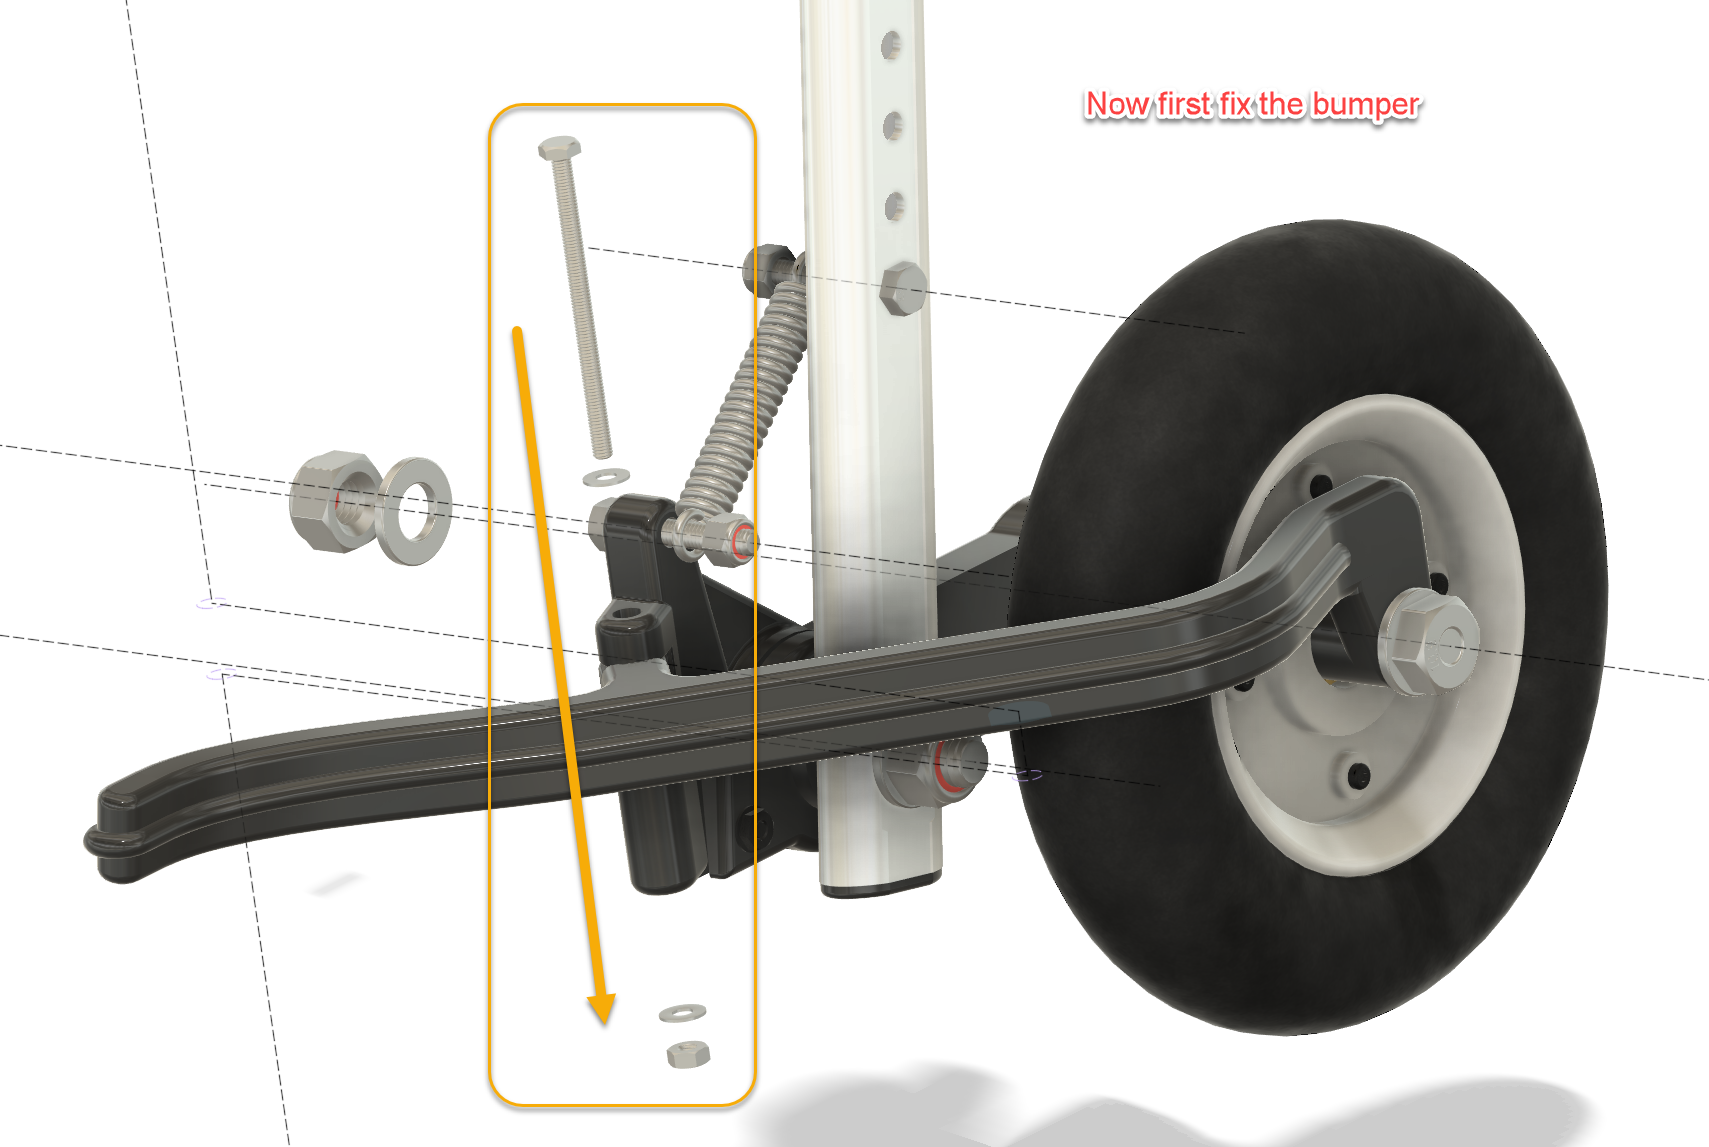
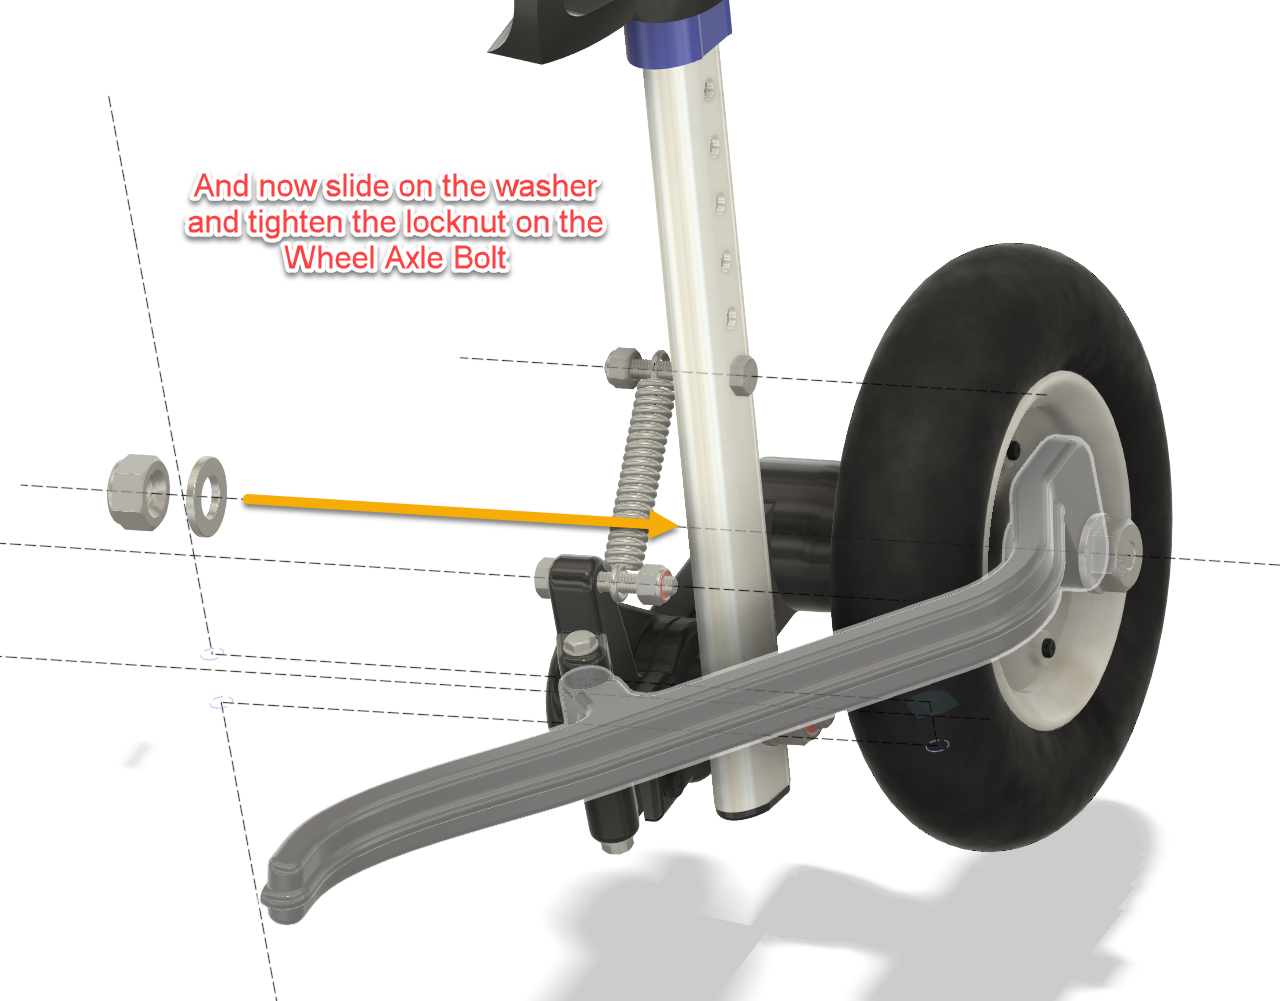
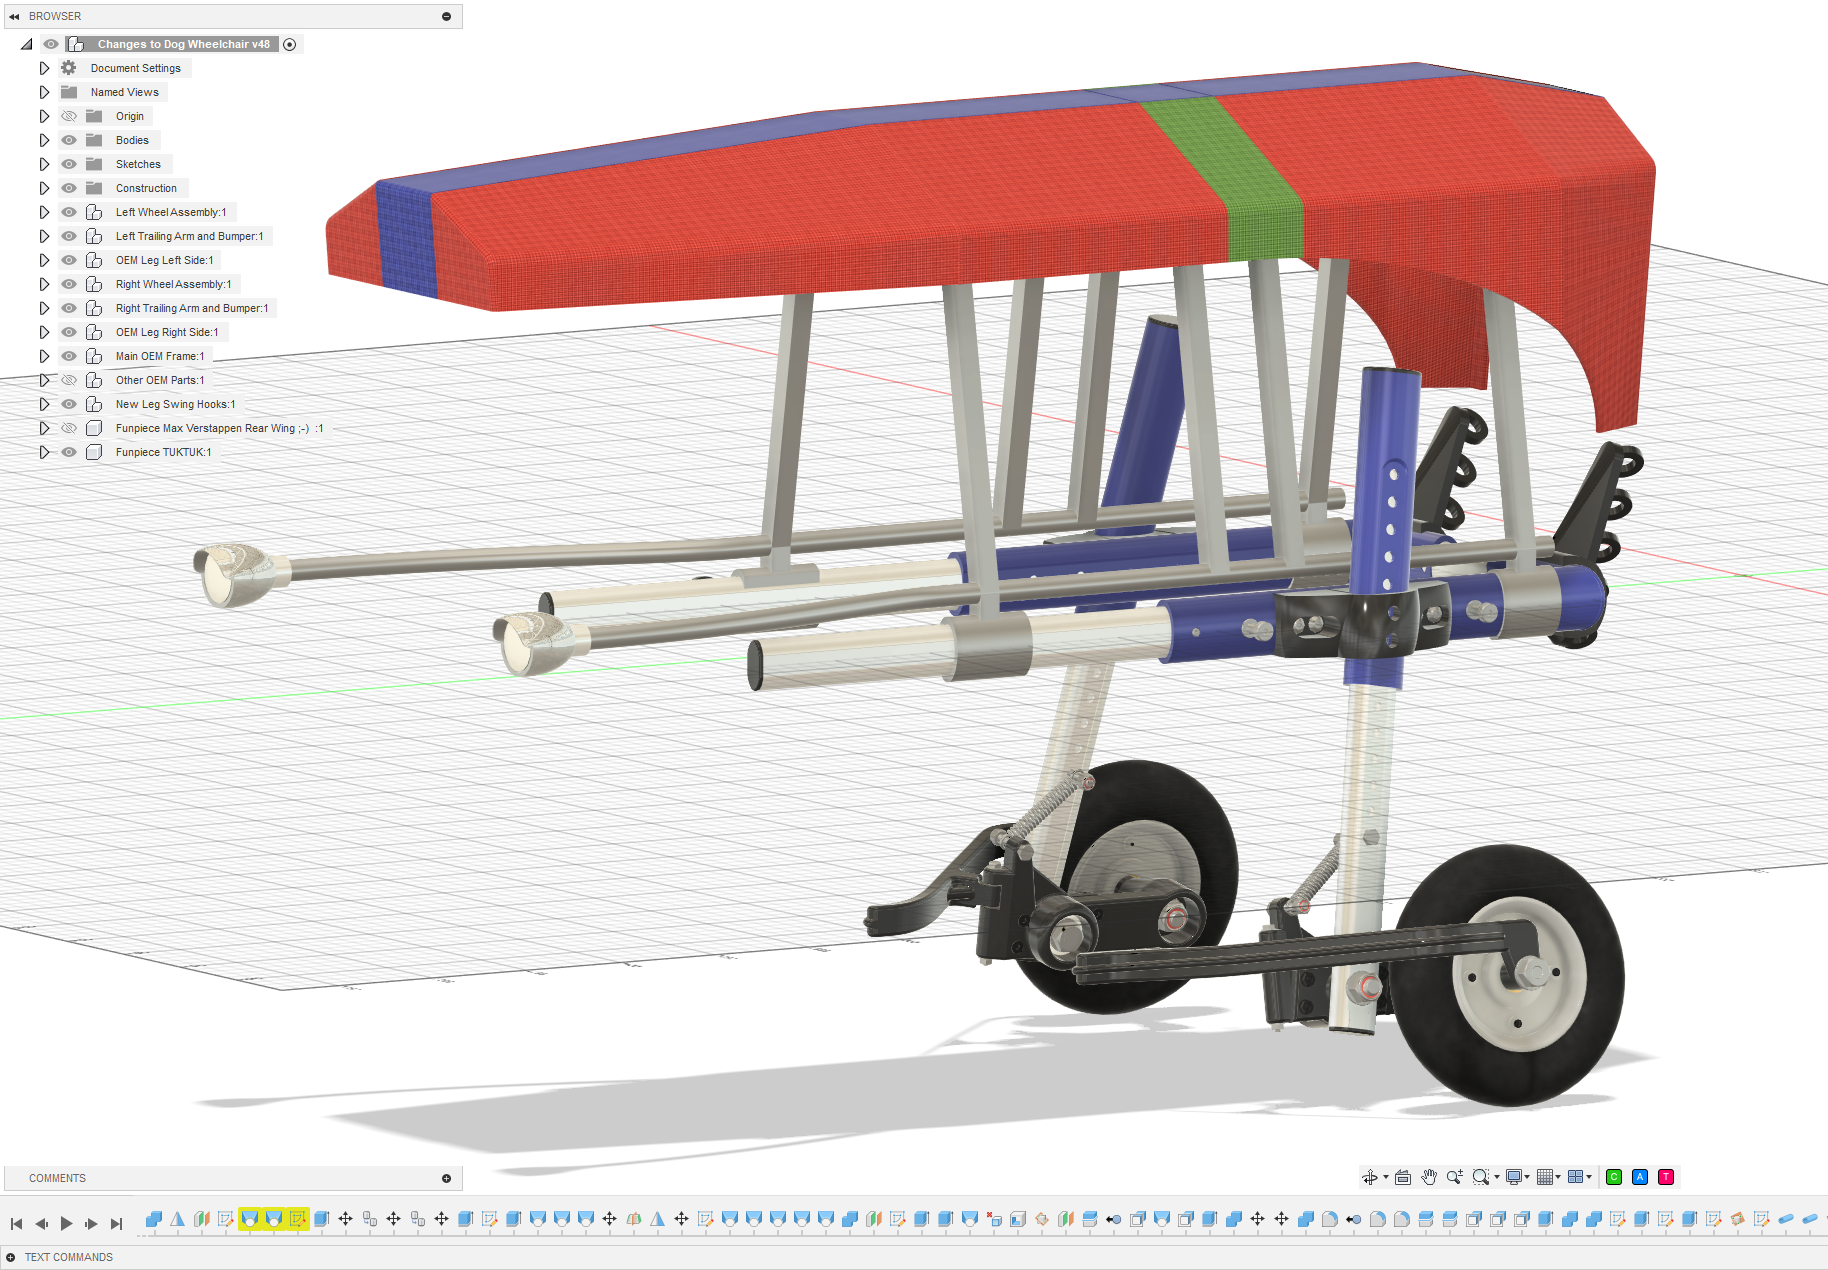
Each wheel is mounted on a pivoting trailing arm running on a ball bearing. A spring between the trailing arm and the wheelchair leg provides suspension.
Instead of every bump being transmitted directly into the frame, the wheel can now move independently.
The spring preload can be adjusted by selecting a different mounting hole in the wheelchair leg. This makes it possible to tune the suspension for the weight of the dog.
The goal isn’t to turn the wheelchair into a miniature off-road vehicle — tempting though that idea may be — but simply to let the wheels follow small irregularities in the ground without forcing the dog’s body to follow every movement.
The result is a noticeably smoother and more natural ride.
Wheel guard rails
The long curved guards around the wheels solve another very practical problem.
If the wheelchair passes too close to a door frame, furniture or another obstacle, the guard touches it before the wheel does.
Its curved shape then gently guides the wheelchair away from the obstacle rather than allowing the wheel to catch abruptly.
Simple idea. Surprisingly effective.
A few modifications to the original wheelchair
The conversion does require some changes to the original frame.
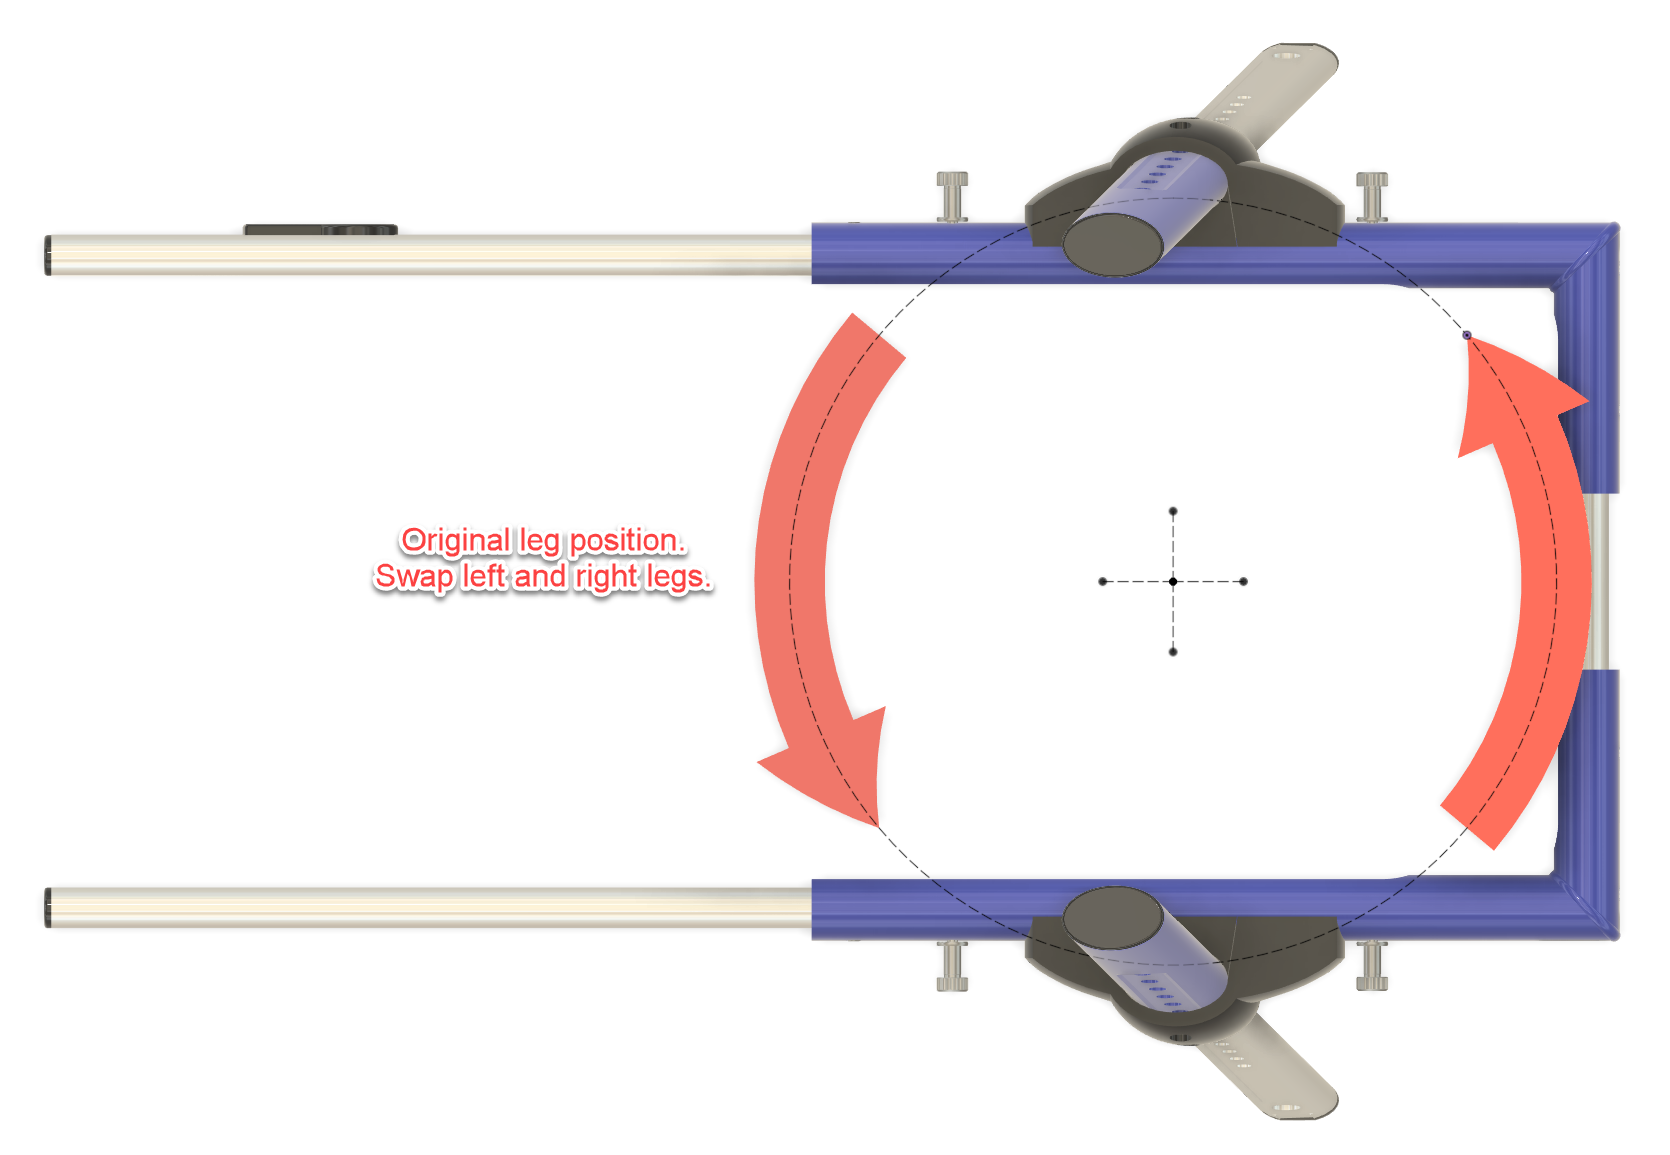
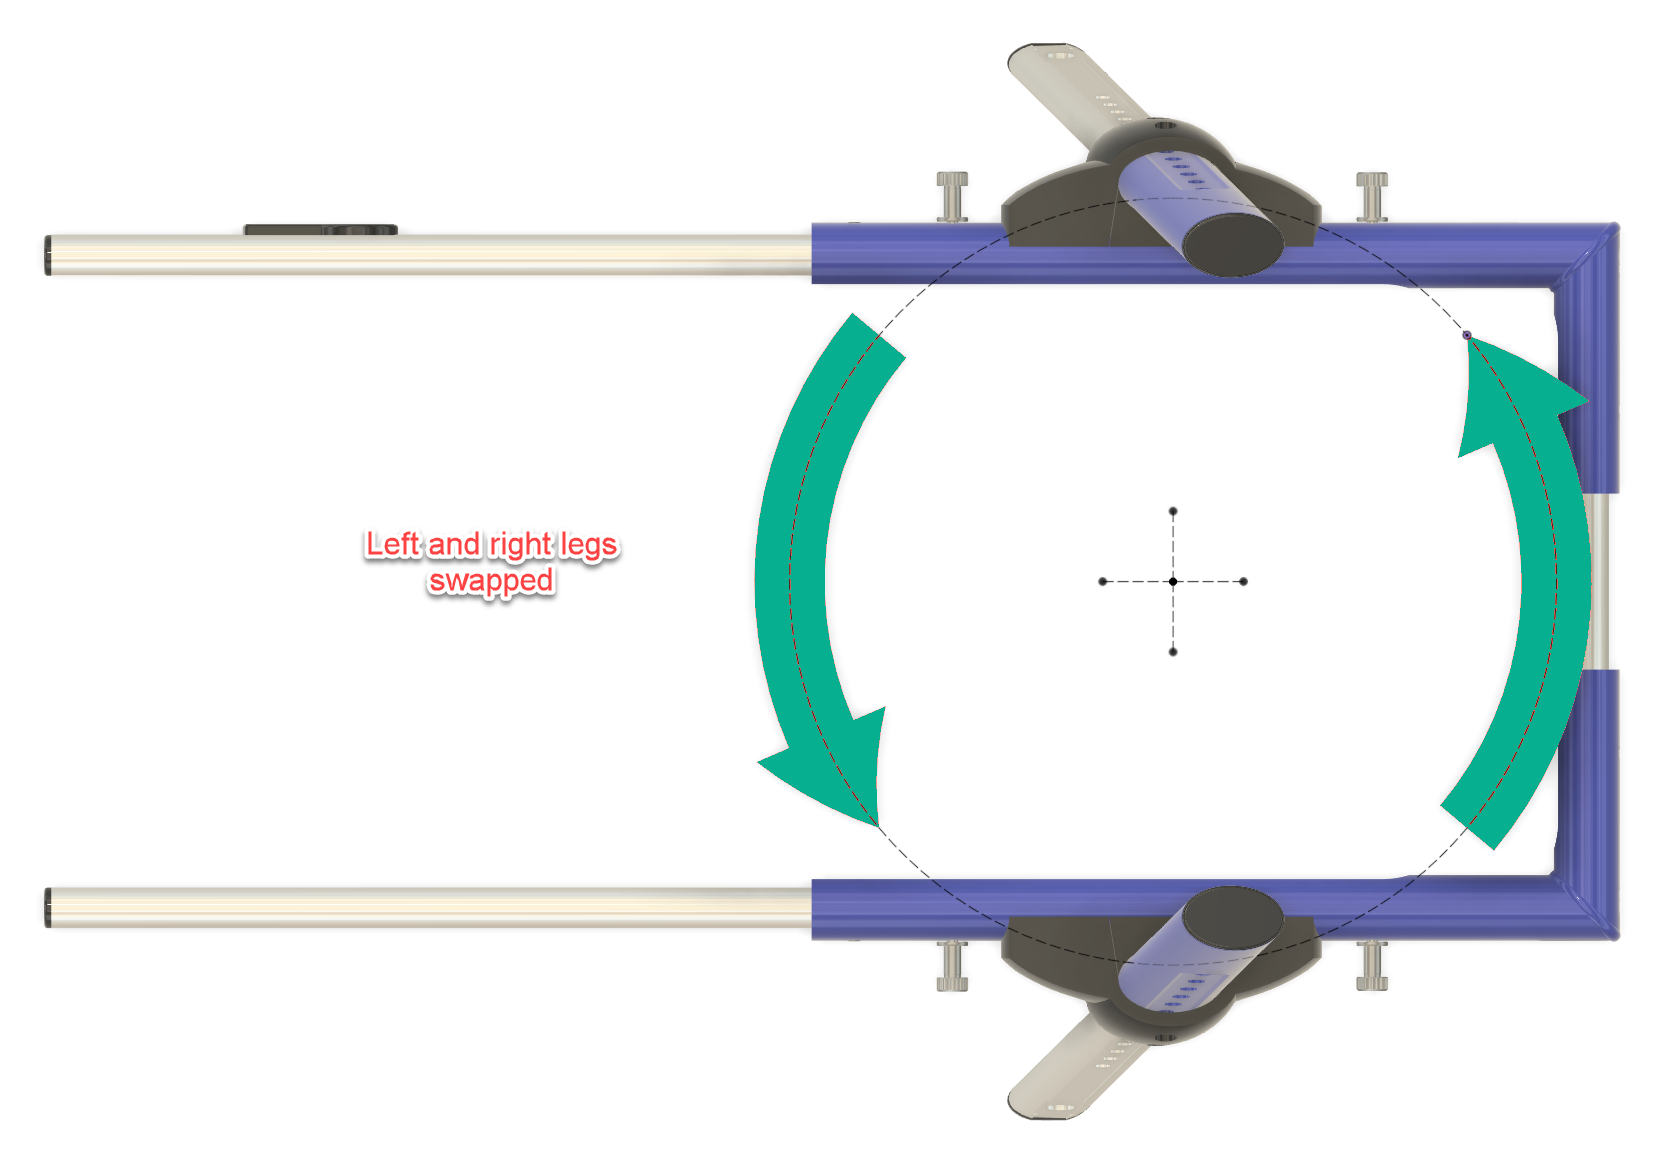
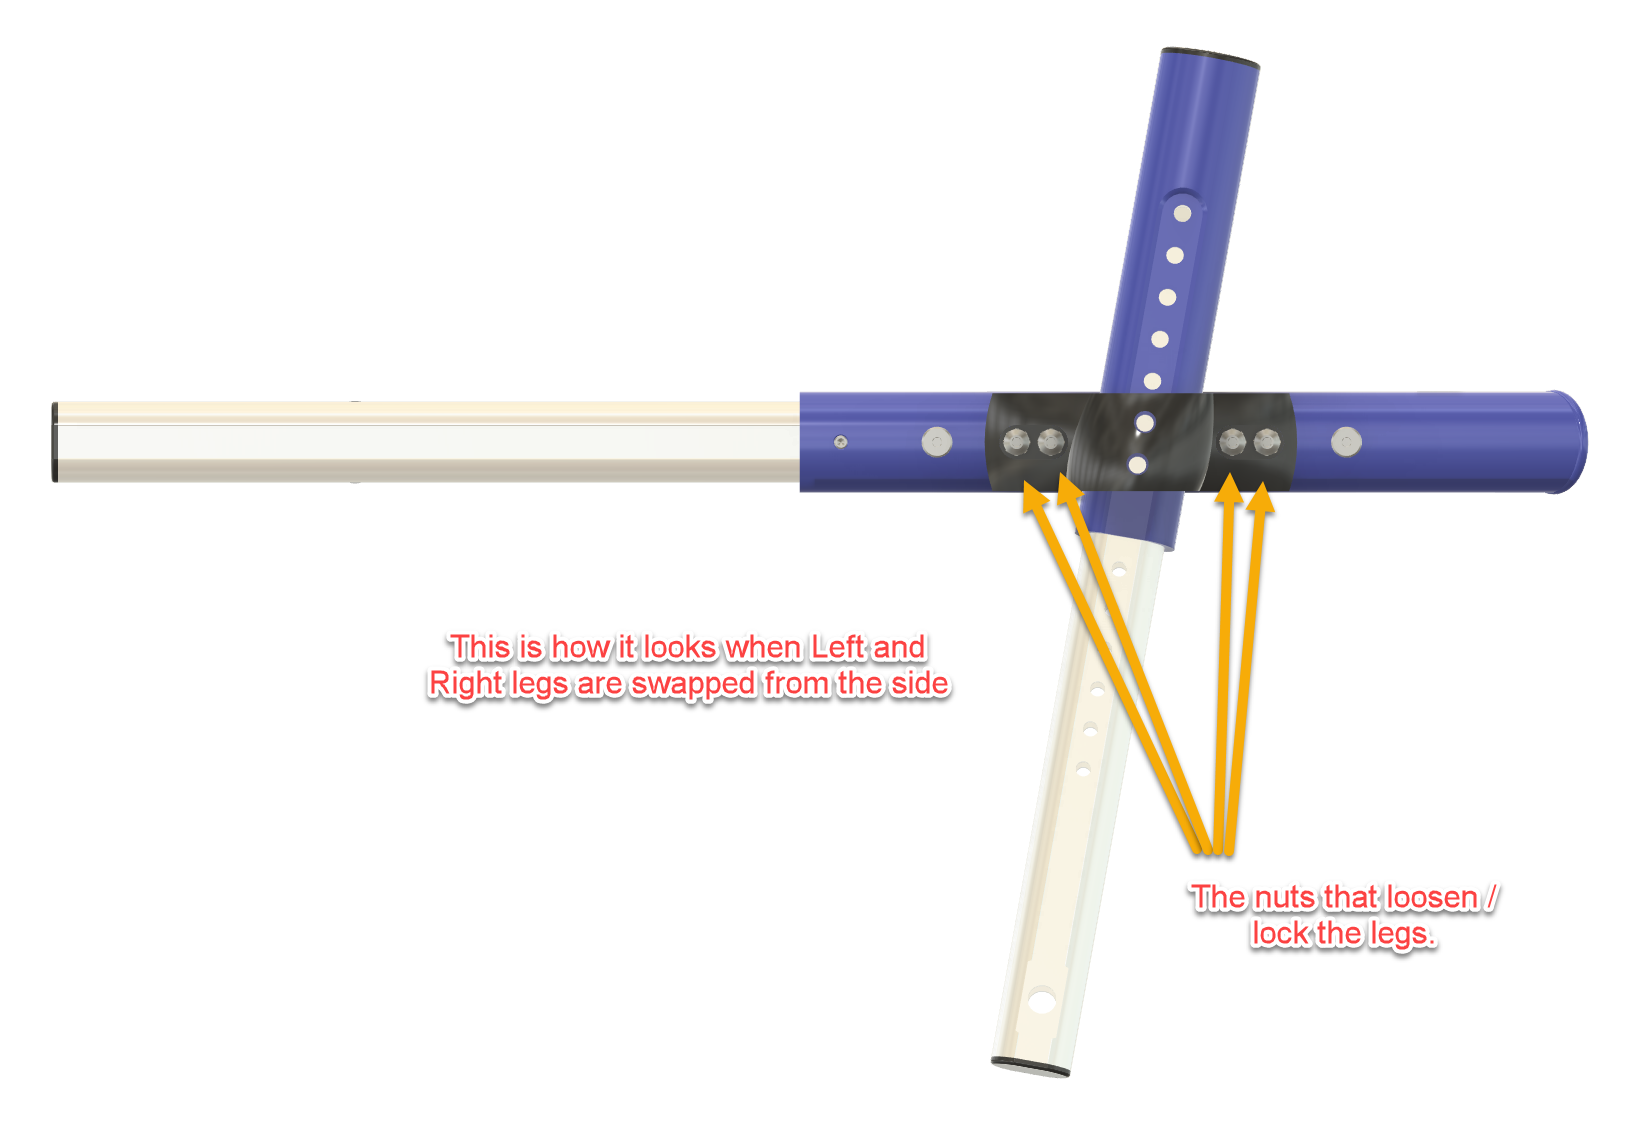
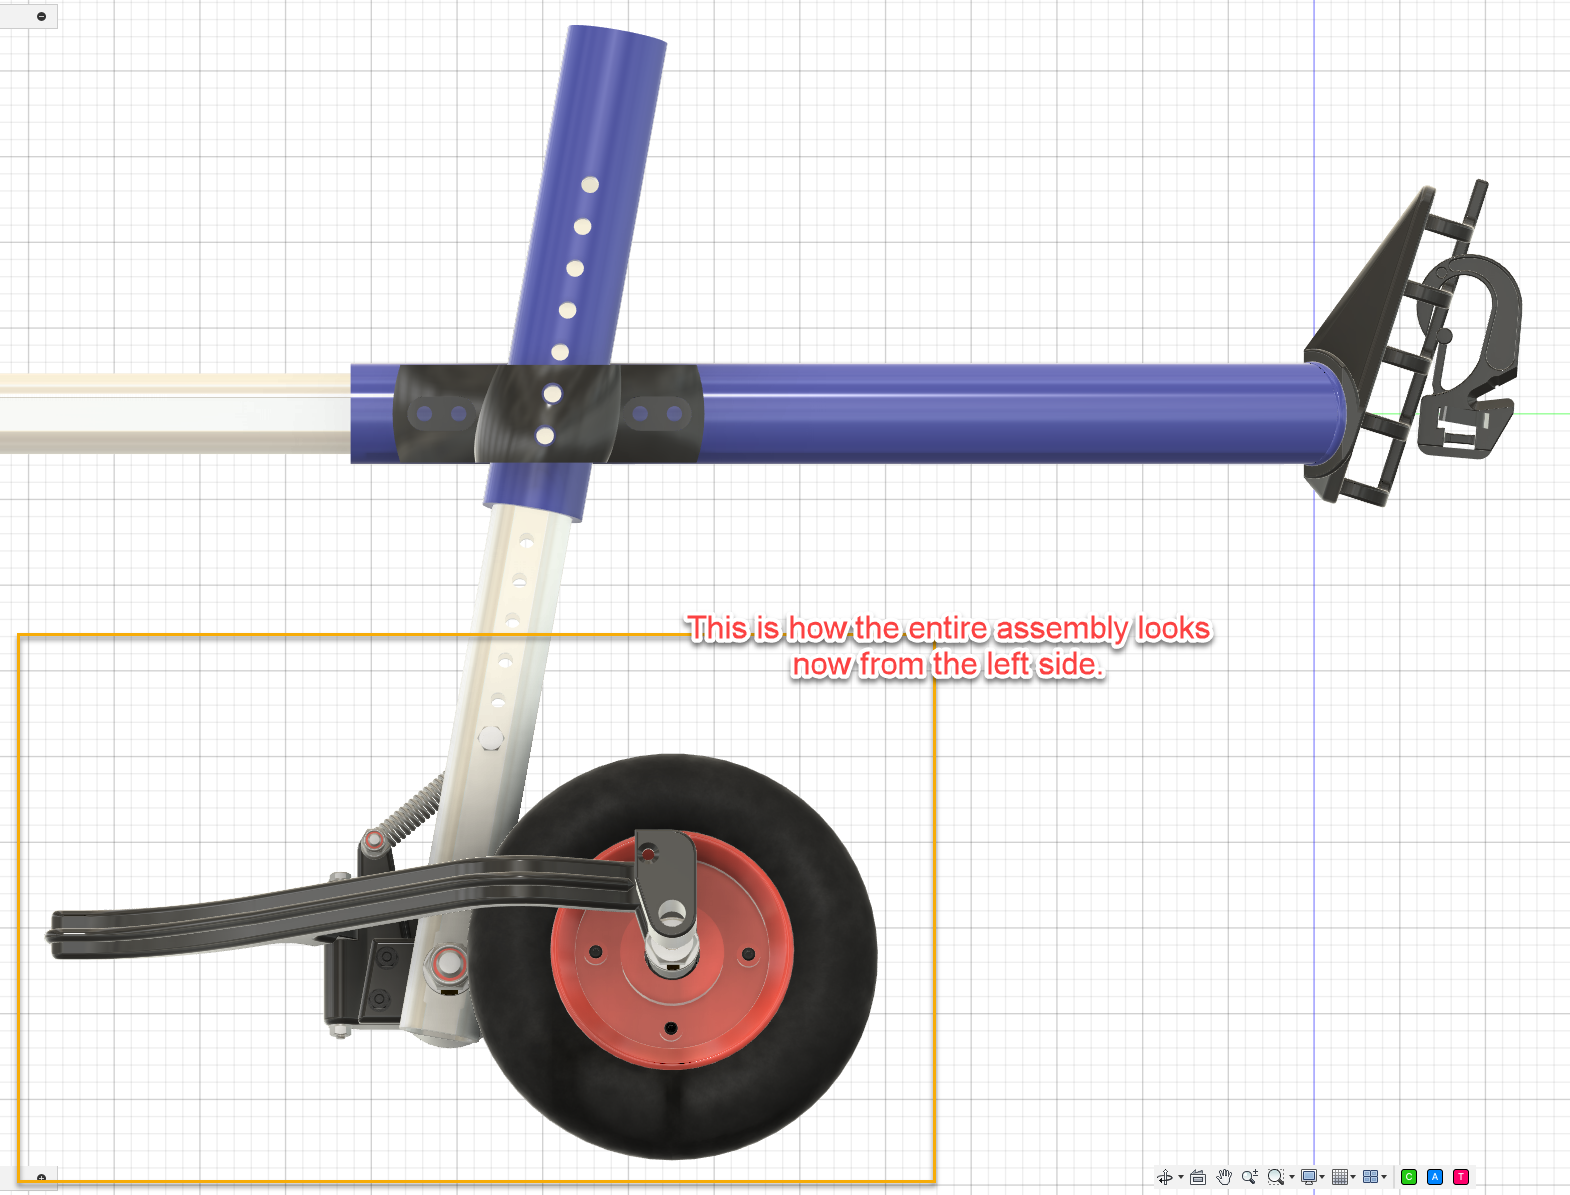
The left and right wheelchair legs are swapped, which changes the orientation of the wheel assemblies and provides the geometry needed for the trailing-arm suspension.
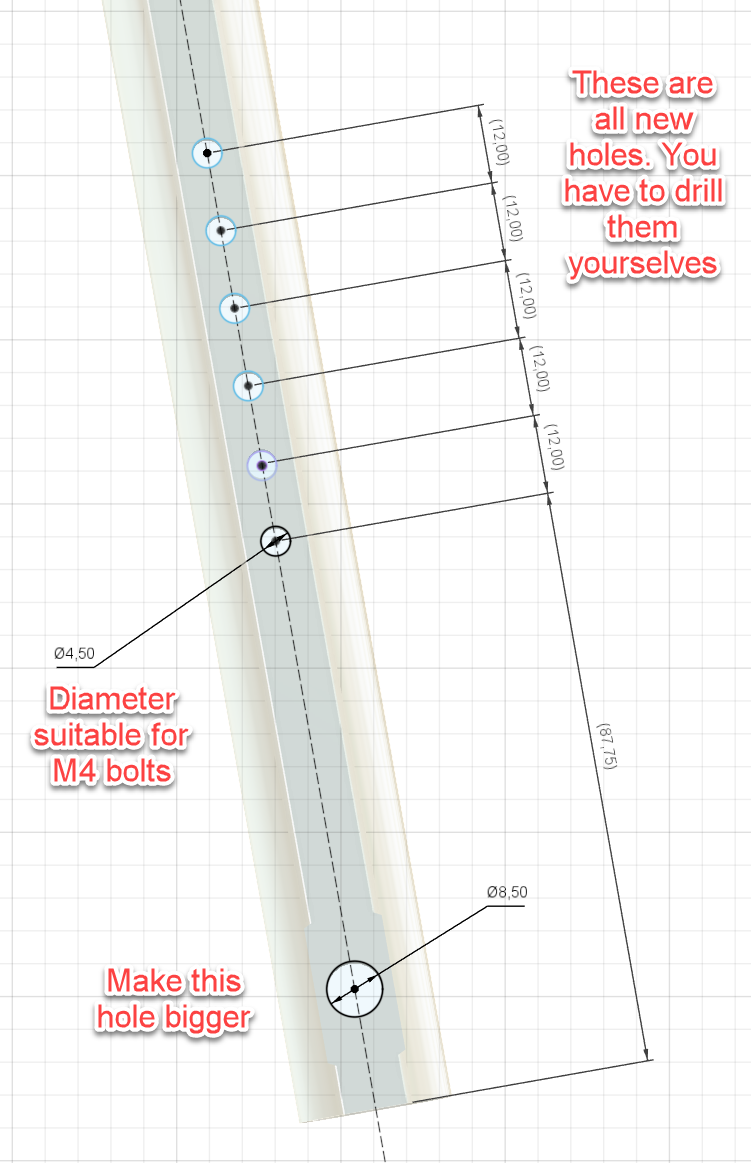
Additional 4.5 mm holes are drilled in the legs at 12 mm intervals. These provide several spring mounting positions so the suspension tension can be adjusted.
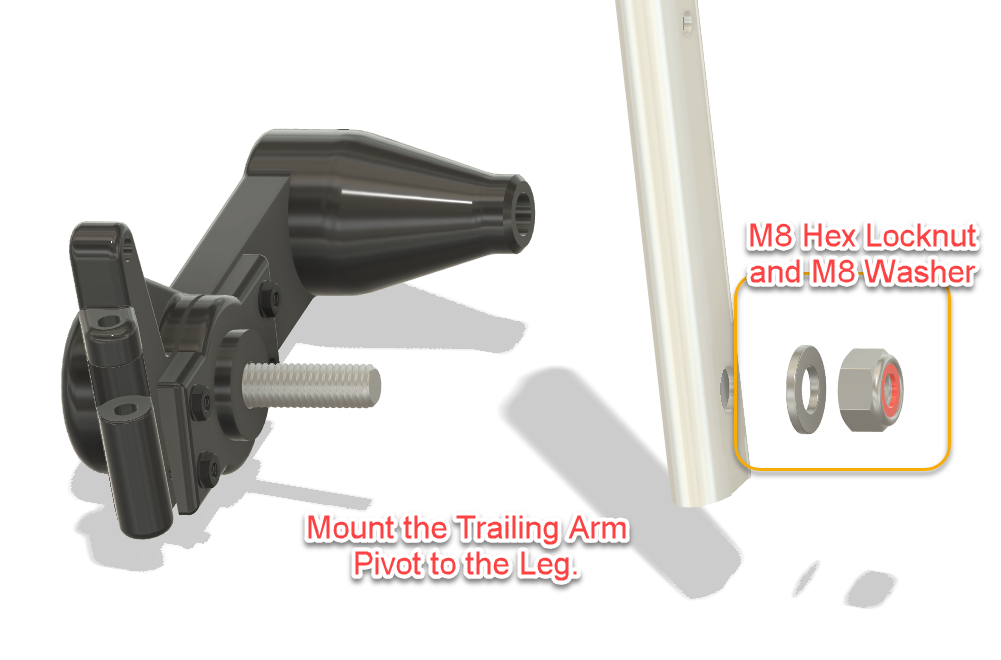
The lower existing hole is enlarged to 8.5 mm for mounting the trailing-arm pivot.
The original wheel components are retained where practical, while the newly designed parts form the suspension, bearing mounts and wheel guards.
3D printing the parts
All custom parts in my version were resin printed using Anycubic Water-Washable ABS-Like Resin V2.
To keep the wheelchair as light as possible, larger parts were printed hollow while retaining enough wall thickness and structural reinforcement for their intended load.
FDM printing should also be possible, but material choice and print orientation matter. These parts are structural: they carry the wheels, absorb shocks and experience repeated cyclic loading.
So this is not the ideal project for “three walls, 10% infill, she’ll be right.”
Strong and lightweight is the objective.
Jerry in his Modified Dog Wheelchair
Building it yourself
The project files include the printable components together with drawings and assembly illustrations showing how the conversion is made.
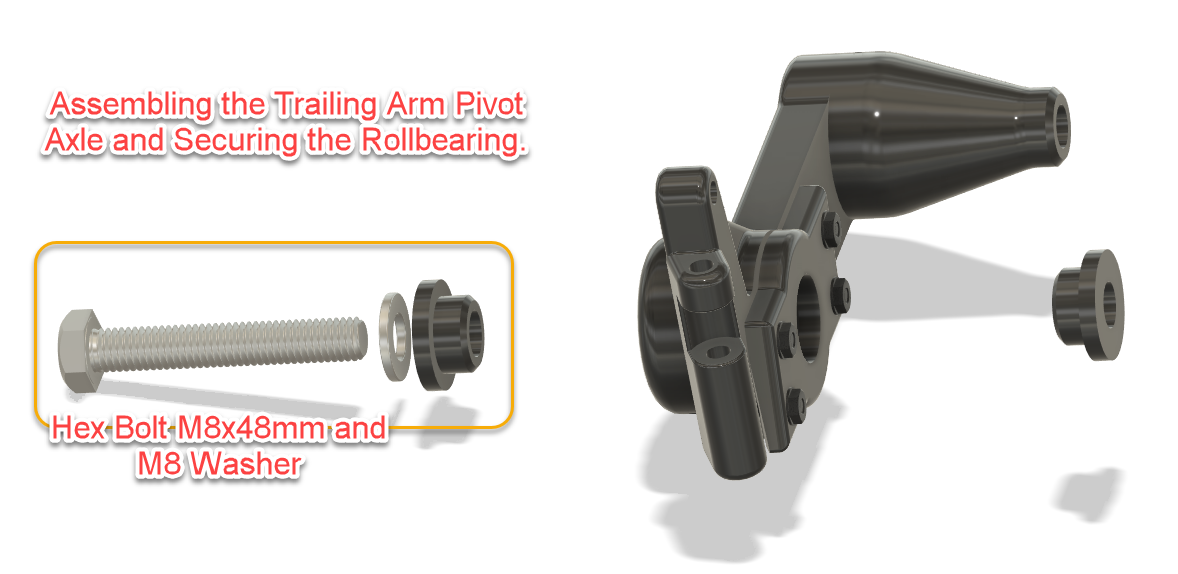
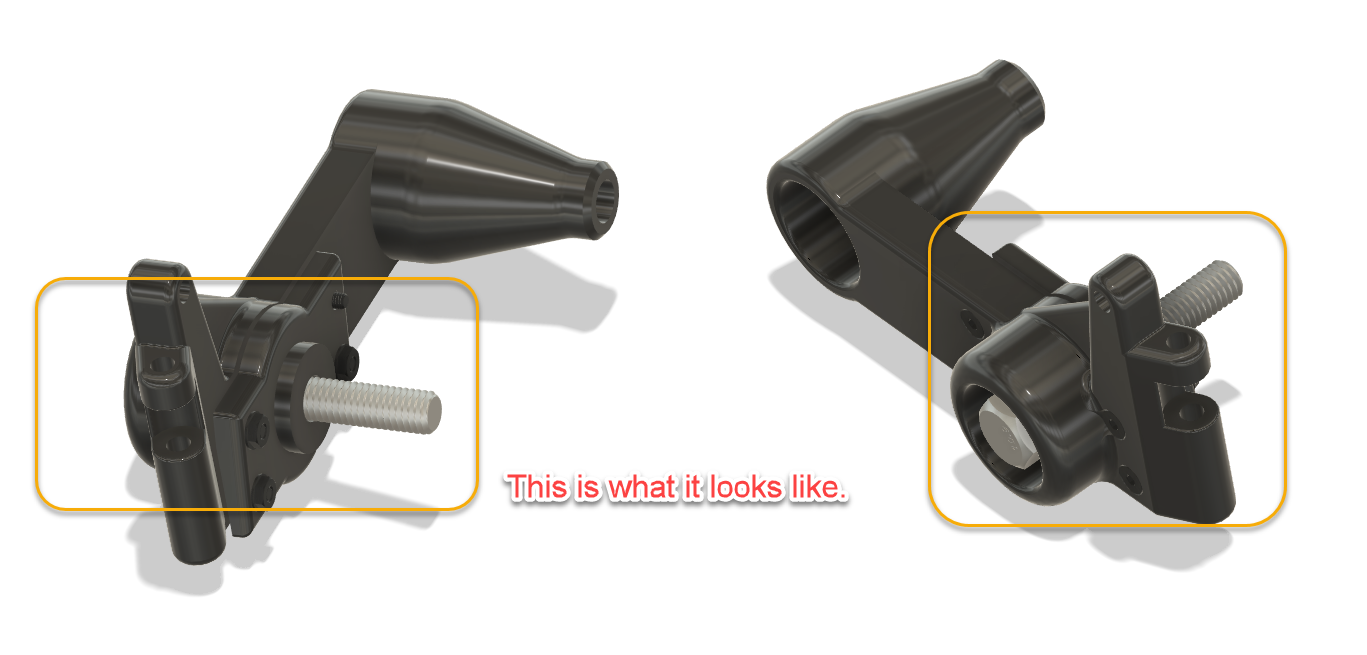
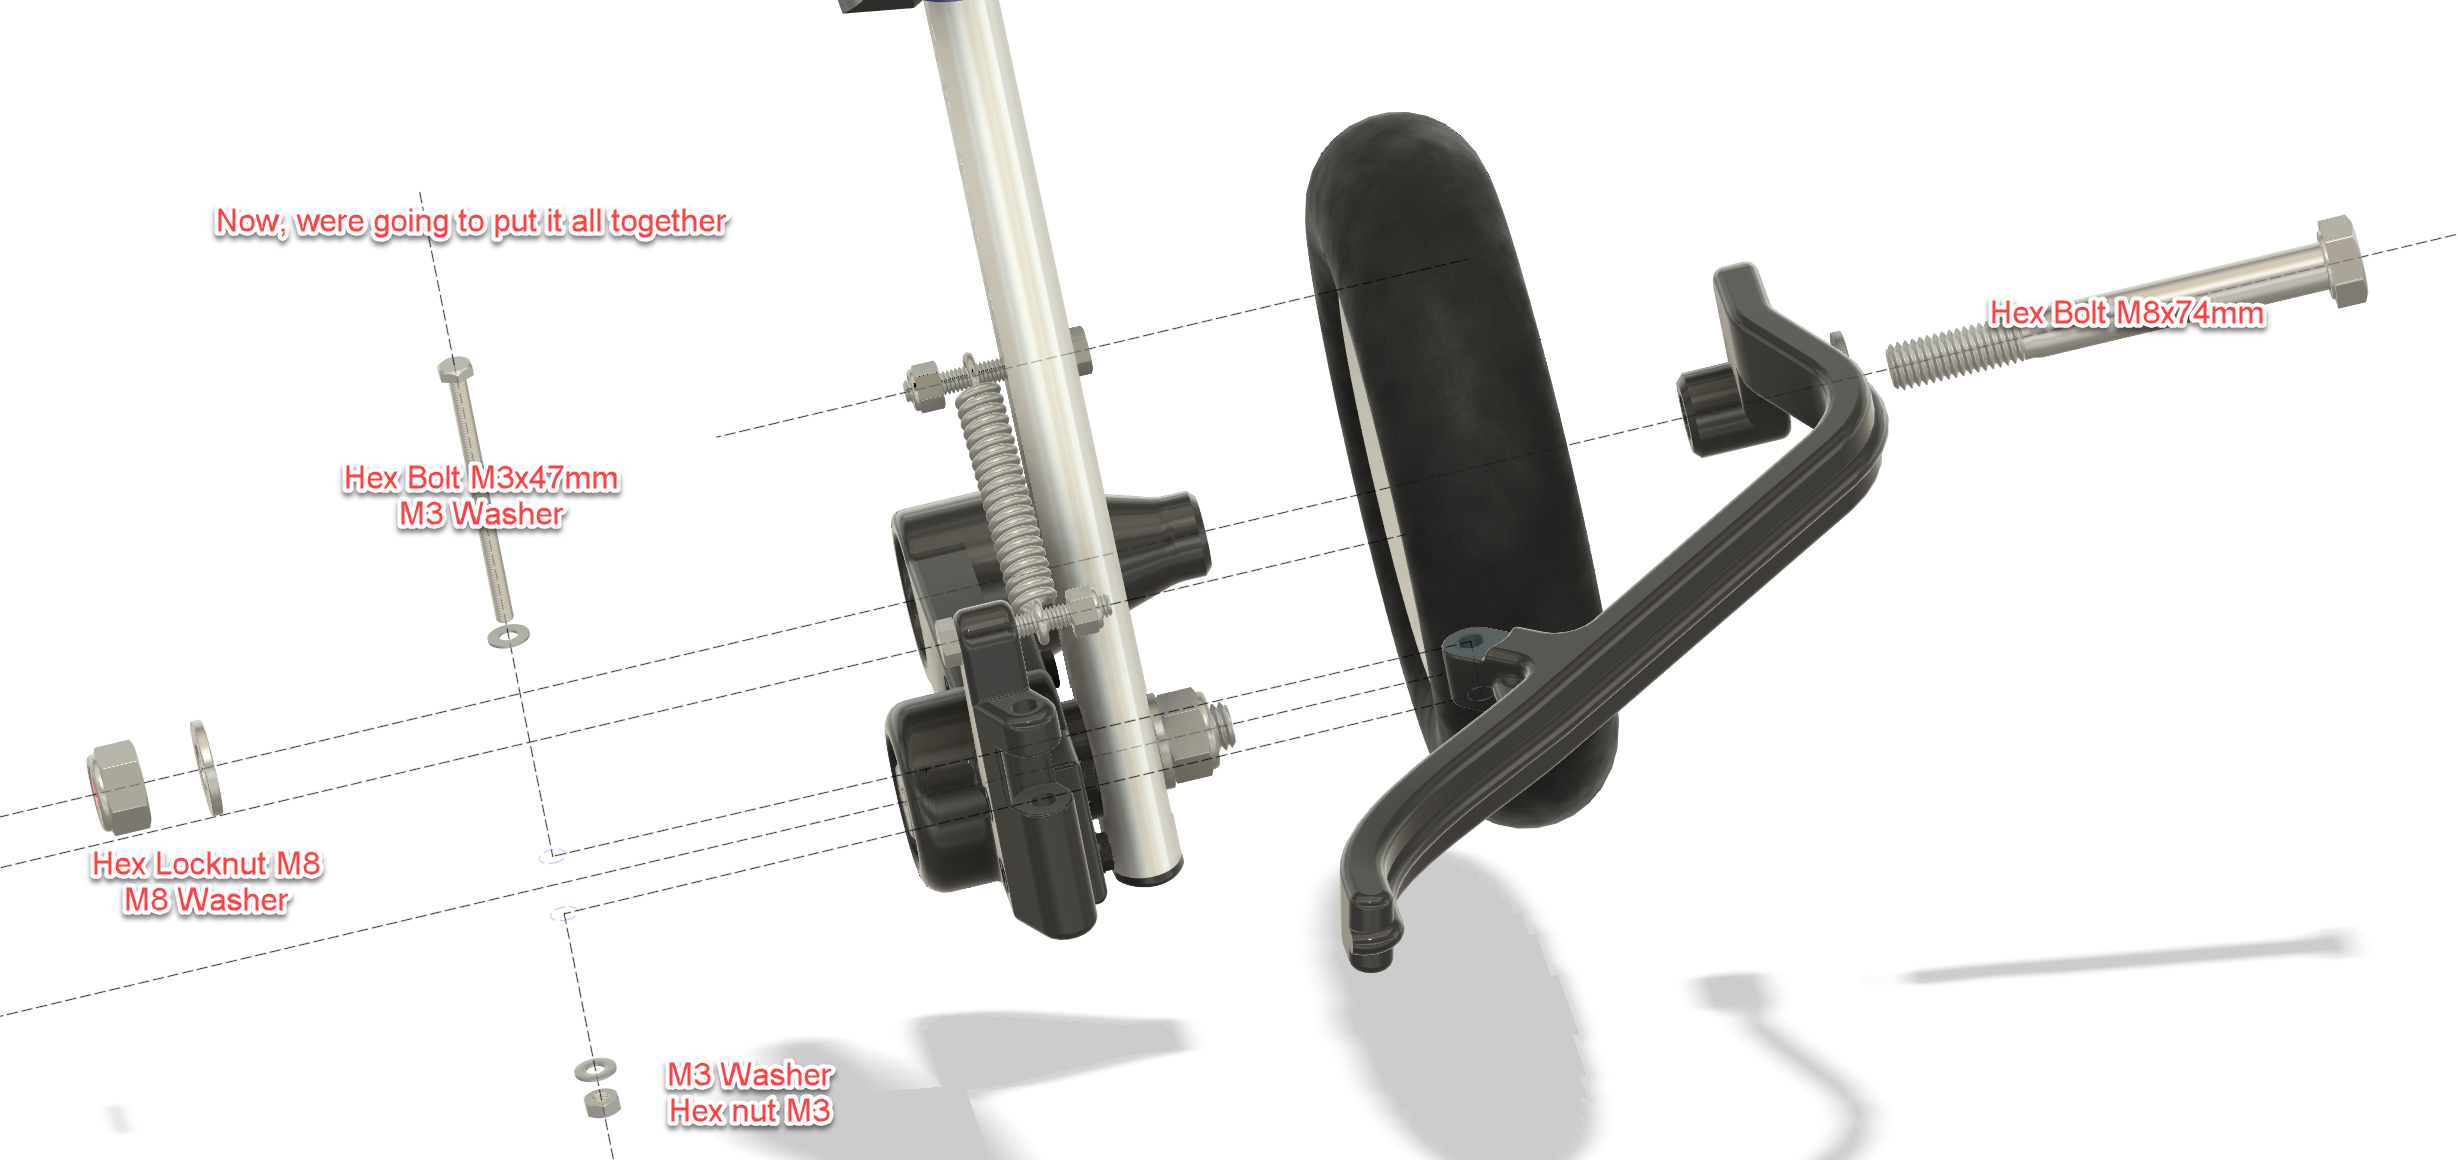
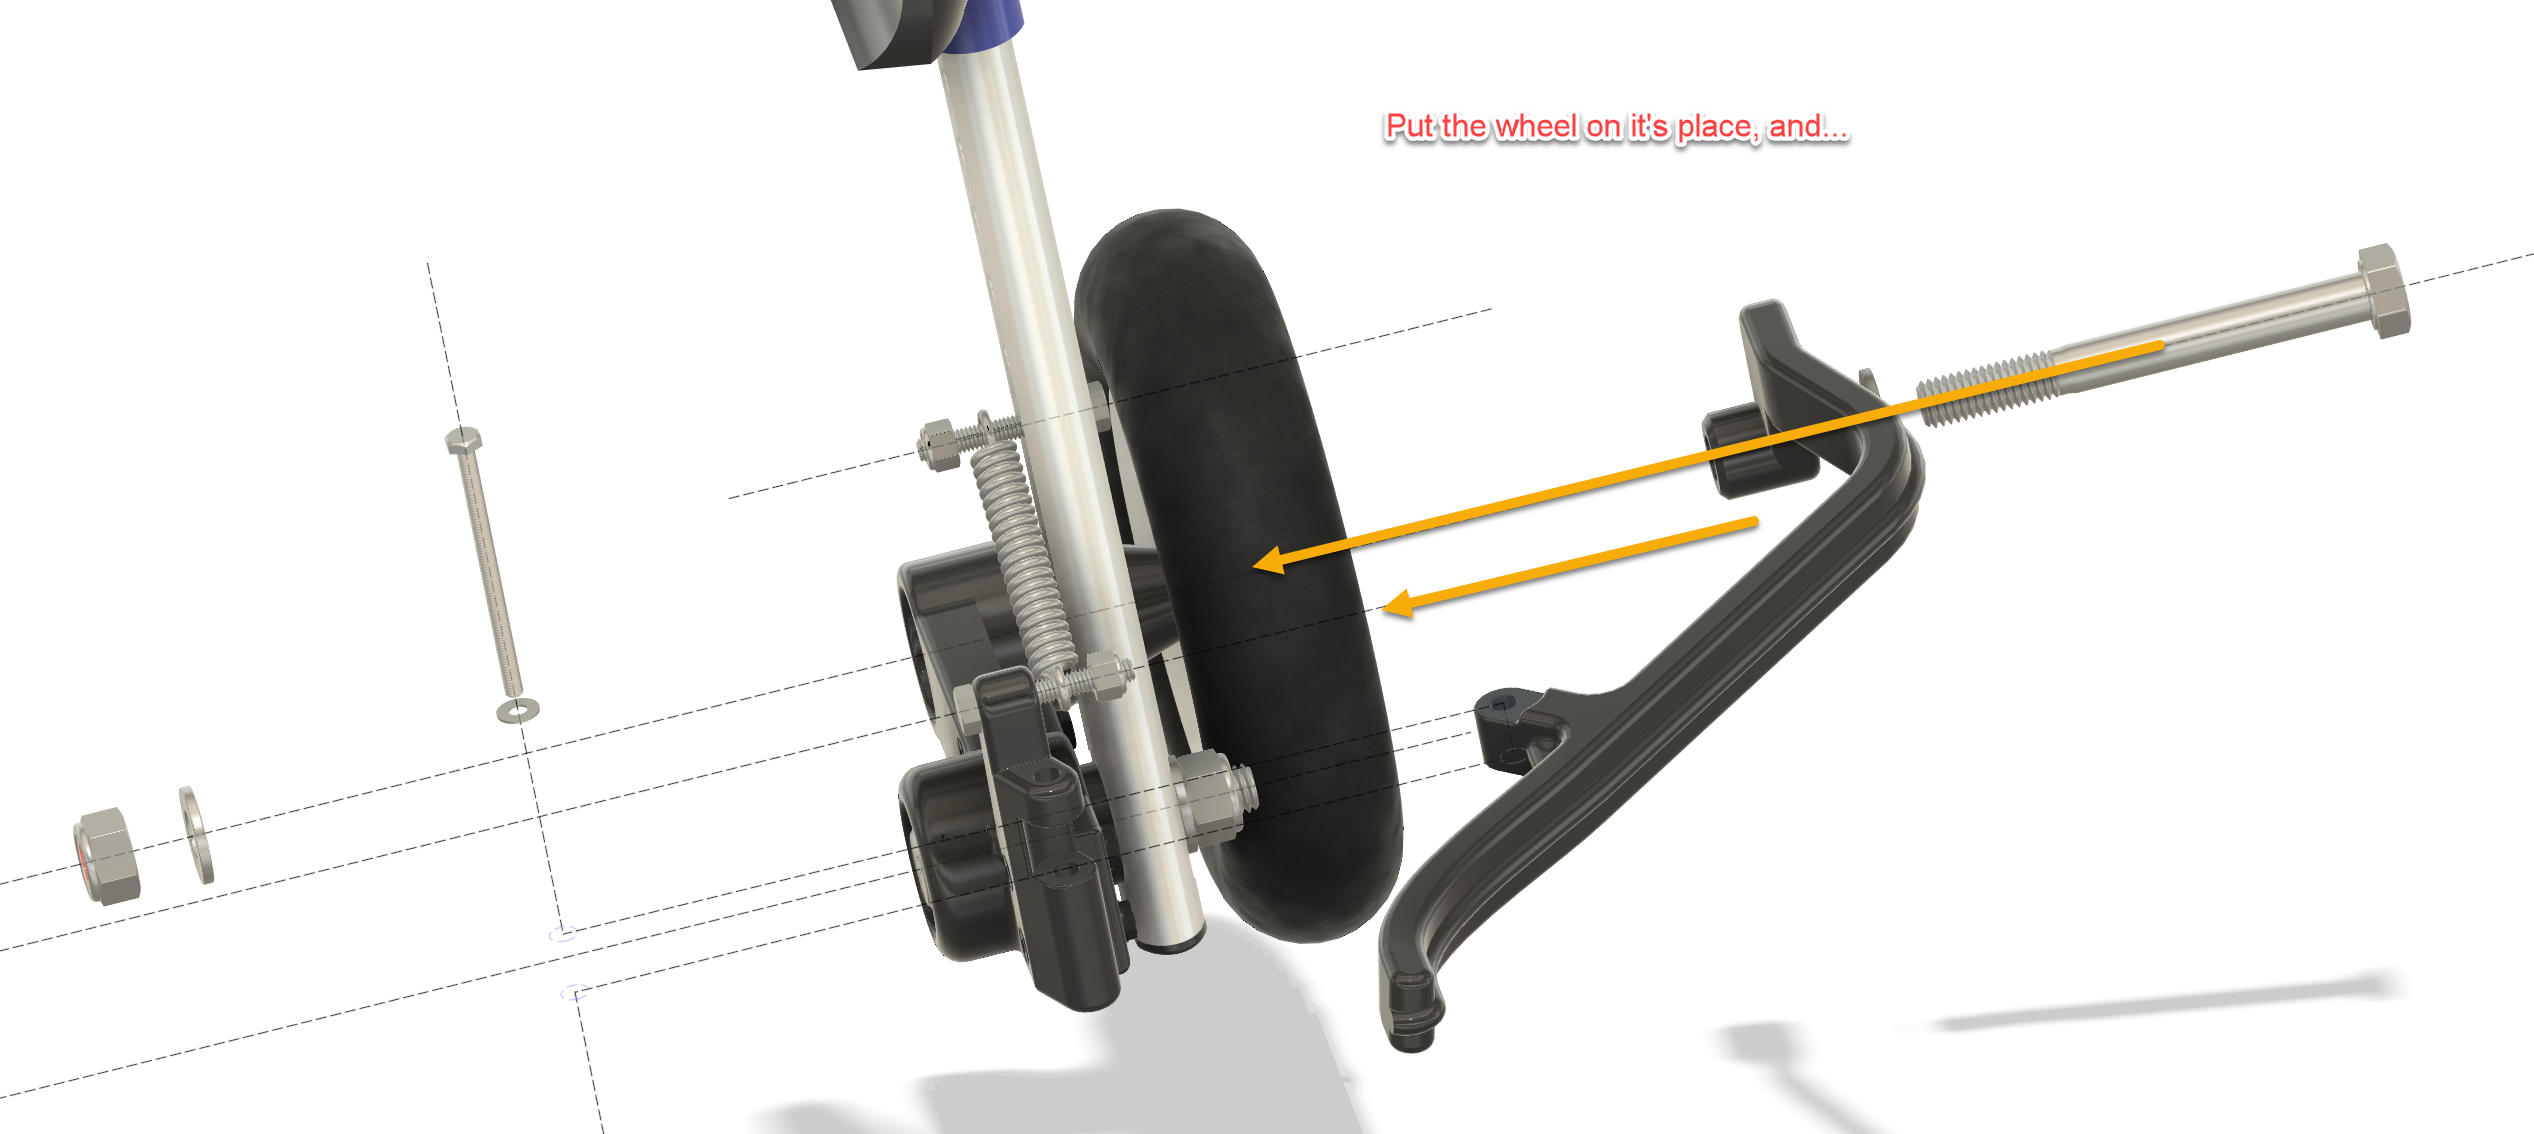
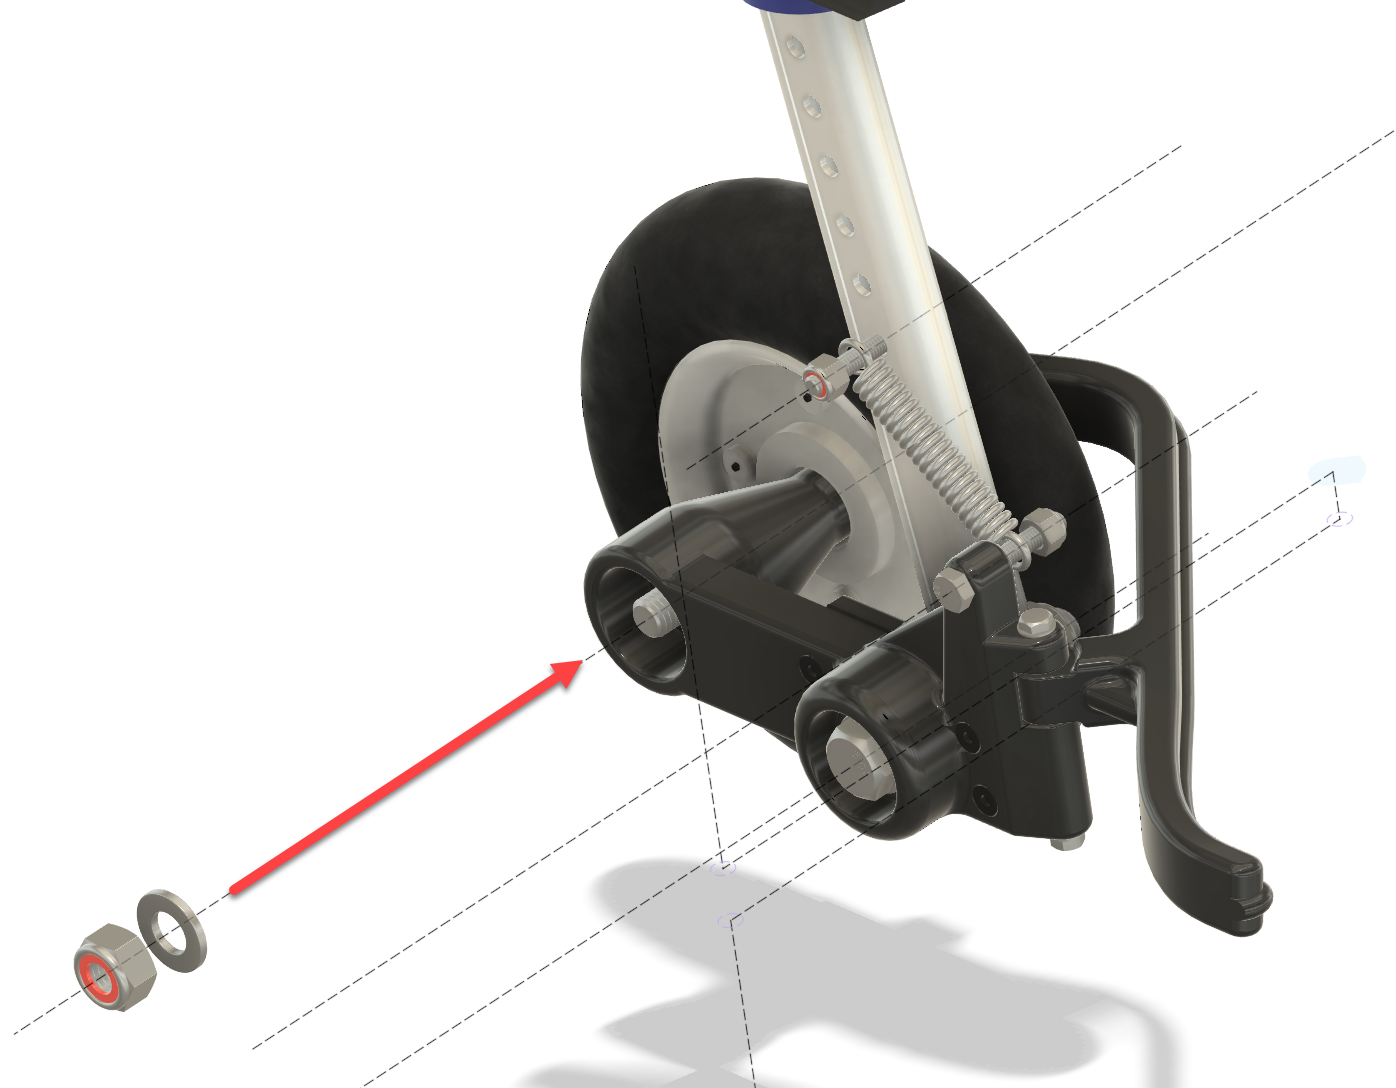
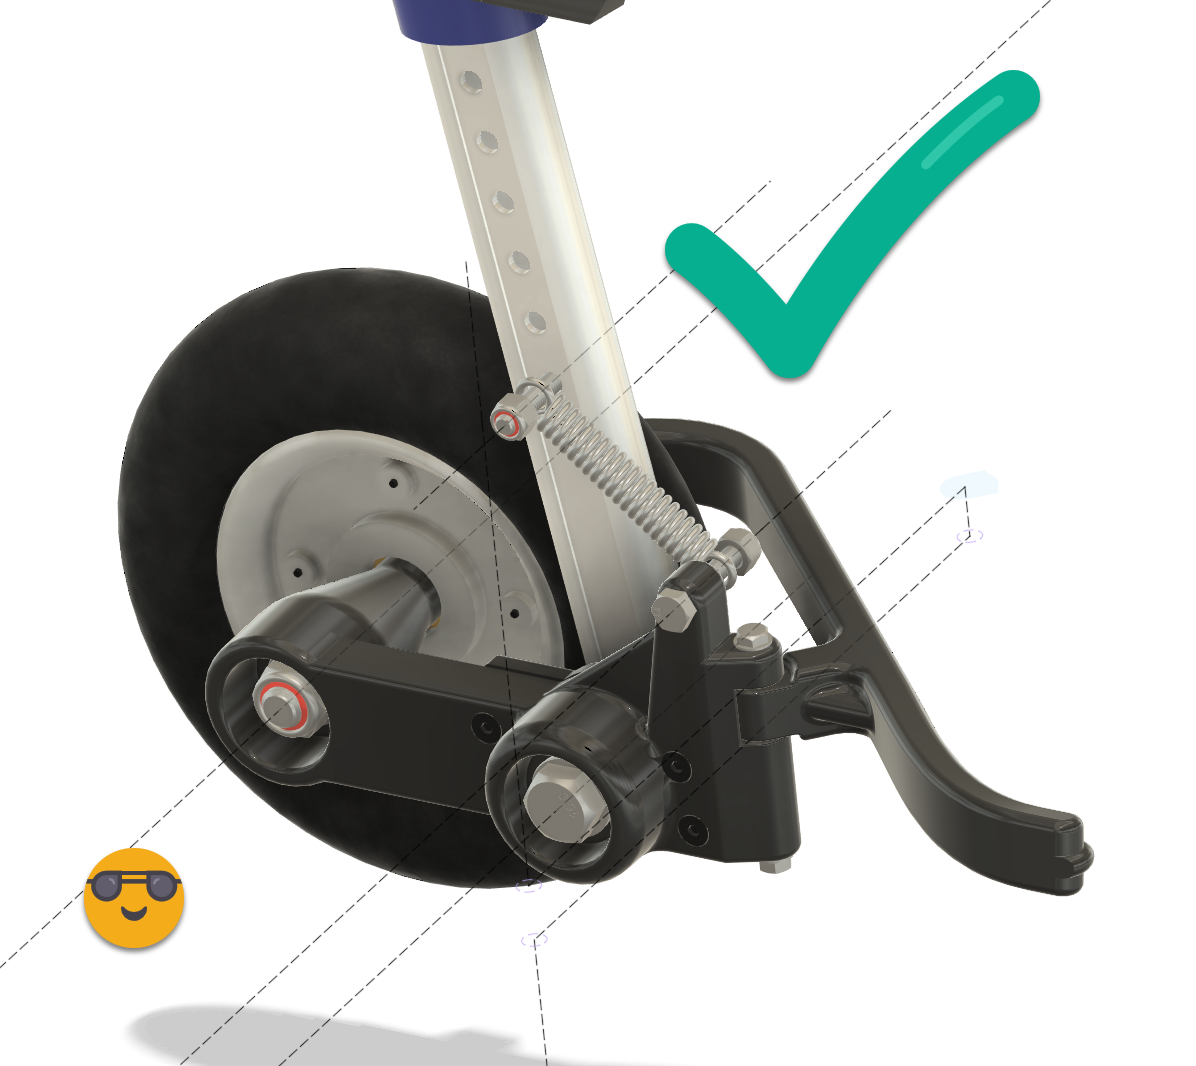
The build covers modification of the wheelchair legs, installation of the ball bearings, assembly of the trailing-arm pivots, spring mounting, wheel modification and final installation of the wheel guards.
Spring strength should be selected according to the dog’s weight. Each side of the suspension should be capable of supporting approximately half of the load carried by the rear of the wheelchair, with enough remaining travel for the suspension to actually do its job.
Once assembled, the trailing arms should rotate freely on their bearings without binding.
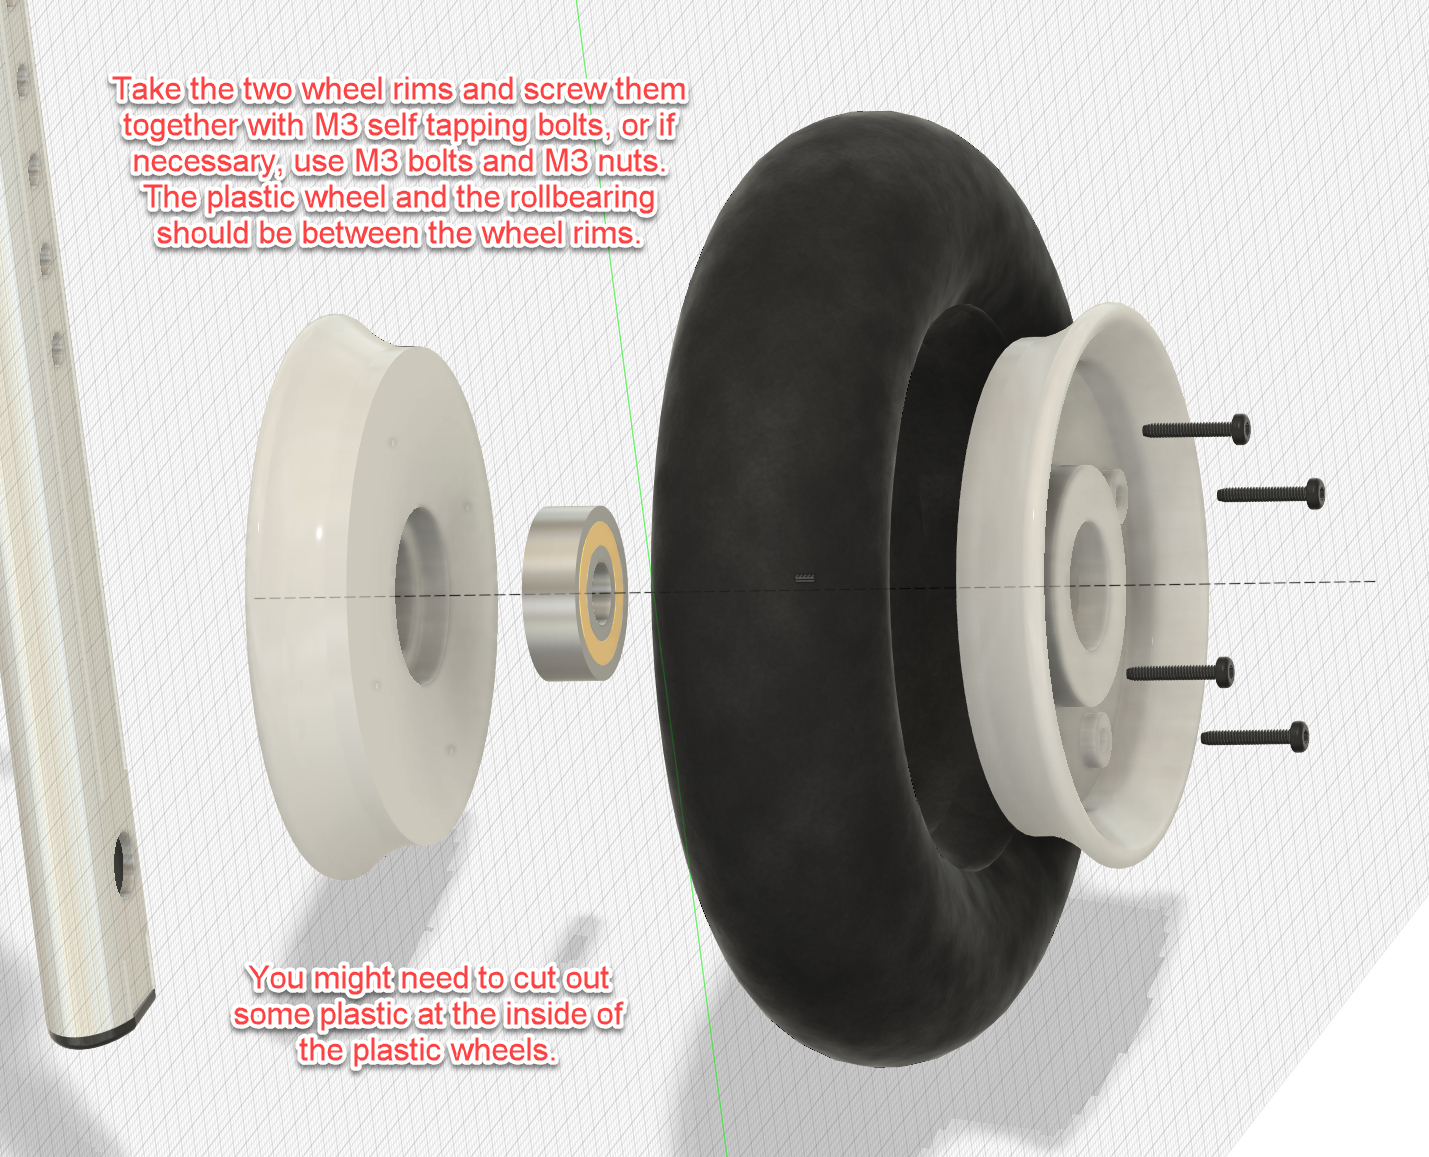
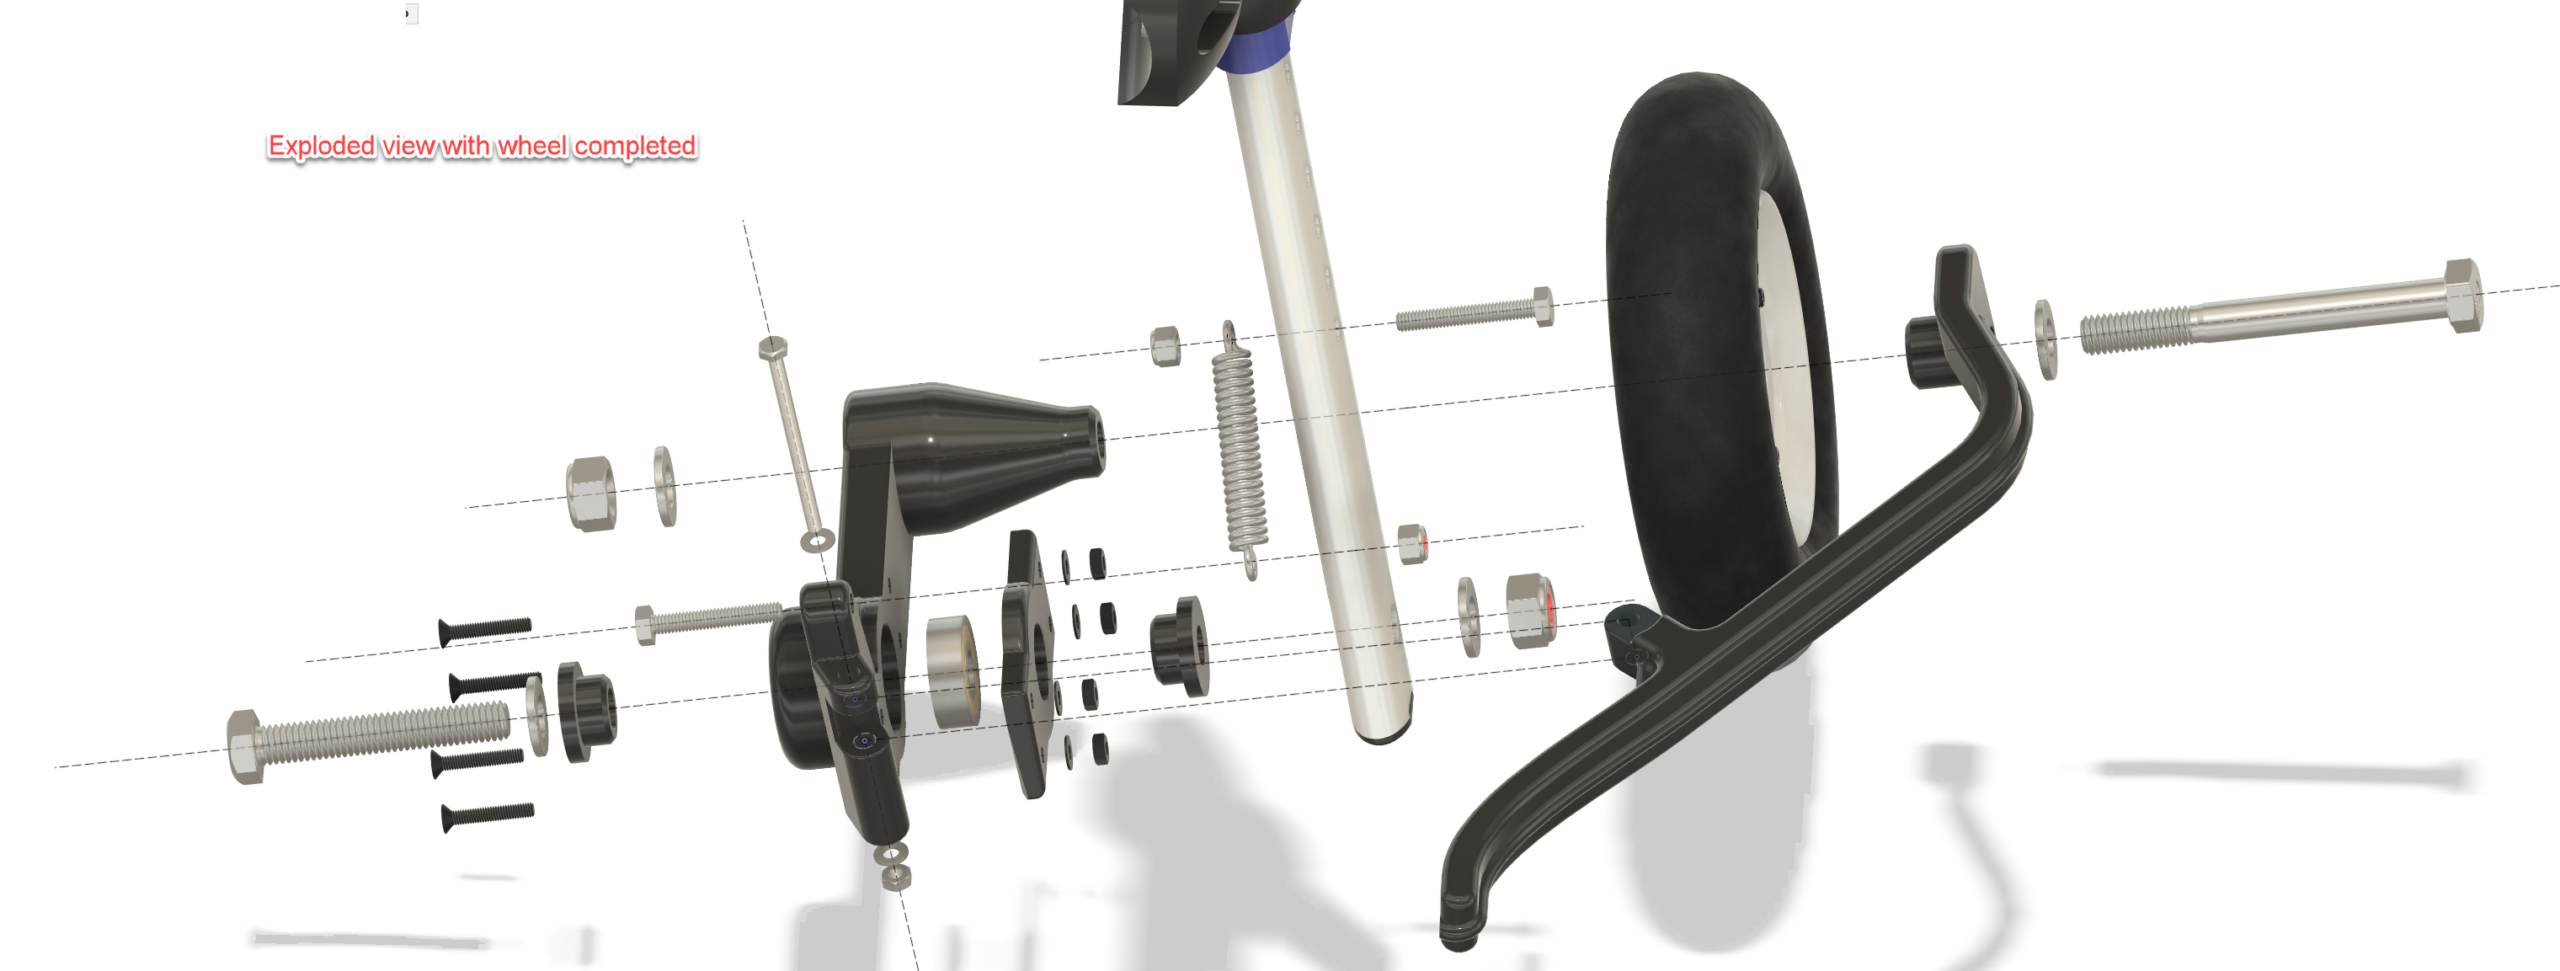
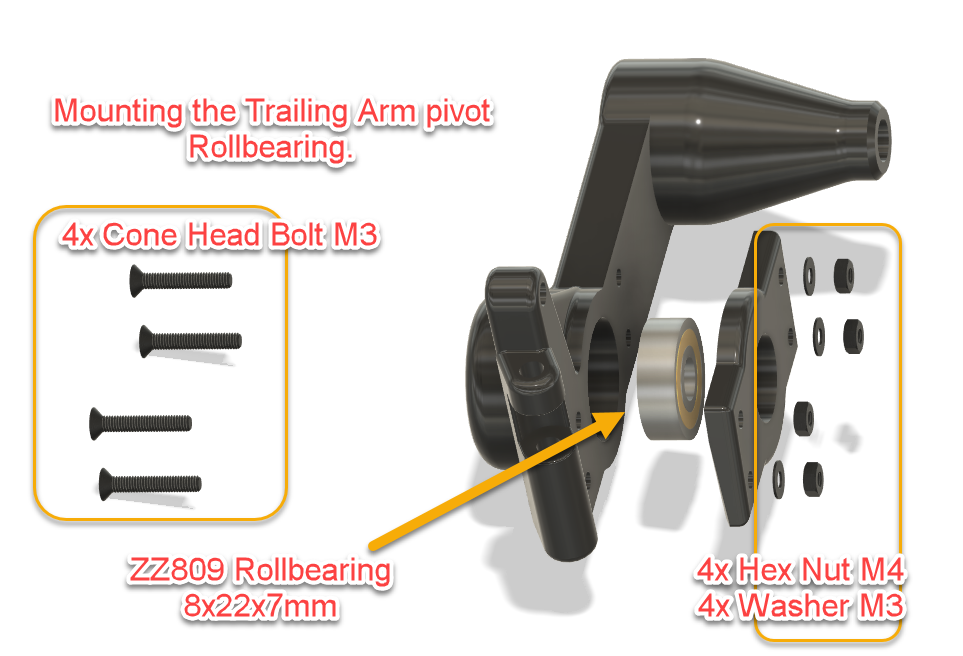
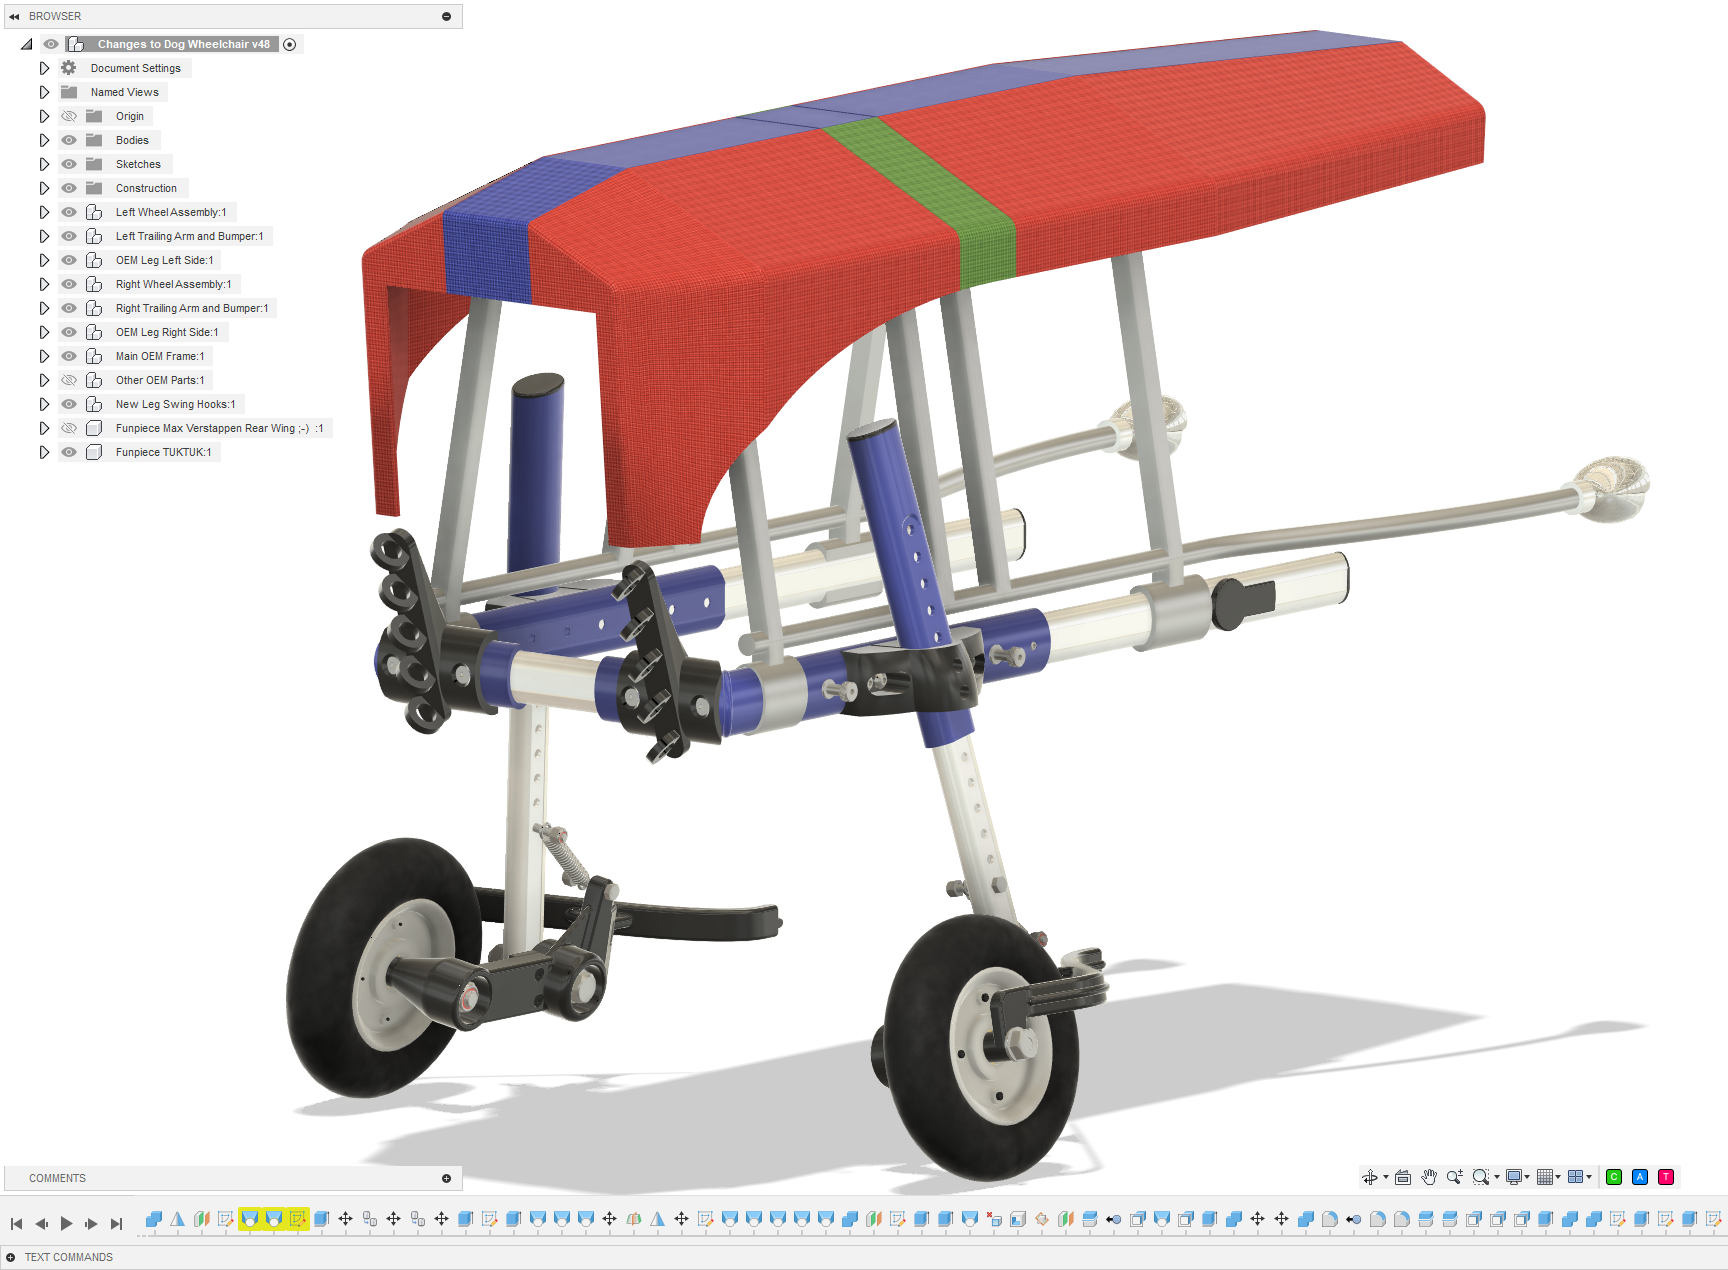
Please follow the assembling instructions in the pictures below.
Dog Wheelchair Mods
Dog Wheelchair Mods
Dog Wheelchair Mods
Dog Wheelchair Mods
Dog Wheelchair Mods
Dog Wheelchair Mods
Dog Wheelchair Mods
Dog Wheelchair Mods
Dog Wheelchair Mods
Dog Wheelchair Mods
Dog Wheelchair Mods
Dog Wheelchair Mods
Dog Wheelchair Mods
Dog Wheelchair Mods
Dog Wheelchair Mods
Dog Wheelchair Mods
Dog Wheelchair Mods
Dog Wheelchair Mods
Dog Wheelchair Mods
Dog Wheelchair Mods
Dog Wheelchair Mods
Dog Wheelchair Mods
Dog Wheelchair Mods
Dog Wheelchair Mods
Dog Wheelchair Mods
Dog Wheelchair Mods
Dog Wheelchair Mods
Dog Wheelchair Mods
Dog Wheelchair Mods
Dog Wheelchair Mods
Dog Wheelchair Mods
Dog Wheelchair Mods
Dog Wheelchair Mods
Dog Wheelchair Mods
Dog Wheelchair Mods
Dog Wheelchair Mods
Dog Wheelchair Mods
Dog Wheelchair Mods
Dog Wheelchair Mods
Dog Wheelchair Mods
Dog Wheelchair Mods
Dog Wheelchair Mods
Dog Wheelchair Mods
Dog Wheelchair Mods
Dog Wheelchair Mods
Dog Wheelchair Mods
Dog Wheelchair Mods
Dog Wheelchair Mods
Dog Wheelchair Mods
Dog Wheelchair Mods
Dog Wheelchair Mods
Dog Wheelchair Mods
1/1
The result
What started as an attempt to make the wheels turn a little easier ended up becoming a fairly substantial redesign of the rear wheel assembly.
Very much a case of:
“I’ll just improve this one small thing…”
Several CAD sessions, bearings, springs, bolts, prototypes and 3D prints later, the wheelchair had independent suspension.
But the important part is much simpler.
For our dachshund, it worked.
The wheels roll more freely, the suspension absorbs small shocks instead of transferring them directly into his back, and the guards prevent the wheels from catching abruptly on obstacles.
That made his walks easier and more comfortable — and gave him more opportunity to get outside and explore again.
And ultimately, that’s what this project was for.
Files included
The downloadable project contains the 3D-printable parts, a Bill of Materials for the required bearings, springs and fasteners, and illustrated assembly instructions showing the modifications and assembly sequence.
Feel free to adapt the design to your own situation. A button for downloading the original CAD file is added above. Dog wheelchairs, dogs and injuries differ, so consider this a starting point rather than a universal medical solution. Check the fit carefully, make sure nothing restricts or rubs against the dog, and adjust the suspension conservatively.
If you build one, I’d genuinely love to hear how it worked out.
Happy making — and, more importantly, happy walking.
Ready for some fun?
Does your dog hate rain?
→ The Dog TukTuk
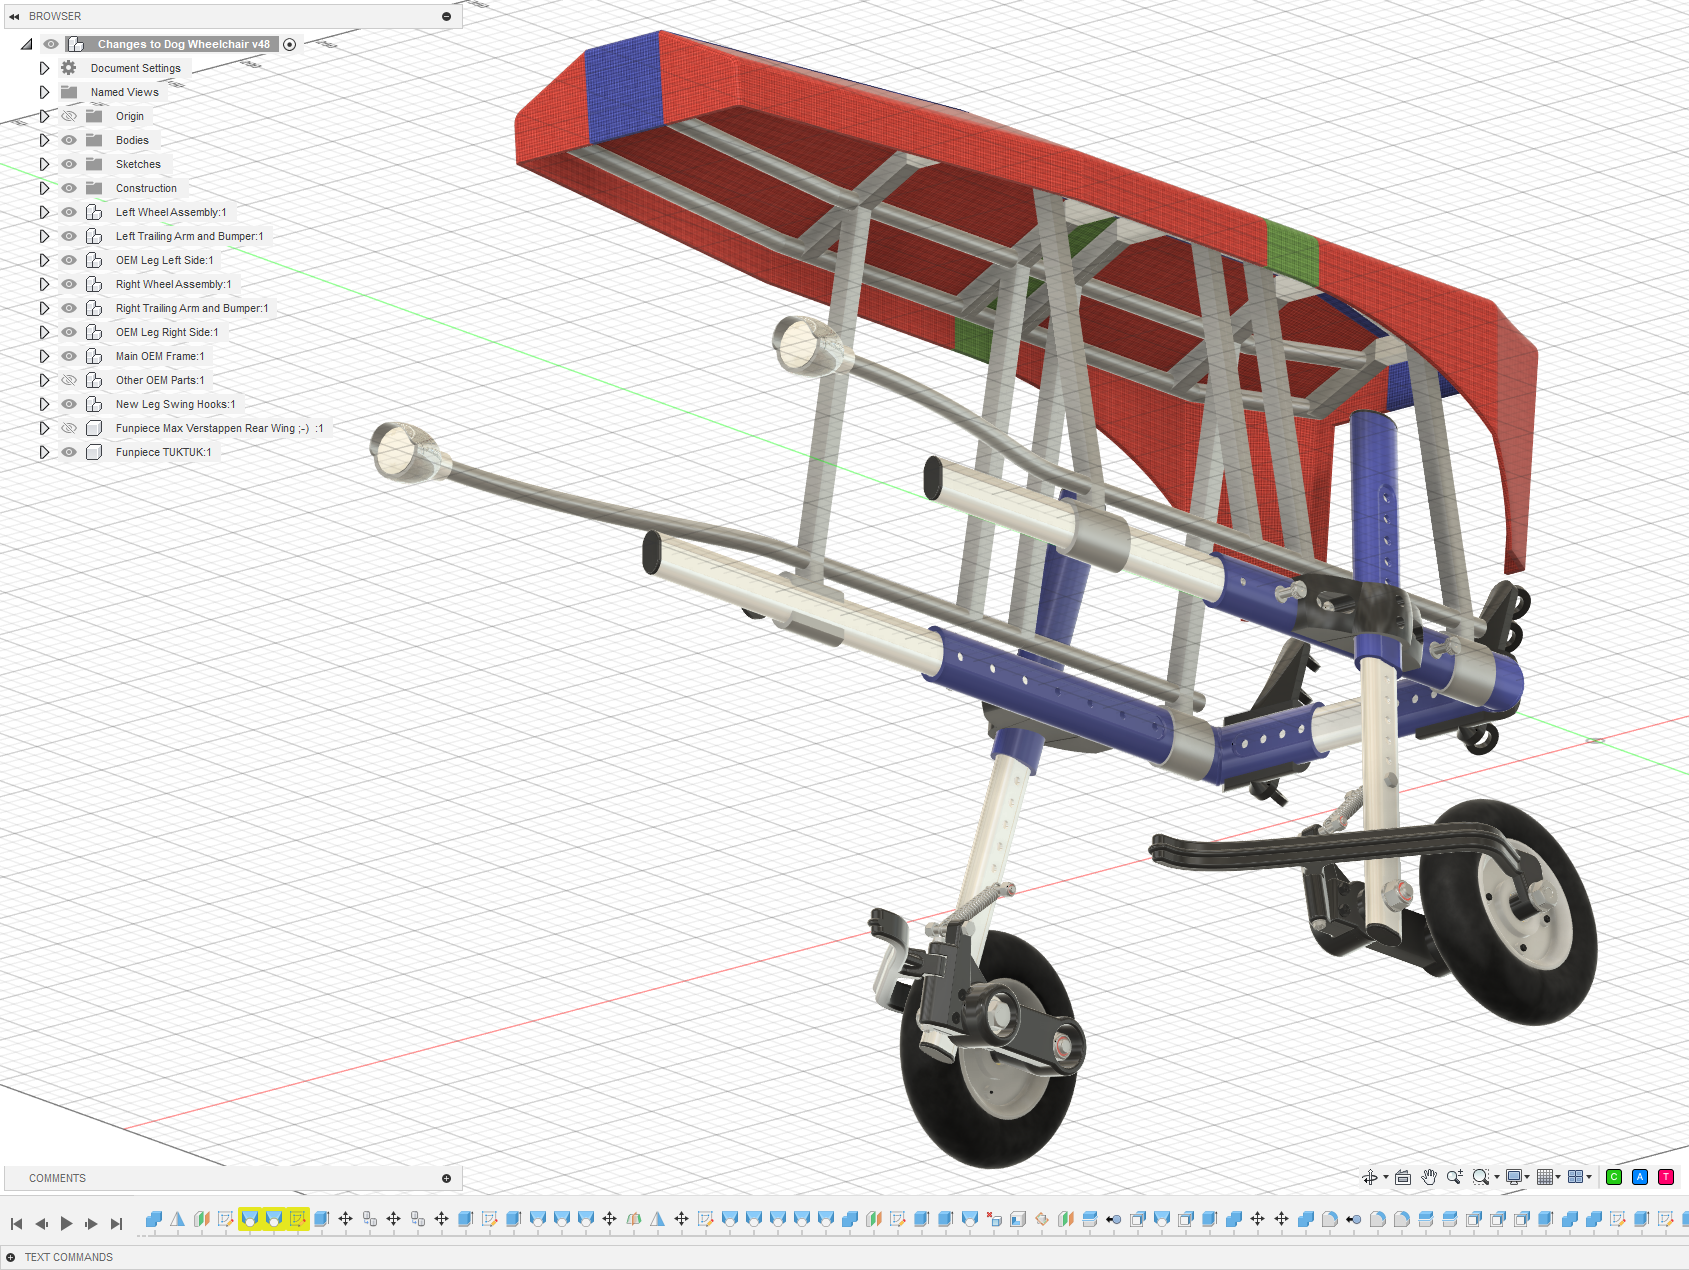
Why let a little rain ruin a perfectly good walk? Add a roof, a bit of aerodynamic styling and suddenly your dog has its own all-weather transport. The Dog TukTuk keeps the worst of the weather out while maintaining that essential “my human may have taken this project slightly too far” look.
Is your dog extremely fast and in need of more downforce through the corners?
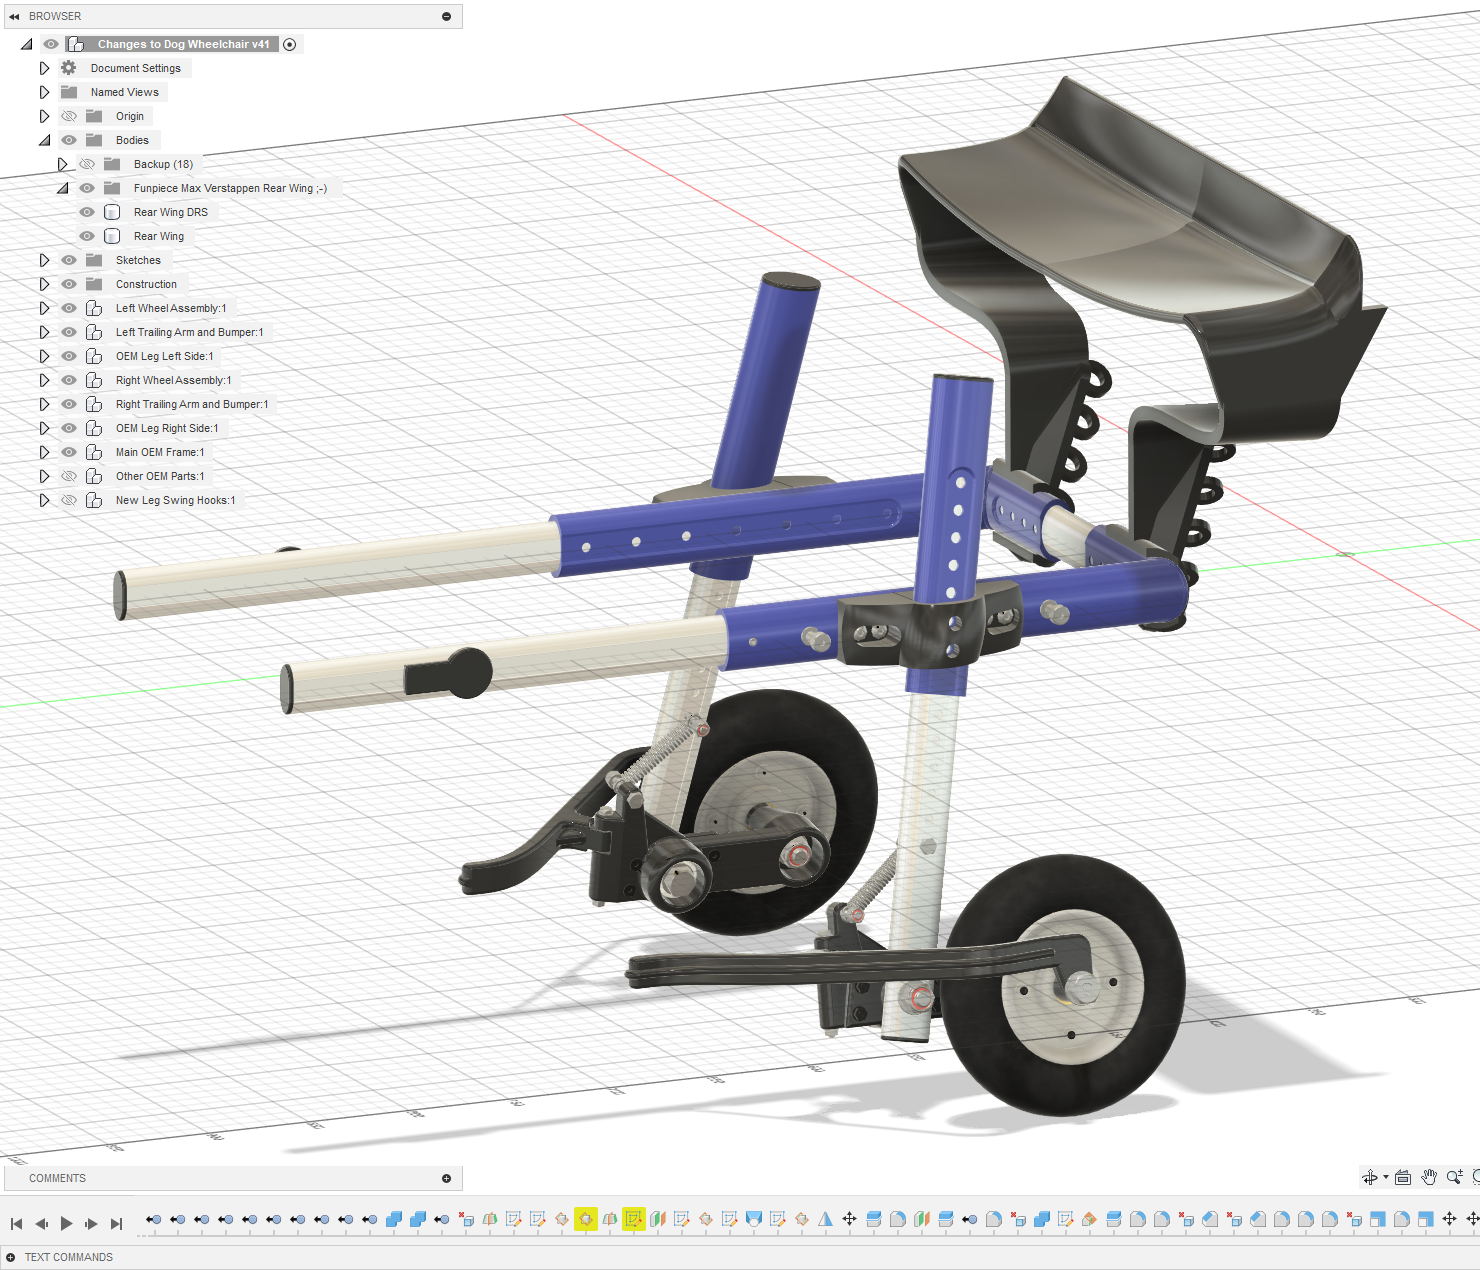
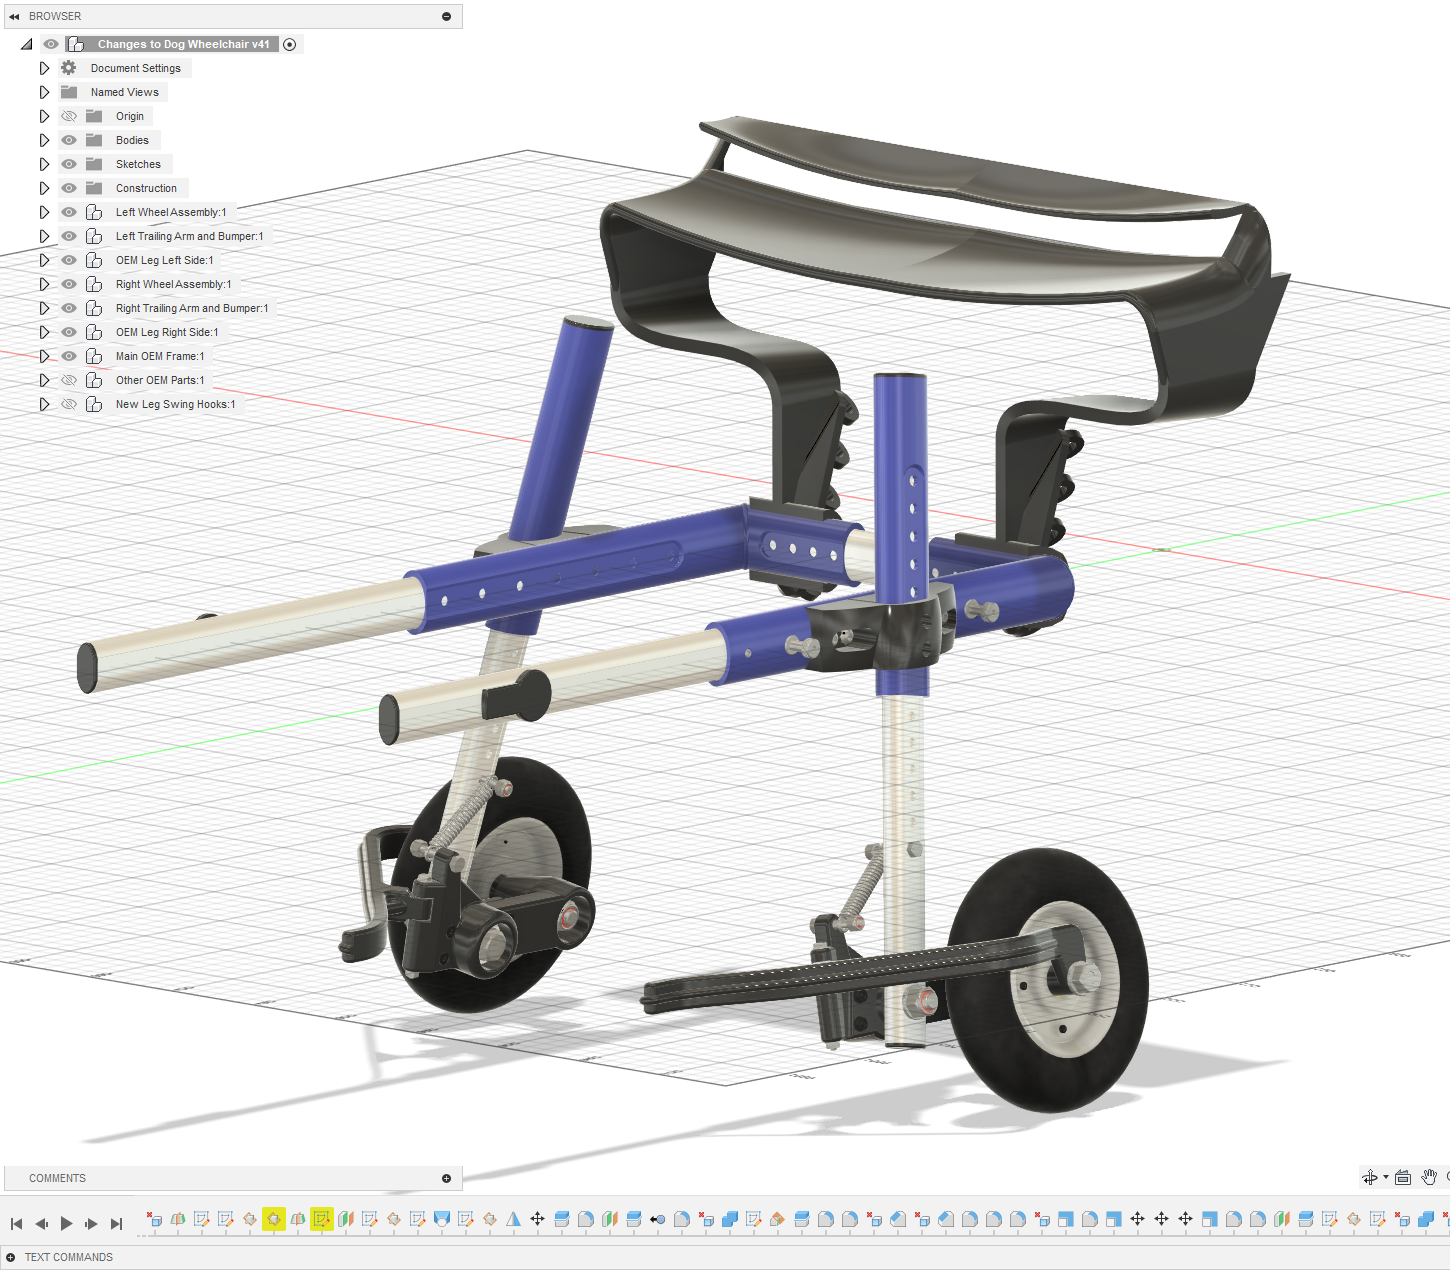
→ The Max Verstappen-worthy Rear Wing
When your dachshund starts suffering from high-speed oversteer, there is really only one sensible solution: more downforce.
F1 Rear Wing
F1 Rear Wing
F1 Rear Wing
Inspired by Formula 1, this completely unnecessary rear wing adds serious racing credentials to the wheelchair. And because ordinary downforce clearly wasn’t enough, there is even a DRS version for those crucial overtaking manoeuvres on the way to the food bowl.
Wind-tunnel tested? No.
FIA approved? Definitely not.
Does it make the wheelchair faster? Jerry thinks so.
Building a Motorized Dobsonian Telescope Mount in My Living Room
I’ve built and modified things for as long as I can remember.
Most of my earlier projects revolved around home improvement rather than hobby projects. I always repaired our household appliances myself, something I learned from my father, who was both highly technical and incredibly handy. In my younger years I also maintained my own motorcycle. Every winter it came apart completely and went back together piece by piece.
My educational background reflects that fascination with technology. I started with vocational school (LTS) and technical college (MTS), both focused on electrical engineering, with additional training in machining and mechanical design. Later I graduated in electronics engineering (HTS), and many years afterward I added an MBA. Technology and making things have always been part of who I am.
Long before the existence of my current 9 m² workshop – the 9m² Creatory – all of my projects were built in whatever space I had available. Which, in this case, was our living room.
And that is where this story begins.
The old Bynolyt
For many years I owned a Bynolyt Bynostar 4595 Newtonian telescope. A modest instrument by modern standards, but one that had accompanied me for nearly thirty years.
Specifications:
Aperture: 114 mm
Focal length: 900 mm
Focal ratio: f/7.9
2× Barlow lens
H-20 mm and H-6 mm eyepieces
At some point I became fascinated by astrophotography and wanted to automate the tracking of celestial objects. A traditional Dobsonian mount is manually operated, but I wondered whether I could build a fully motorized version myself.
Naturally, the answer was “why not?”
Starting with Wood
Like many Dobsonian builders, I started with wood.
The first design was created entirely in 2D using an ancient CorelDRAW X7 version. Fusion 360 and things like parametric design would only enter my life a few years later. The mount itself was built from waterproof MDF, which was later treated even further against moisture.
Front View
Side View
Ground Board Detail
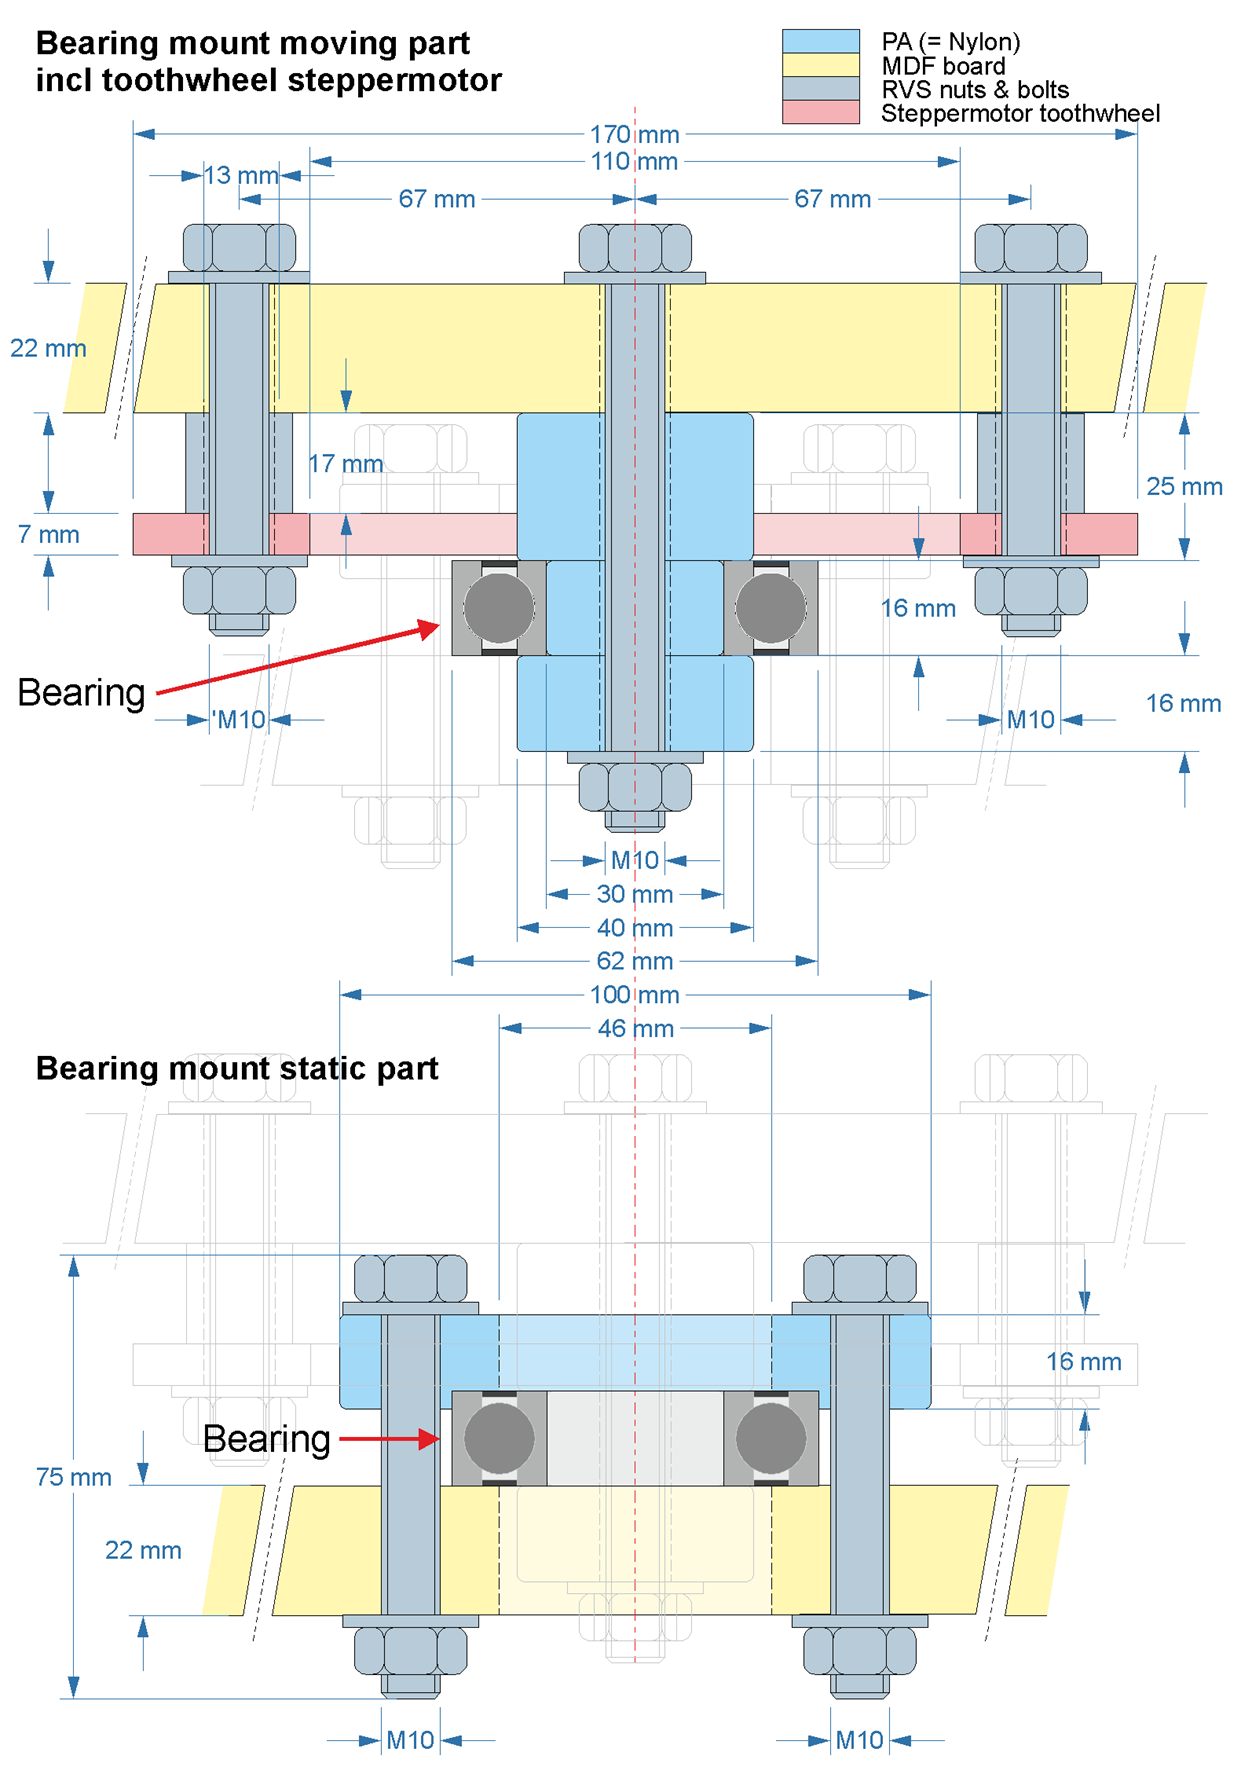
Altitude Bearing Detail
The design was fairly conventional, using a rotating ground board for azimuth movement and a horizontal altitude axis supported by side bearings.
The First Working Mount
Eventually the design became reality.
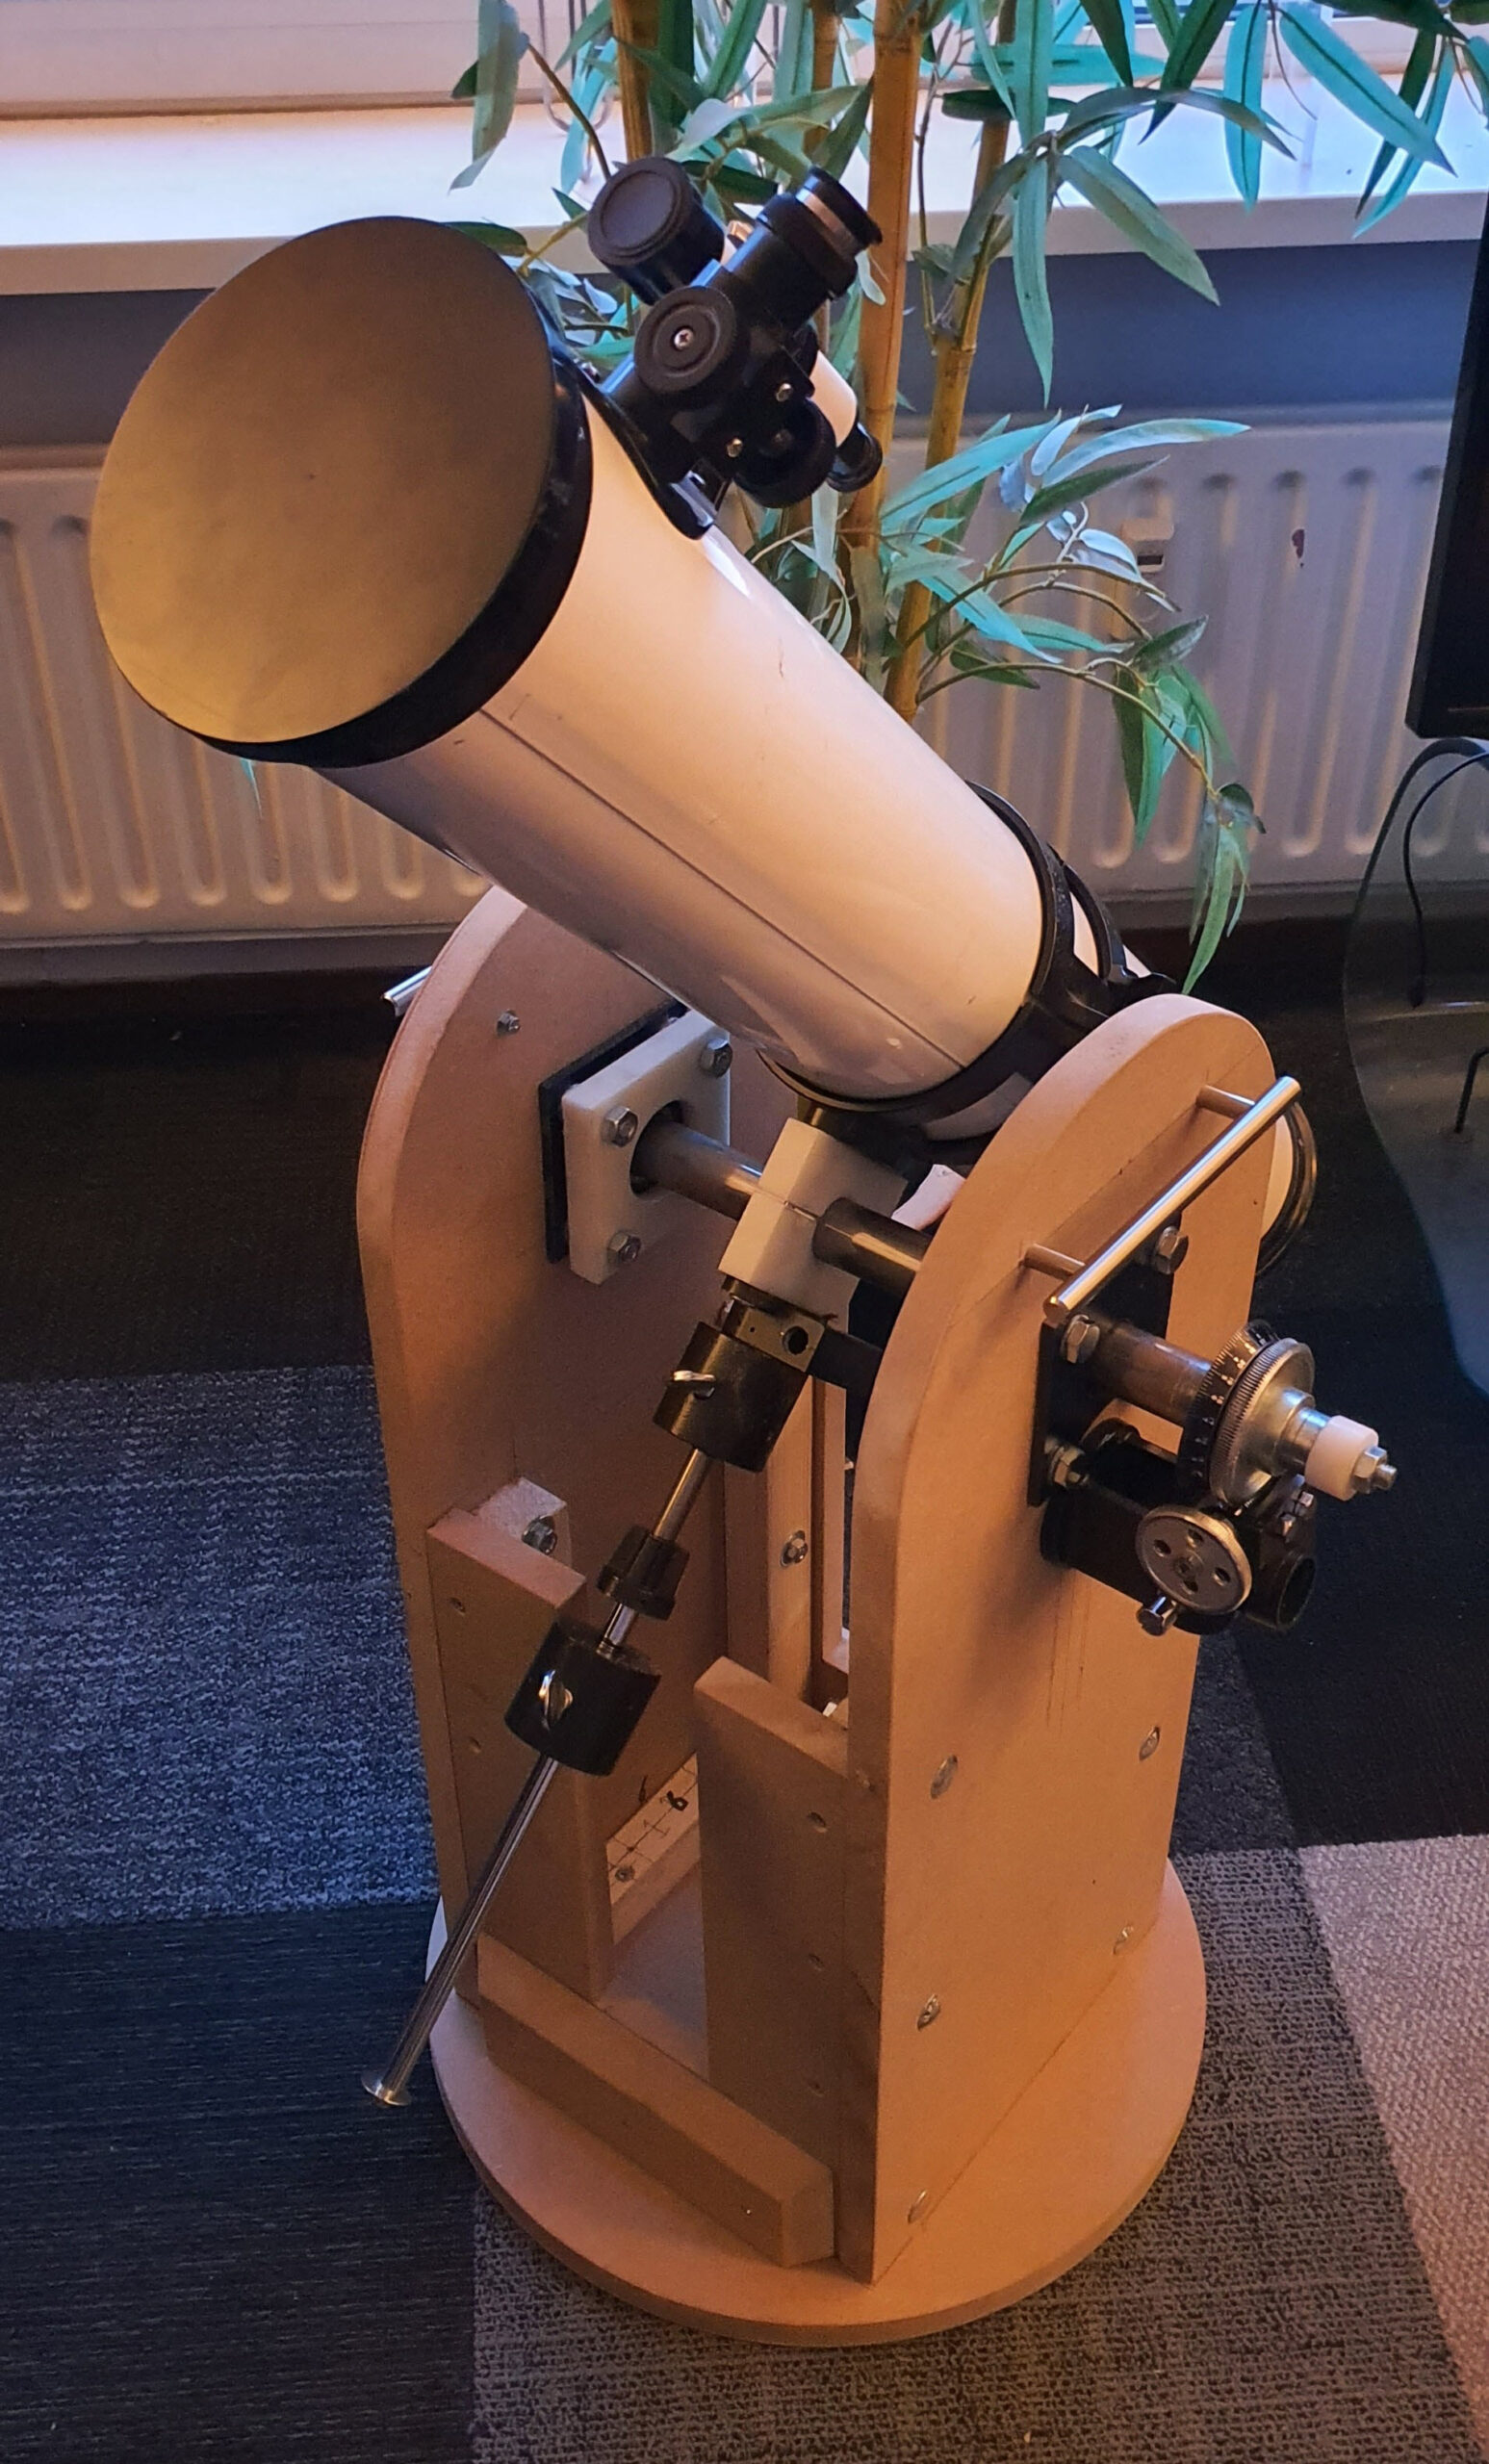
Wooden Dobsonian Mount
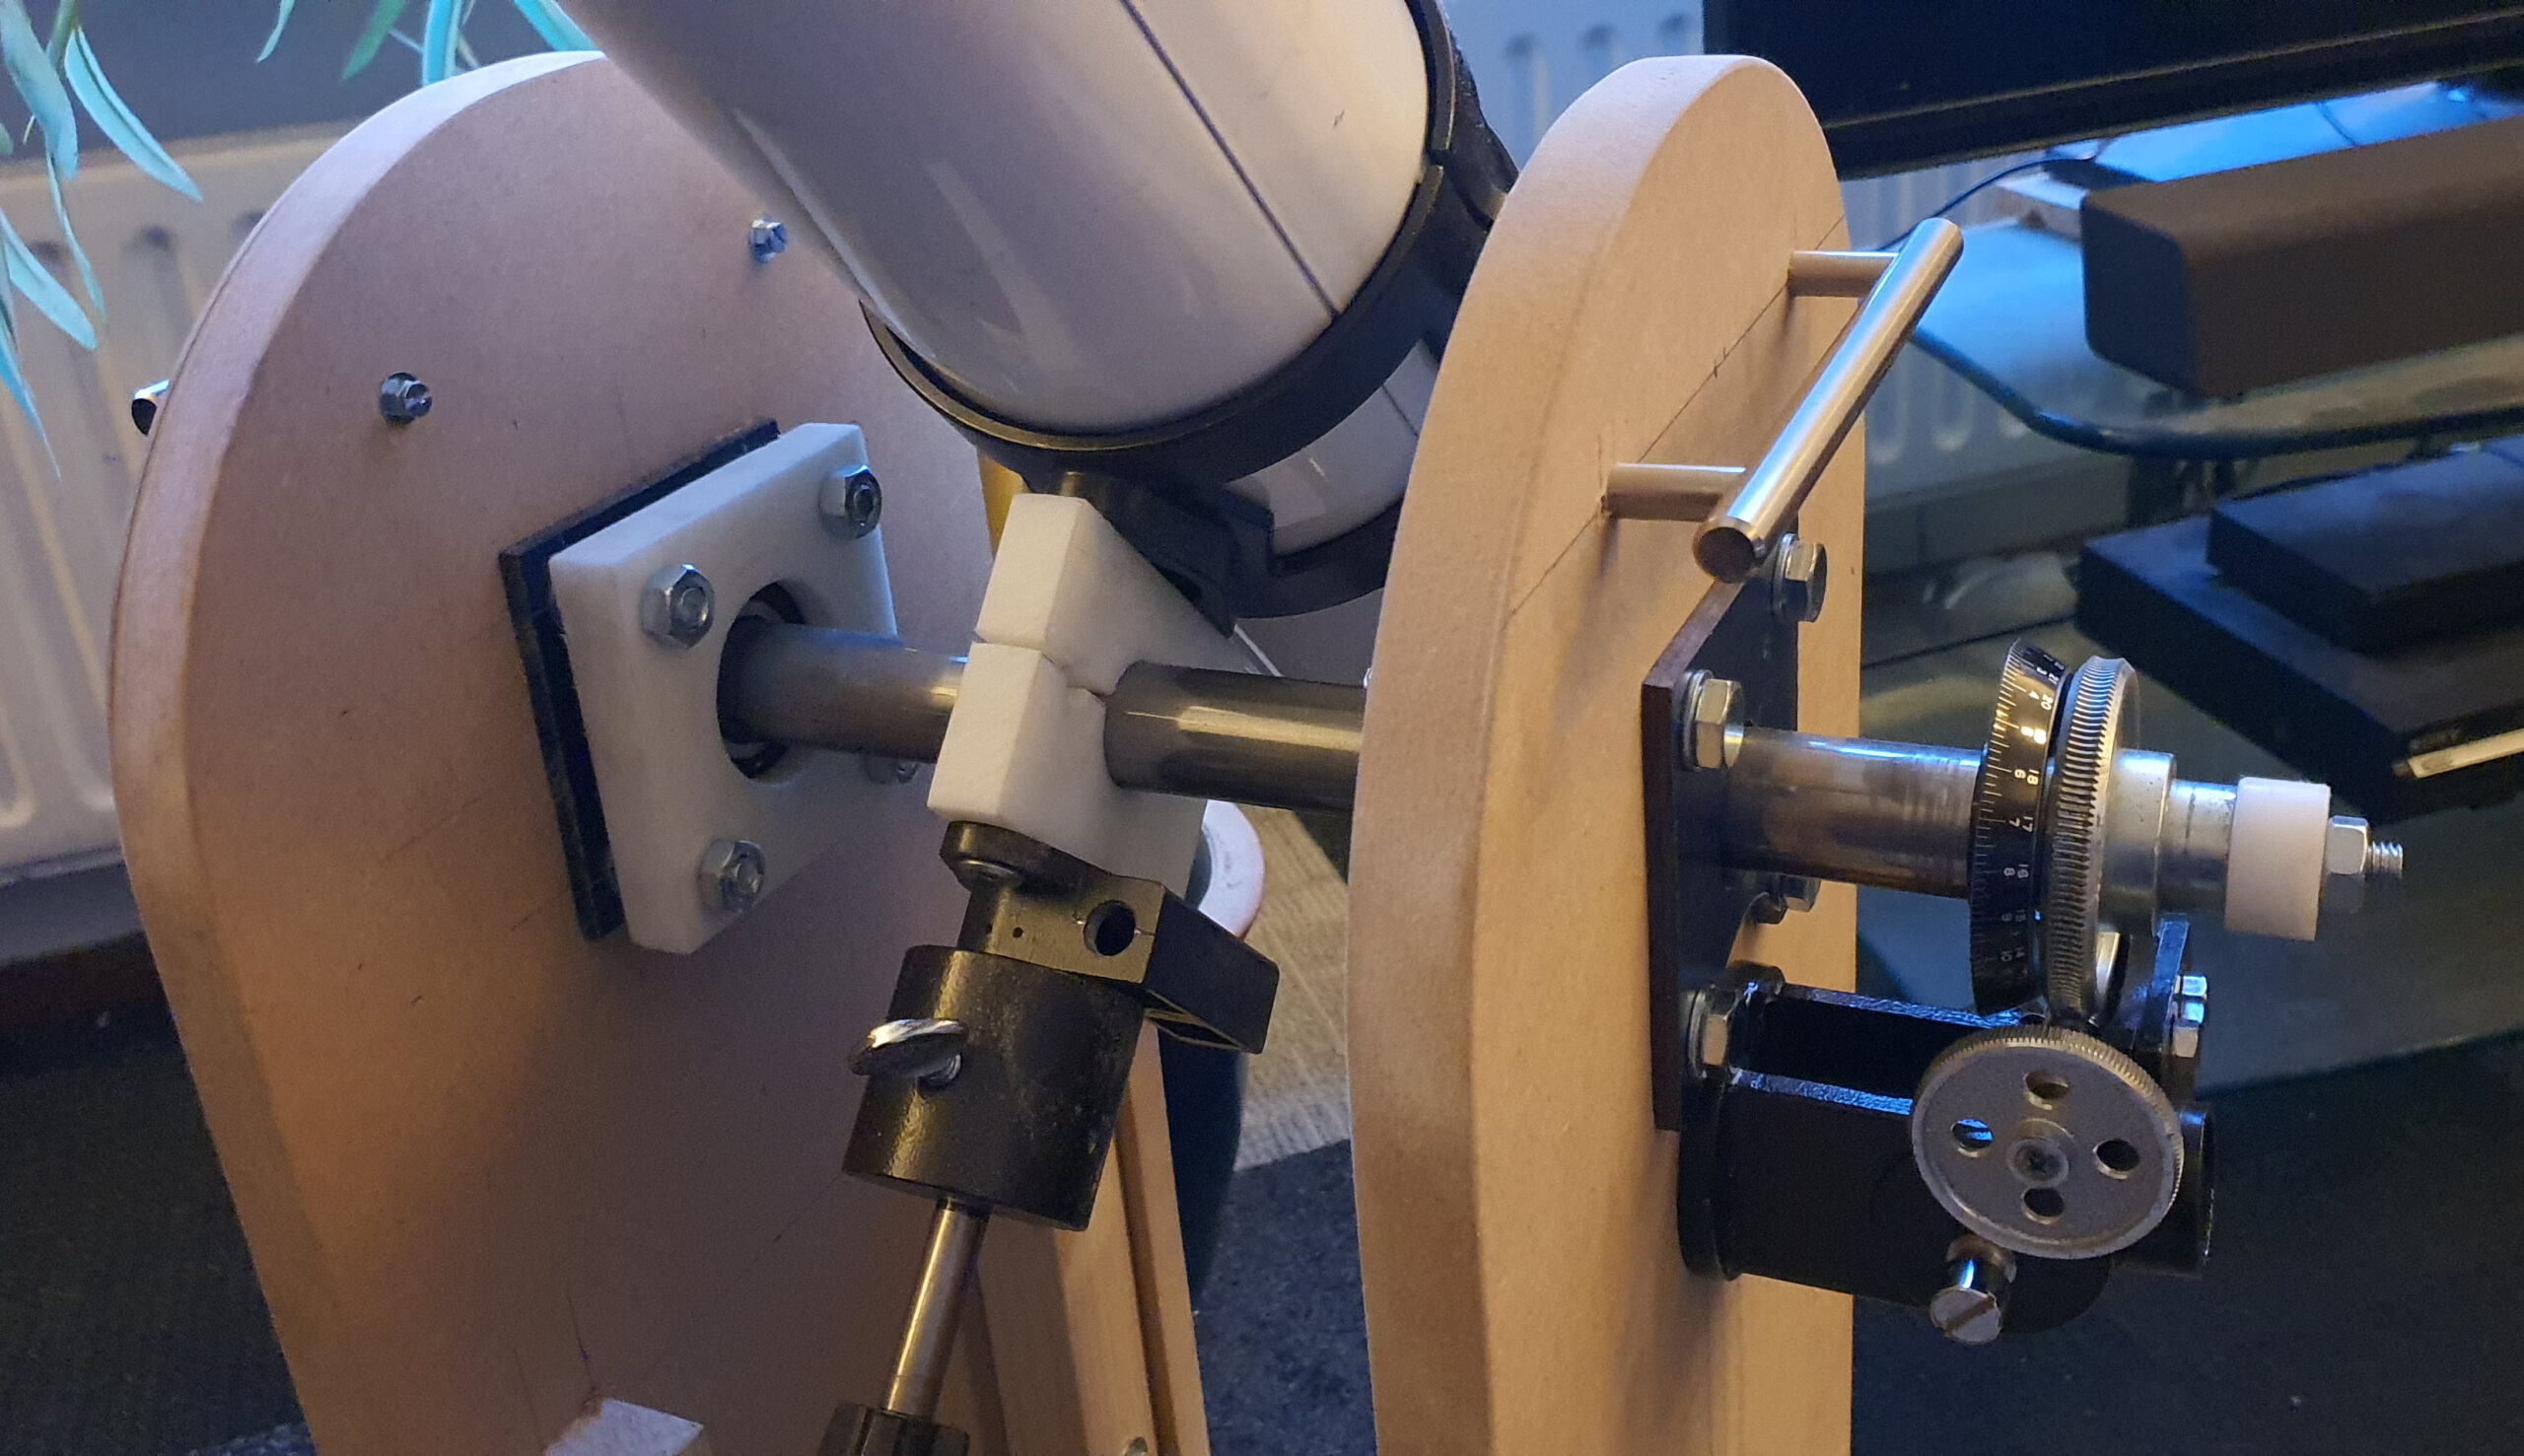
Wooden Dobsonian Mount – Detail
The telescope itself was suspended between two side panels, and the altitude axis was driven through a worm gear arrangement. It worked surprisingly well and, looking back, the wooden construction had one major advantage:
It was light. An advantage I would only fully appreciate later.
Inspiration from the Internet
While searching for ideas, I came across an inspiring project by another enthusiast who had built a Raspberry Pi powered tracking mount.
That project convinced me that I could push my own design much further. And… Inspired by that work, I decided to redesign the entire mount from scratch.
This time in aluminium. After all, aluminium had to be better… right?
Enter Aluminium
The new mount became far more ambitious.
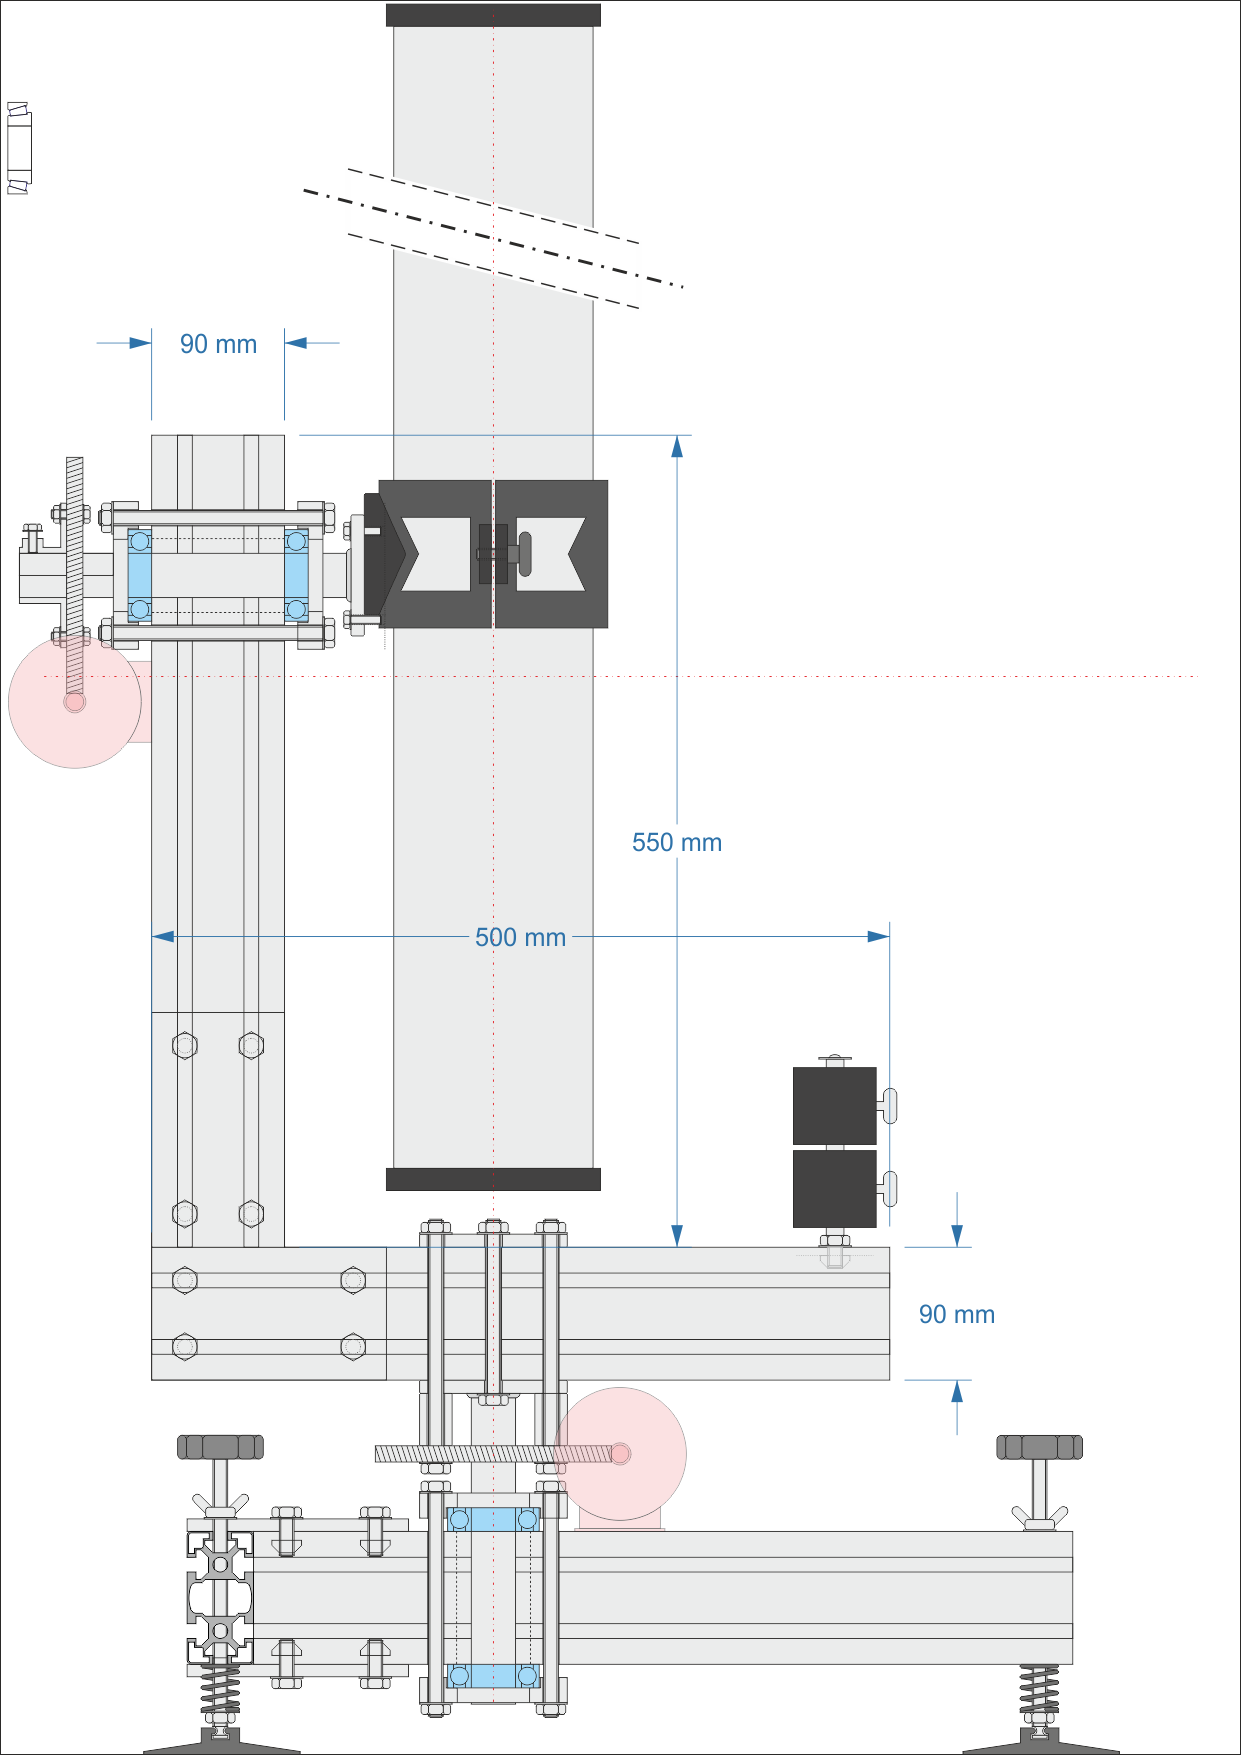
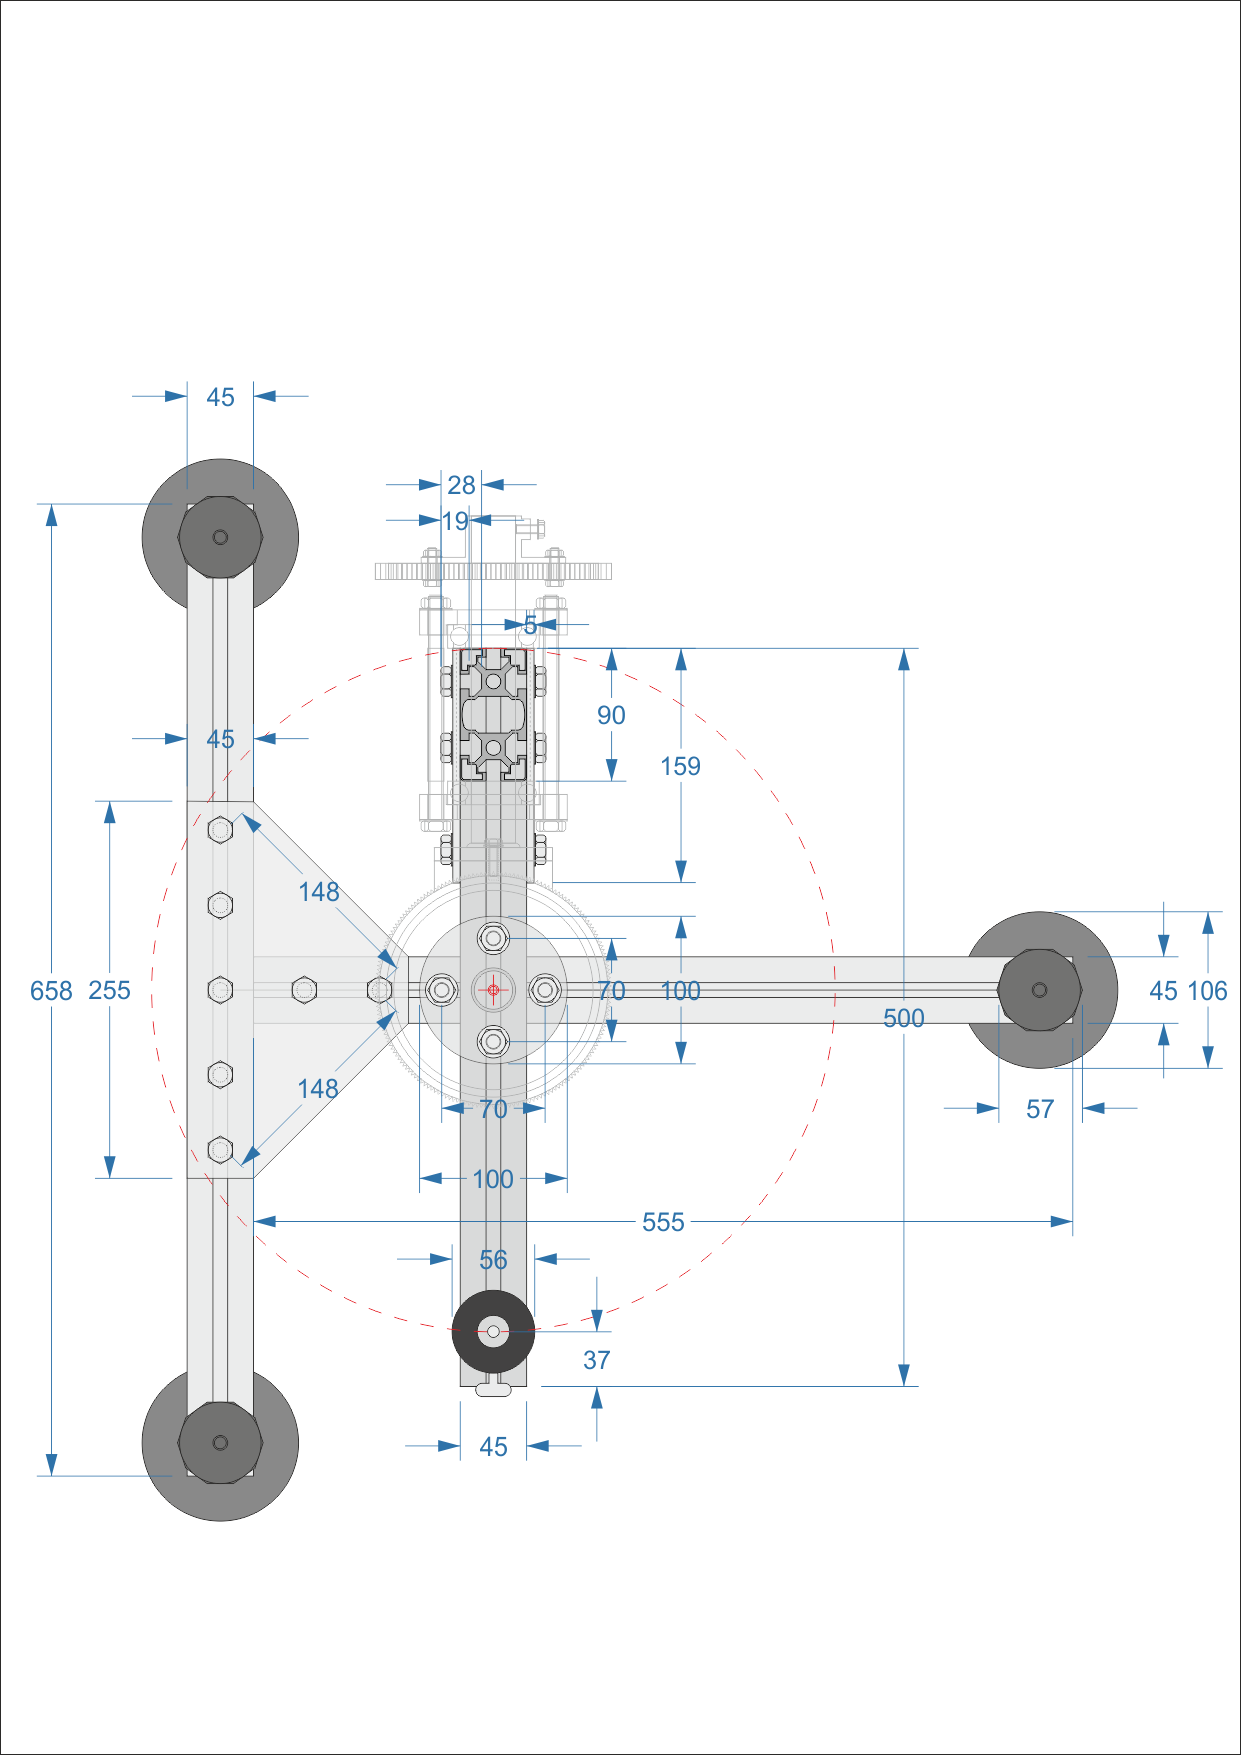
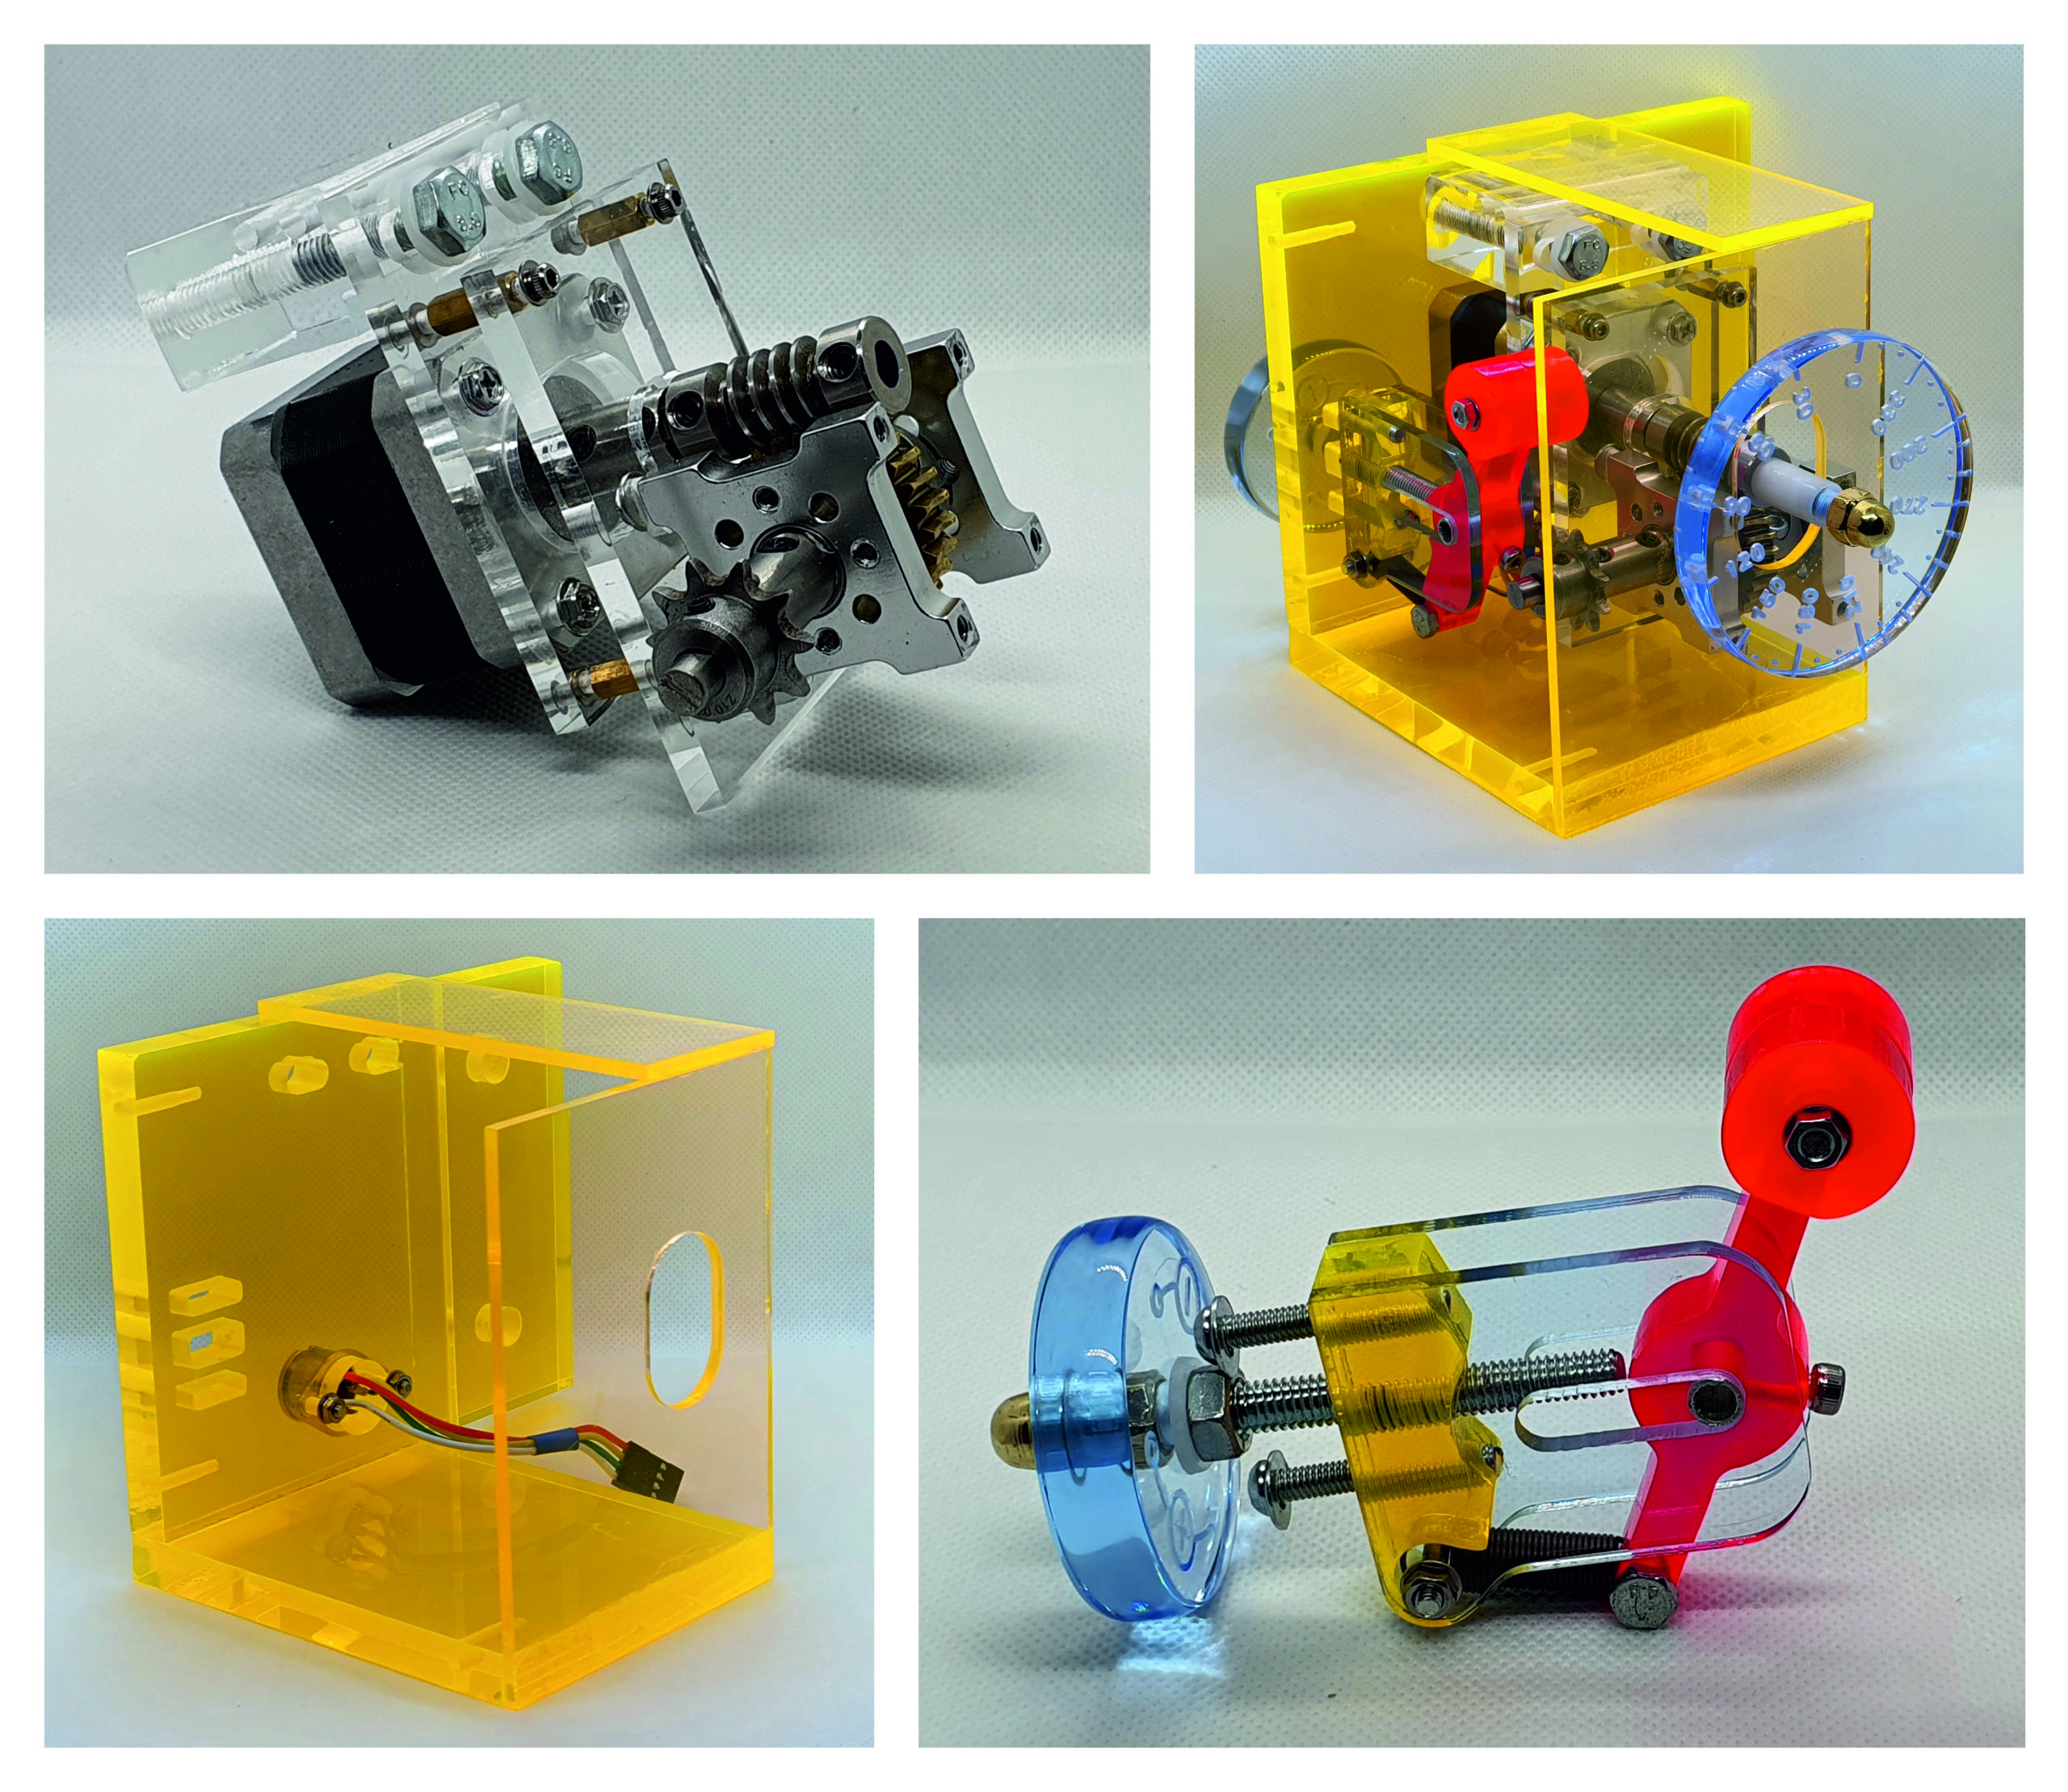
Instead of wood, the structure was built around aluminium profiles. Electronics would live inside laser-cut acrylic enclosures. Bearings, gears, chain drives and stepper motors would provide motion on both axes.
Front View
Top View
Pivot Detail
By then I was already becoming increasingly obsessed with mechanics and precision. Looking back at those drawings, I still smile. They were all made in 2D. Fusion 360 and fully parametric 3D design were still in the future.
When Your Living Room Becomes a Workshop
At that time, there was no 9m² Creatory.
There was only our living room.
My living room as a workspace
Soldering irons, electronics, tools, wires, aluminium profiles, stepper motors and telescope parts were scattered everywhere. My wife deserves a medal for putting up with it.
But little by little, the system came together.
The Final Machine
Eventually the project evolved into something far beyond the original wooden mount.
Photo 11 – The finished aluminium mount
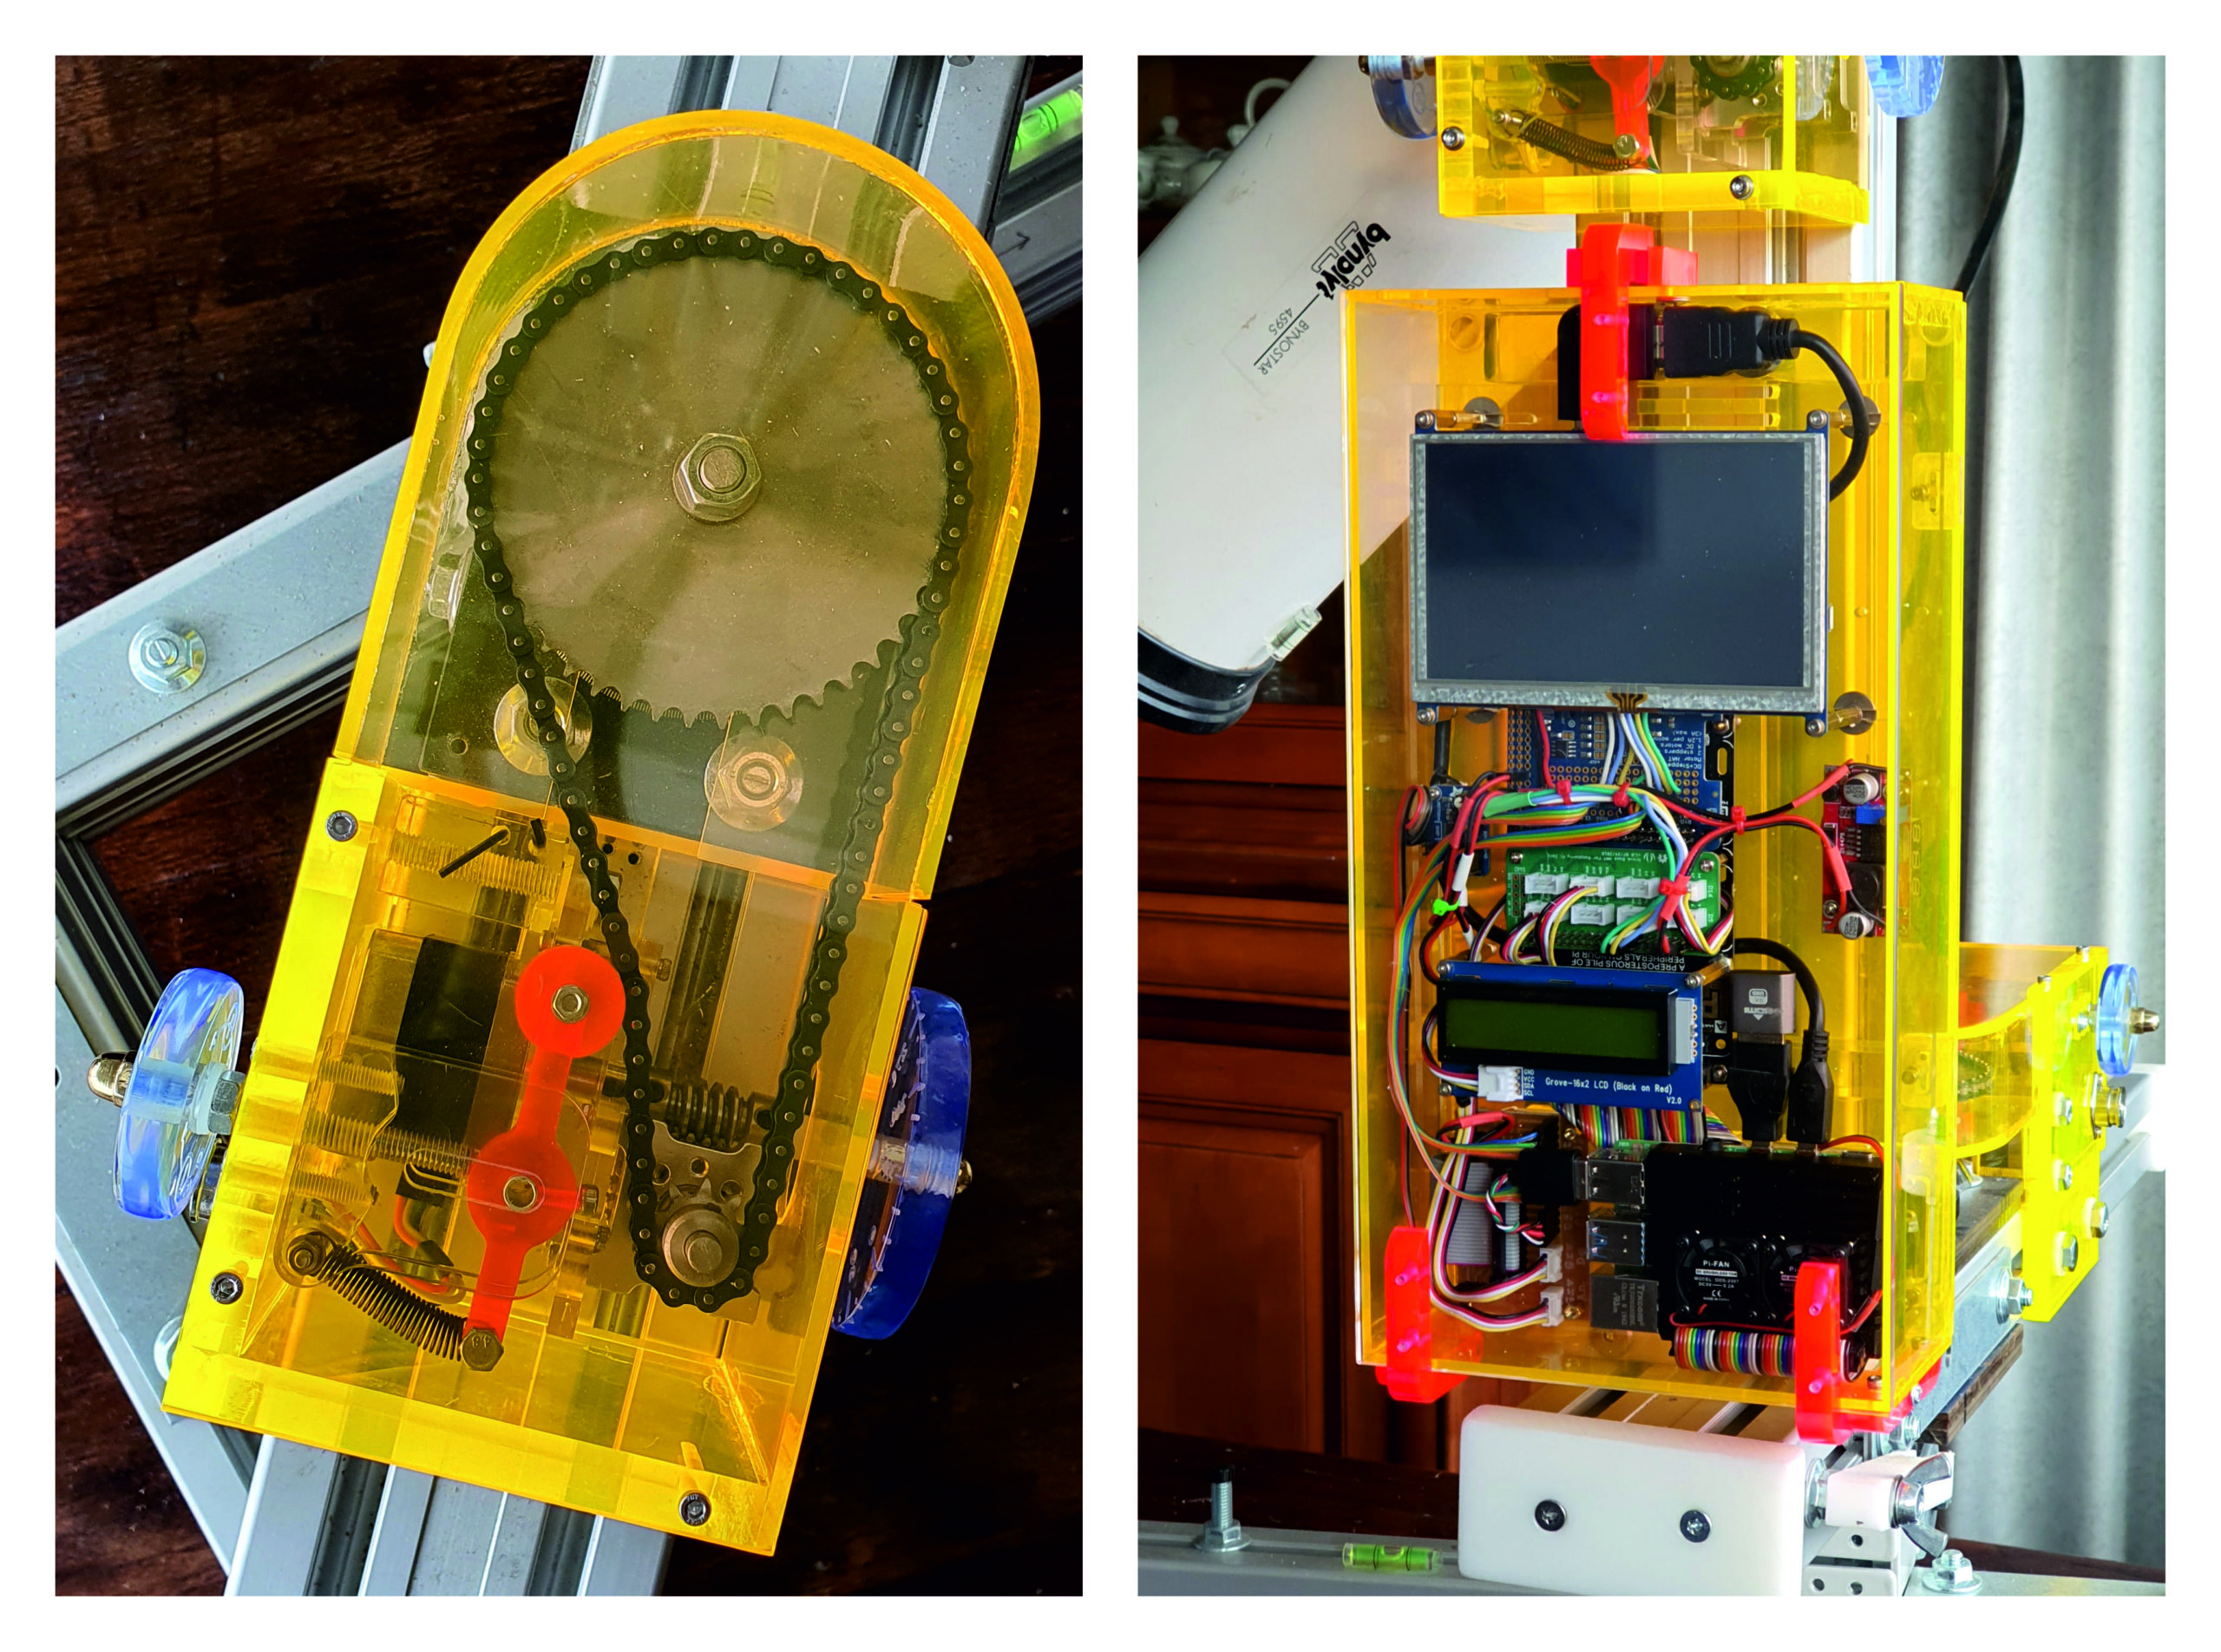
The frame consisted mainly of aluminium profiles, while most enclosures and mechanical parts were fabricated from colored acrylic.
The yellow transparent covers became something of a signature look. Through them you could see chains, gears, springs and adjustment mechanisms moving while the mount tracked the sky.
ALU Dodsonian Mount – Detail 1
ALU Dodsonian Mount – Detail 2
Inside the acrylic housing lived the electronics, display, motor drivers and control hardware. I always liked making the mechanics visible instead of hiding them away.
Some Valuable Lesson
Unfortunately, the aluminium version introduced a problem I had underestimated.
1. Weight.
The moving section became significantly heavier than the original wooden design. Every step made by the stepper motors induced a tiny amount of oscillation. After each movement, the structure would “waggle” ever so slightly.
For visual observing that wasn’t much of a problem.For astrophotography, however, those vibrations translated directly into softer less sharp images.I spent quit some time trying to eliminate that behaviour but never managed to get rid of it completely.
Ironically, the simpler wooden version had actually been the better engineering solution.
Sometimes lighter really is better.
2. The Chain
Looking back, I eventually traced most of the oscillation problem to the chain drive itself. Tightening the chain reduced the wobble, but at the same time increased friction and load on the stepper motors, which then struggled to deliver smooth motion. Leaving the chain looser reduced the load, but introduced just enough compliance to allow the whole assembly to oscillate after each step.
In hindsight, a properly engineered worm gear and worm wheel arrangement would probably have been the better solution, but by then I had already invested a considerable amount of time into the existing design and never got around to redesigning it. The inexpensive bearings I had used also exhibited a tiny amount of play, which proved to be a poor combination with a heavily tensioned chain drive. Eventually, I settled on what engineers everywhere sometimes have to accept: good enough. I knew I wasn’t extracting the maximum performance from the system, but it performed well enough to continue enjoying the project rather than endlessly chasing perfection.
The Telescope Had Aged Too
By that time, my old Bynolyt had nearly thirty years of service behind it.
It had accumulated a bit of “field damage”, and I strongly suspected that the primary mirror needed realignment. Unfortunately, I never got around to restoring it.
Two years later I sold the complete setup to another hobbyist who was particularly impressed by the aluminium mount. He planned to replace the Roller bearings and the chain mechanism (by a worm gear) and use it with a heavier telescope, which suited the construction better.
The new owner also had a clever workaround in mind. Rather than fighting the tiny oscillations mechanically, he wanted to use a precision accelerometer and delay the camera exposure until the mount had completely settled after each movement. I always liked the simplicity of that idea, but I never learned whether he succeeded in getting it to work.
A nice surprise though…
One unexpected highlight came much later. One fun detail worth mentioning is that the yellow acrylic used throughout the project wasn’t chosen purely for aesthetics. I had deliberately selected a fluorescent variety that reacts to ultraviolet light and appears to glow from within. It’s the same type of material often used in nightclubs to create those dramatic blacklight effects. Under UV illumination, the mount looked like something straight out of a science fiction movie—which, admittedly, I considered a nice bonus.
About a year later, I entered the design in a competition dedicated to projects made from acrylic. To my surprise, I won second prize. One of the comments from the jury was that they particularly appreciated the futuristic appearance of the design, with its visible mechanics and translucent glowing panels. Not bad for something that had started life on the dining table in our living room.
Looking Ahead
Several years later I entered a new chapter in my Astronomy hobby and purchased a completely electronically controlled telescope: a Seestar S50 Pro.
Being incapable of leaving things alone, I eventually built an equatorial mount for it as well. Tracking celestial objects around a single axis instead of two significantly improves stability and image quality.