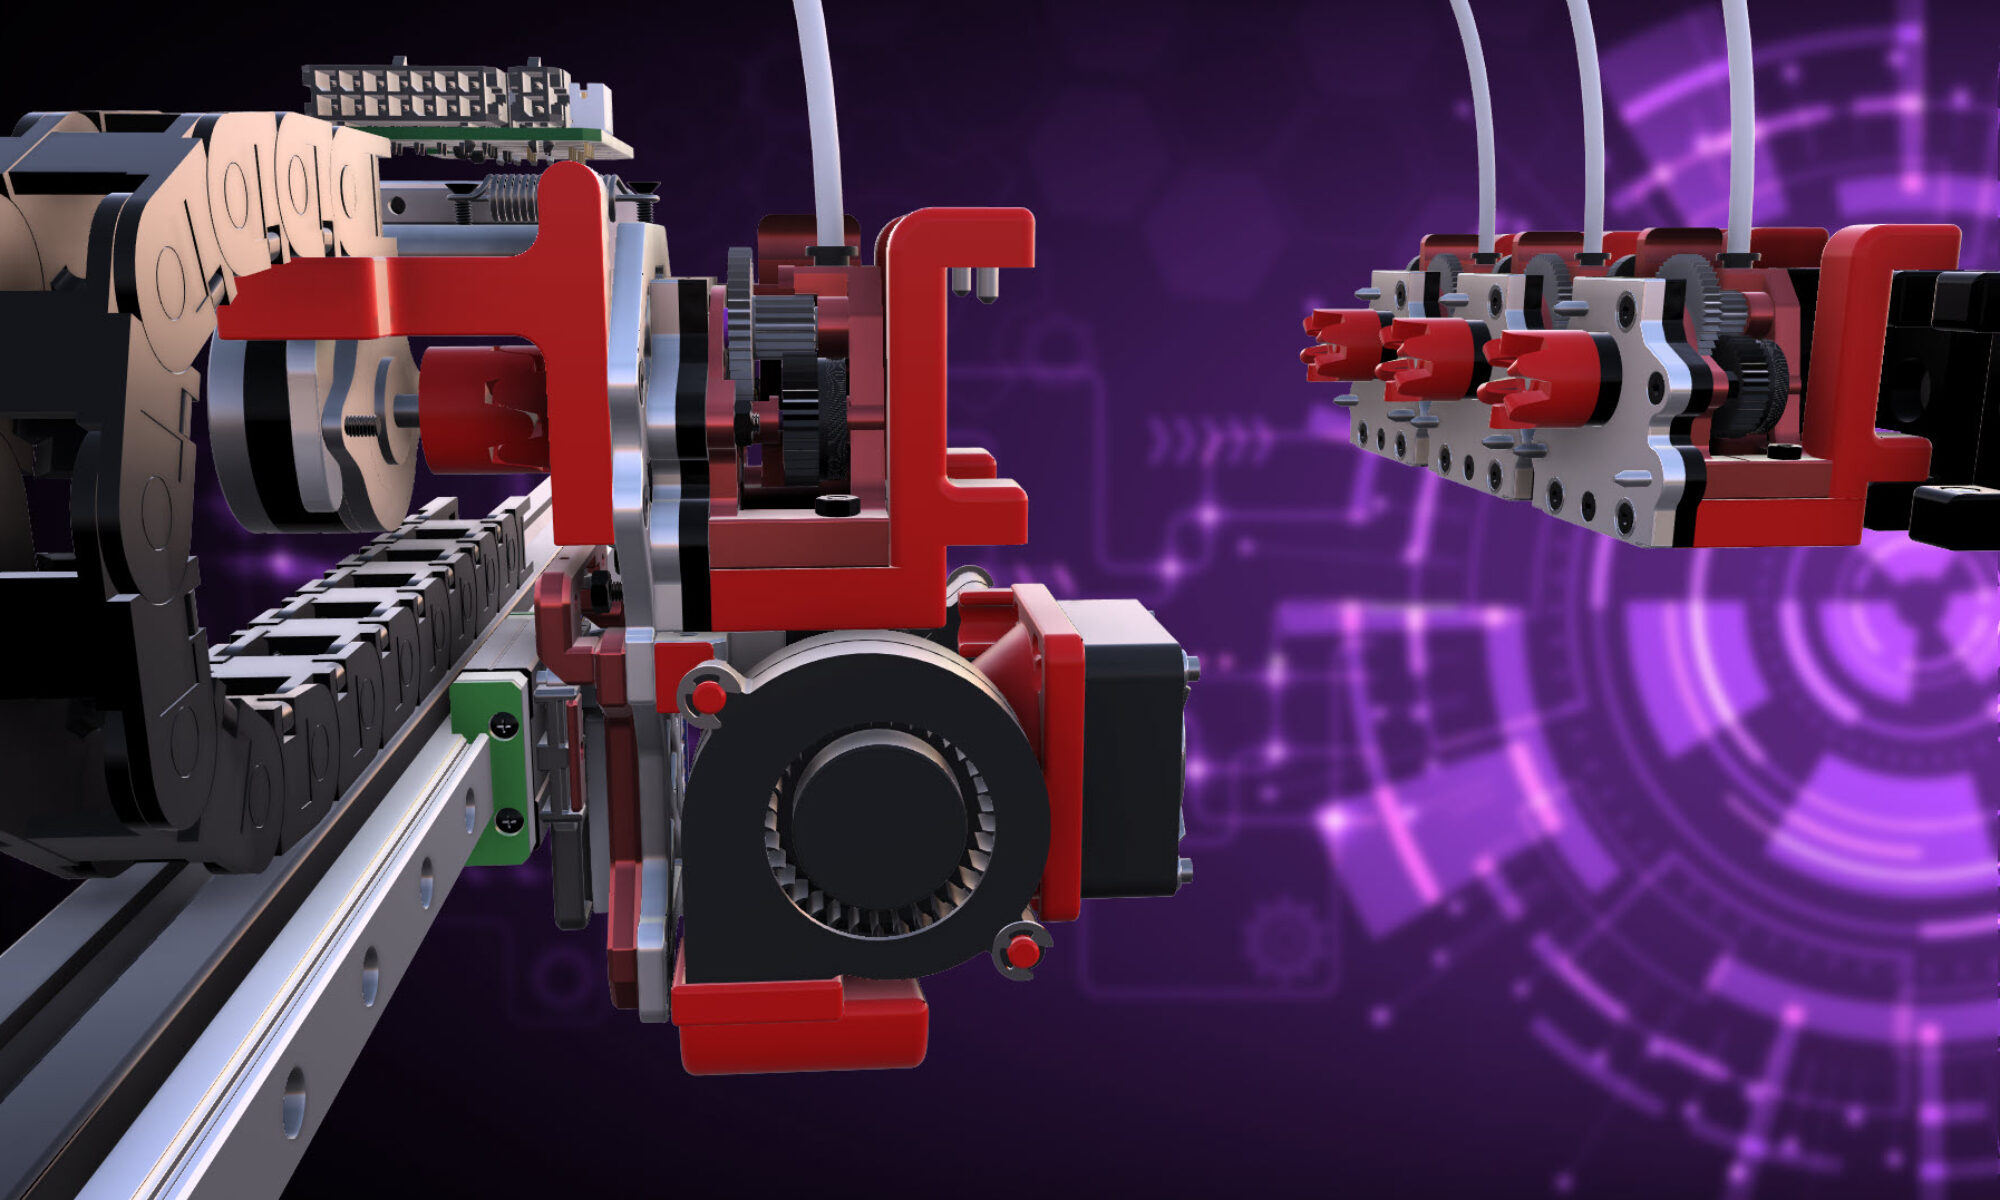


Equatorial Mount for the ZWO Seestar S50 telescope. Giving a smart telescope a different way to follow the sky.
The Seestar S50 is a compact smart telescope capable of automatically locating and tracking objects in the night sky. In its standard configuration it operates as an alt-azimuth telescope, tracking an object by moving in both altitude and azimuth.
That works remarkably well, but the Earth still has an annoying habit of rotating.
For longer observations and astrophotography, an equatorial setup has an important advantage: instead of continuously correcting two axes, the telescope’s primary rotation axis is aligned parallel to the Earth’s rotational axis. Tracking the apparent motion of the sky can then essentially be reduced to rotation around a single axis.
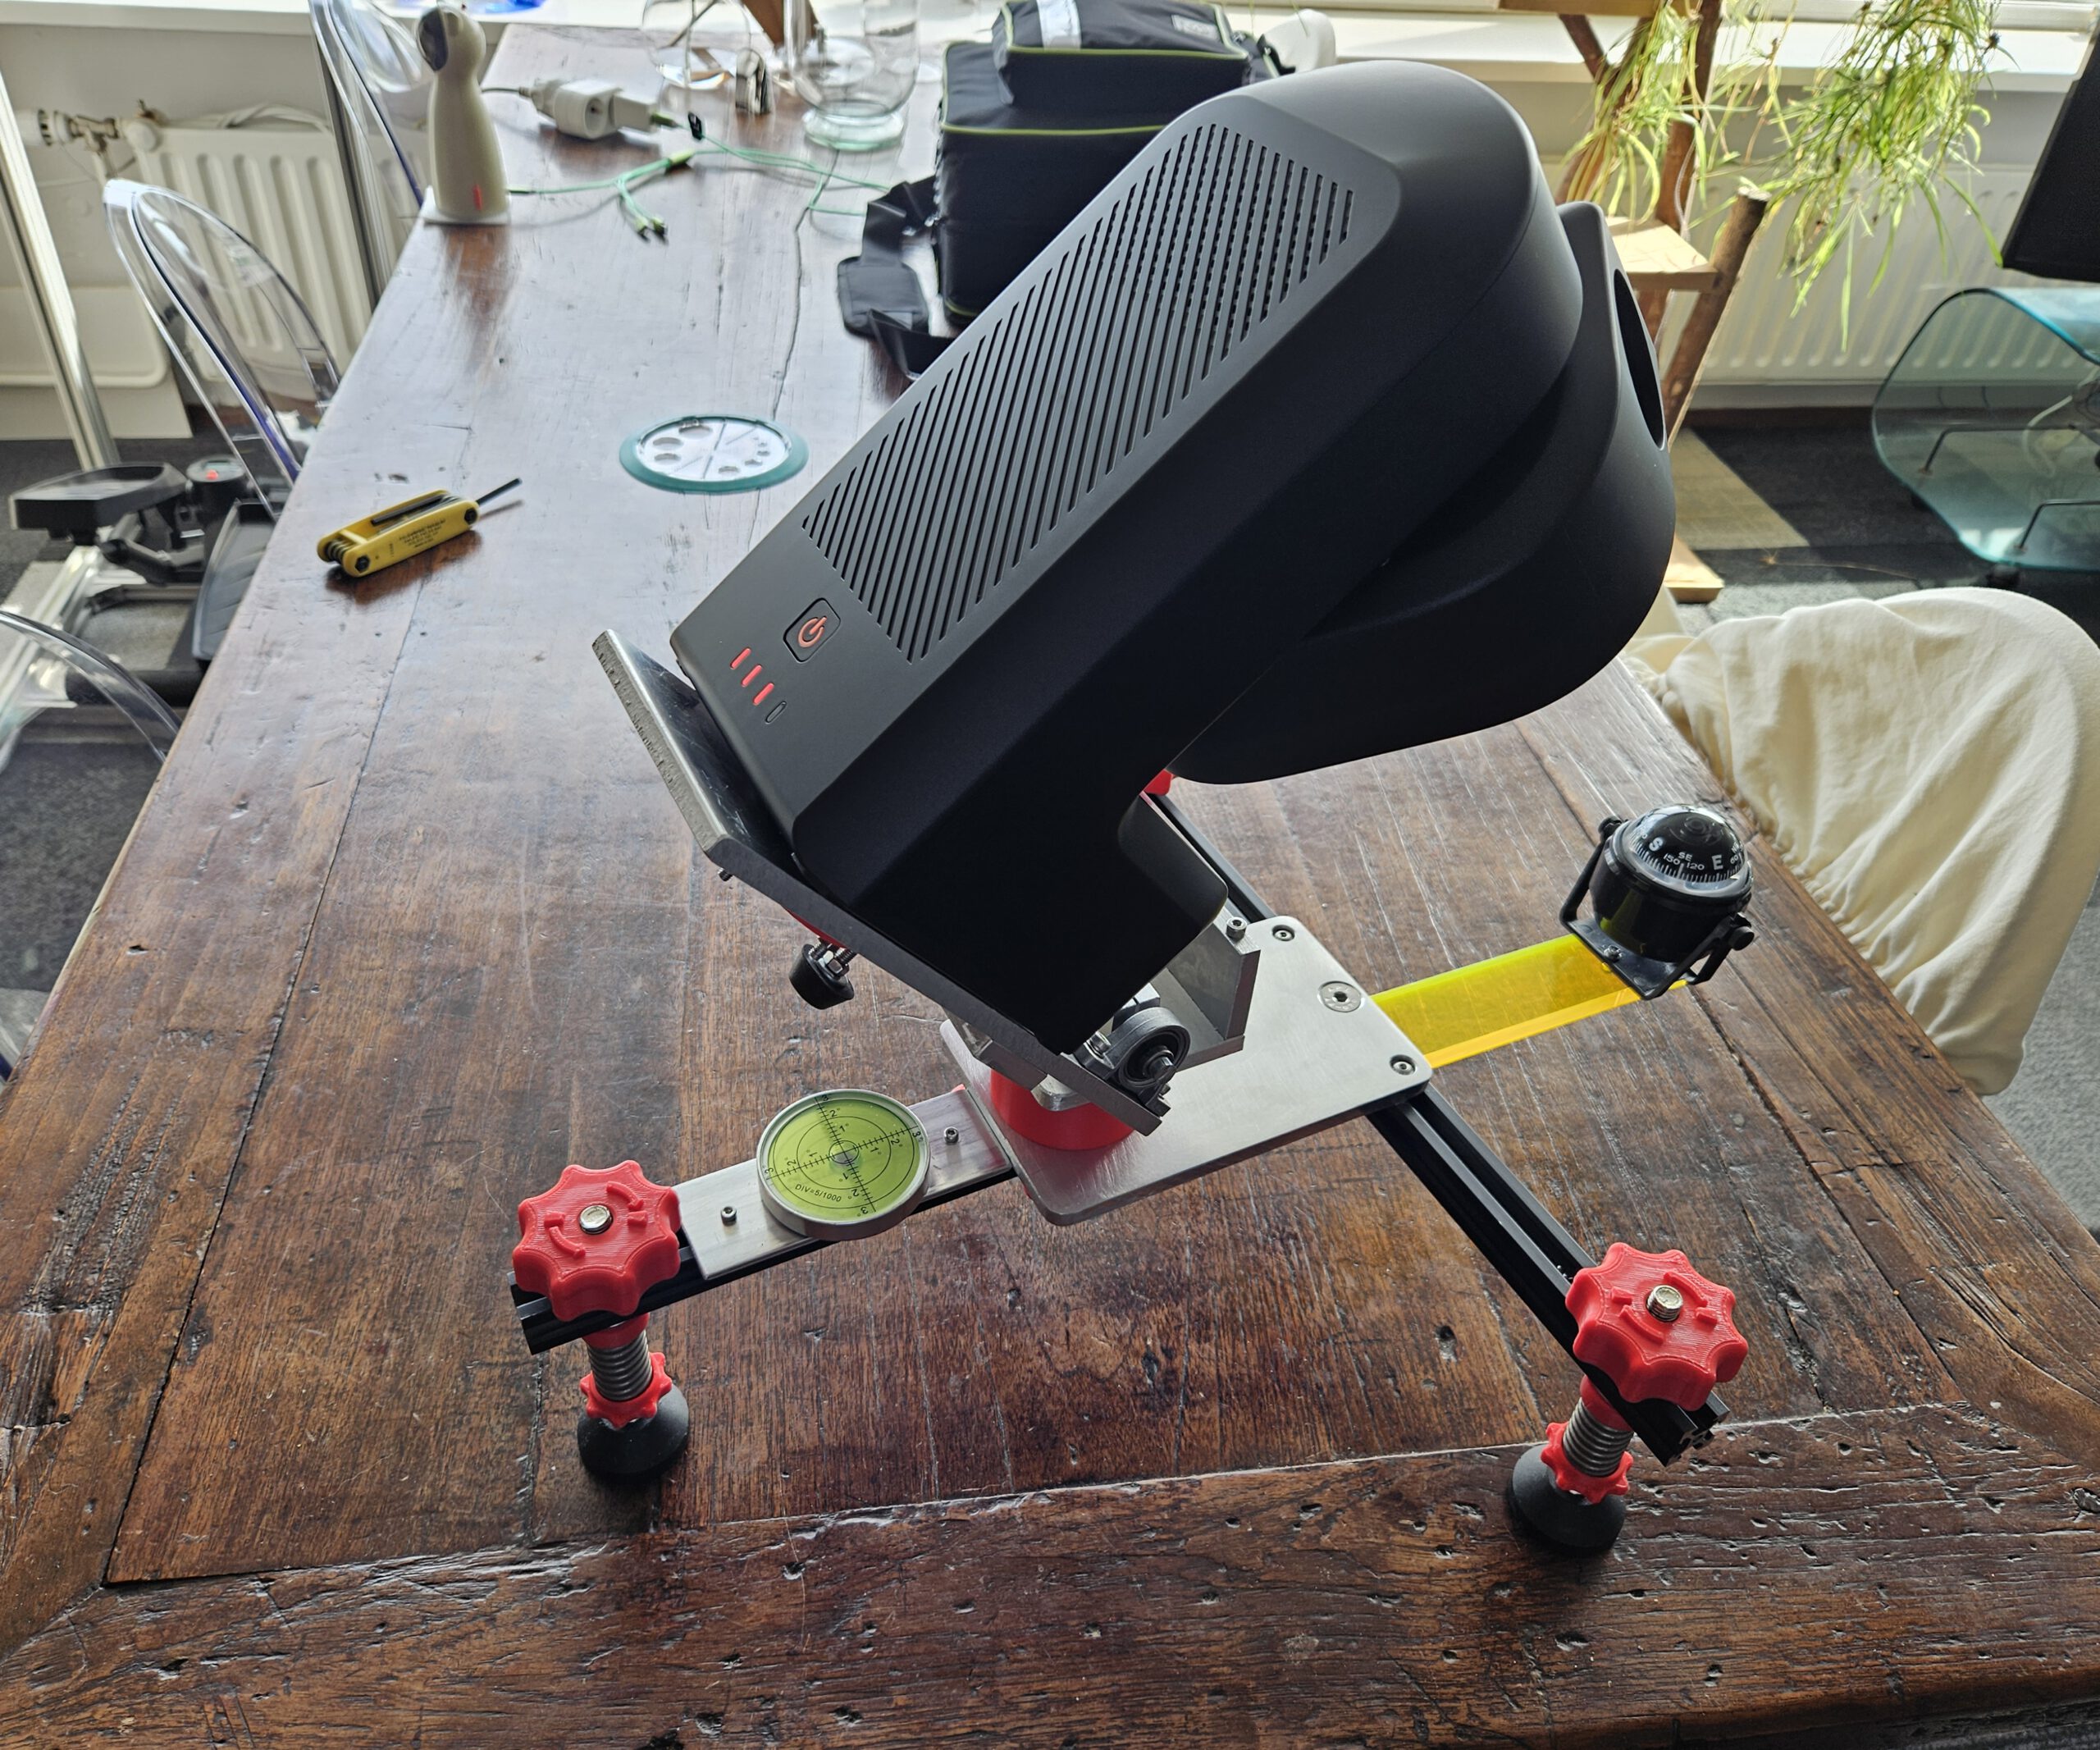
So rather than buying an equatorial wedge or mount, I decided to design and build one specifically for my Seestar S50.


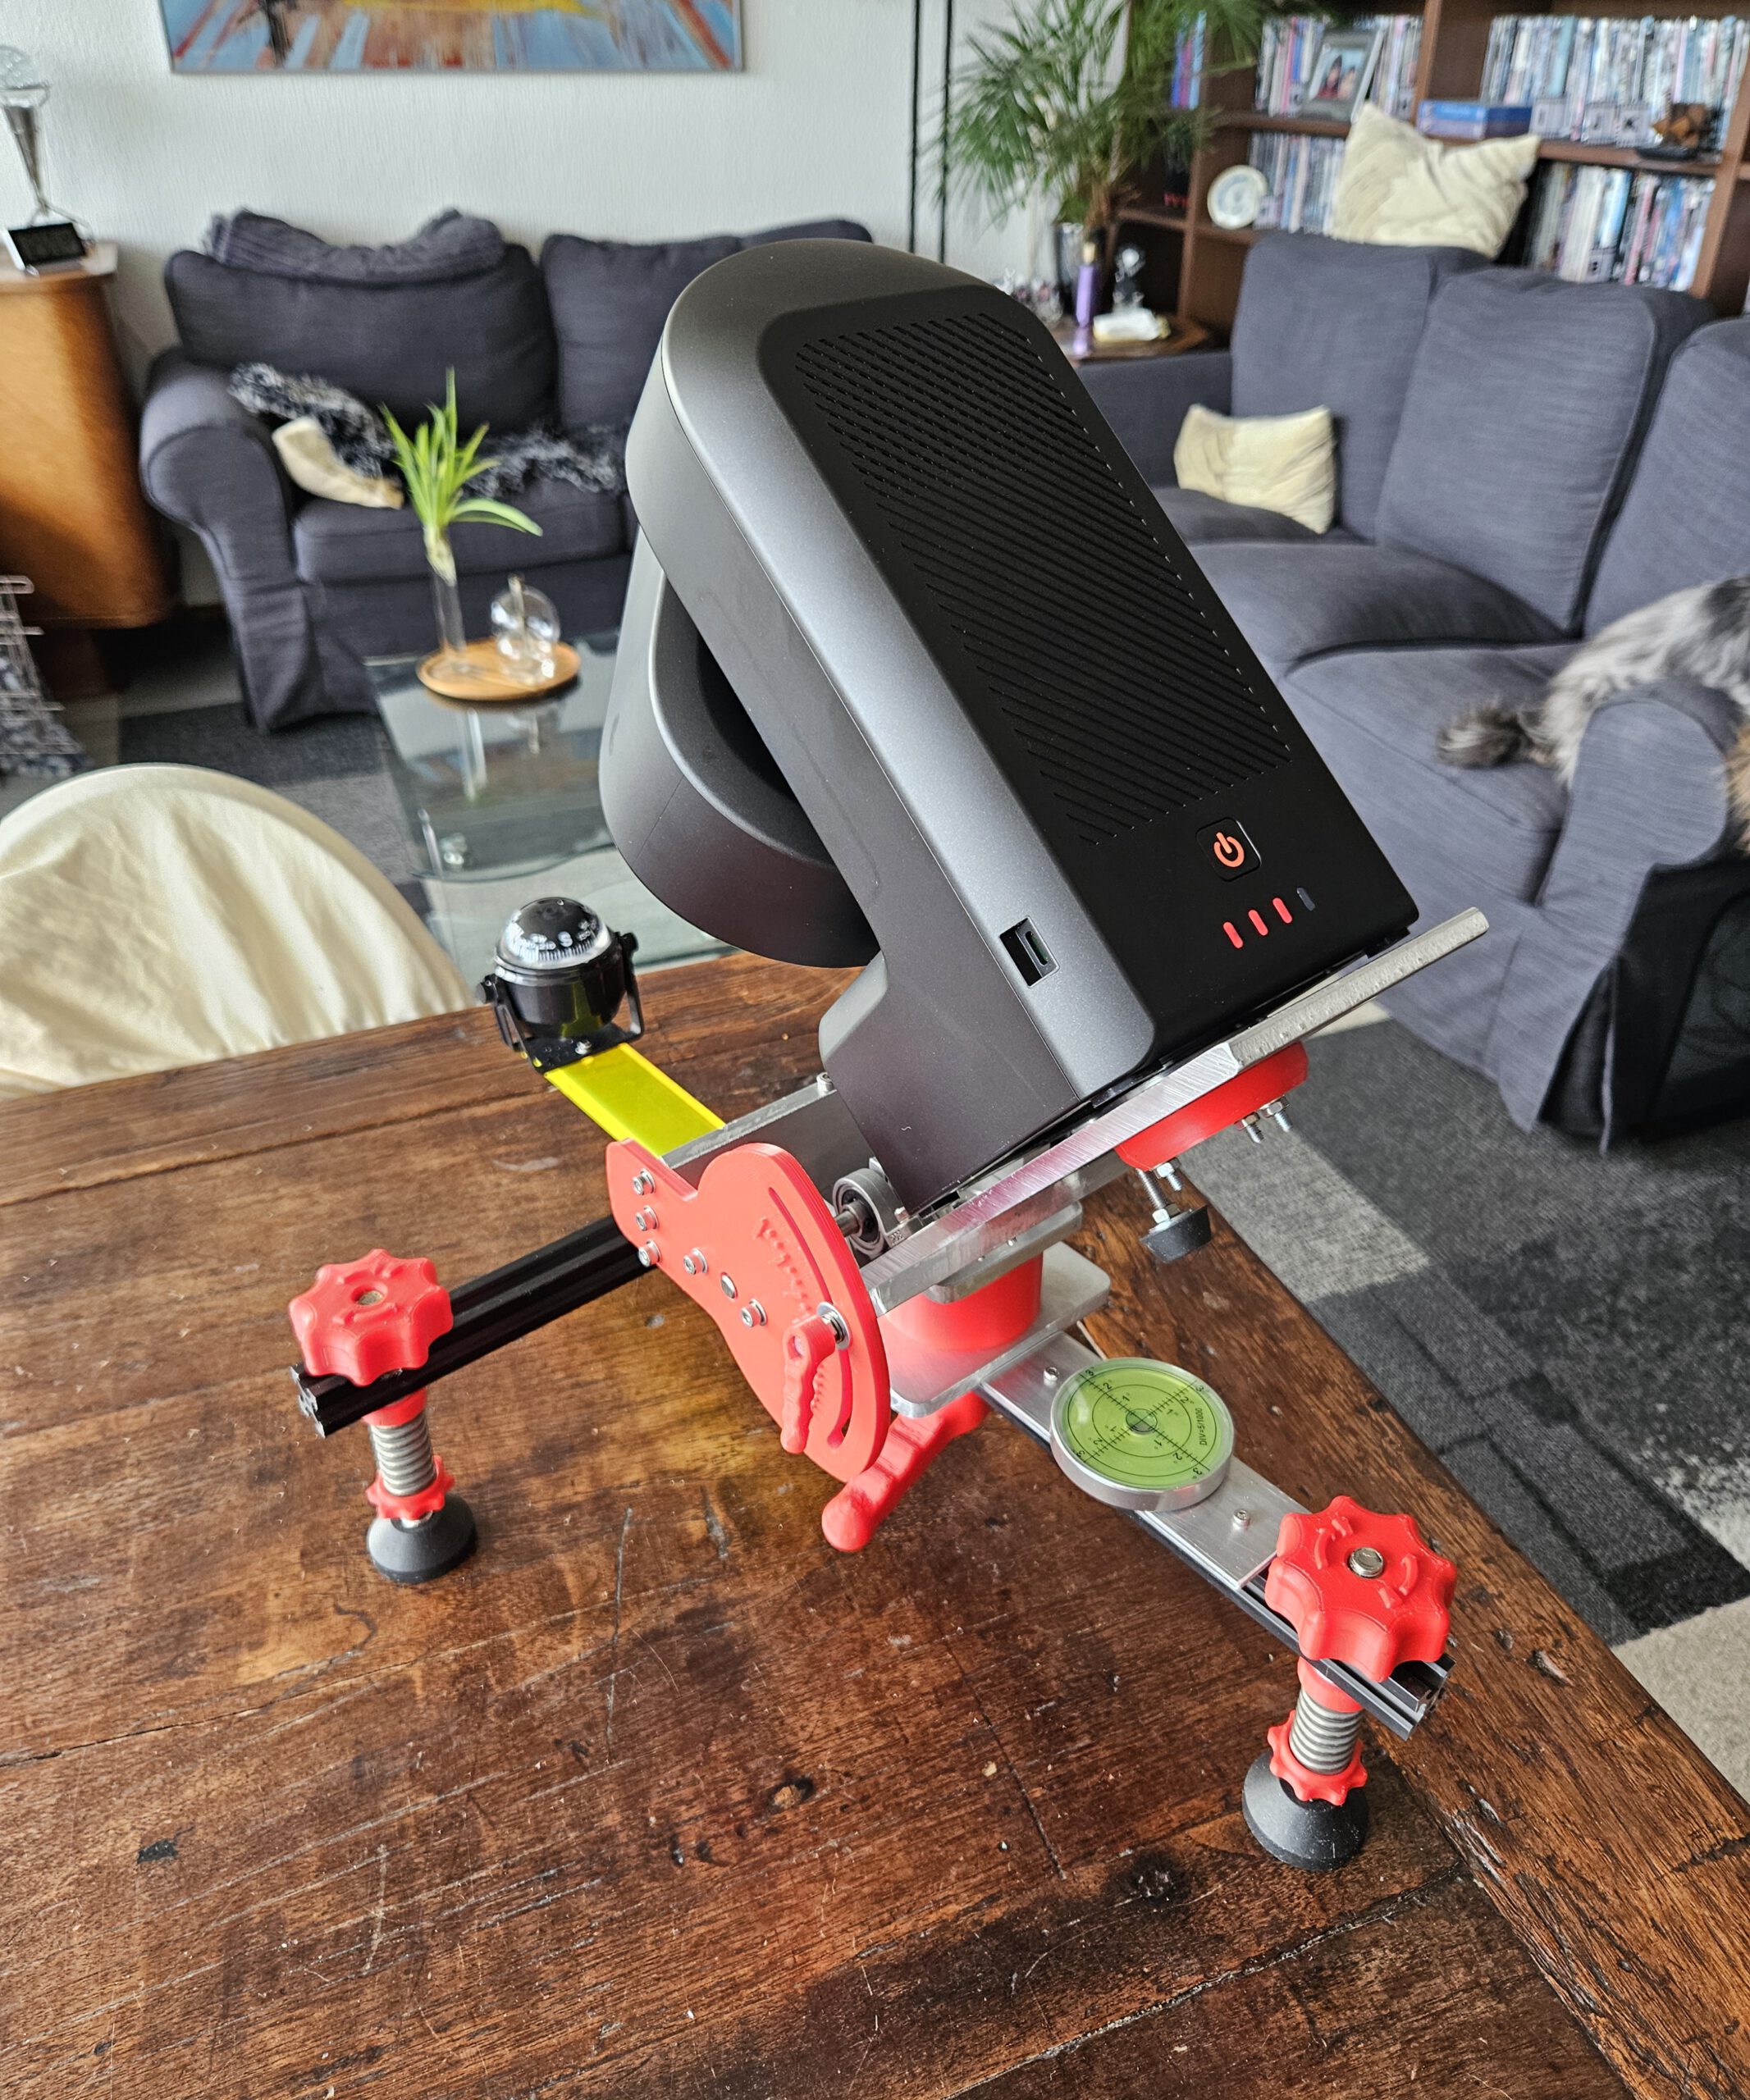
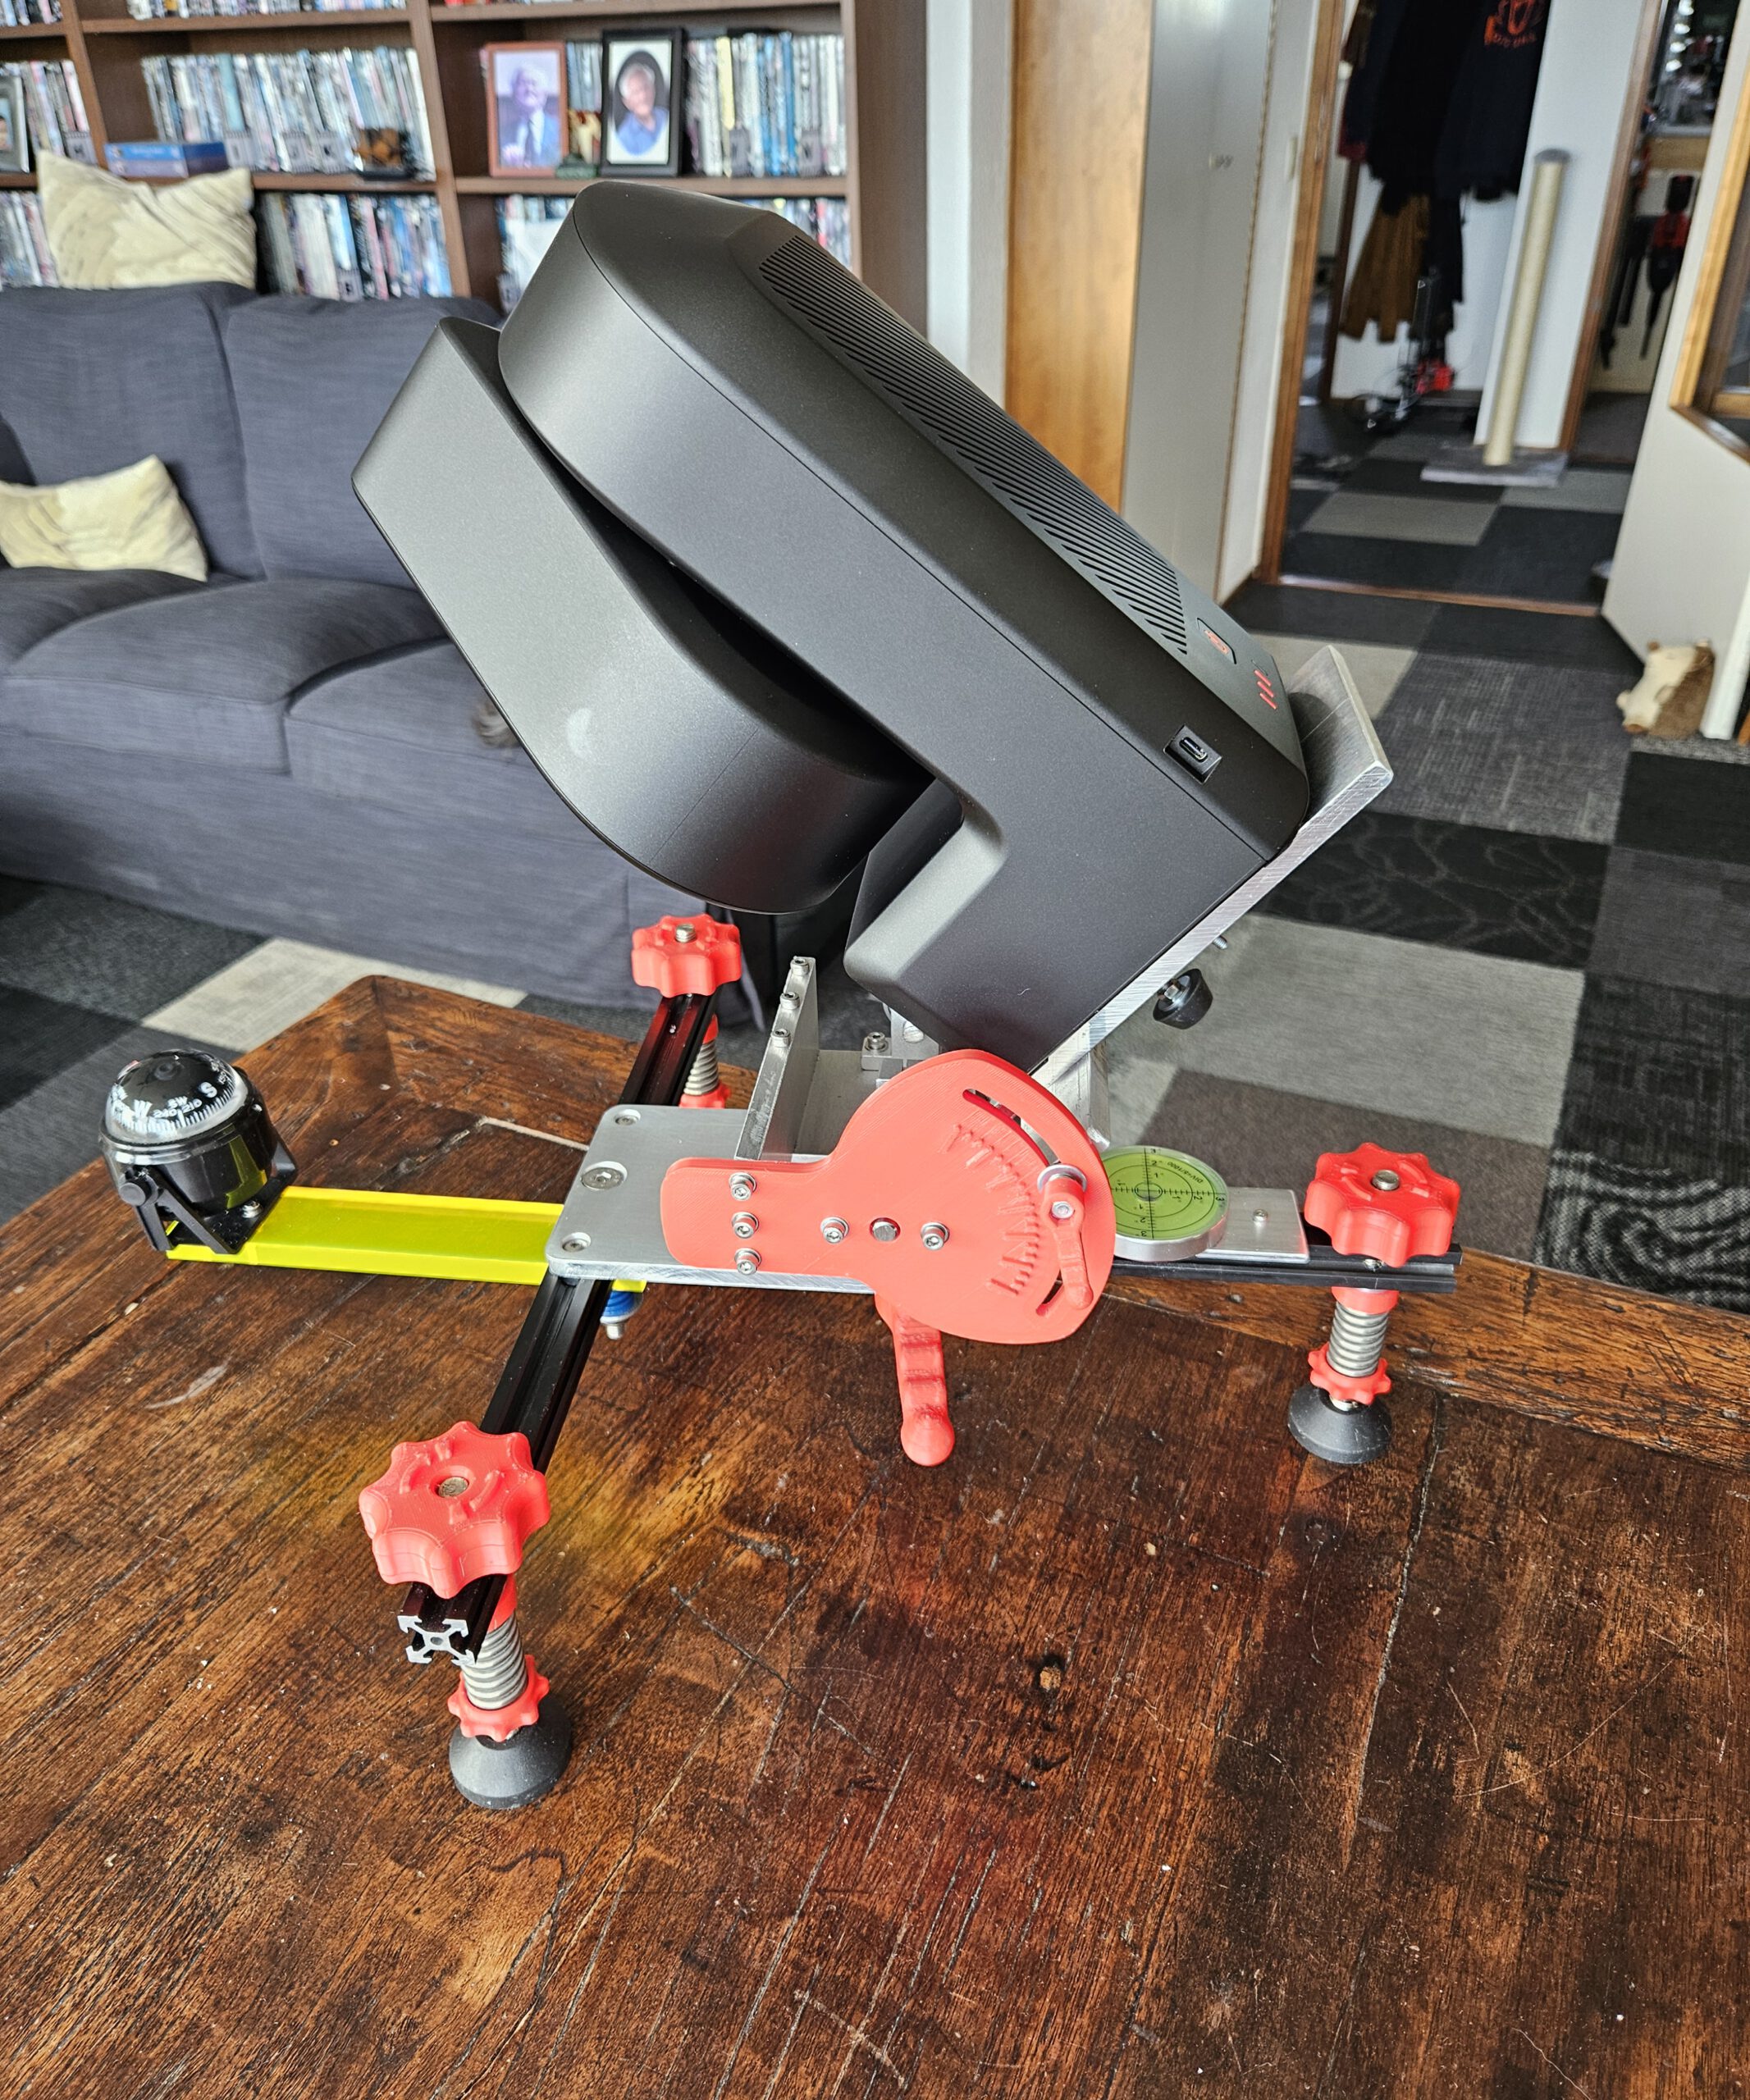
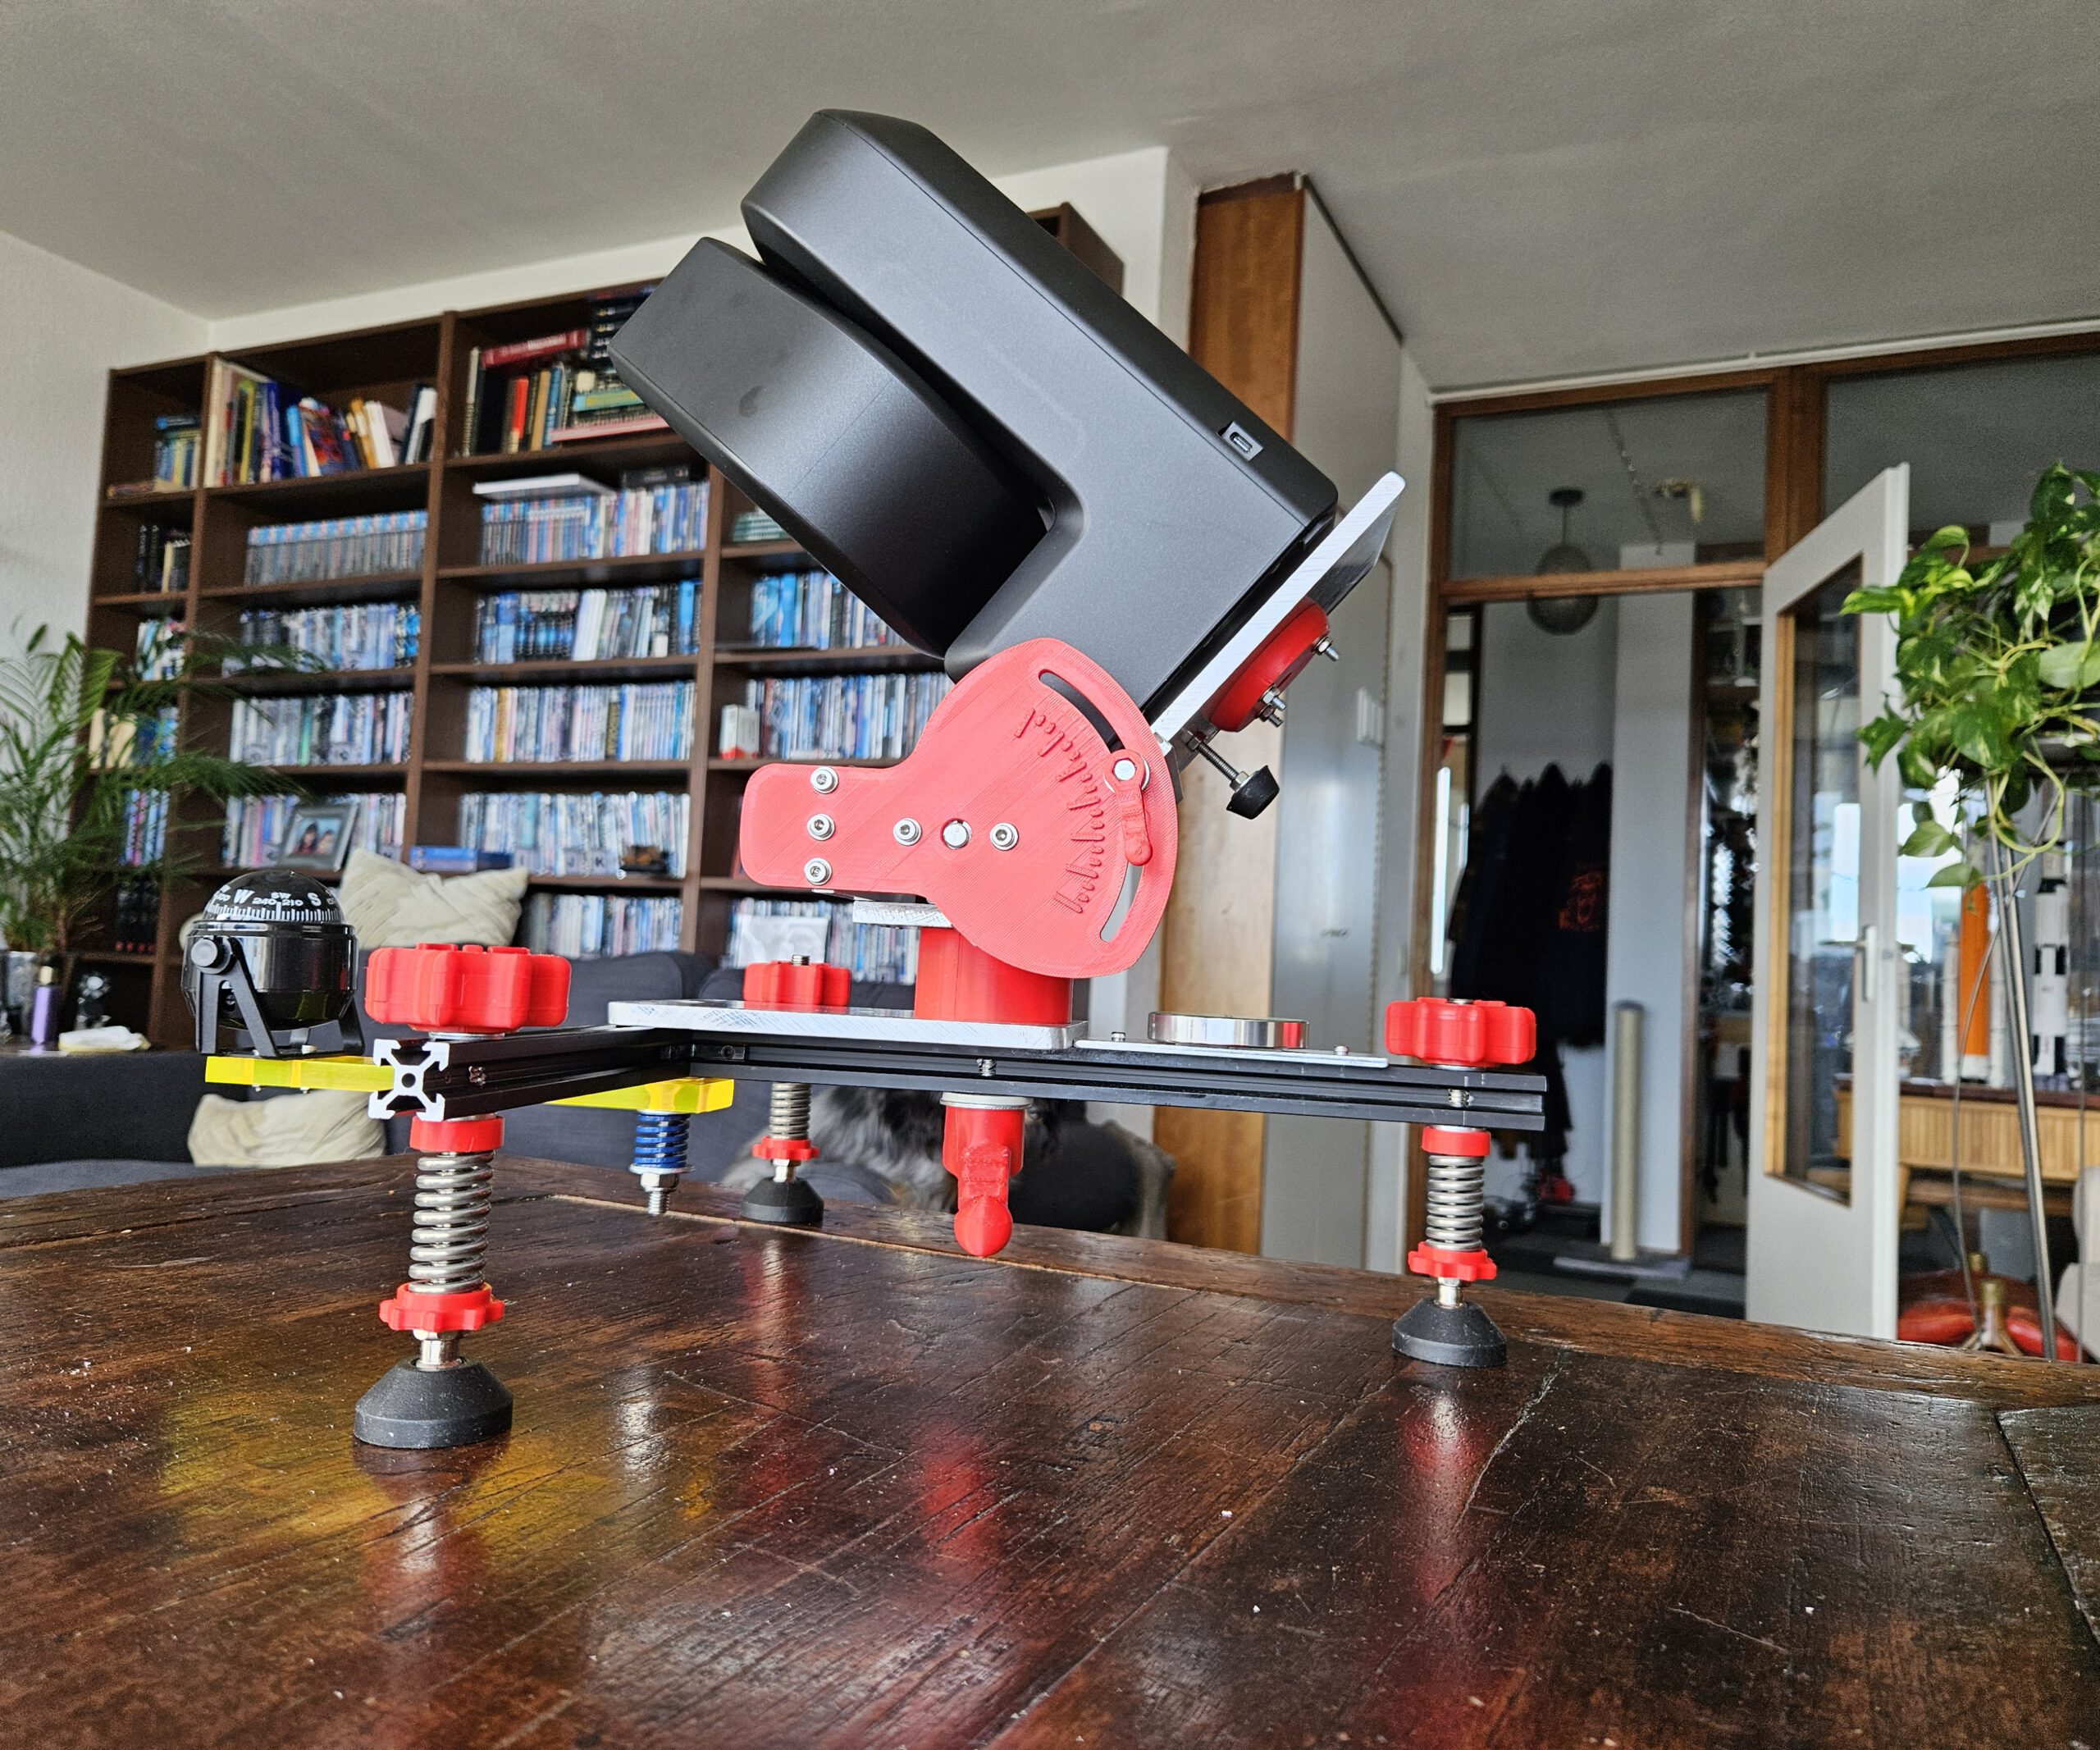
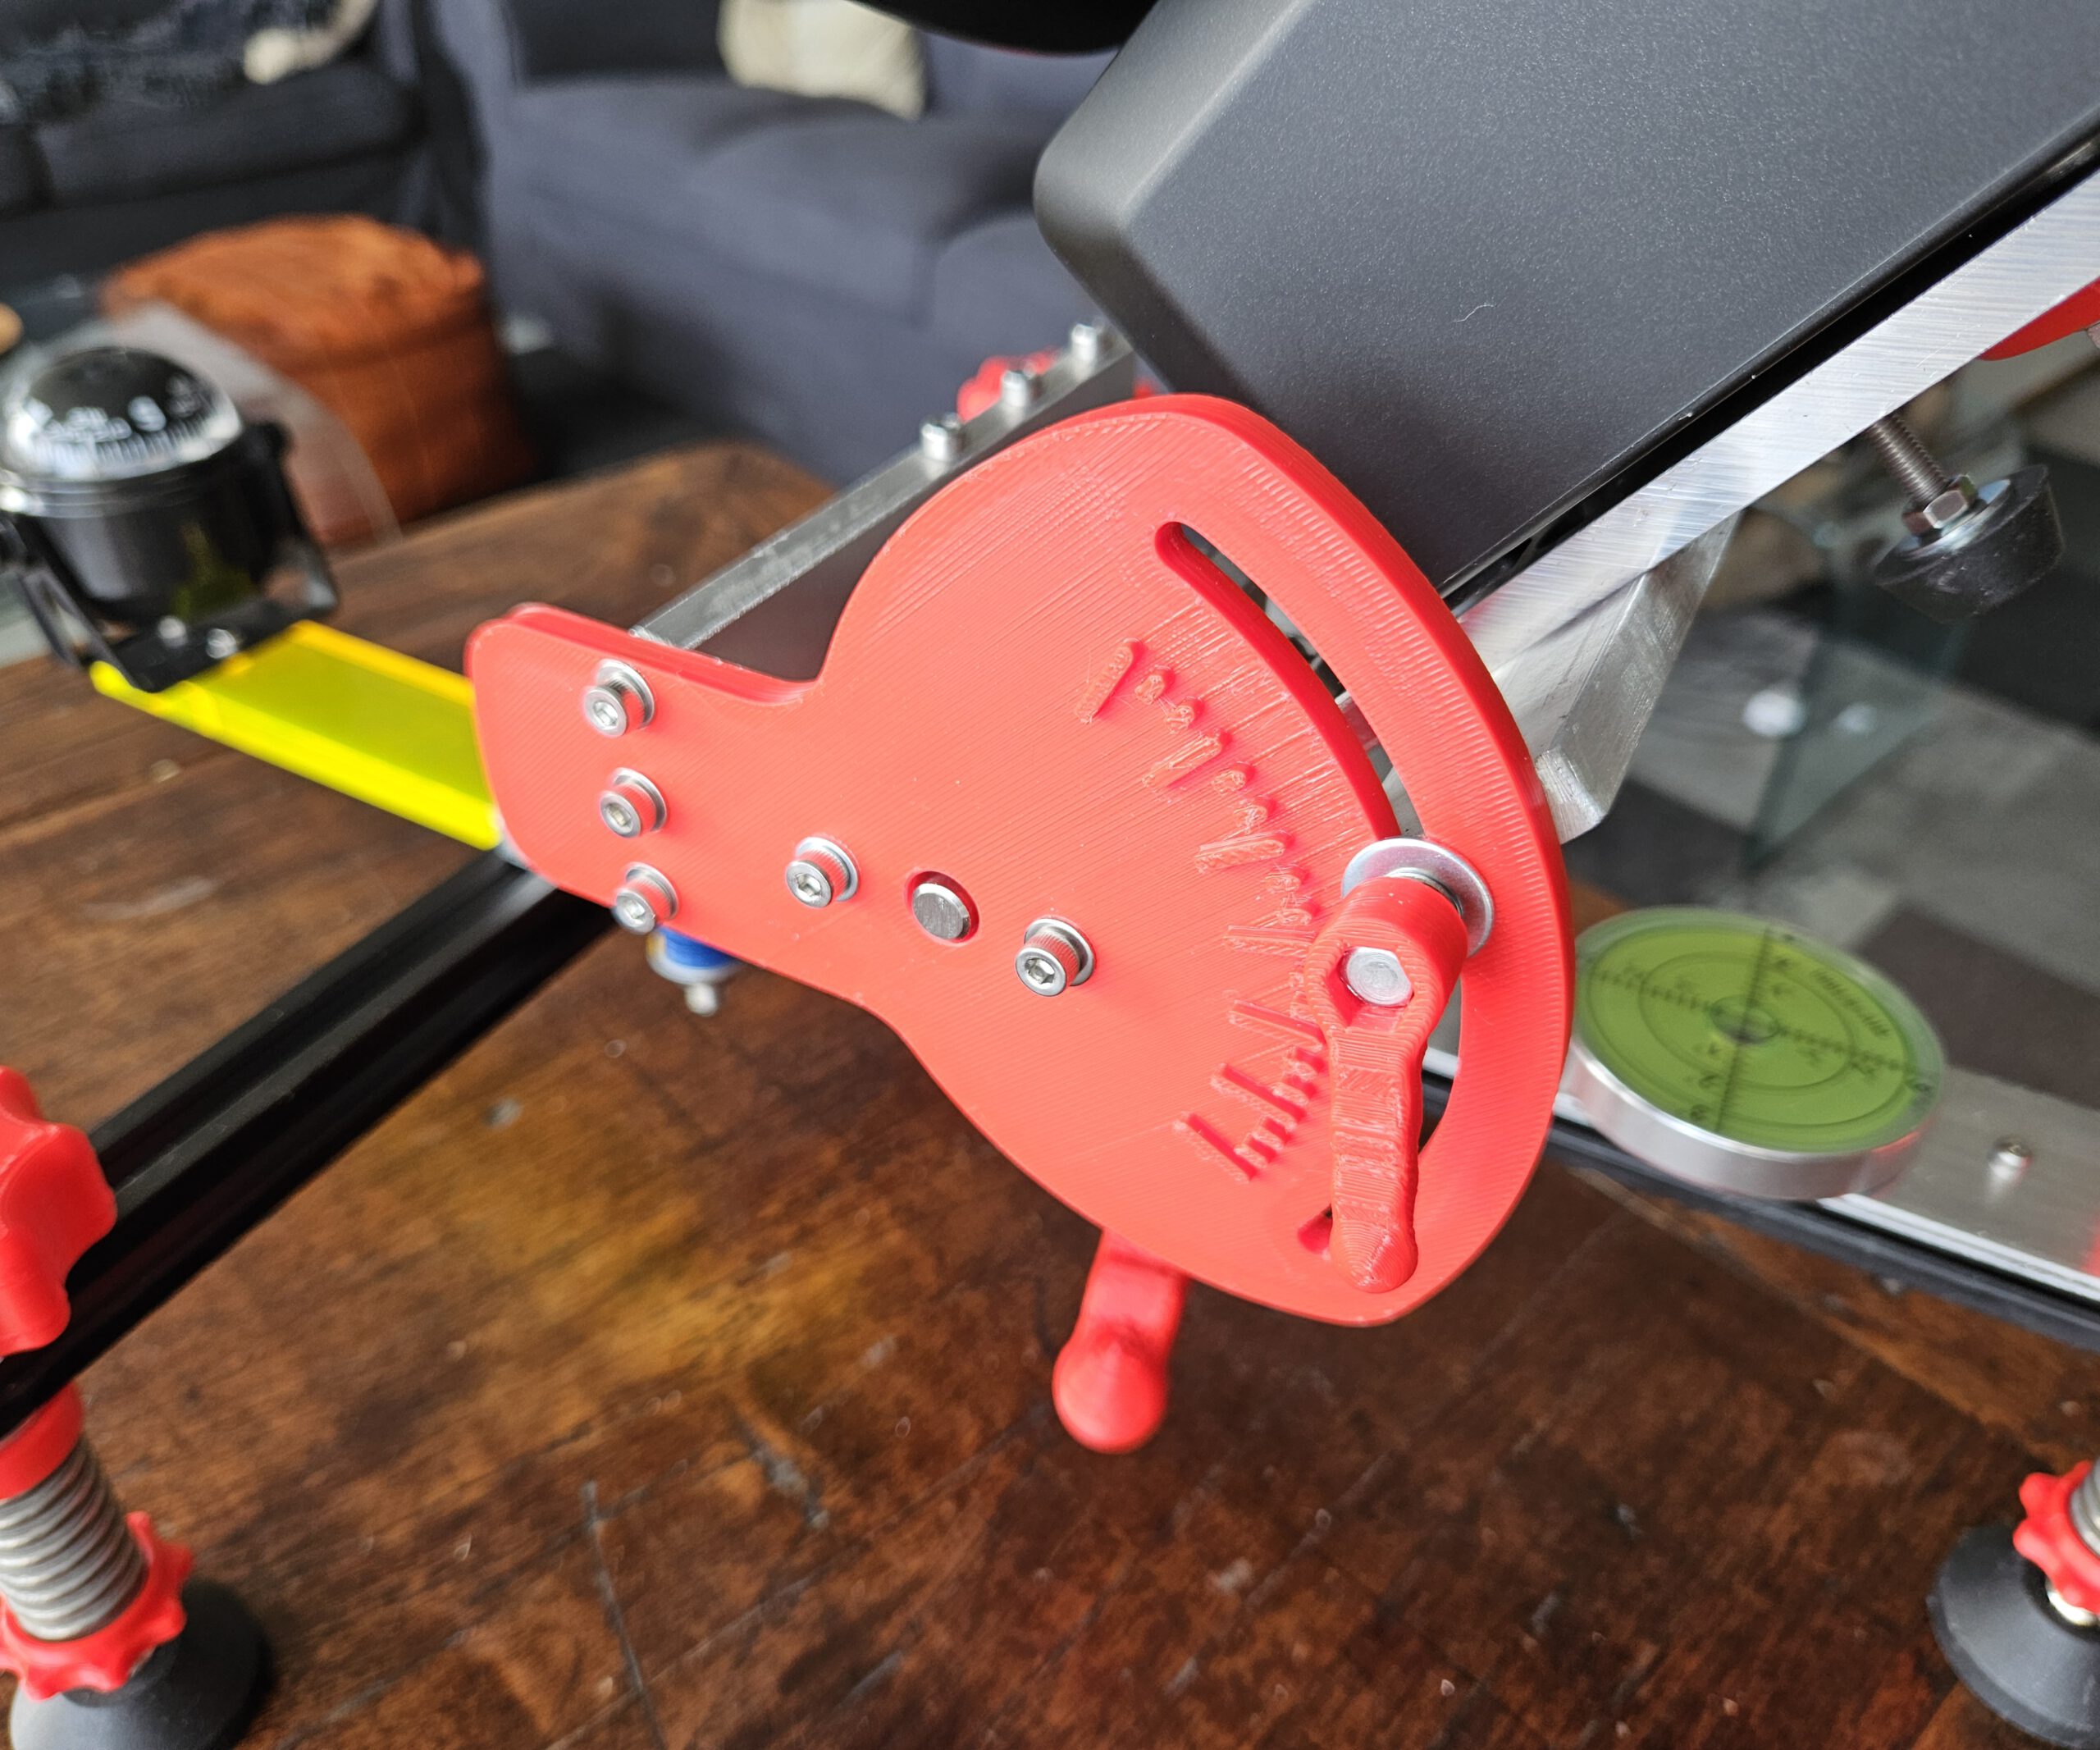
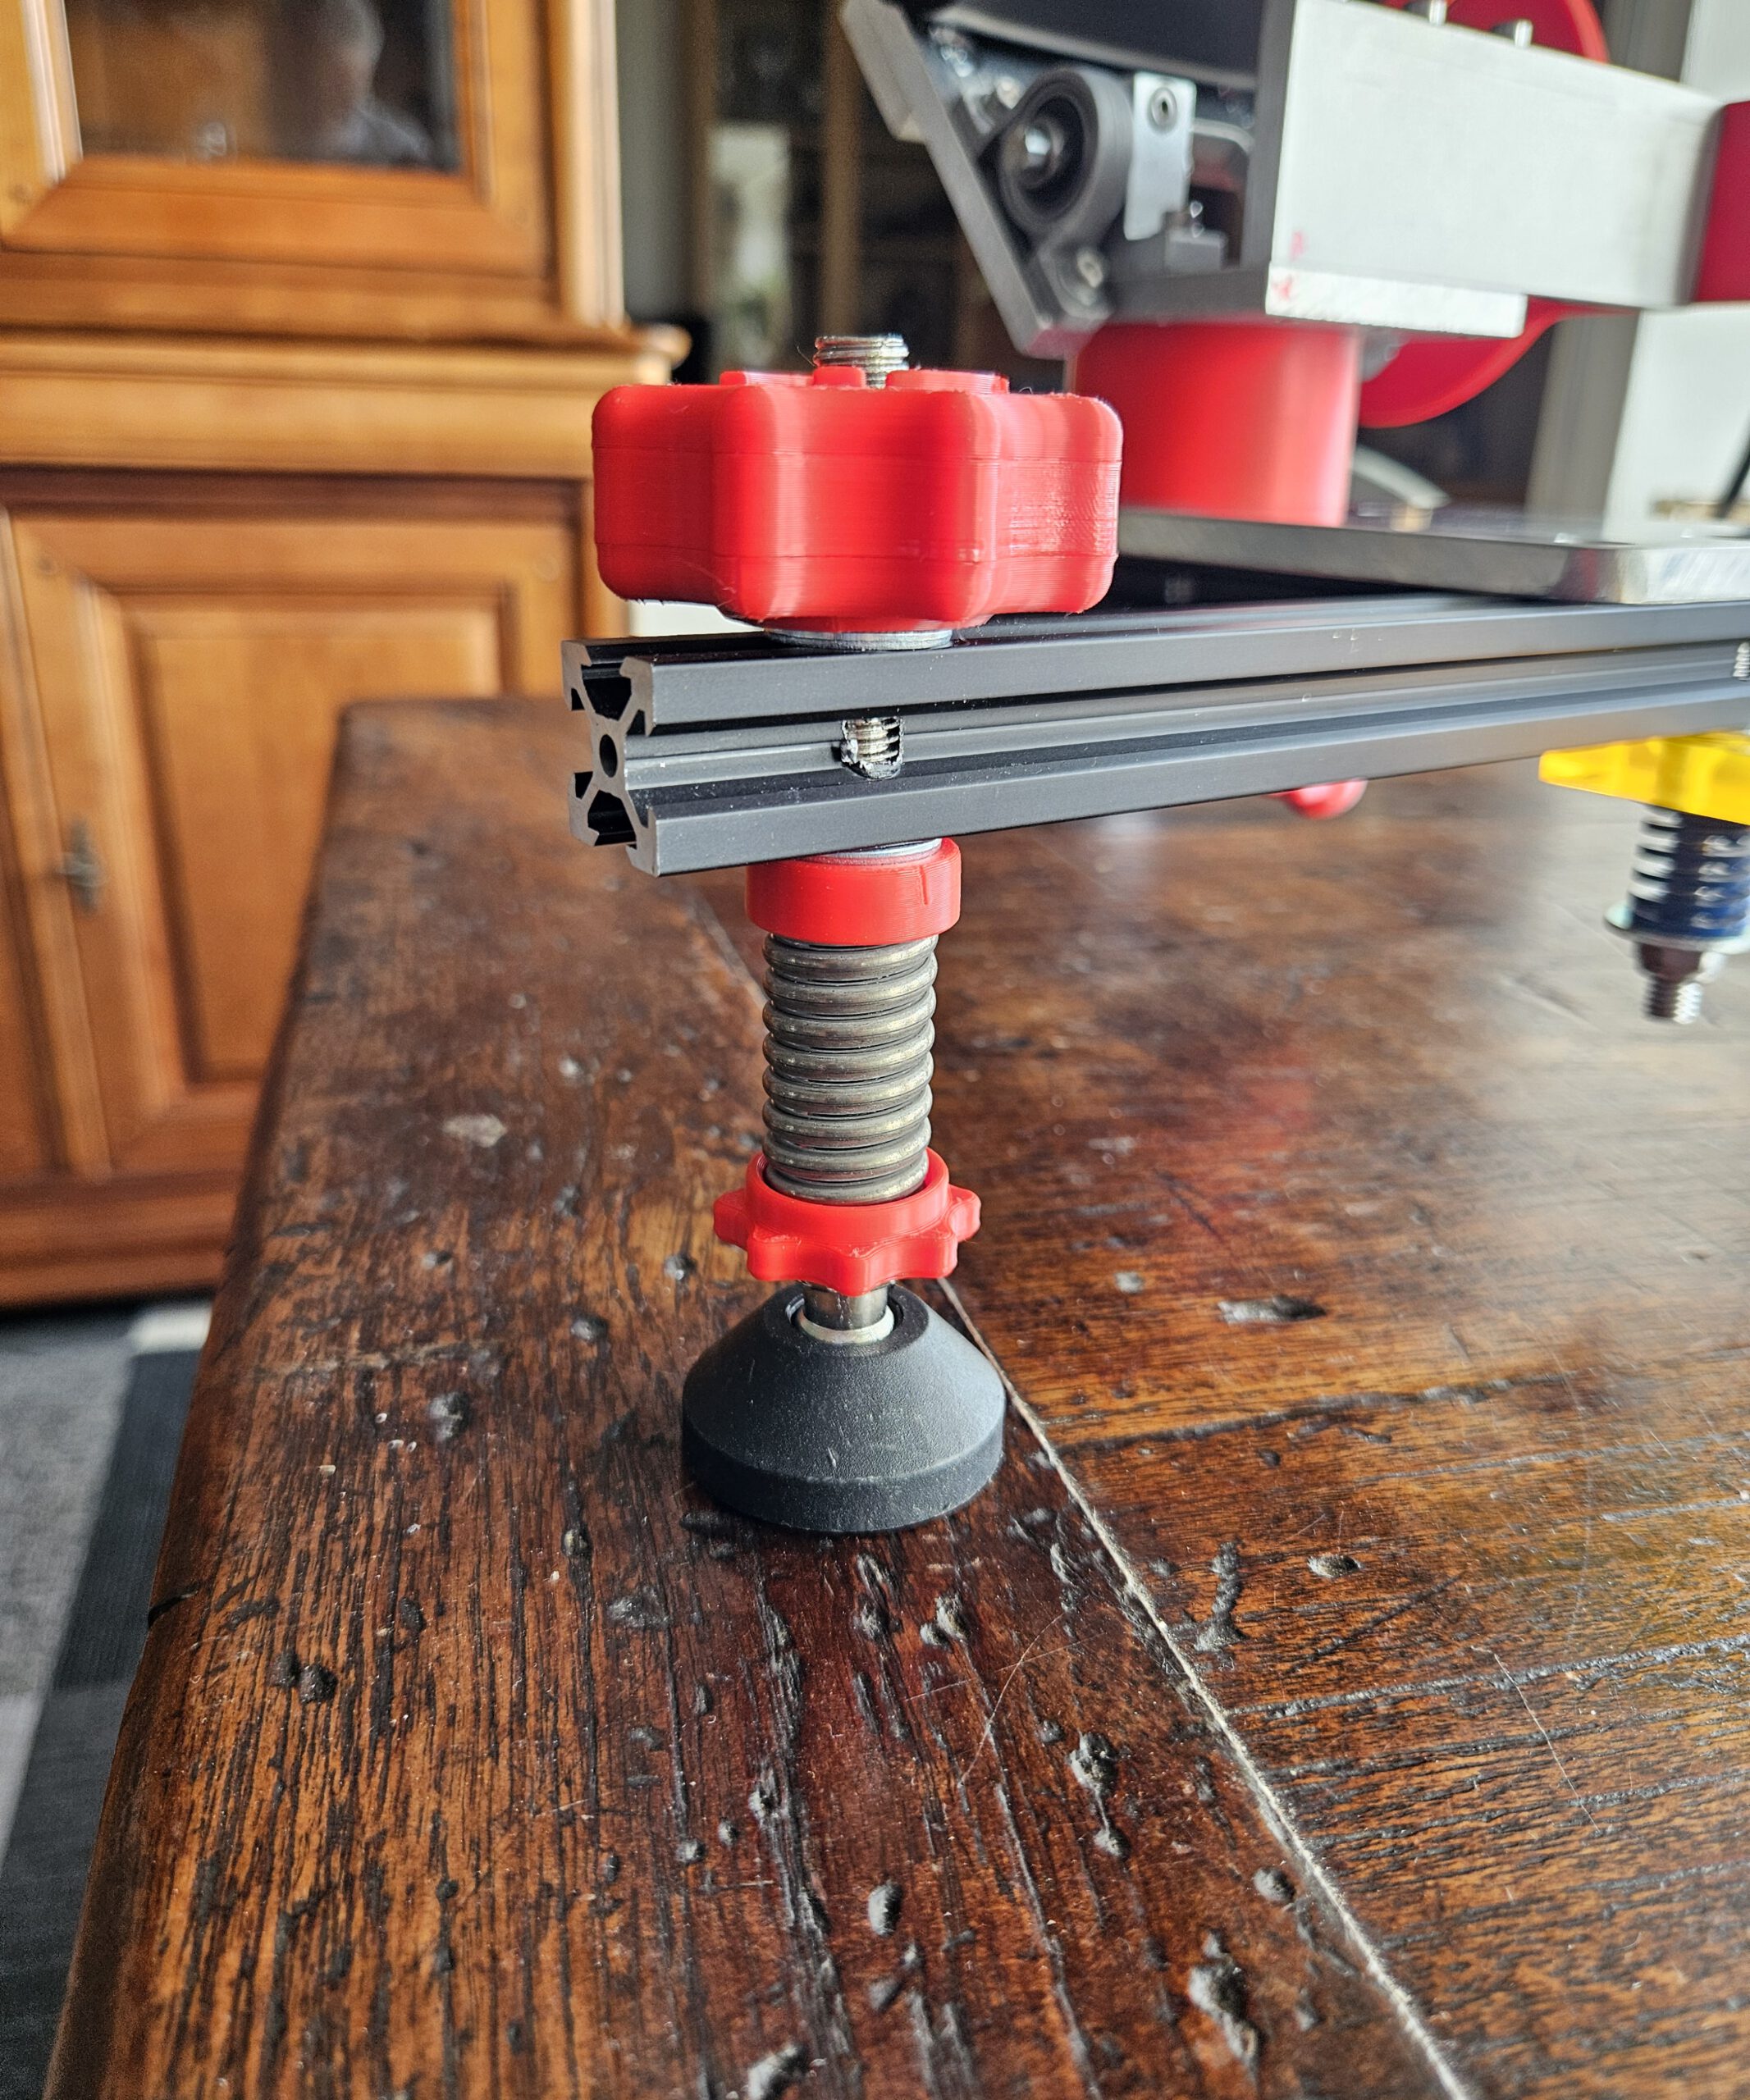
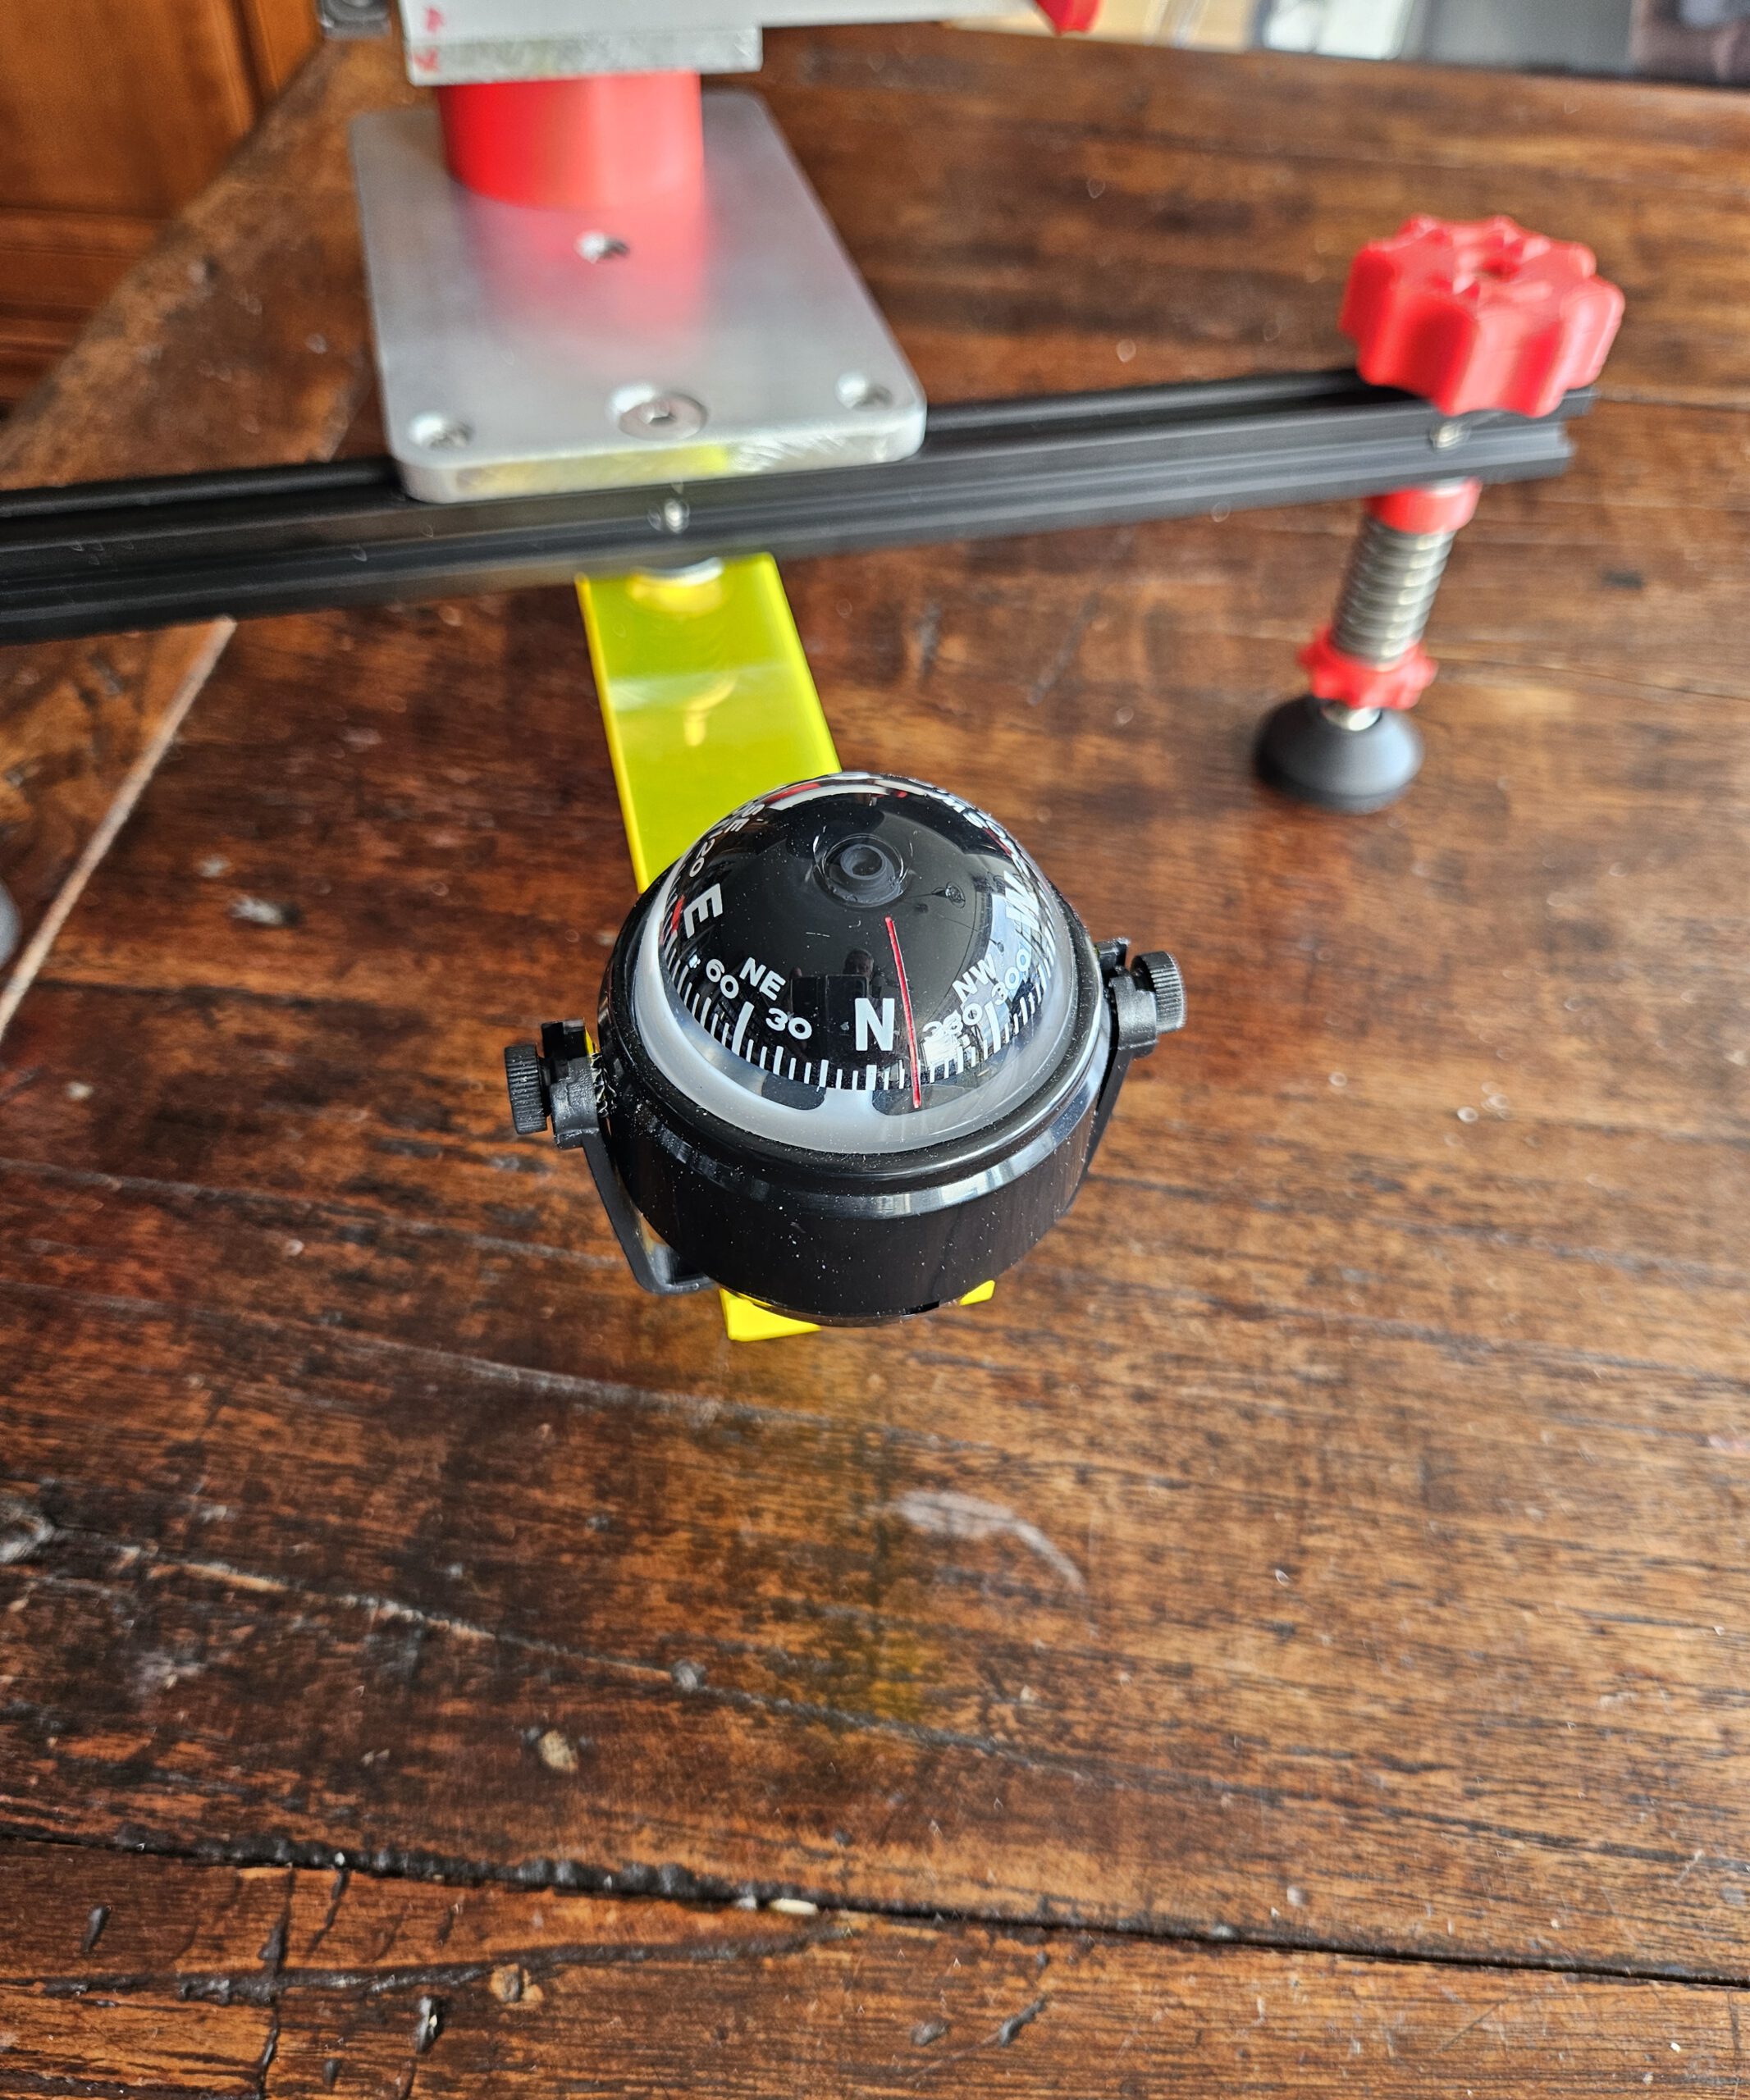
How does it work
The stars appear to move across the night sky because the Earth rotates. Polaris lies very close to the Earth’s rotational axis and therefore appears almost stationary while the other stars seem to circle around it.
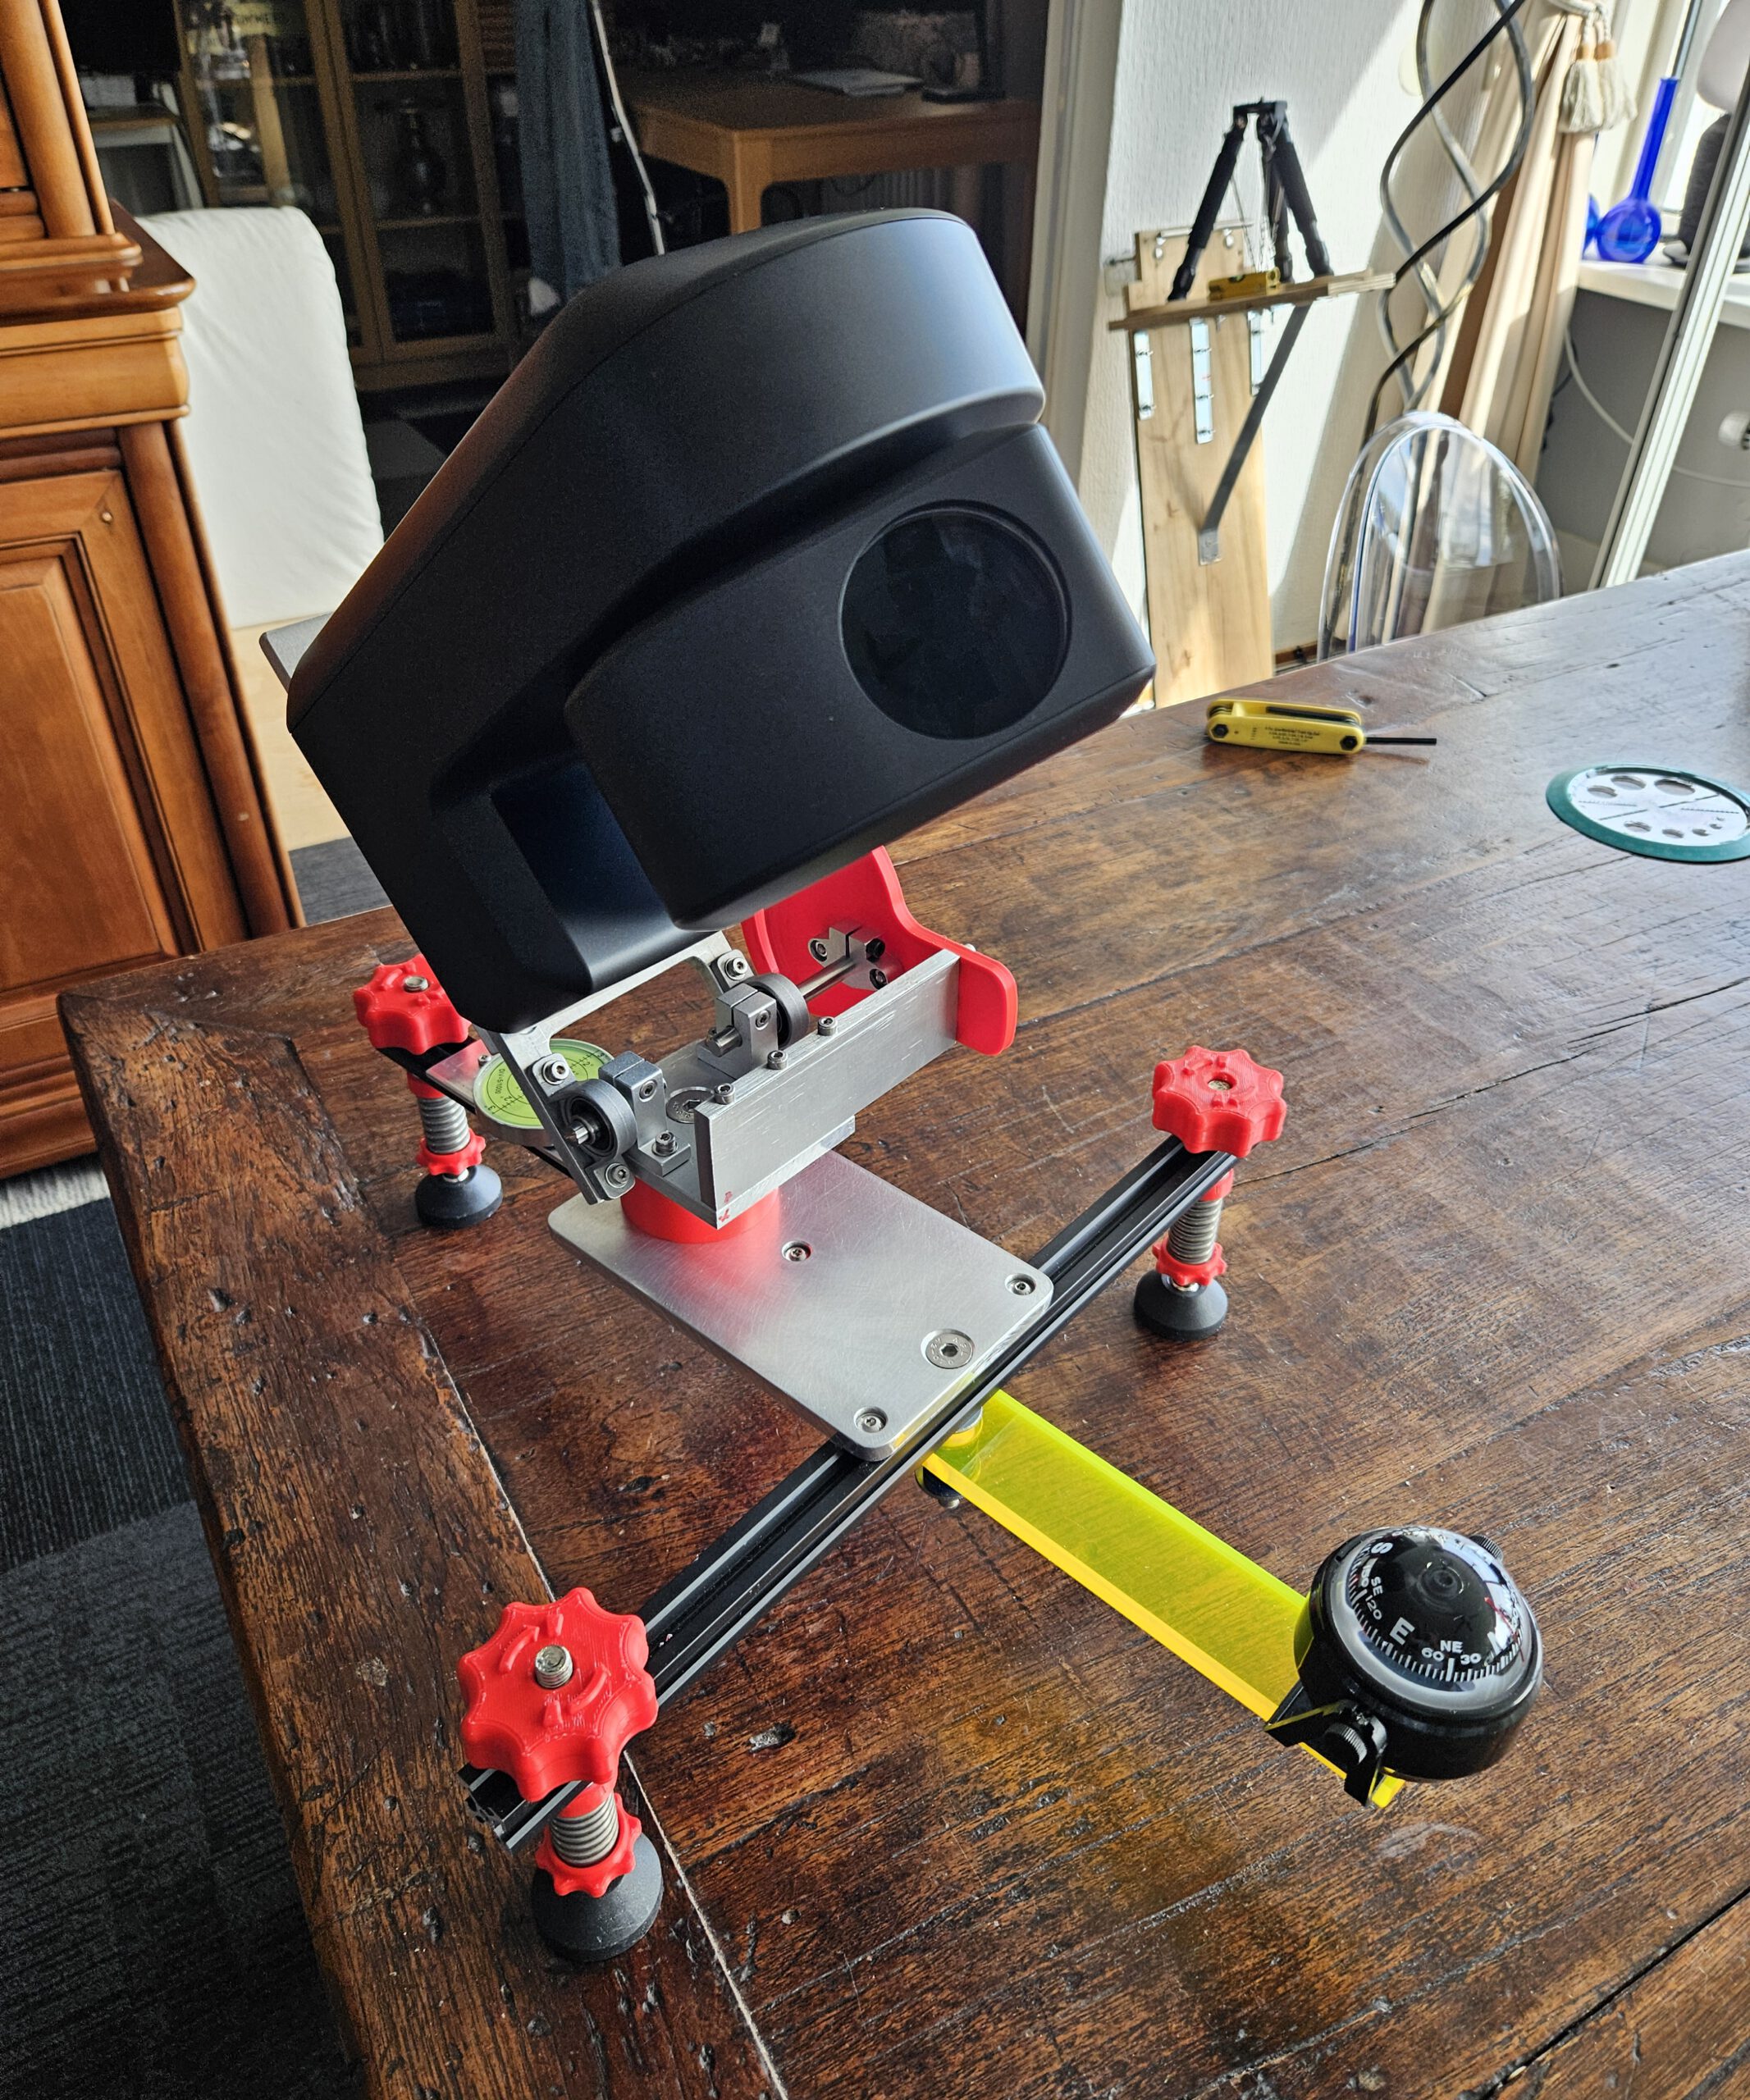
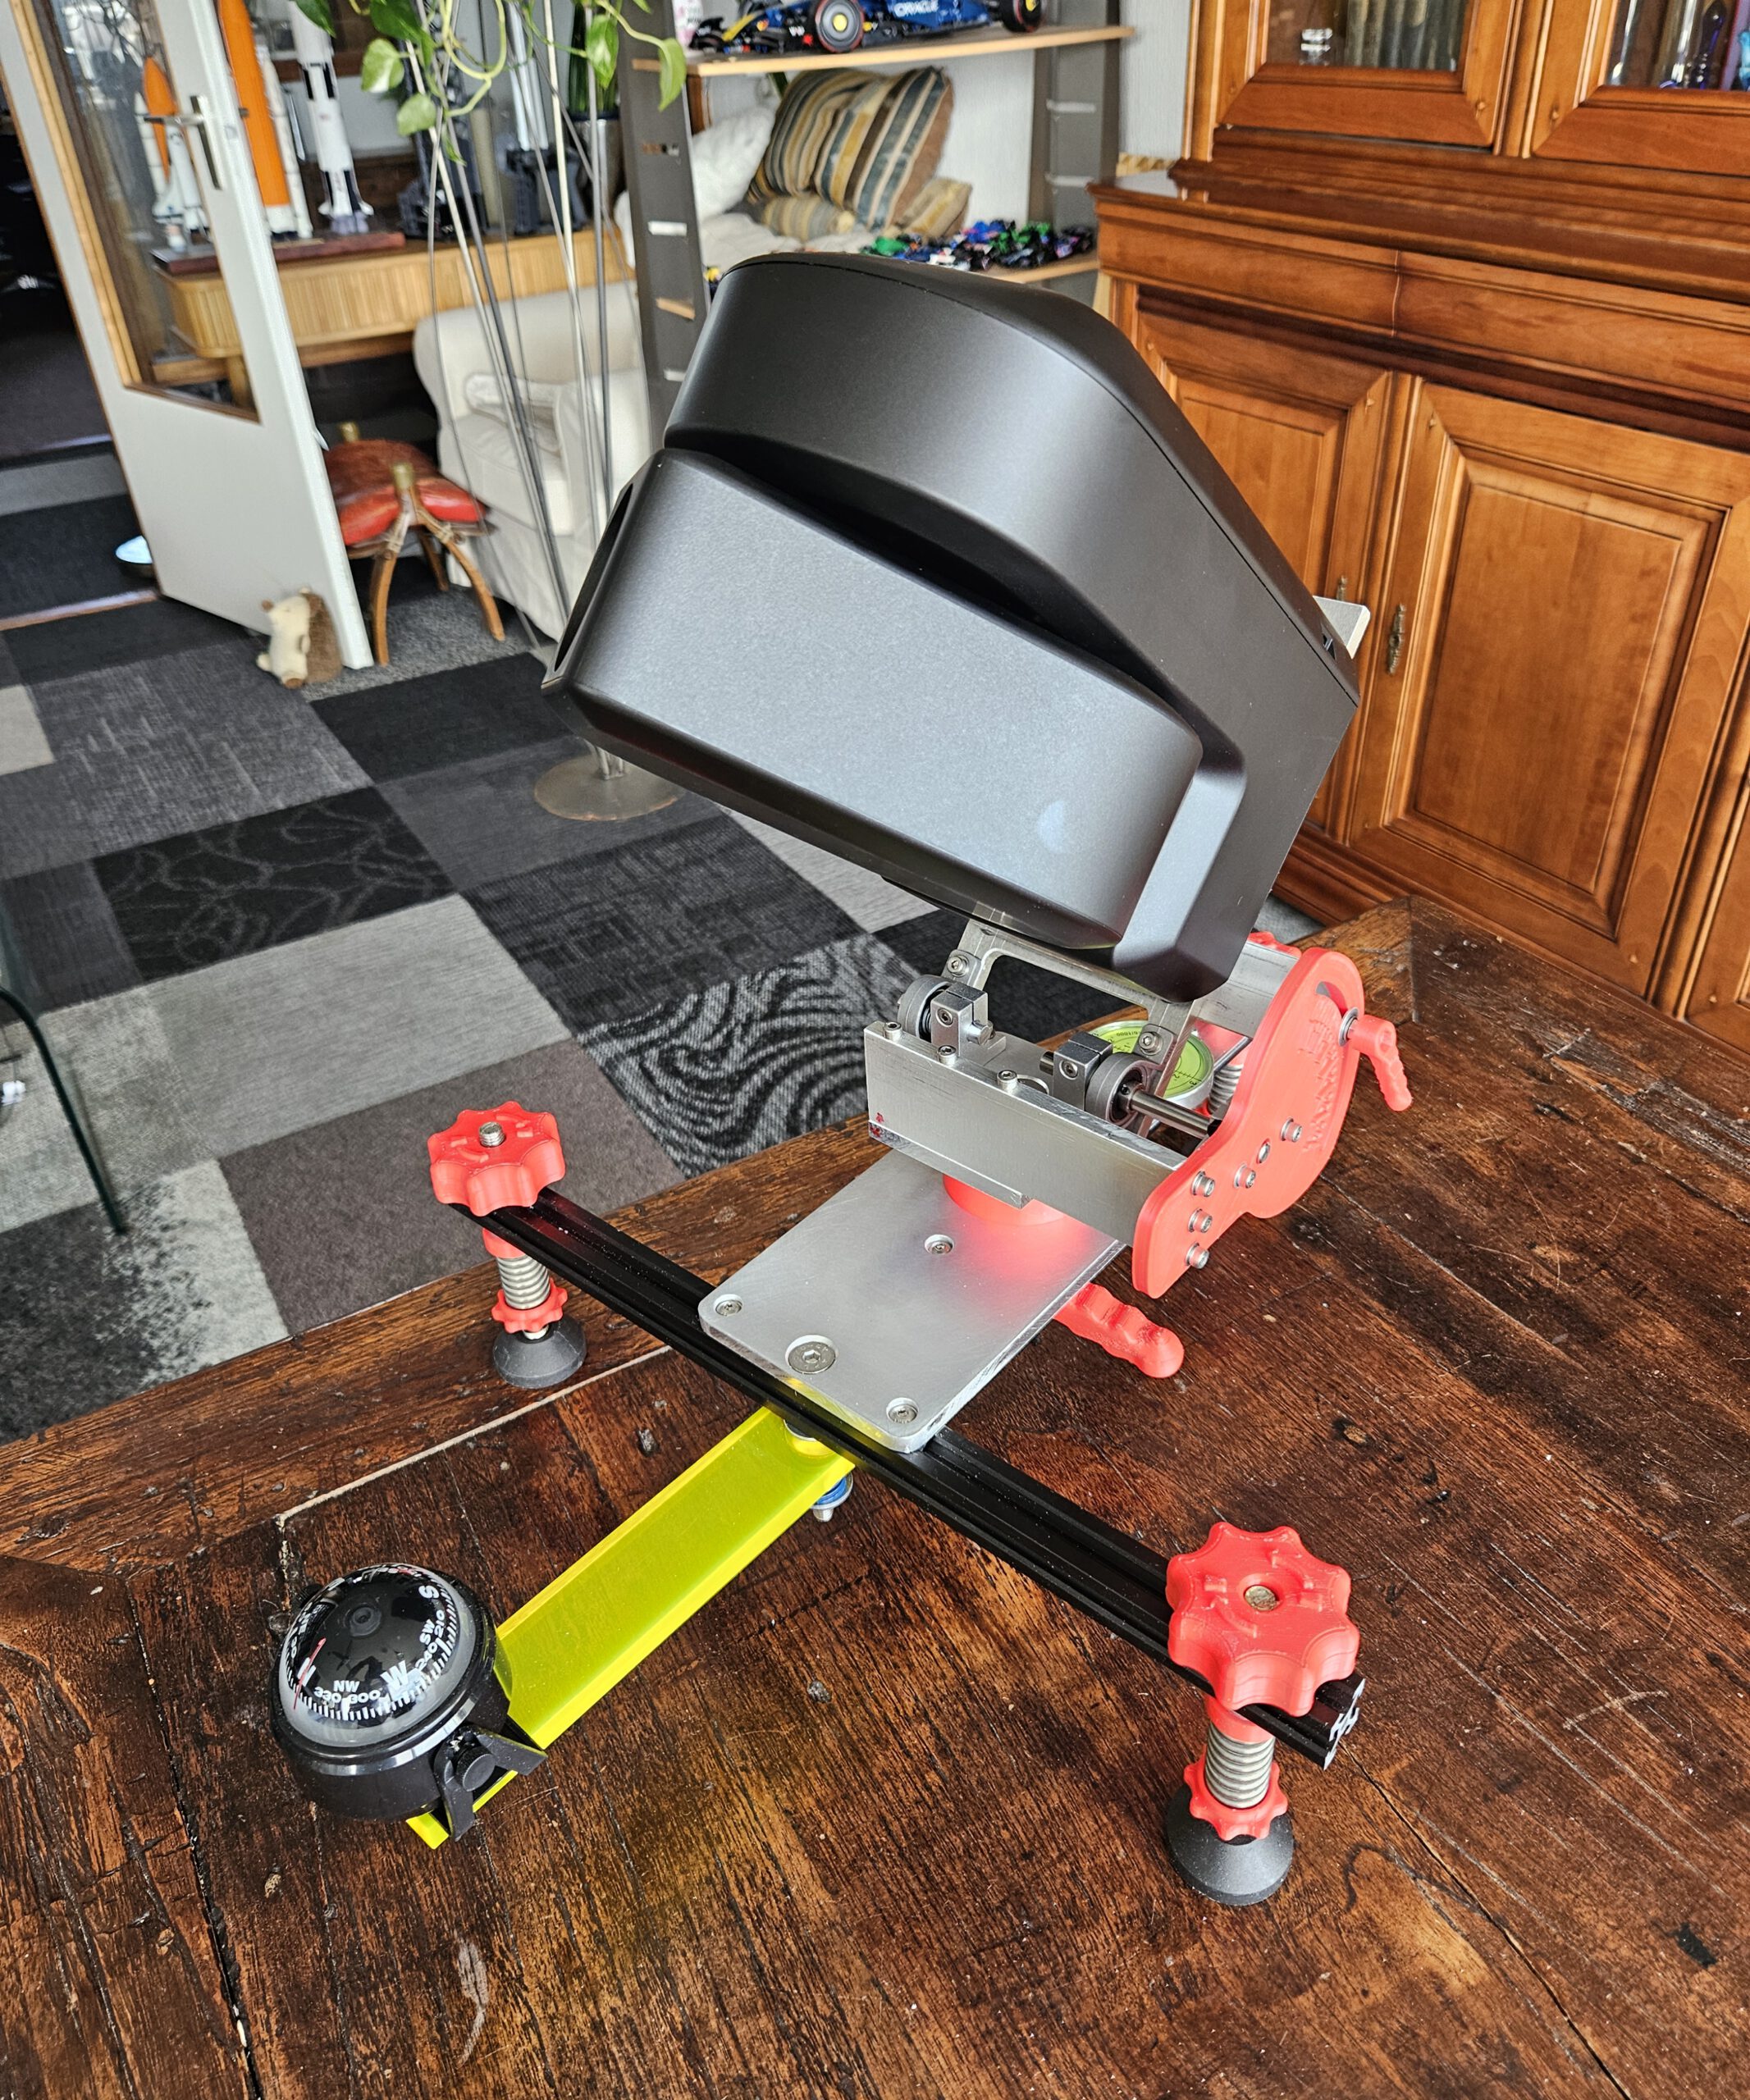
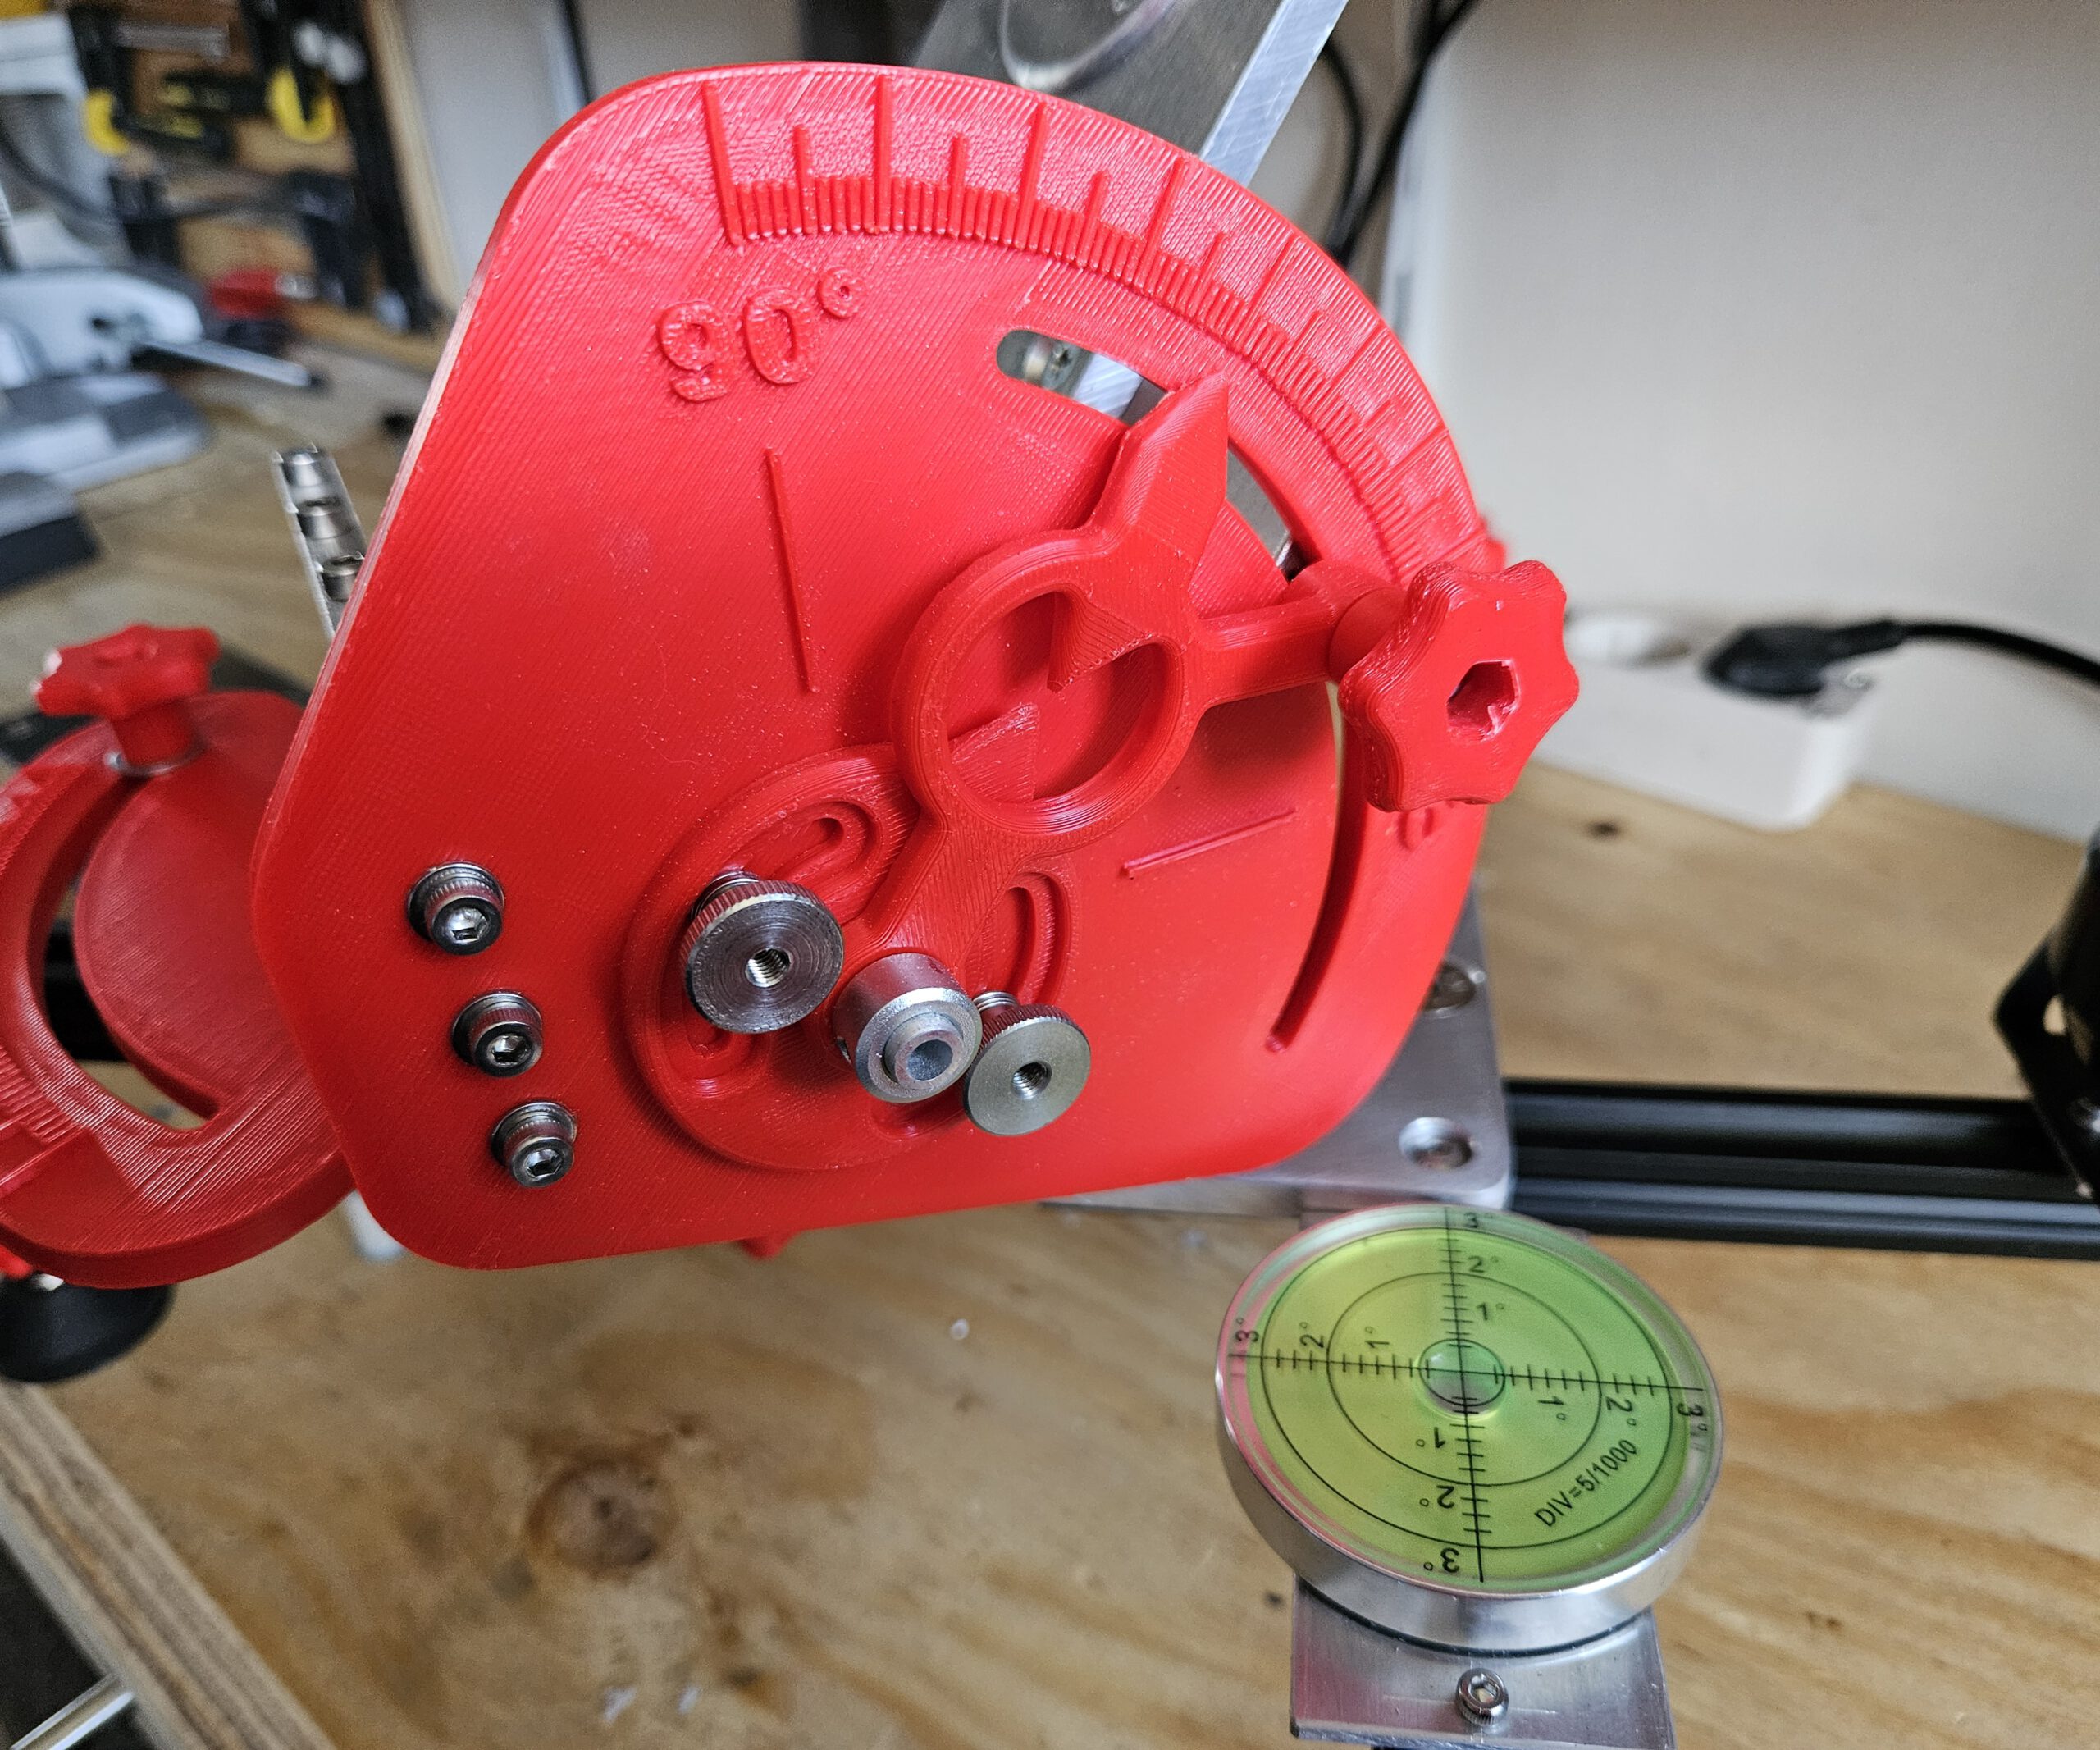
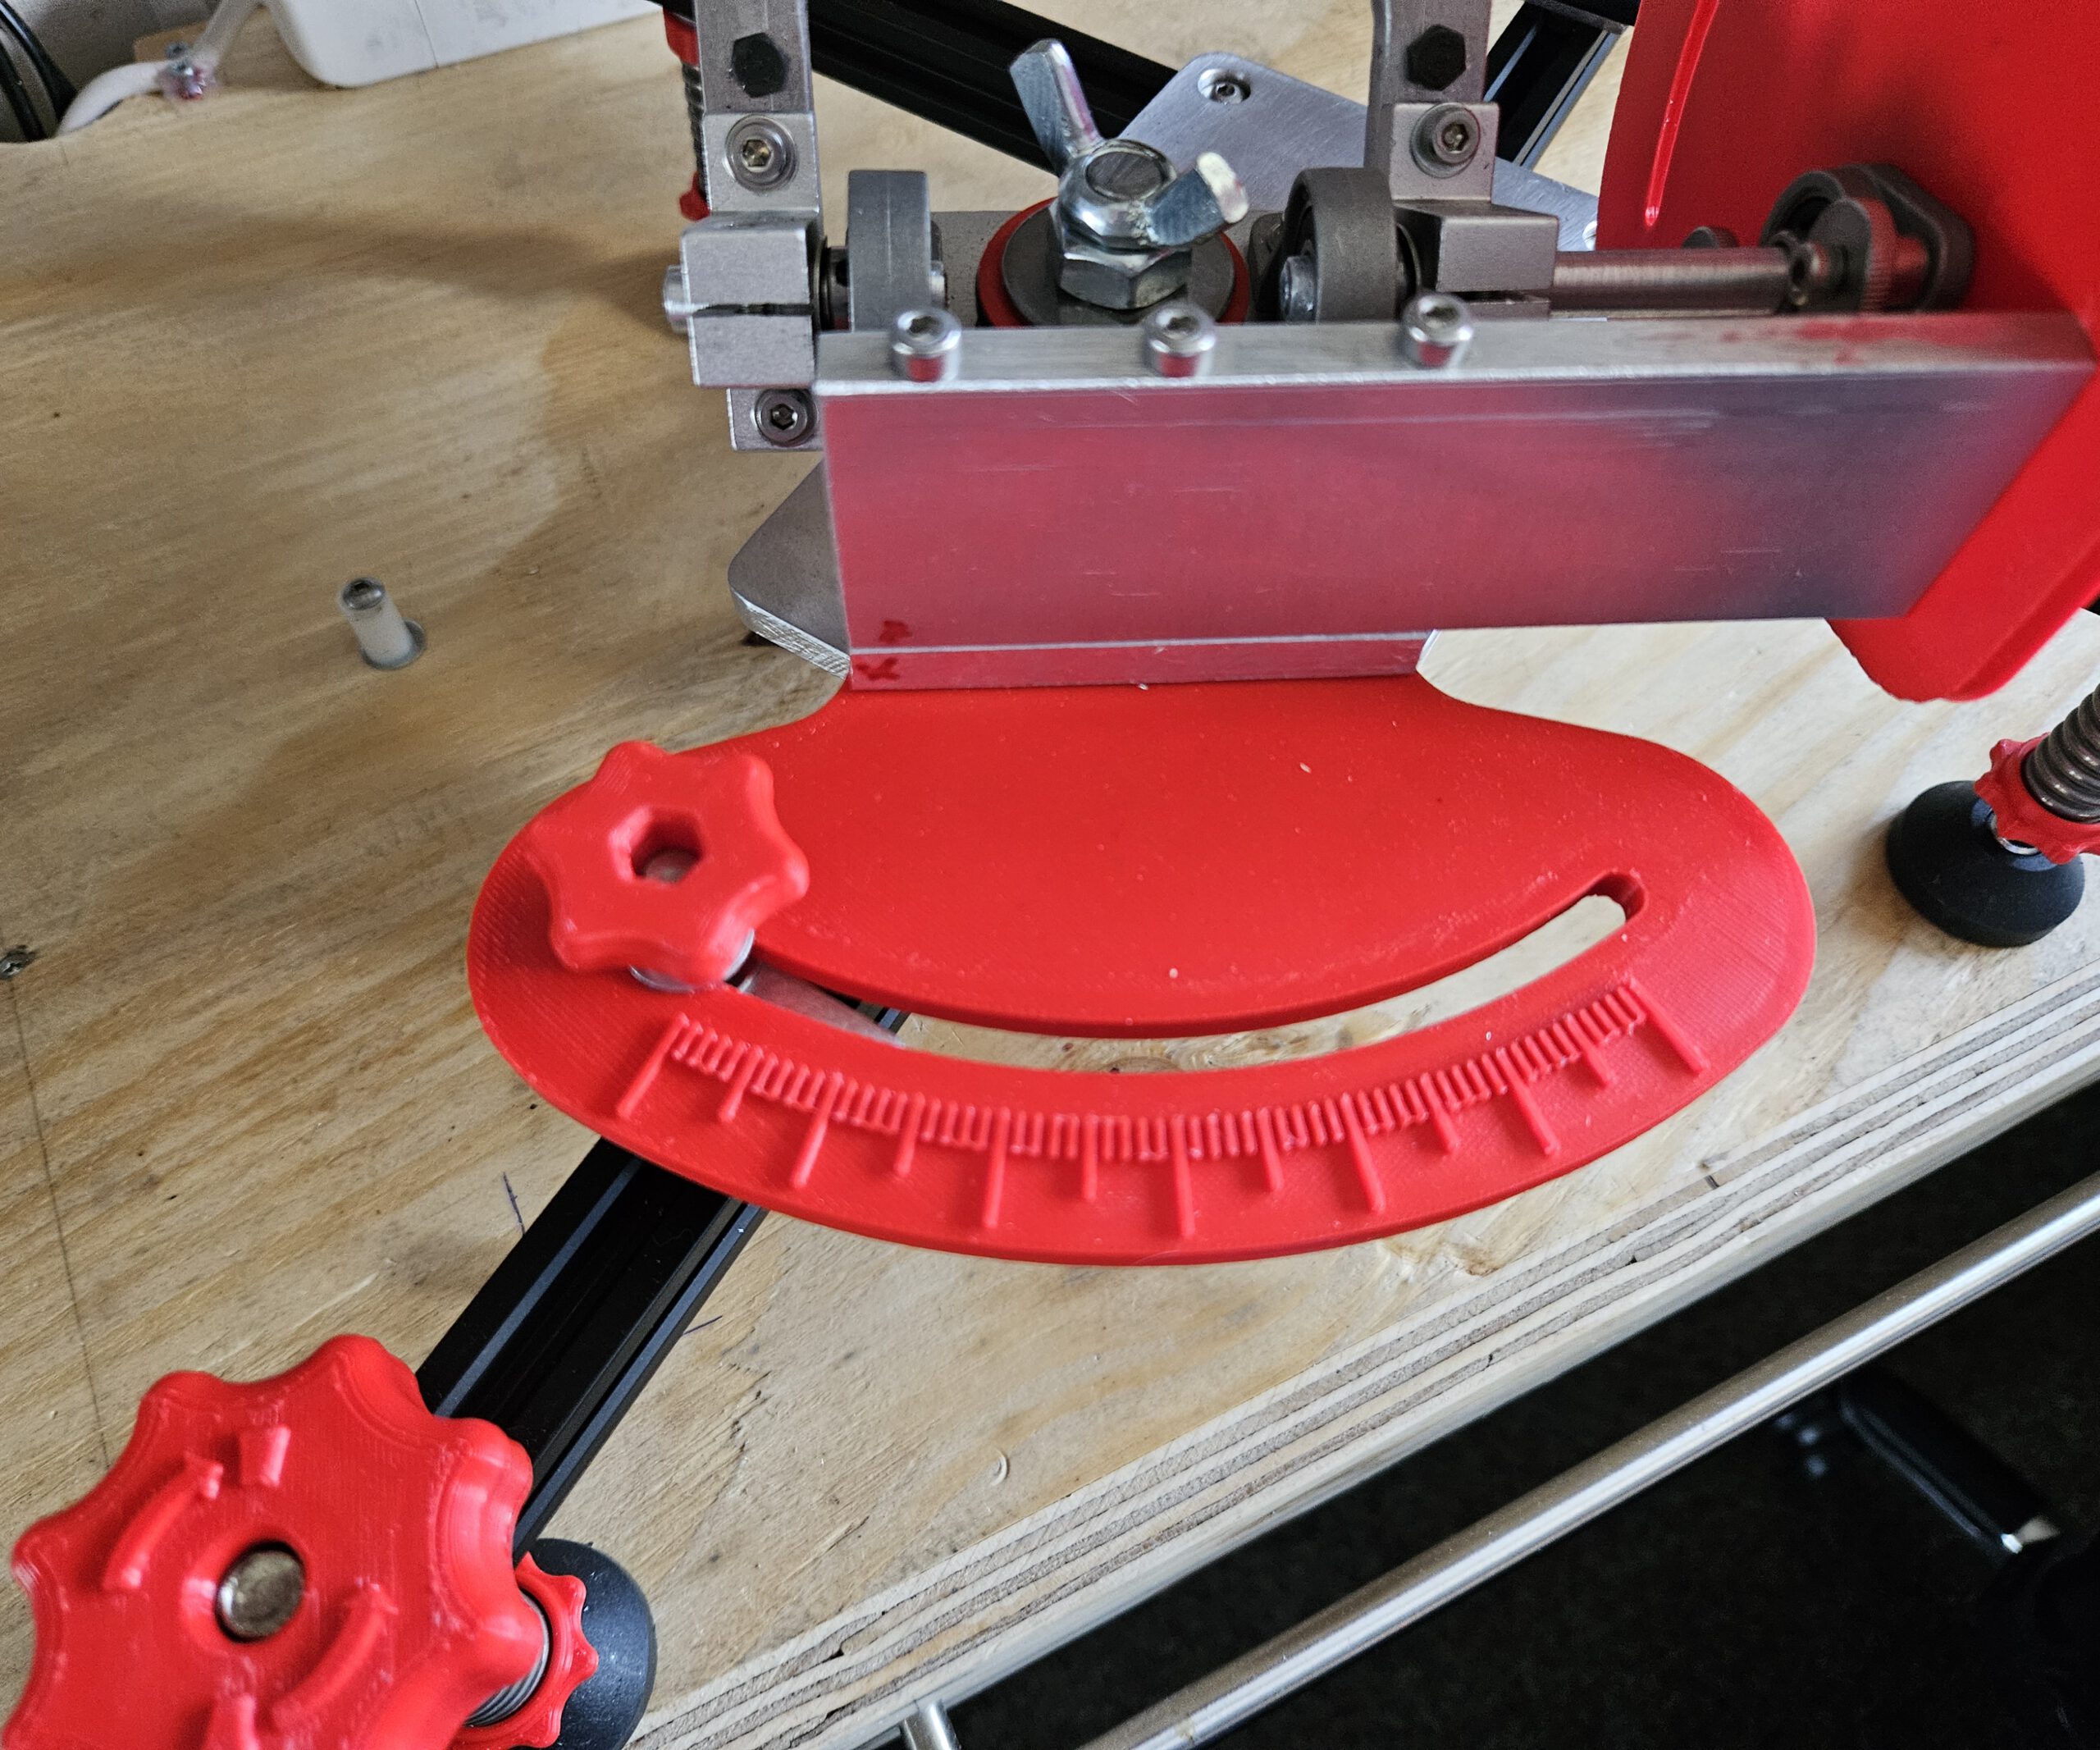
For equatorial tracking, the Seestar’s rotation axis must be aligned parallel to the Earth’s axis. My mount therefore provides adjustment in two directions: altitude sets the angle of the axis to match the local latitude, while azimuth allows the axis to be aimed precisely towards Polaris.
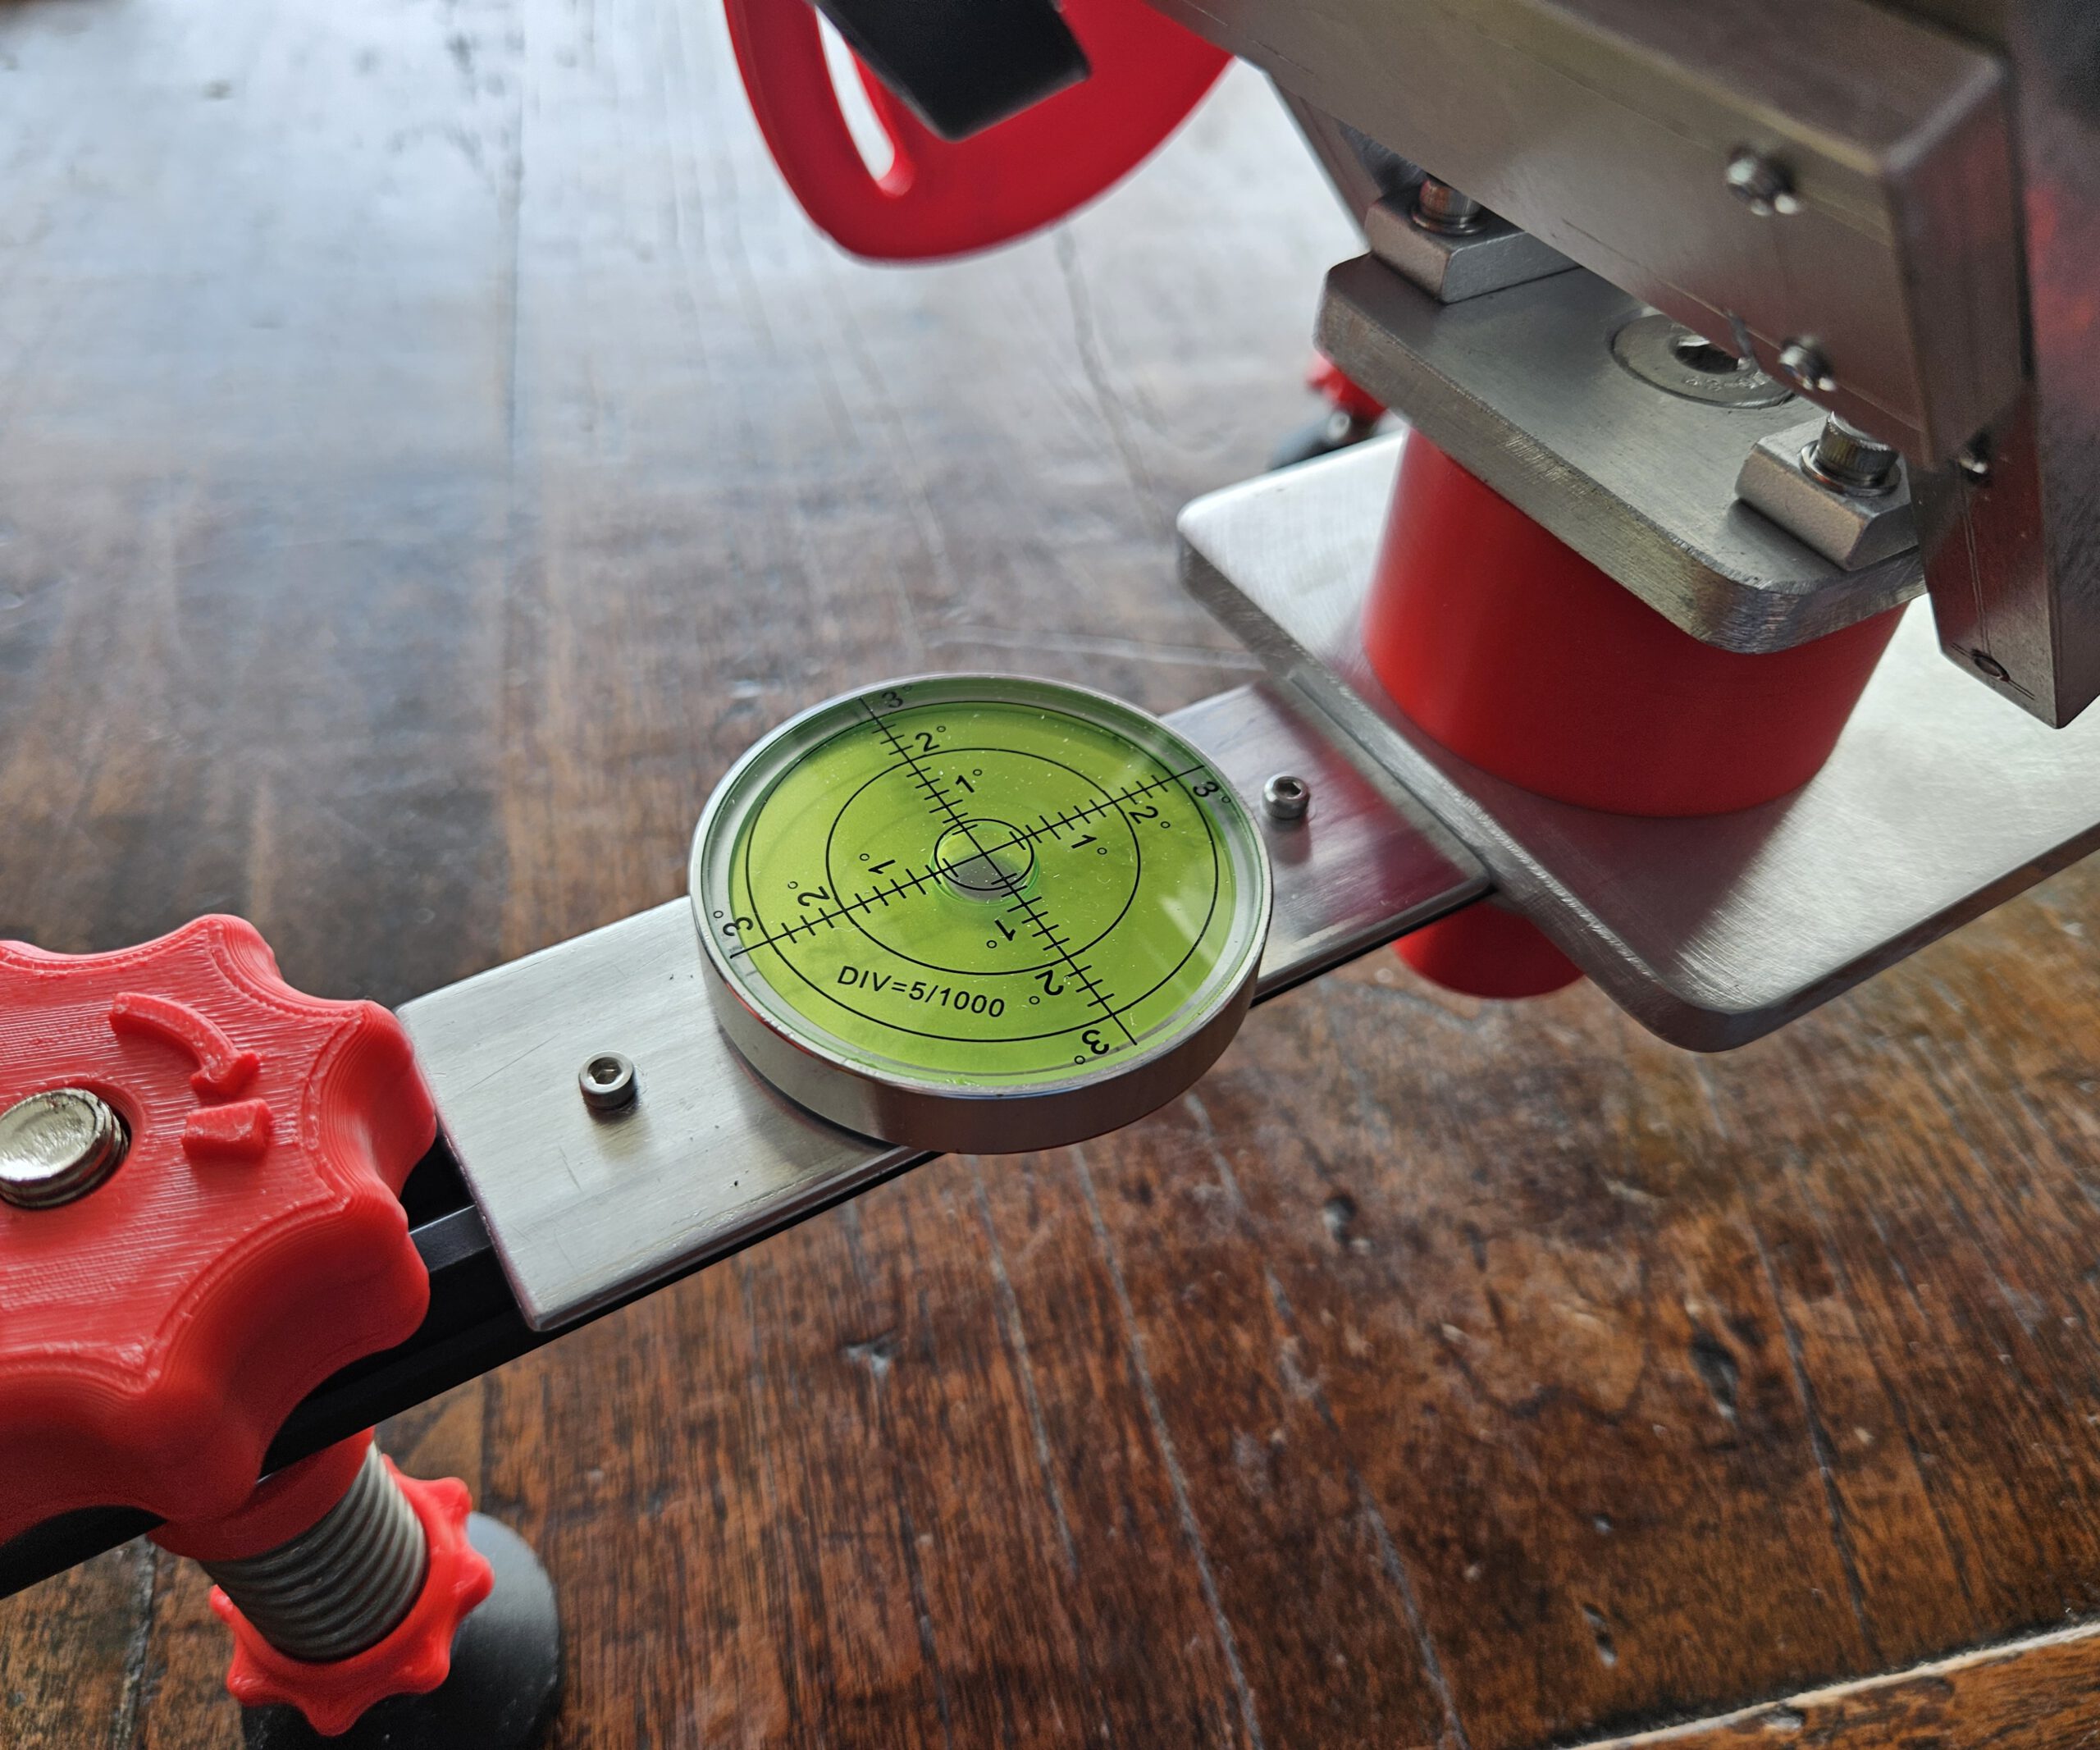
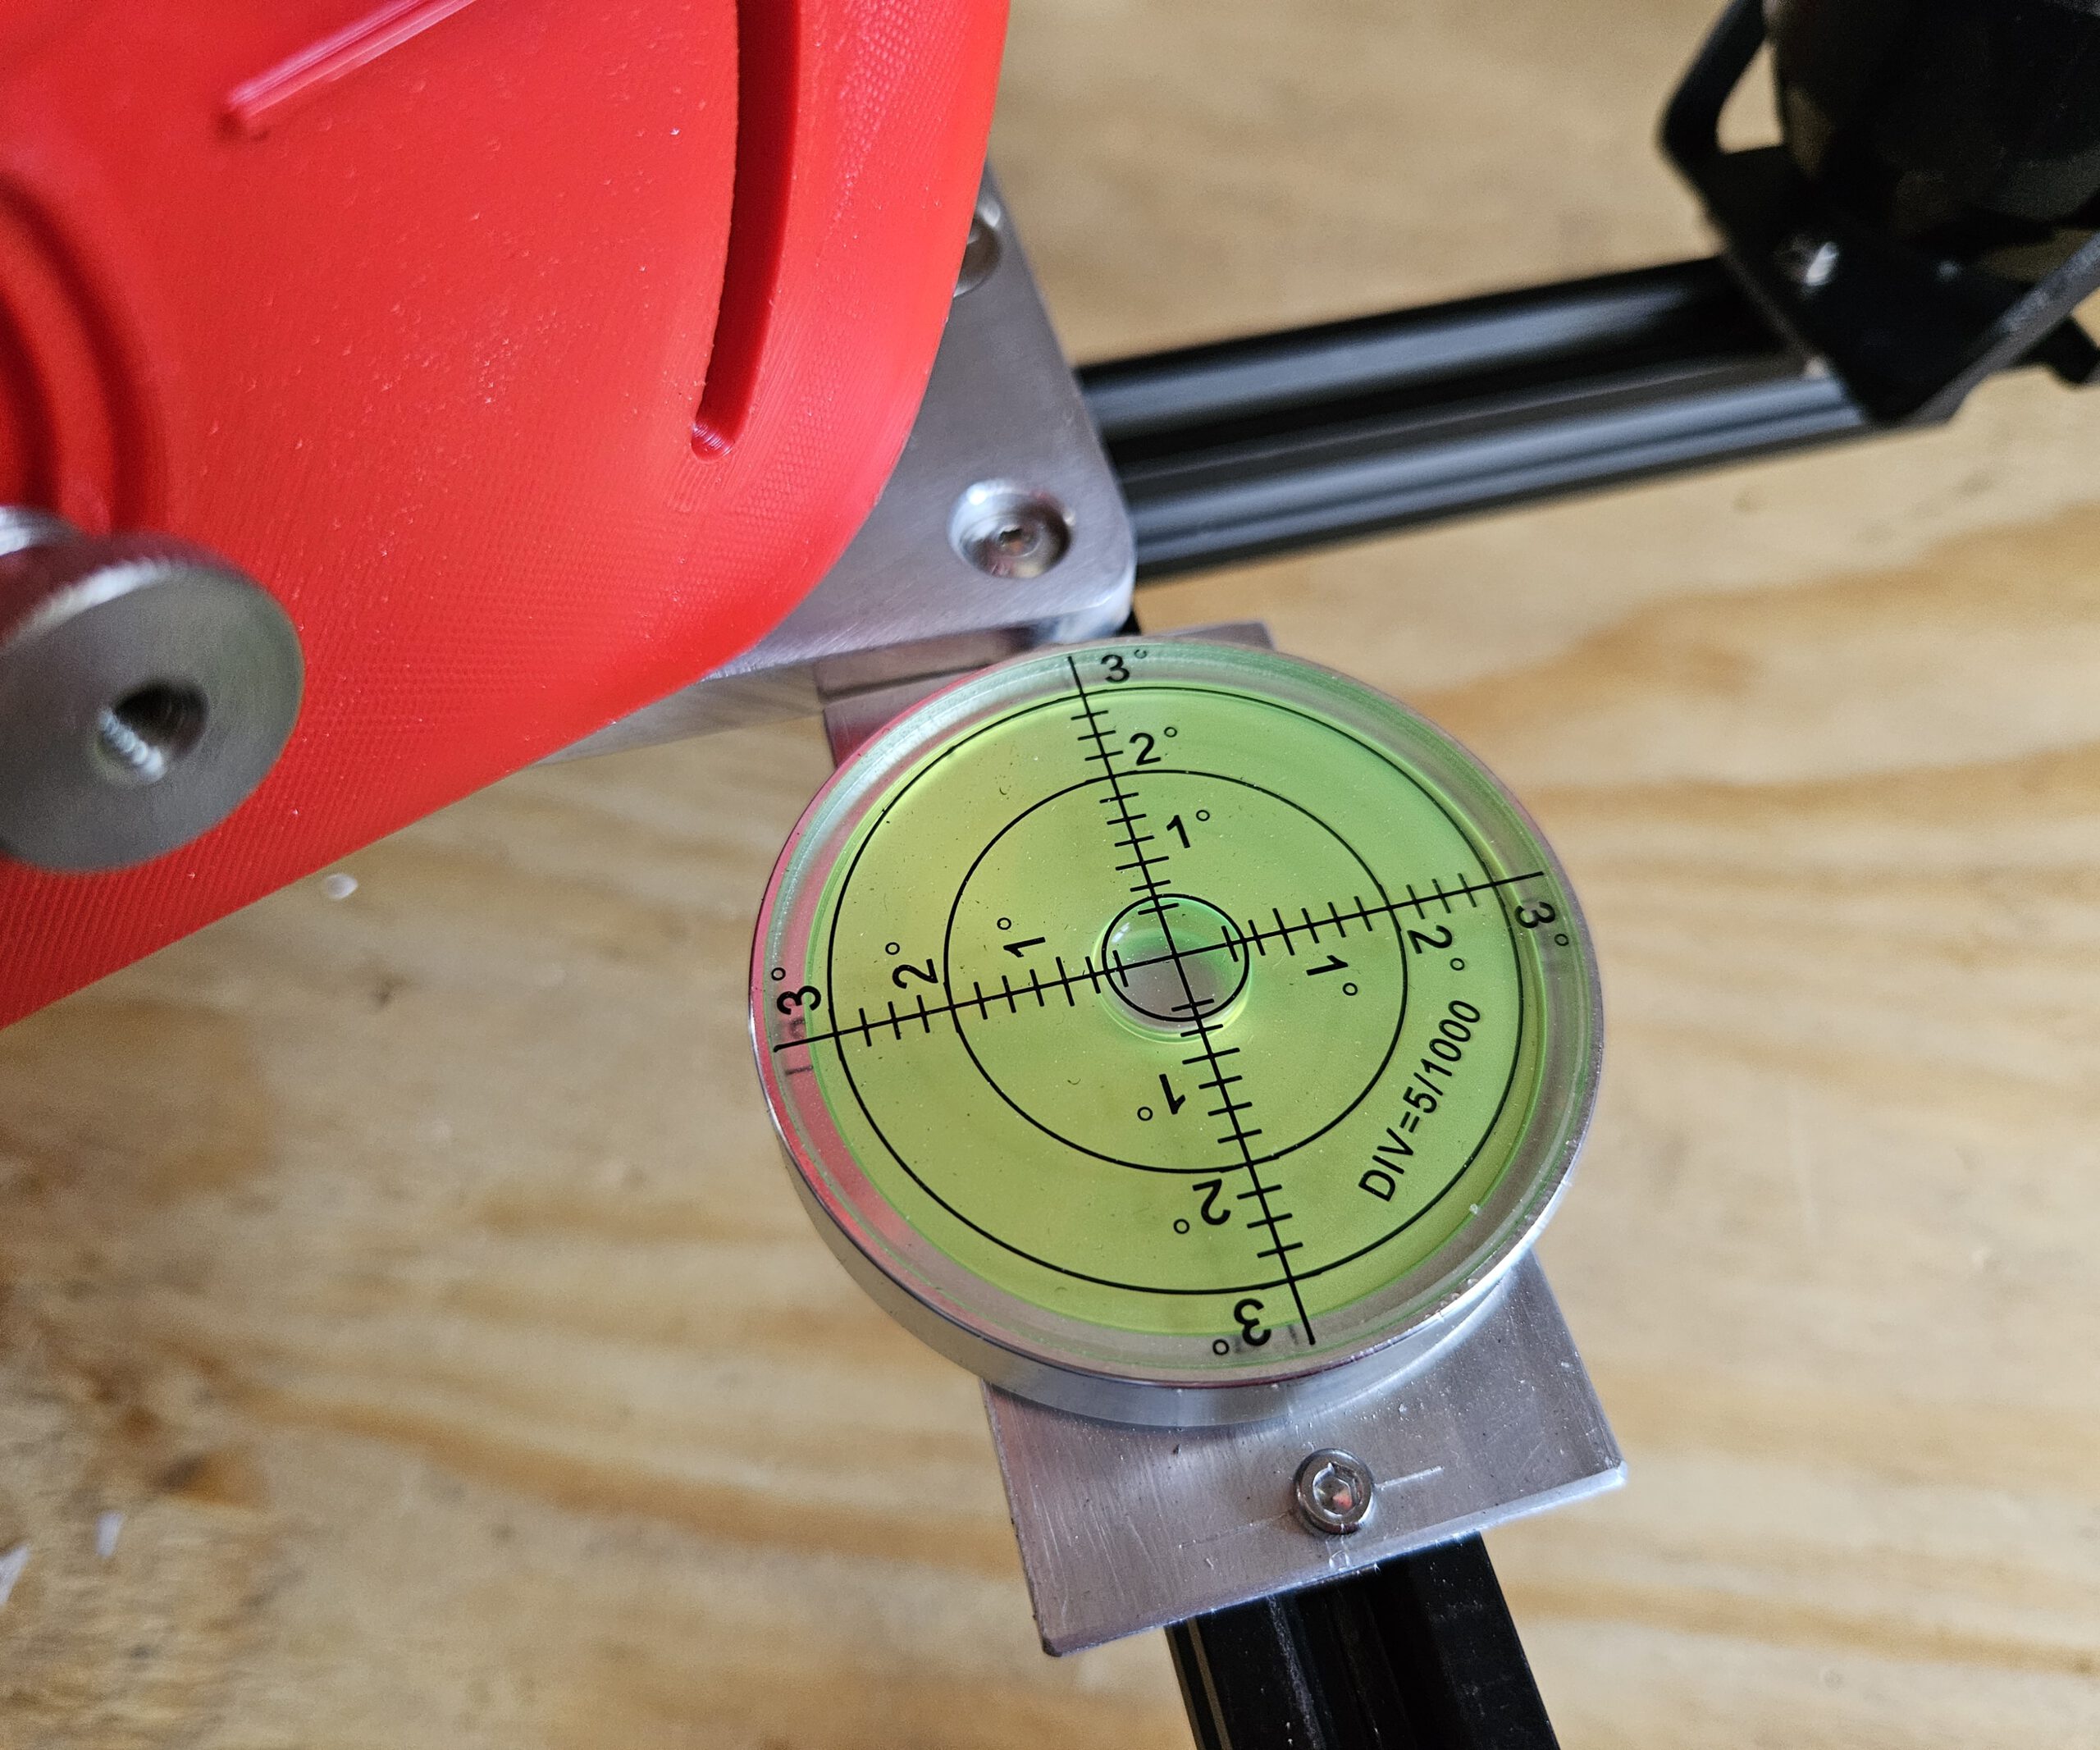
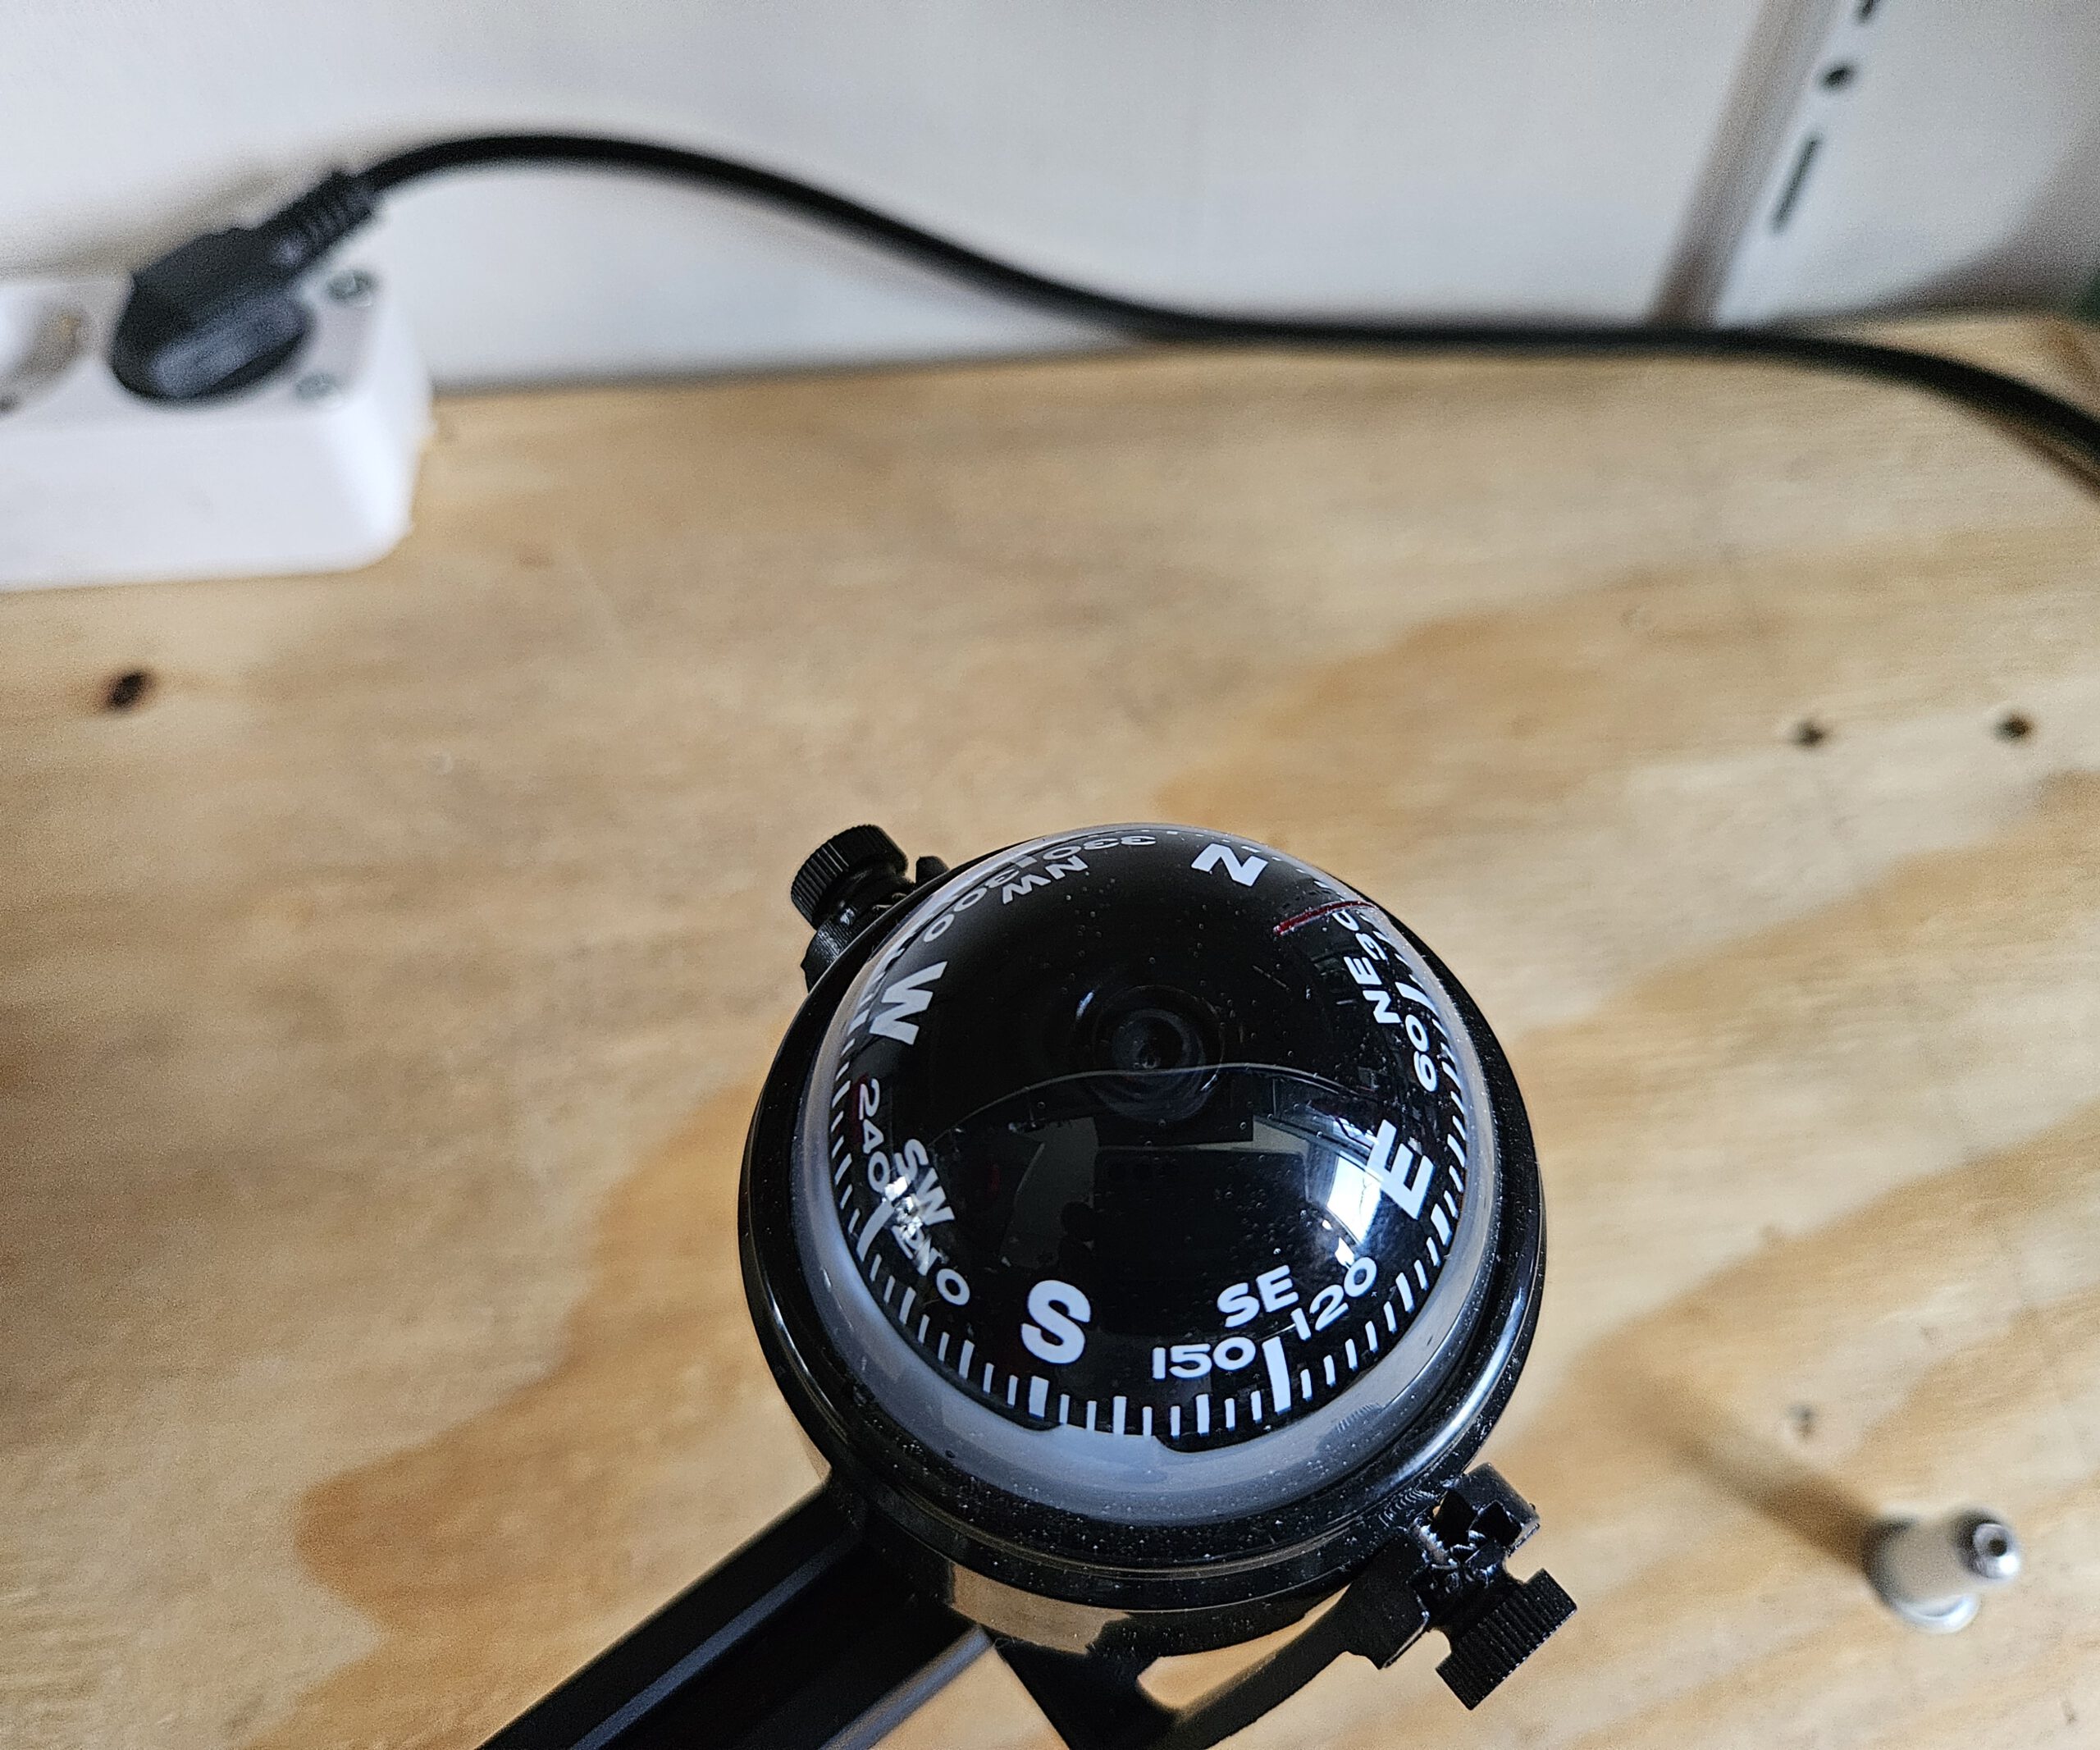
The three adjustable feet are used to level the mount first. A built-in compass and spirit level help with the initial setup, after which the altitude and azimuth controls provide the finer alignment.
Once aligned, the Seestar’s own rotation mechanism can follow the apparent movement of the sky around this axis.

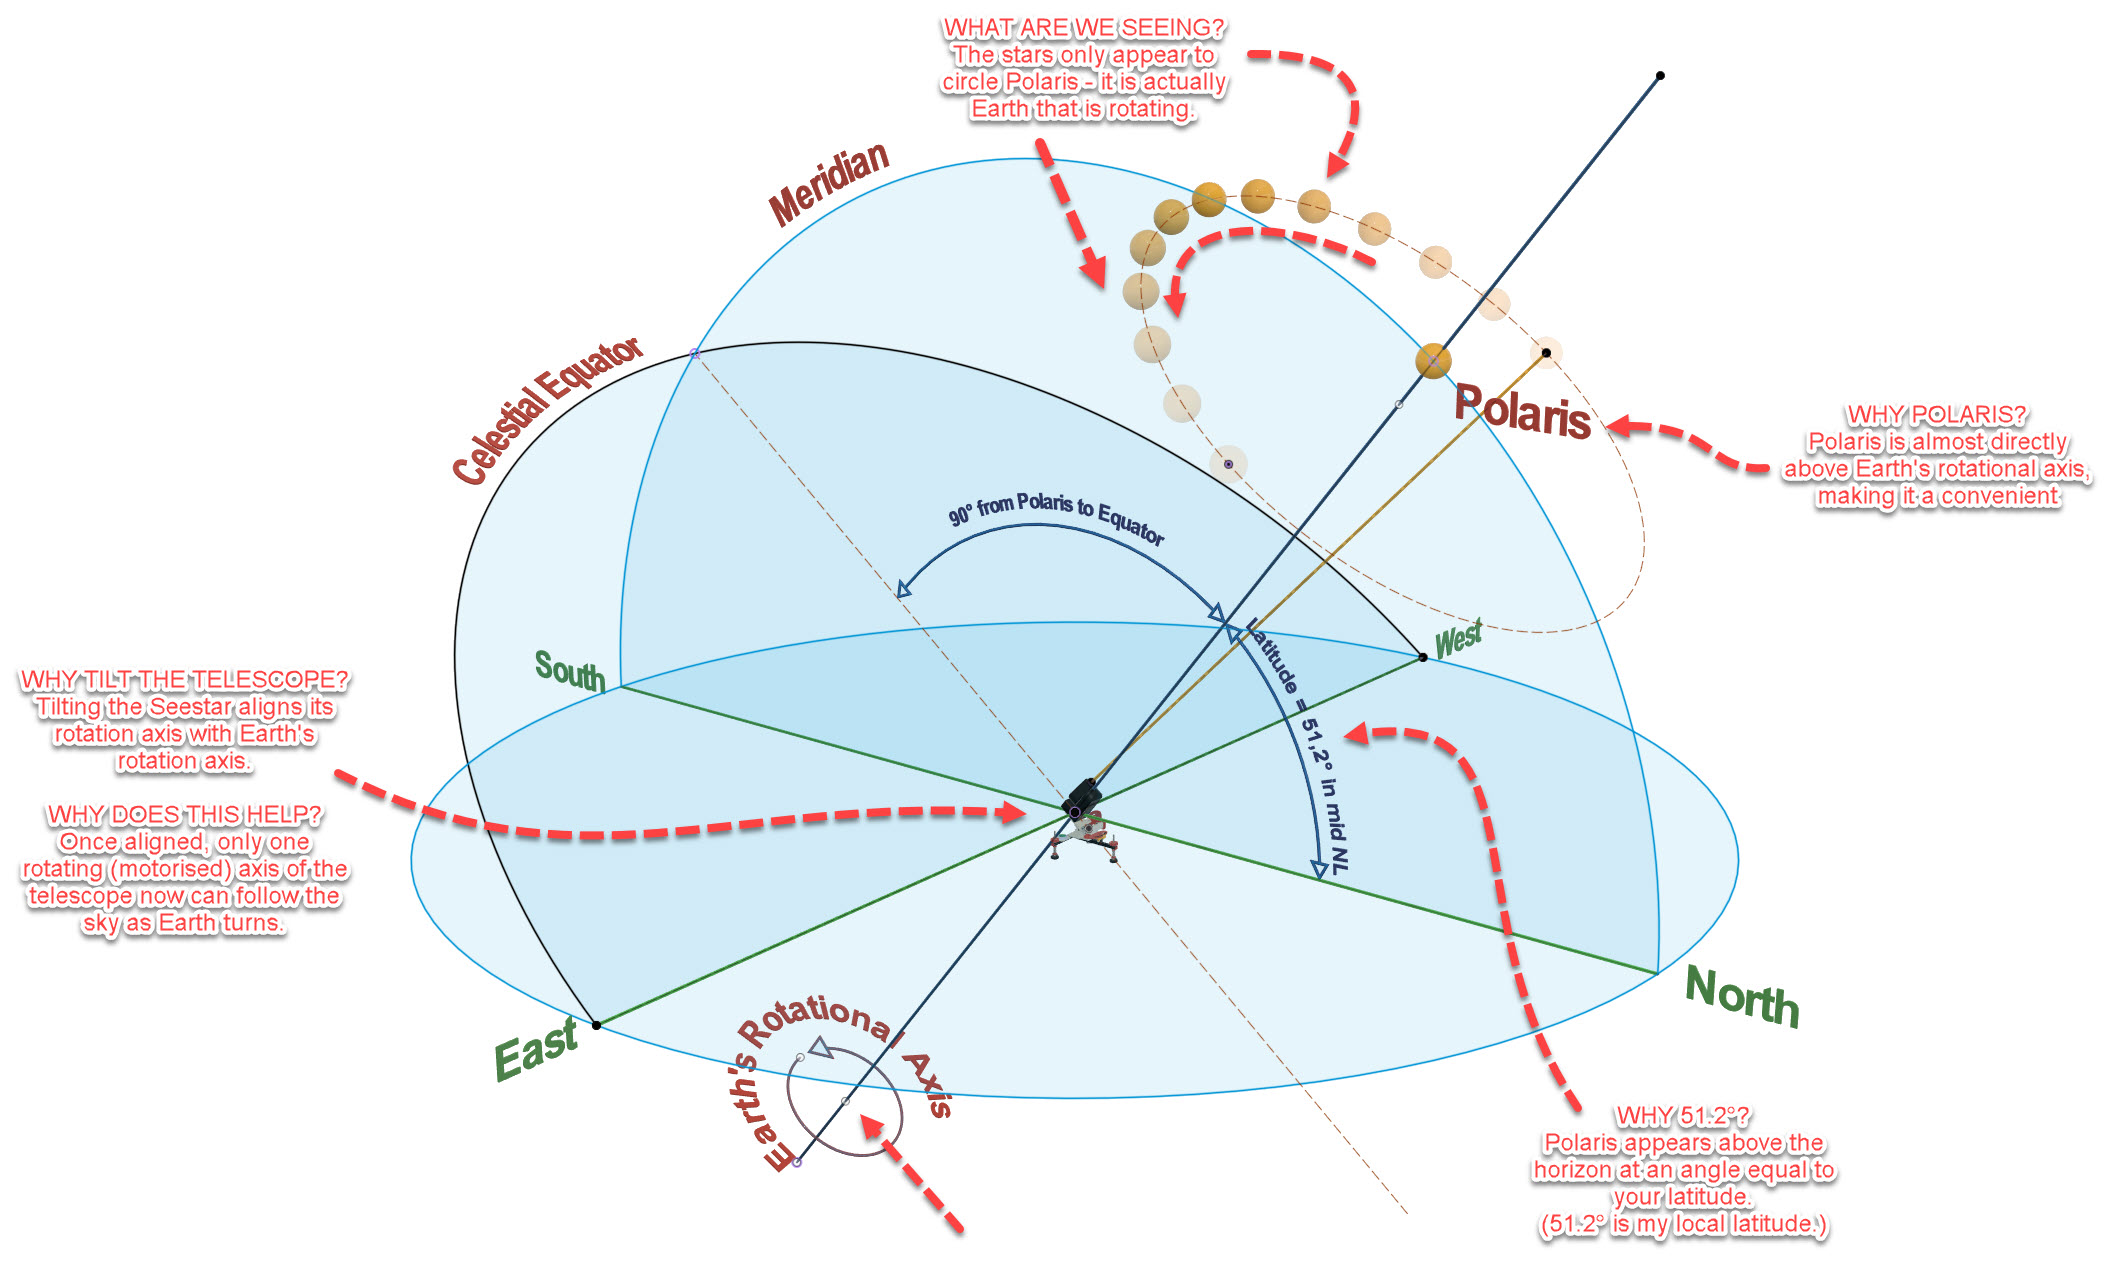
WHY POLARIS?
Polaris is almost directly above Earth’s rotational axis, making it a convenient alignment point.
WHY 51.2°?
Polaris appears above the horizon at an angle equal to your latitude.
WHY TILT THE TELESCOPE?
Tilting the Seestar aligns its rotation axis with Earth’s rotation axis.
WHY DOES THIS HELP?
Once aligned, one rotating axis can follow the sky as Earth turns.
En eventueel bij het rijtje sterren bovenaan, omdat dát volgens mij voor een leek de grootste aha oplevert:
WHAT ARE WE SEEING?
The stars only appear to circle Polaris — it is actually Earth that is rotating.
Pictures of the design


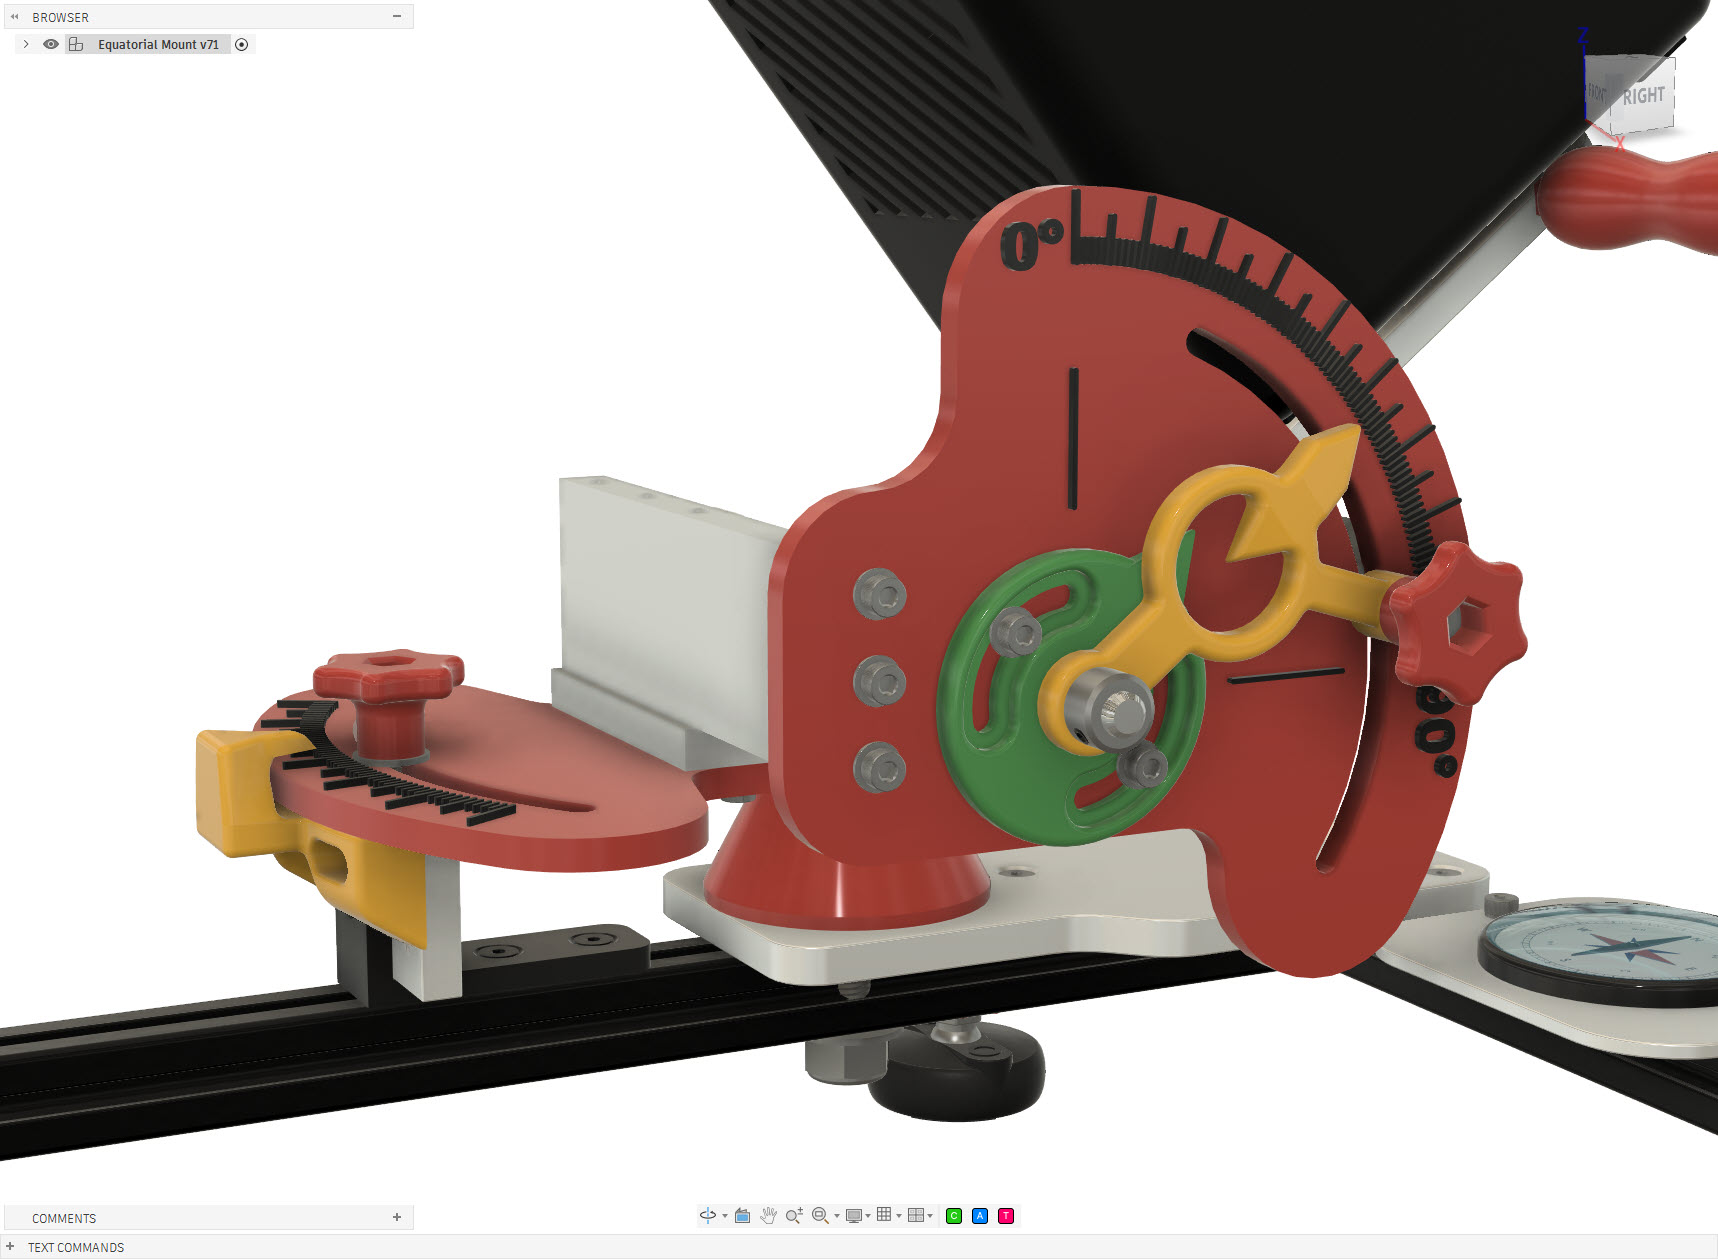
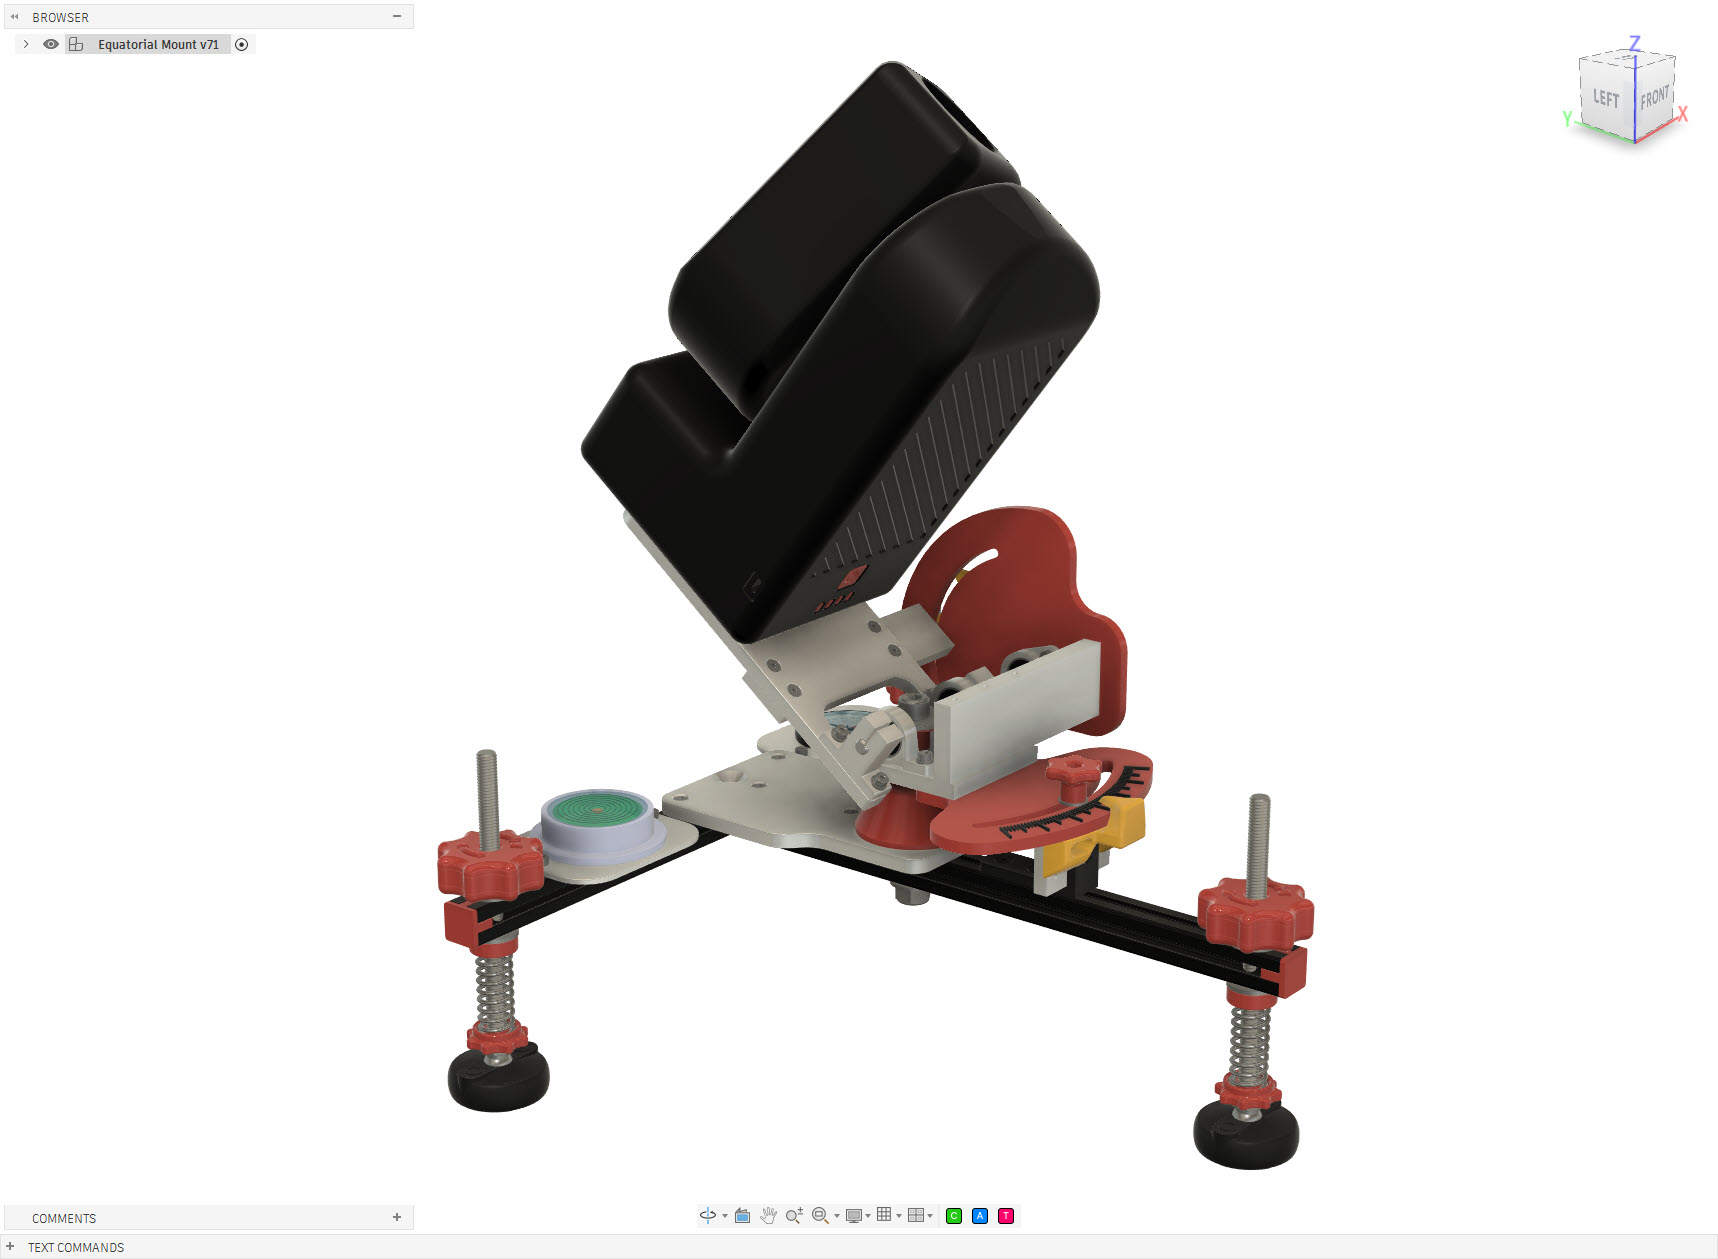
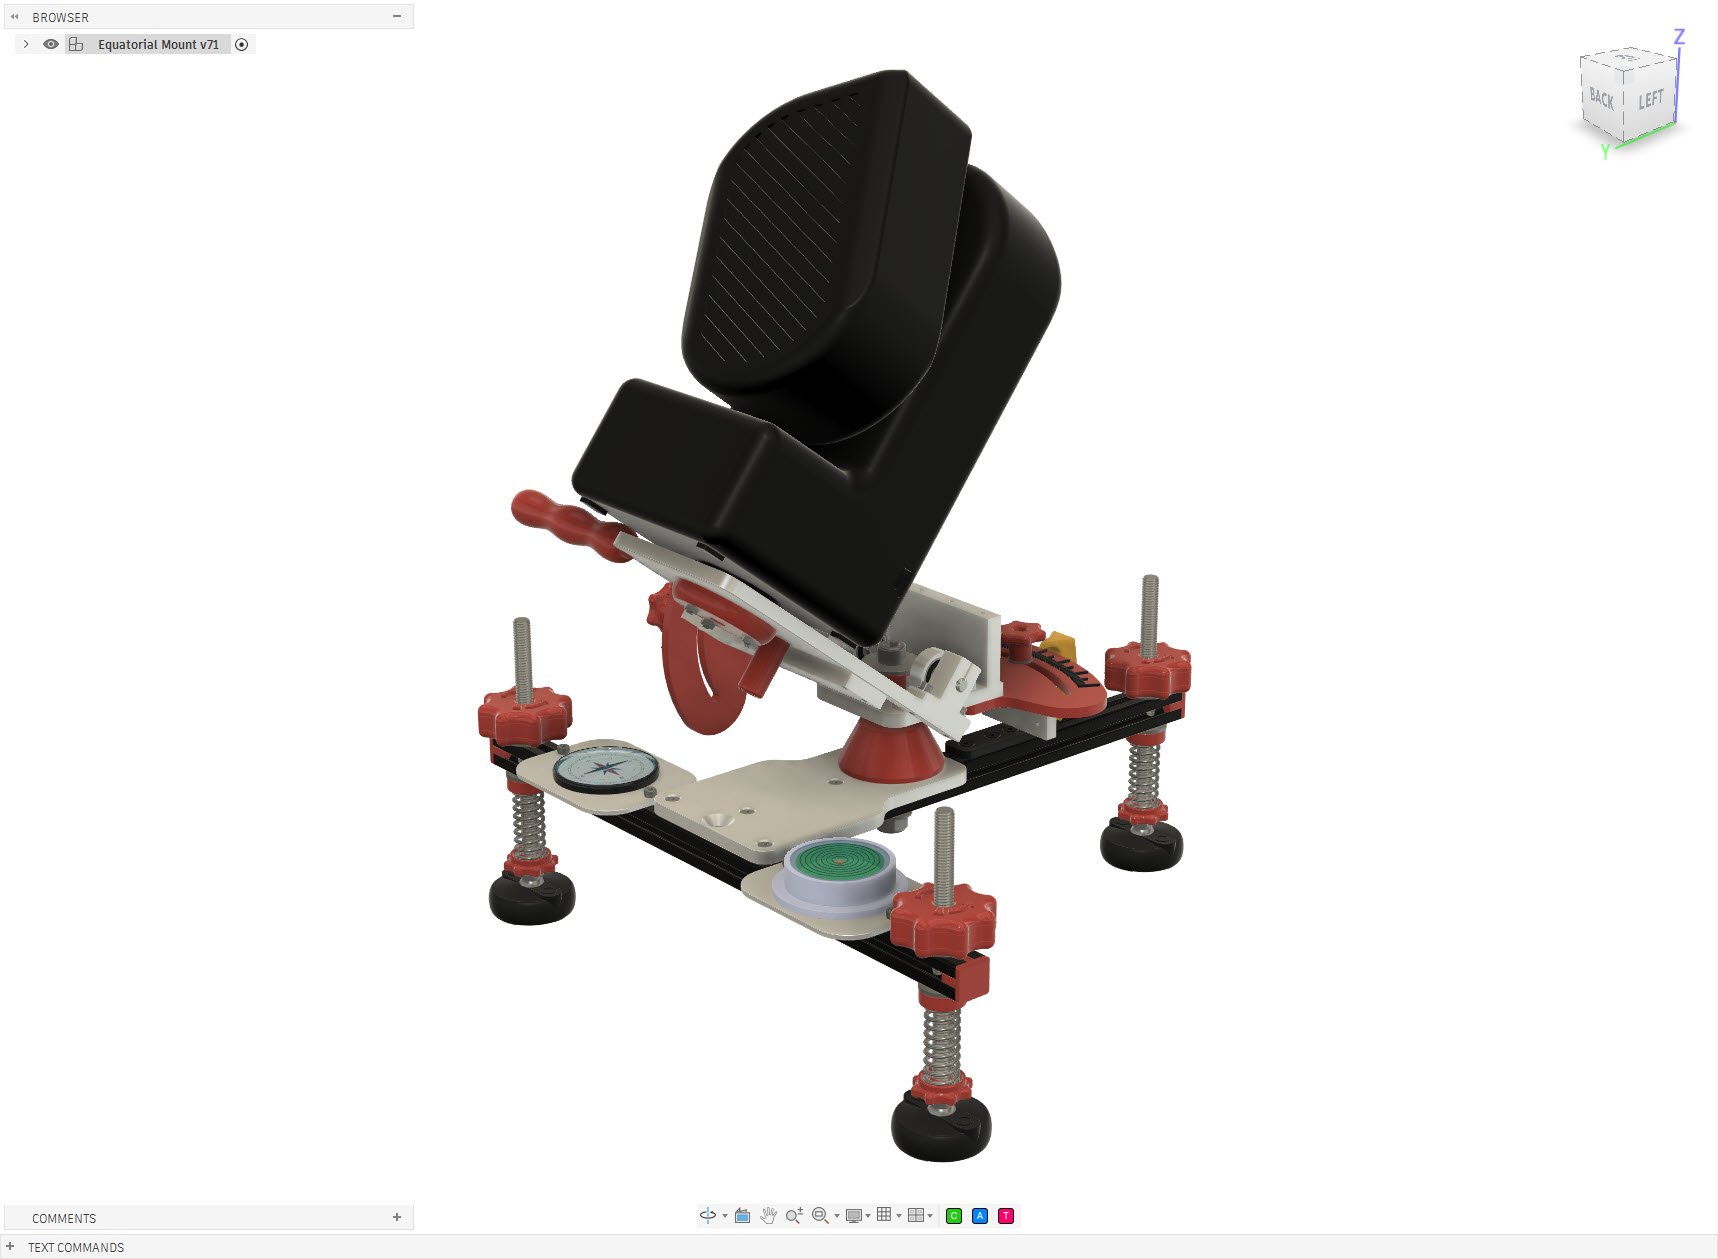
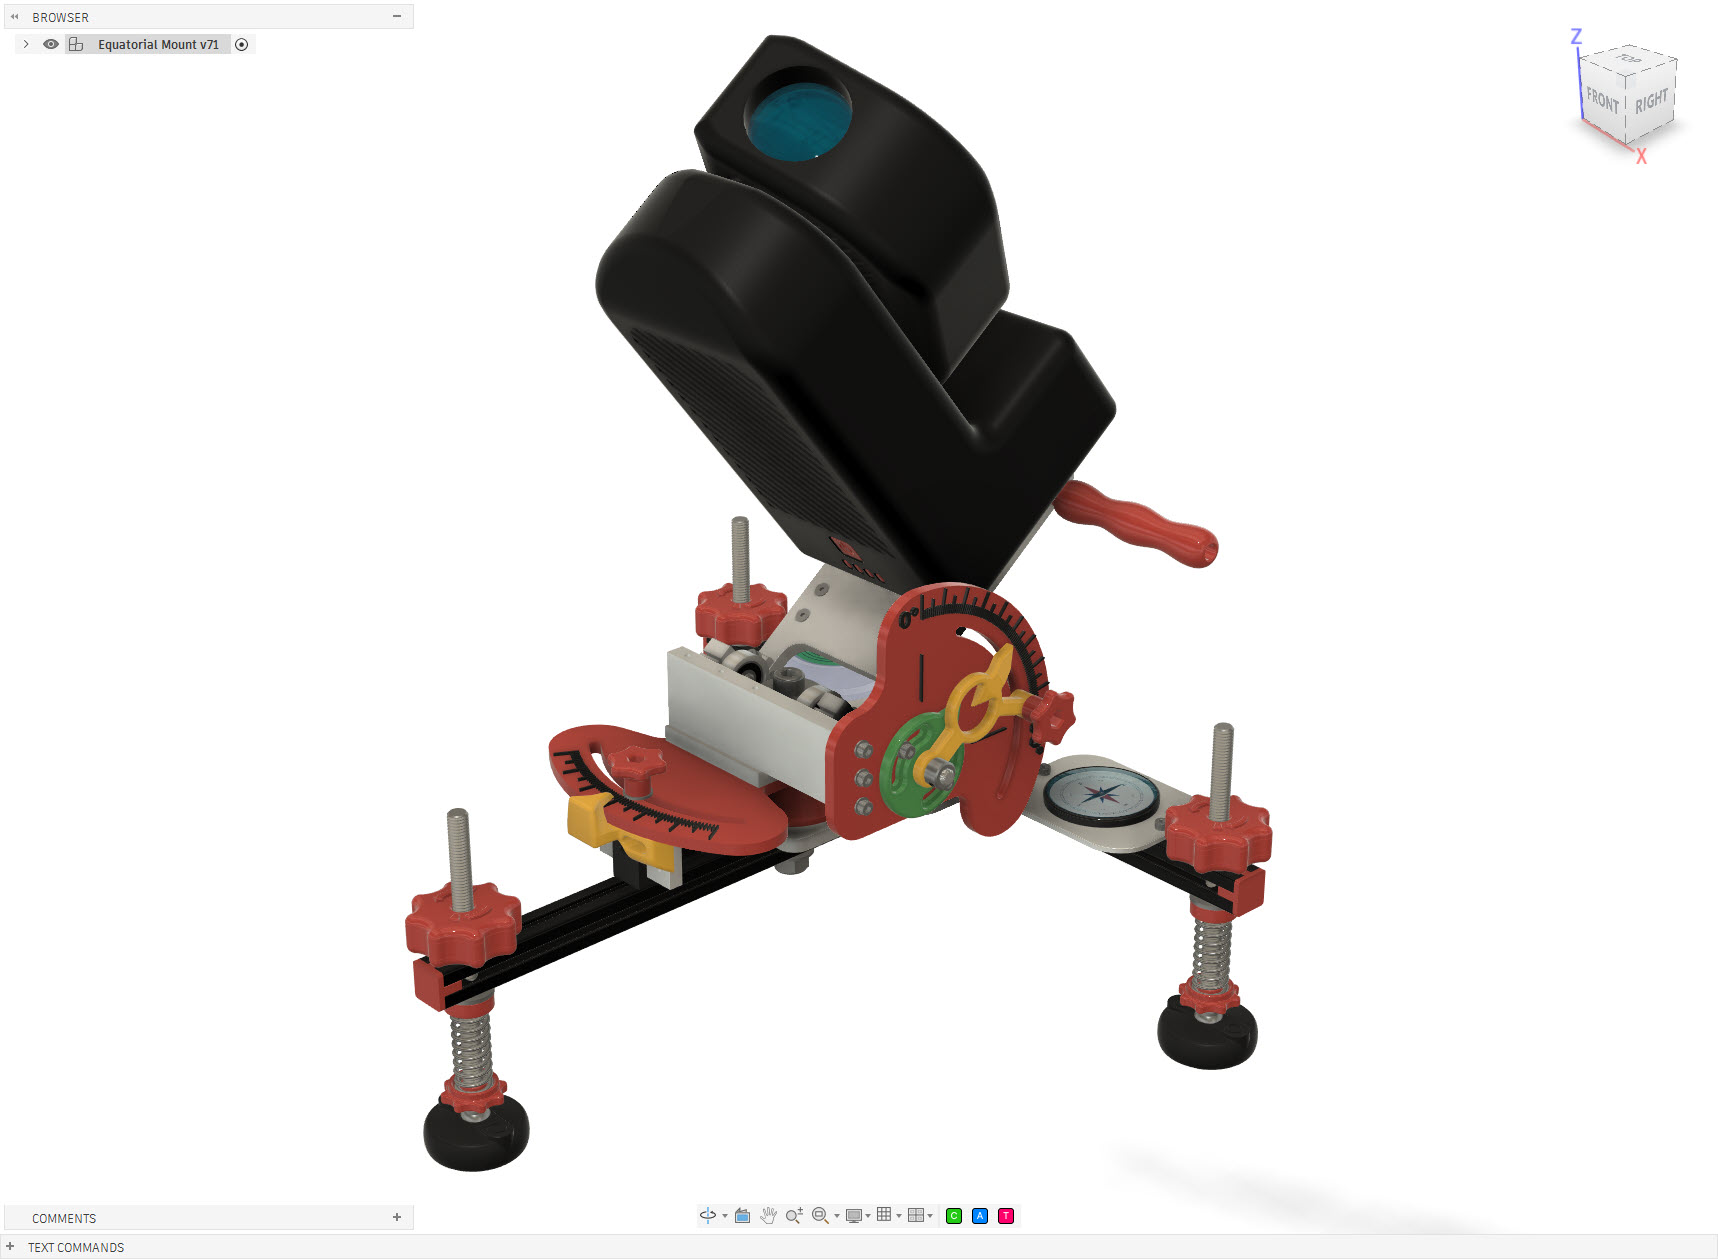
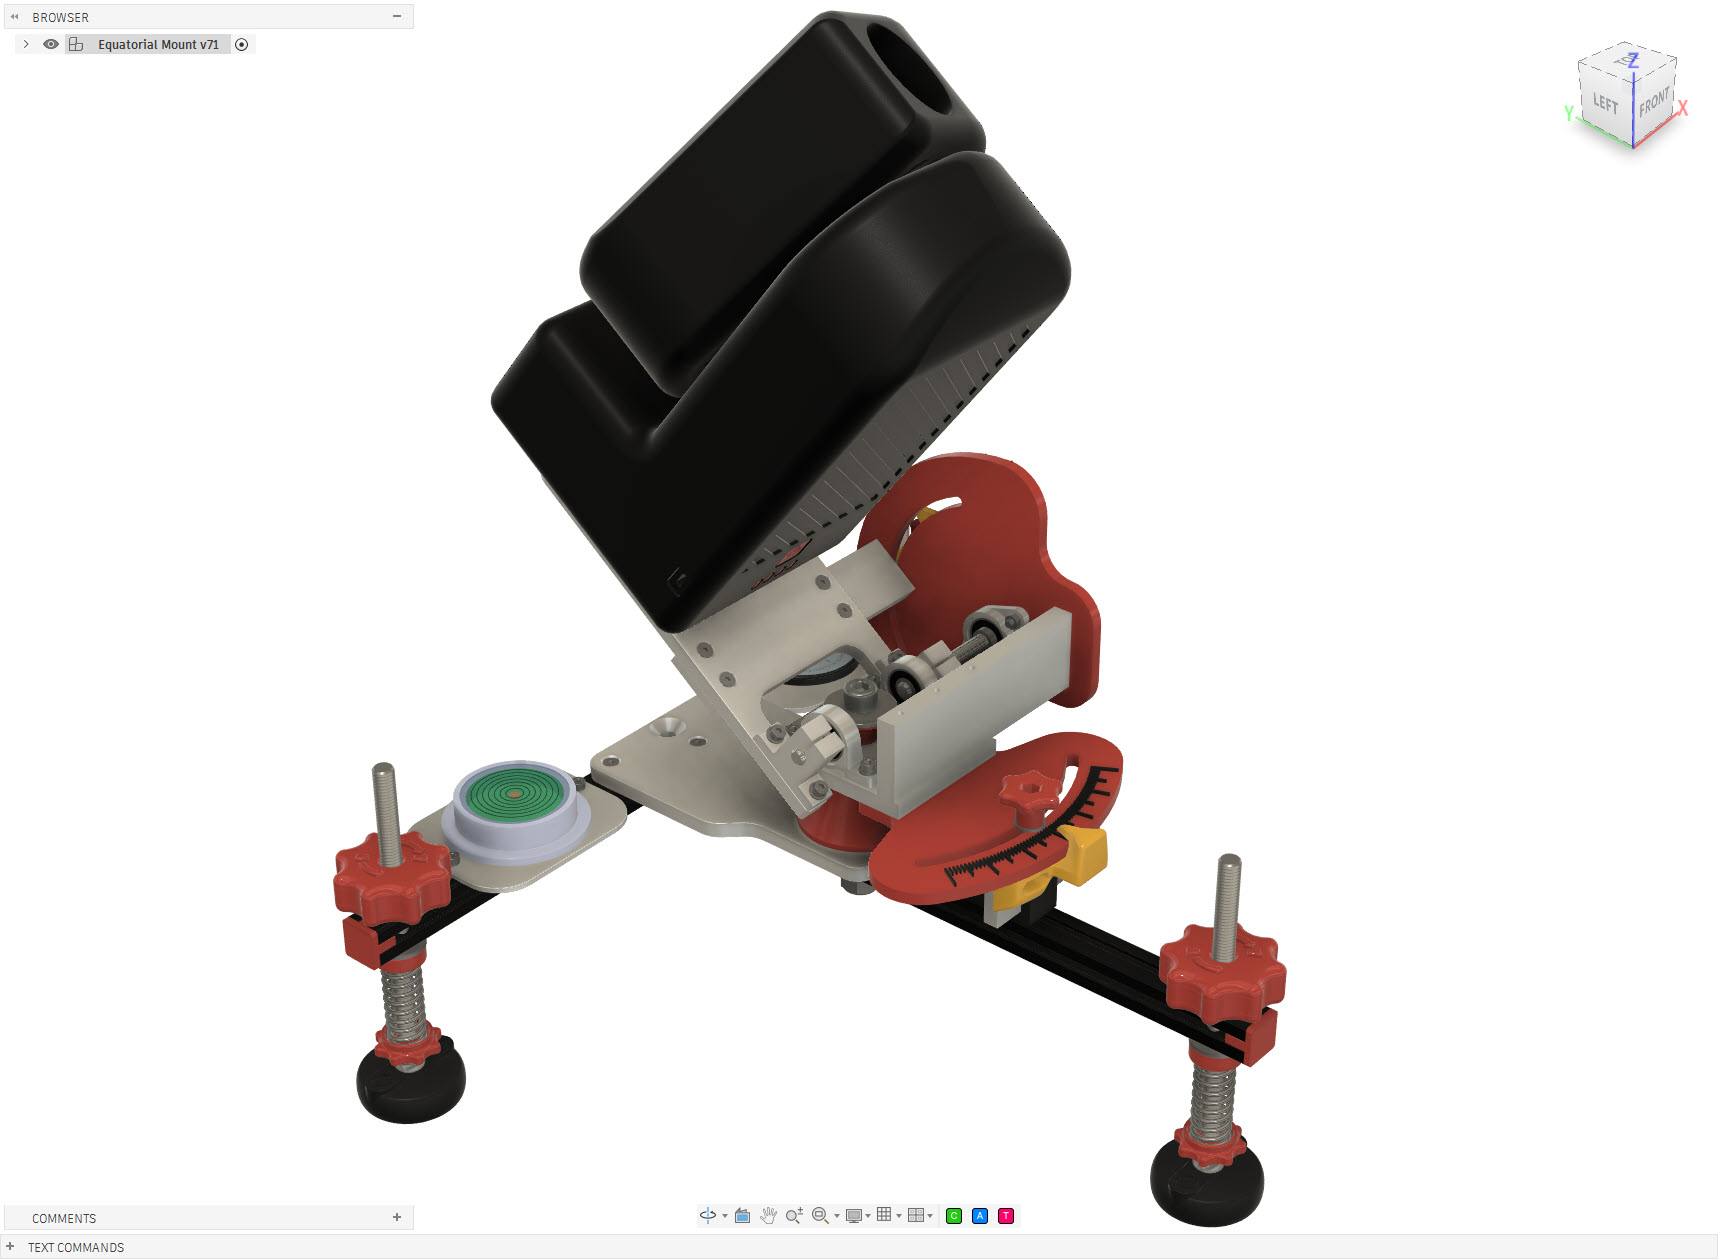
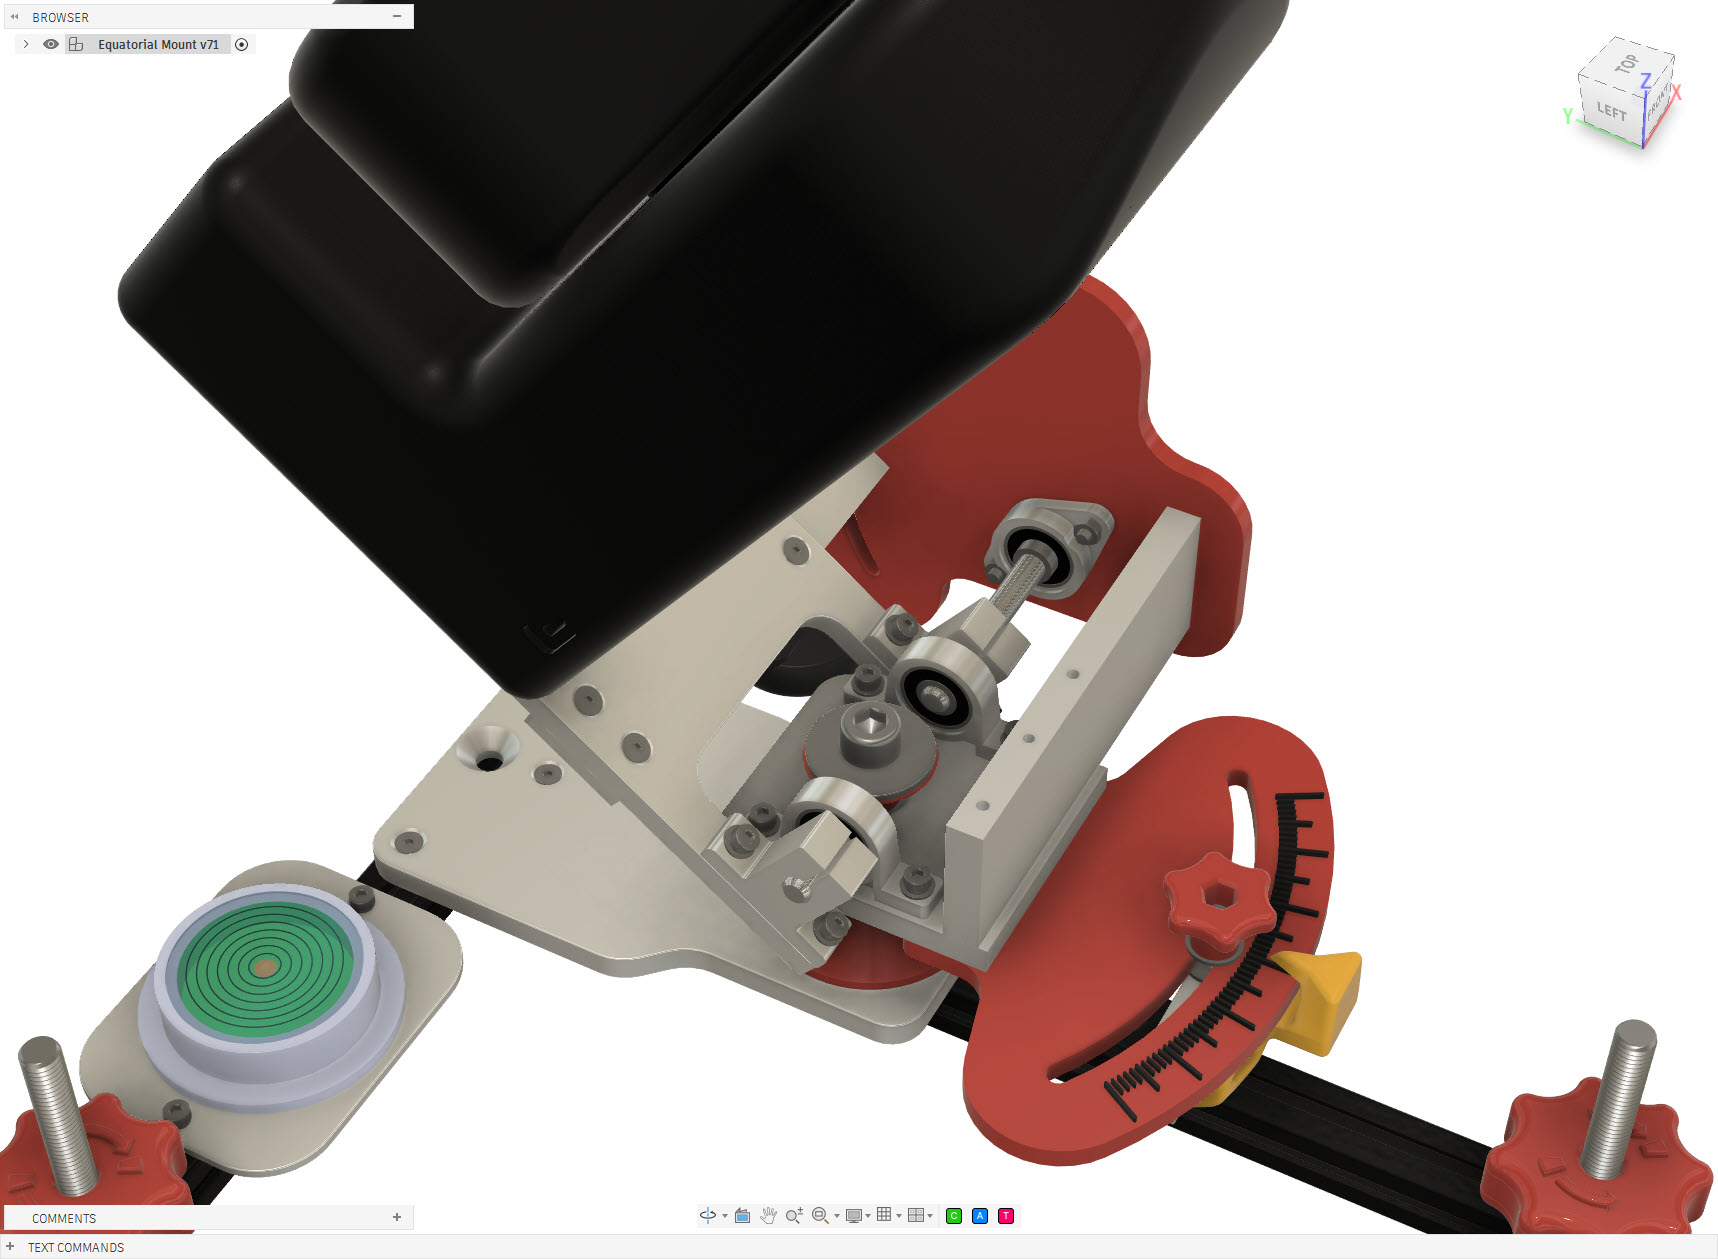
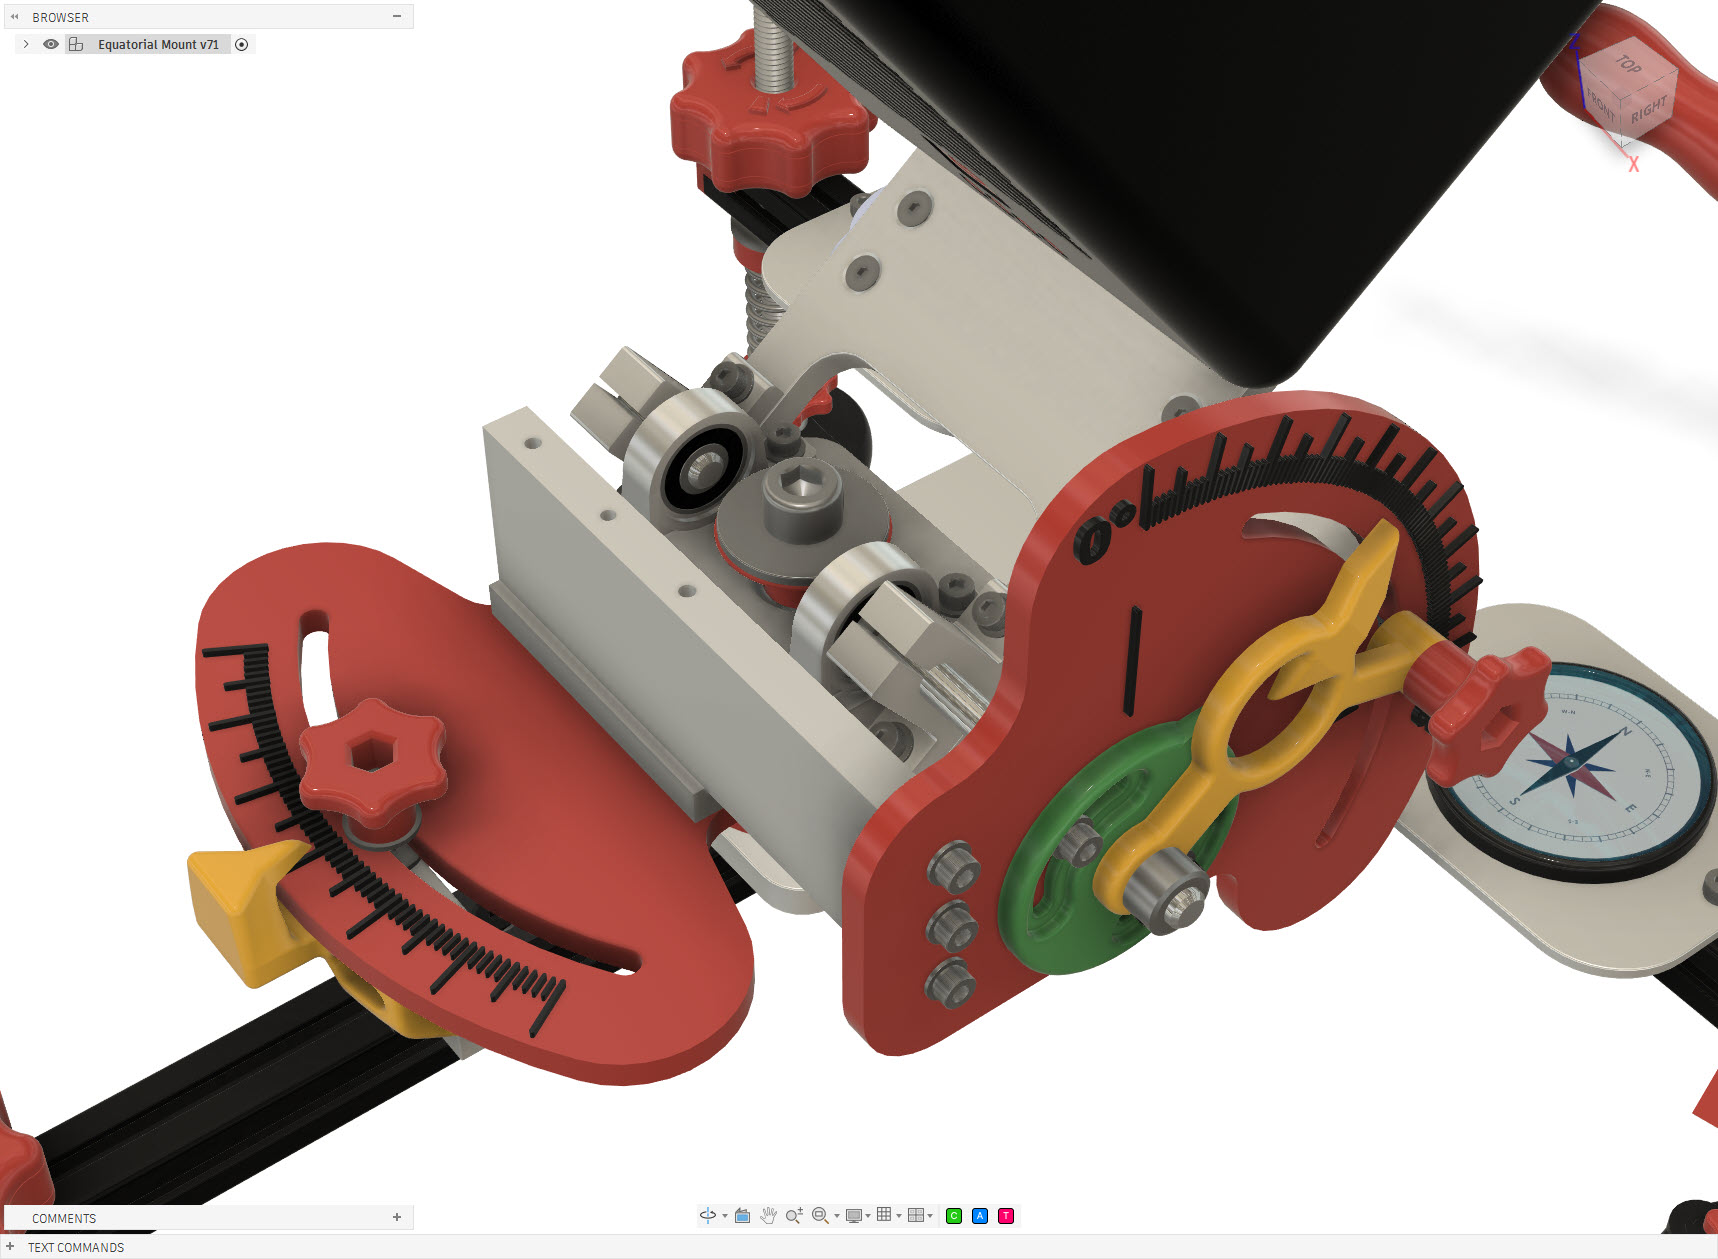
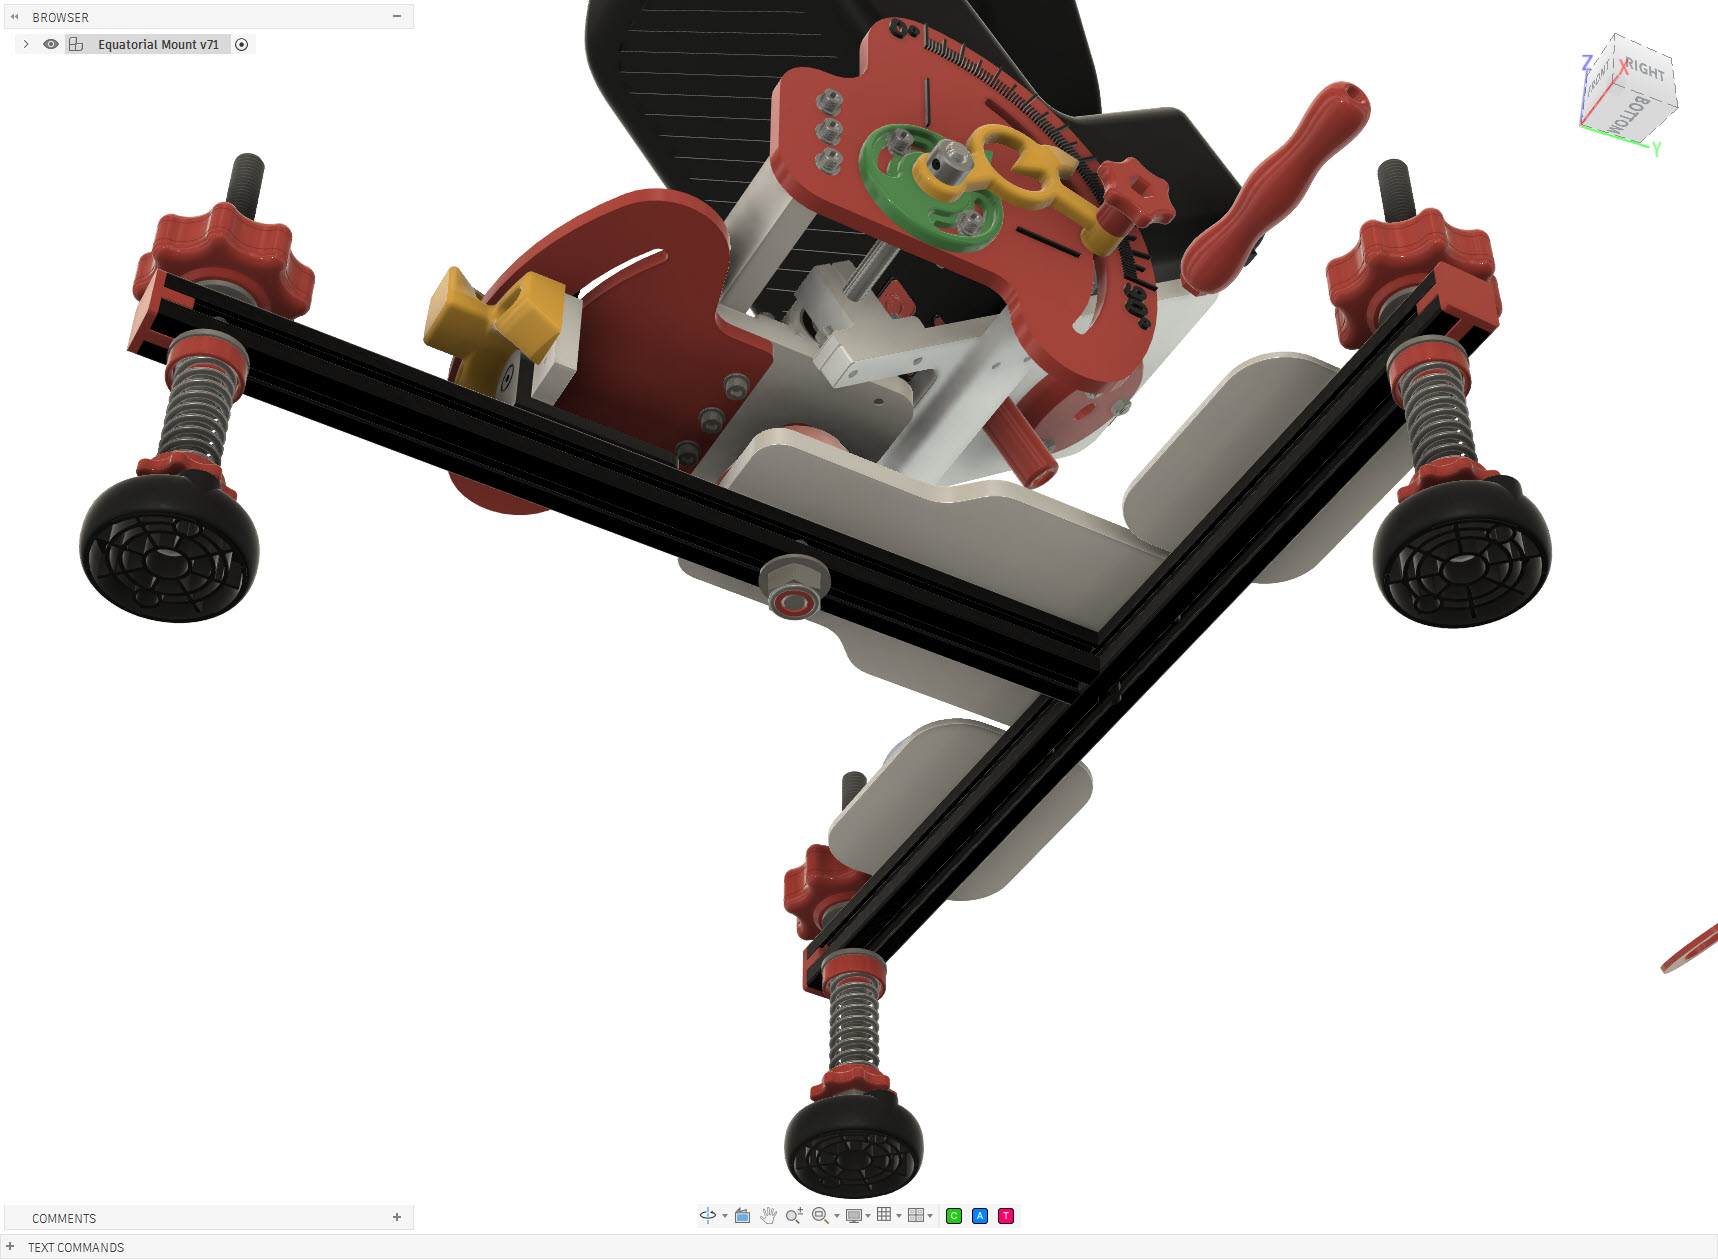
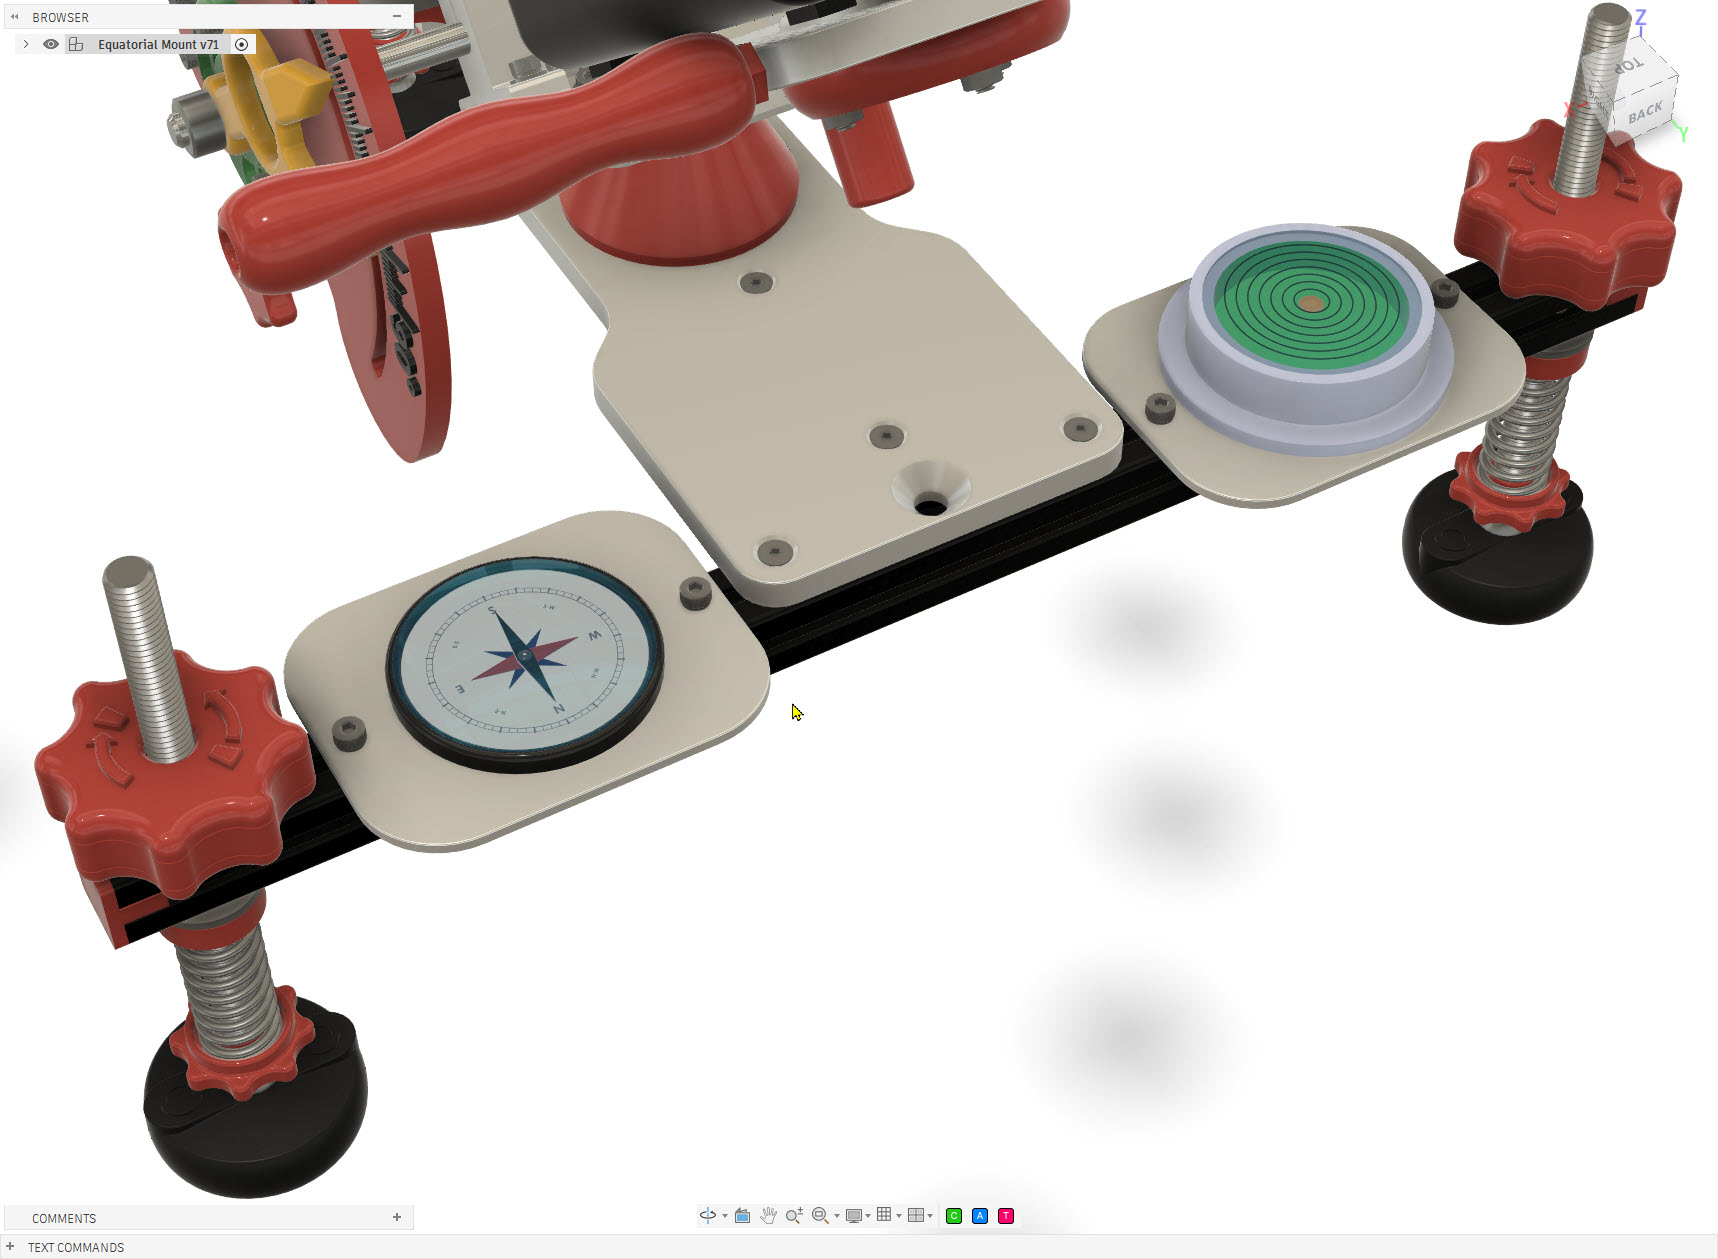
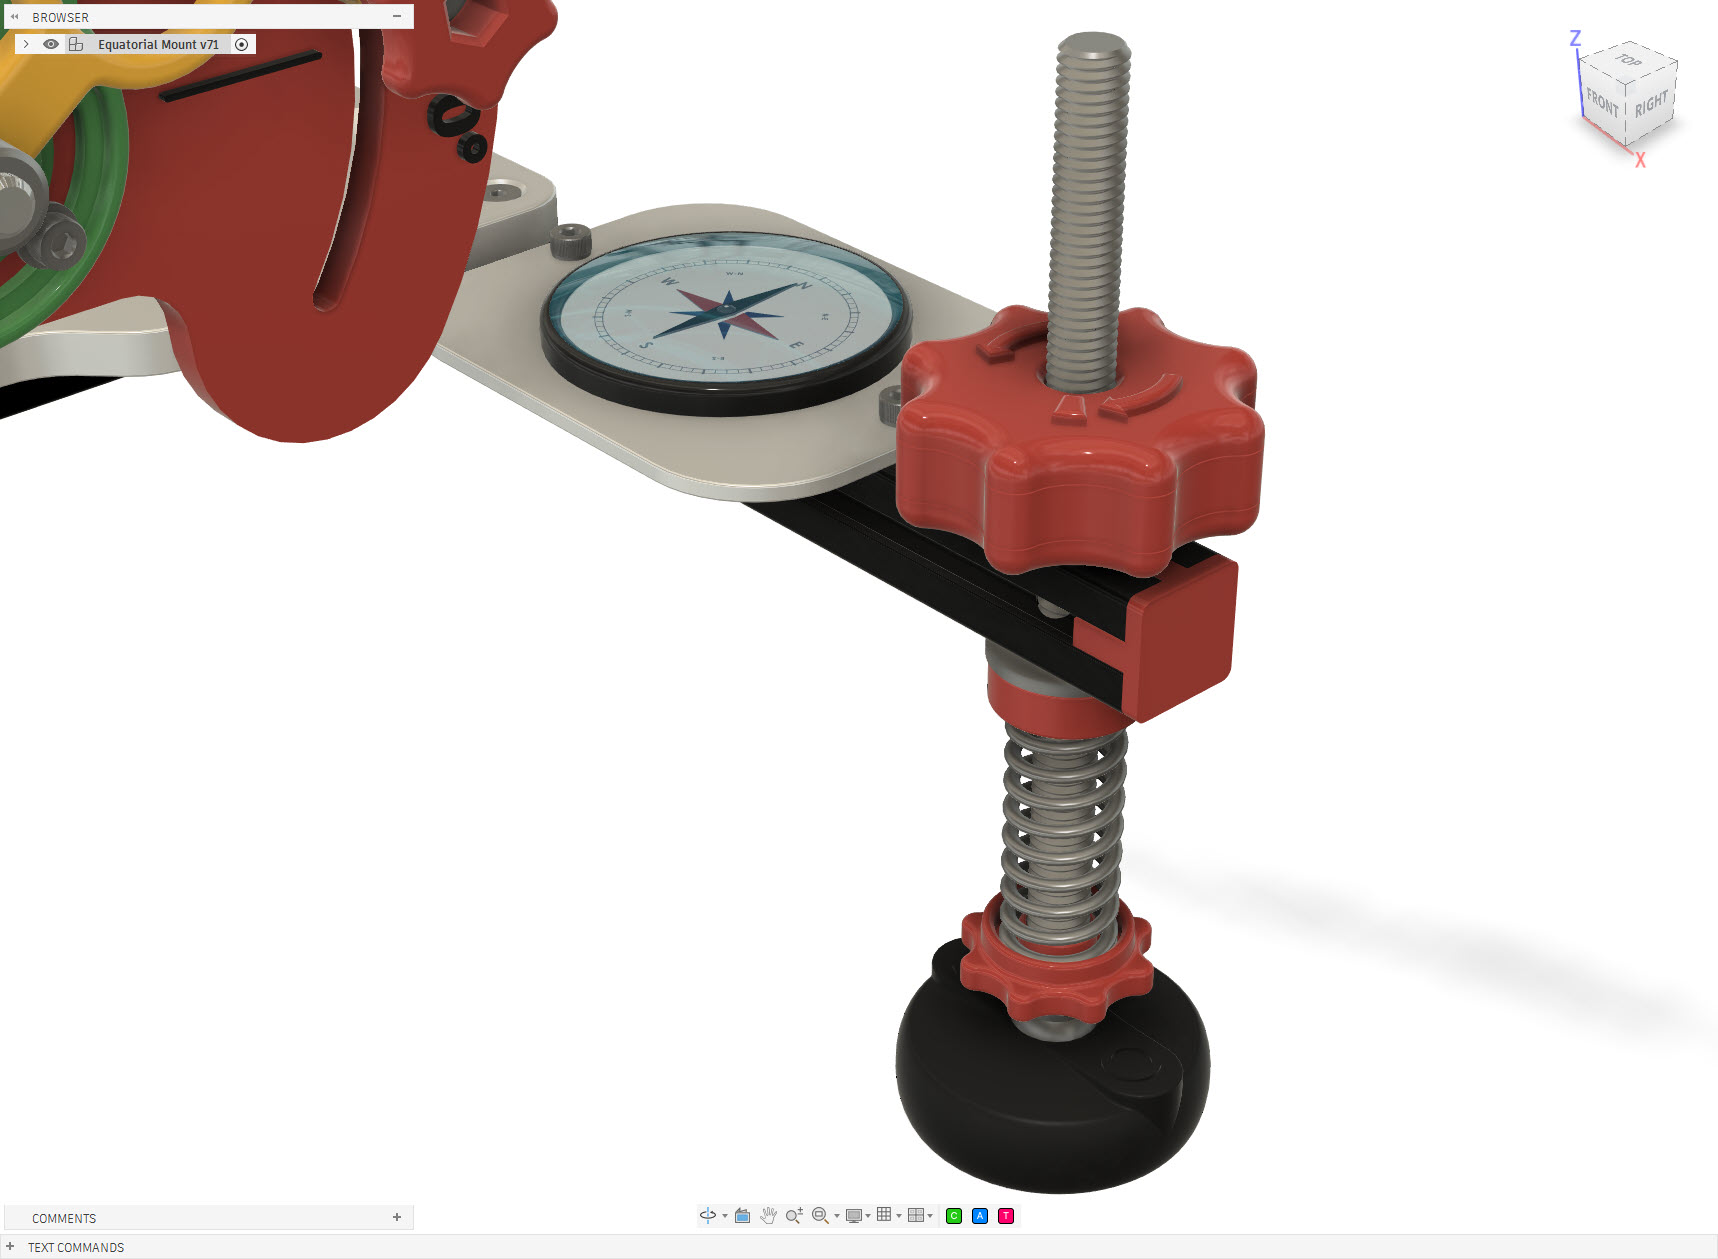
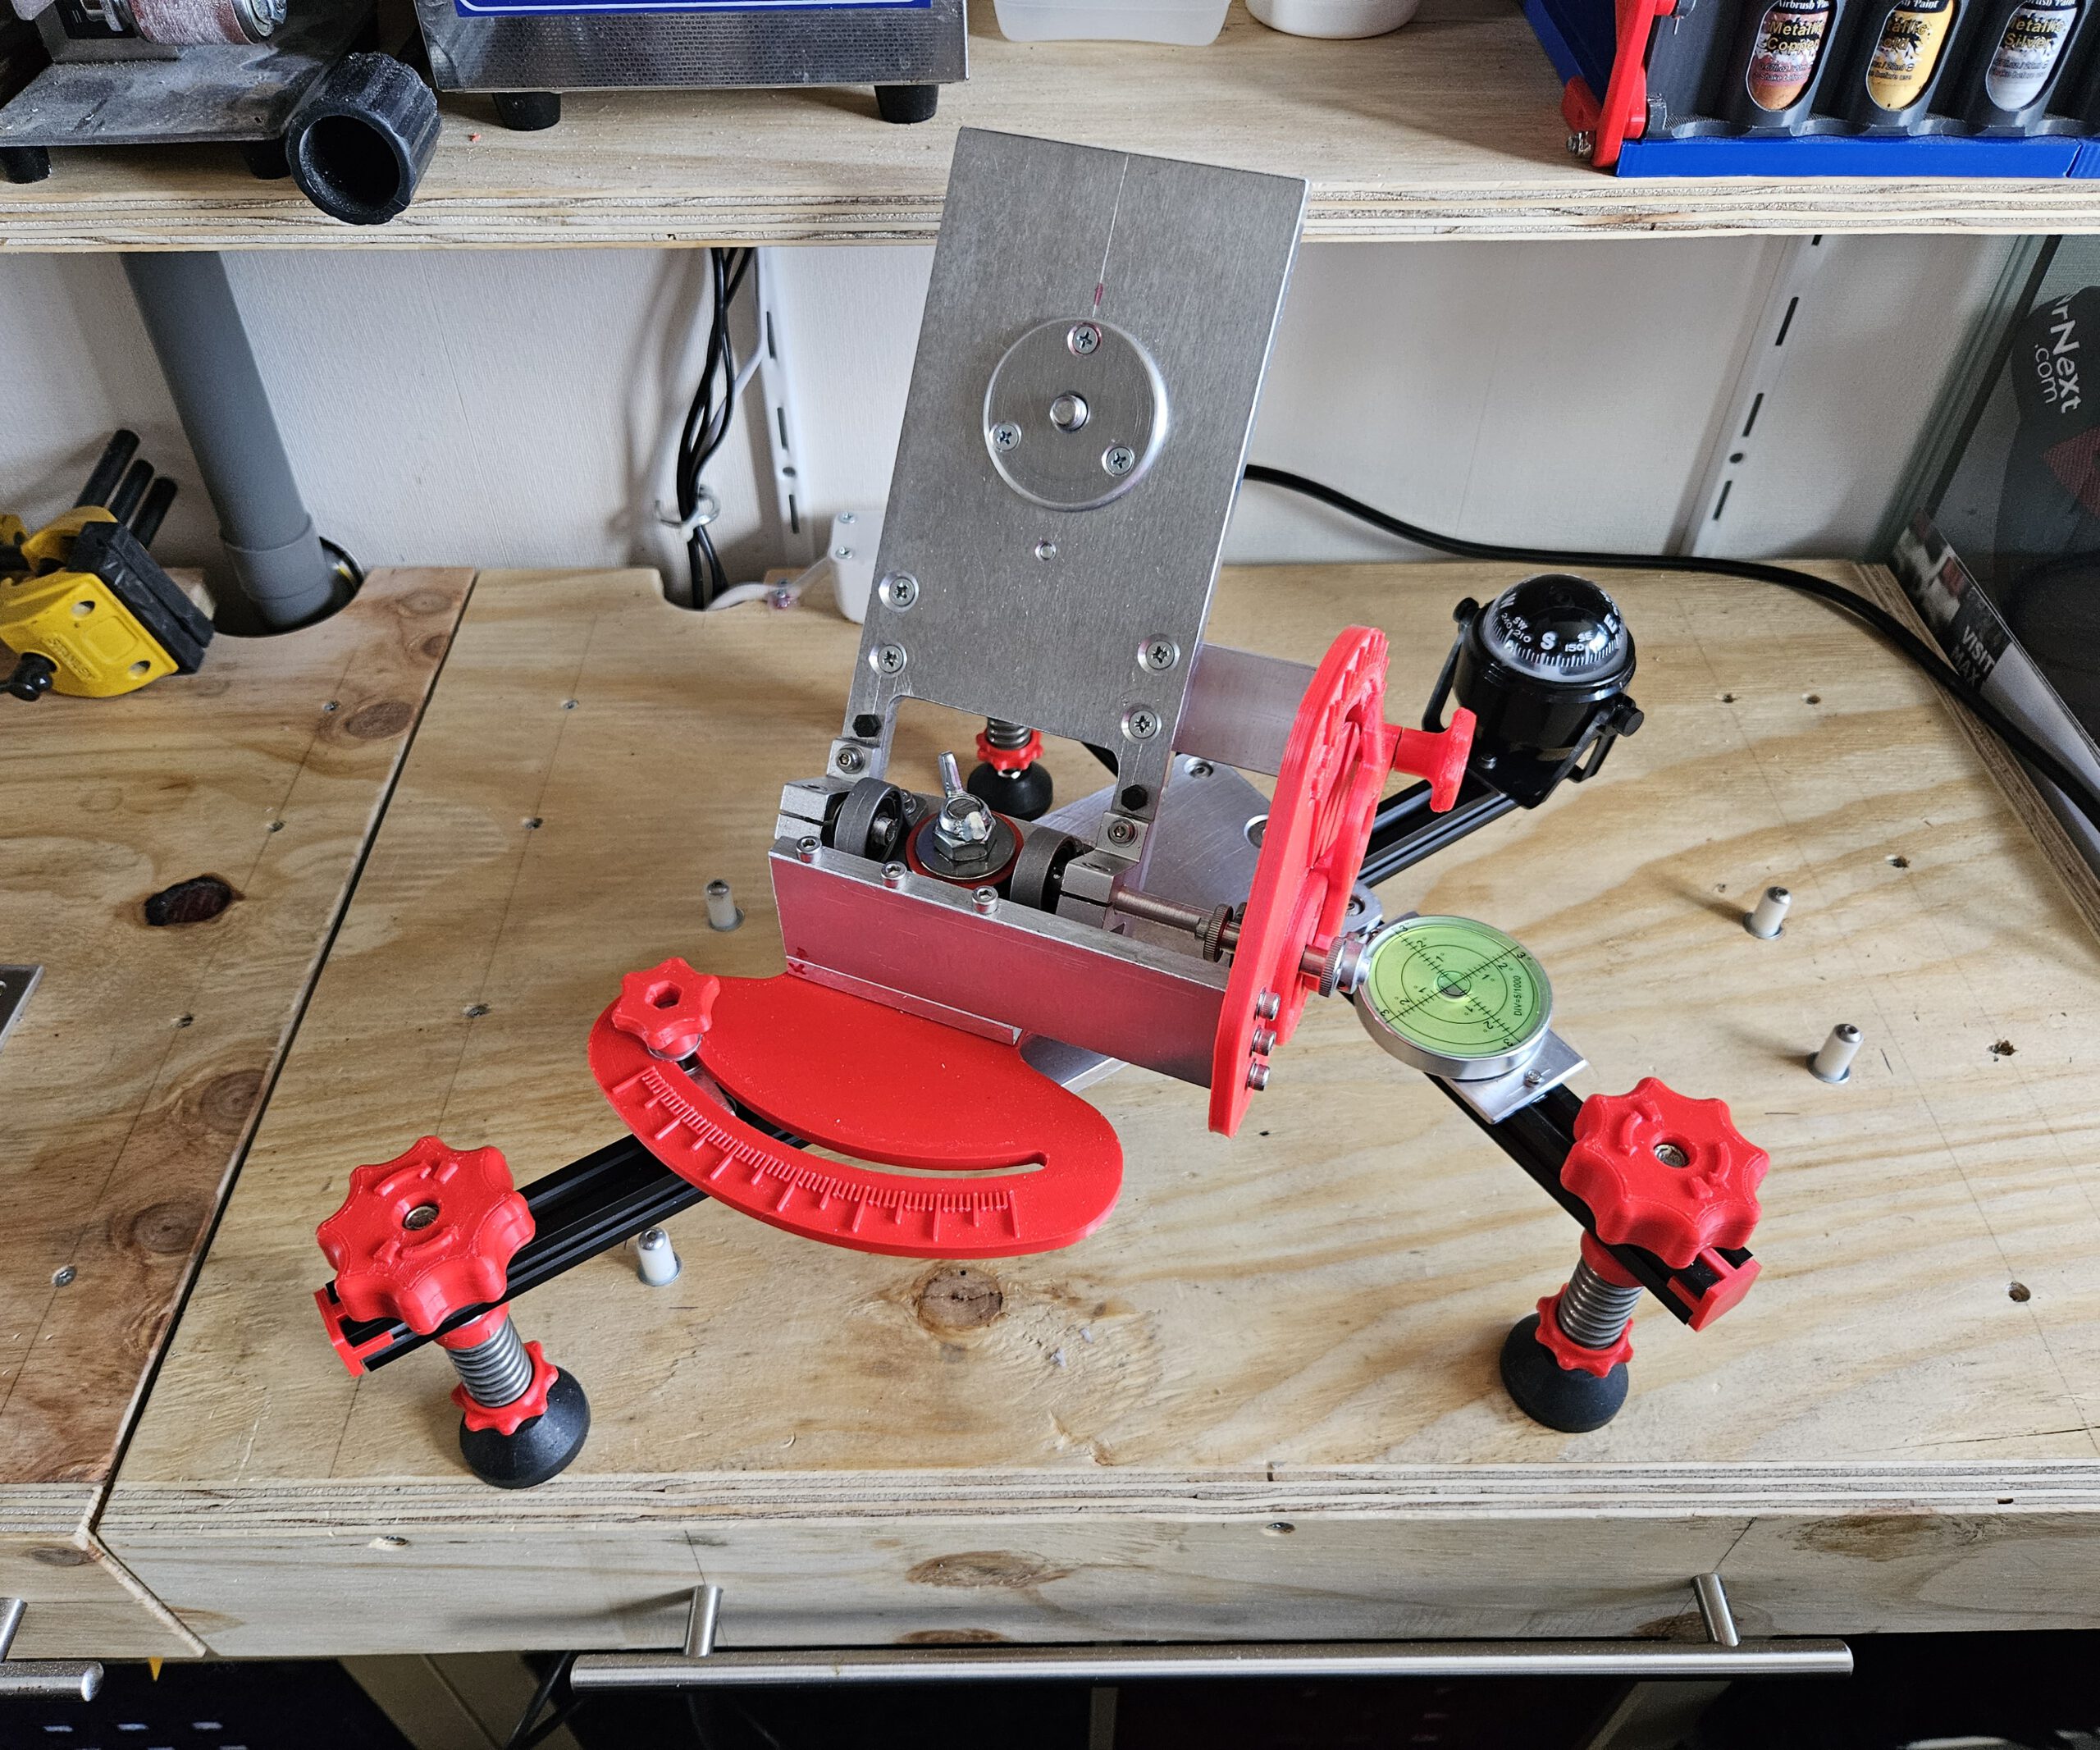
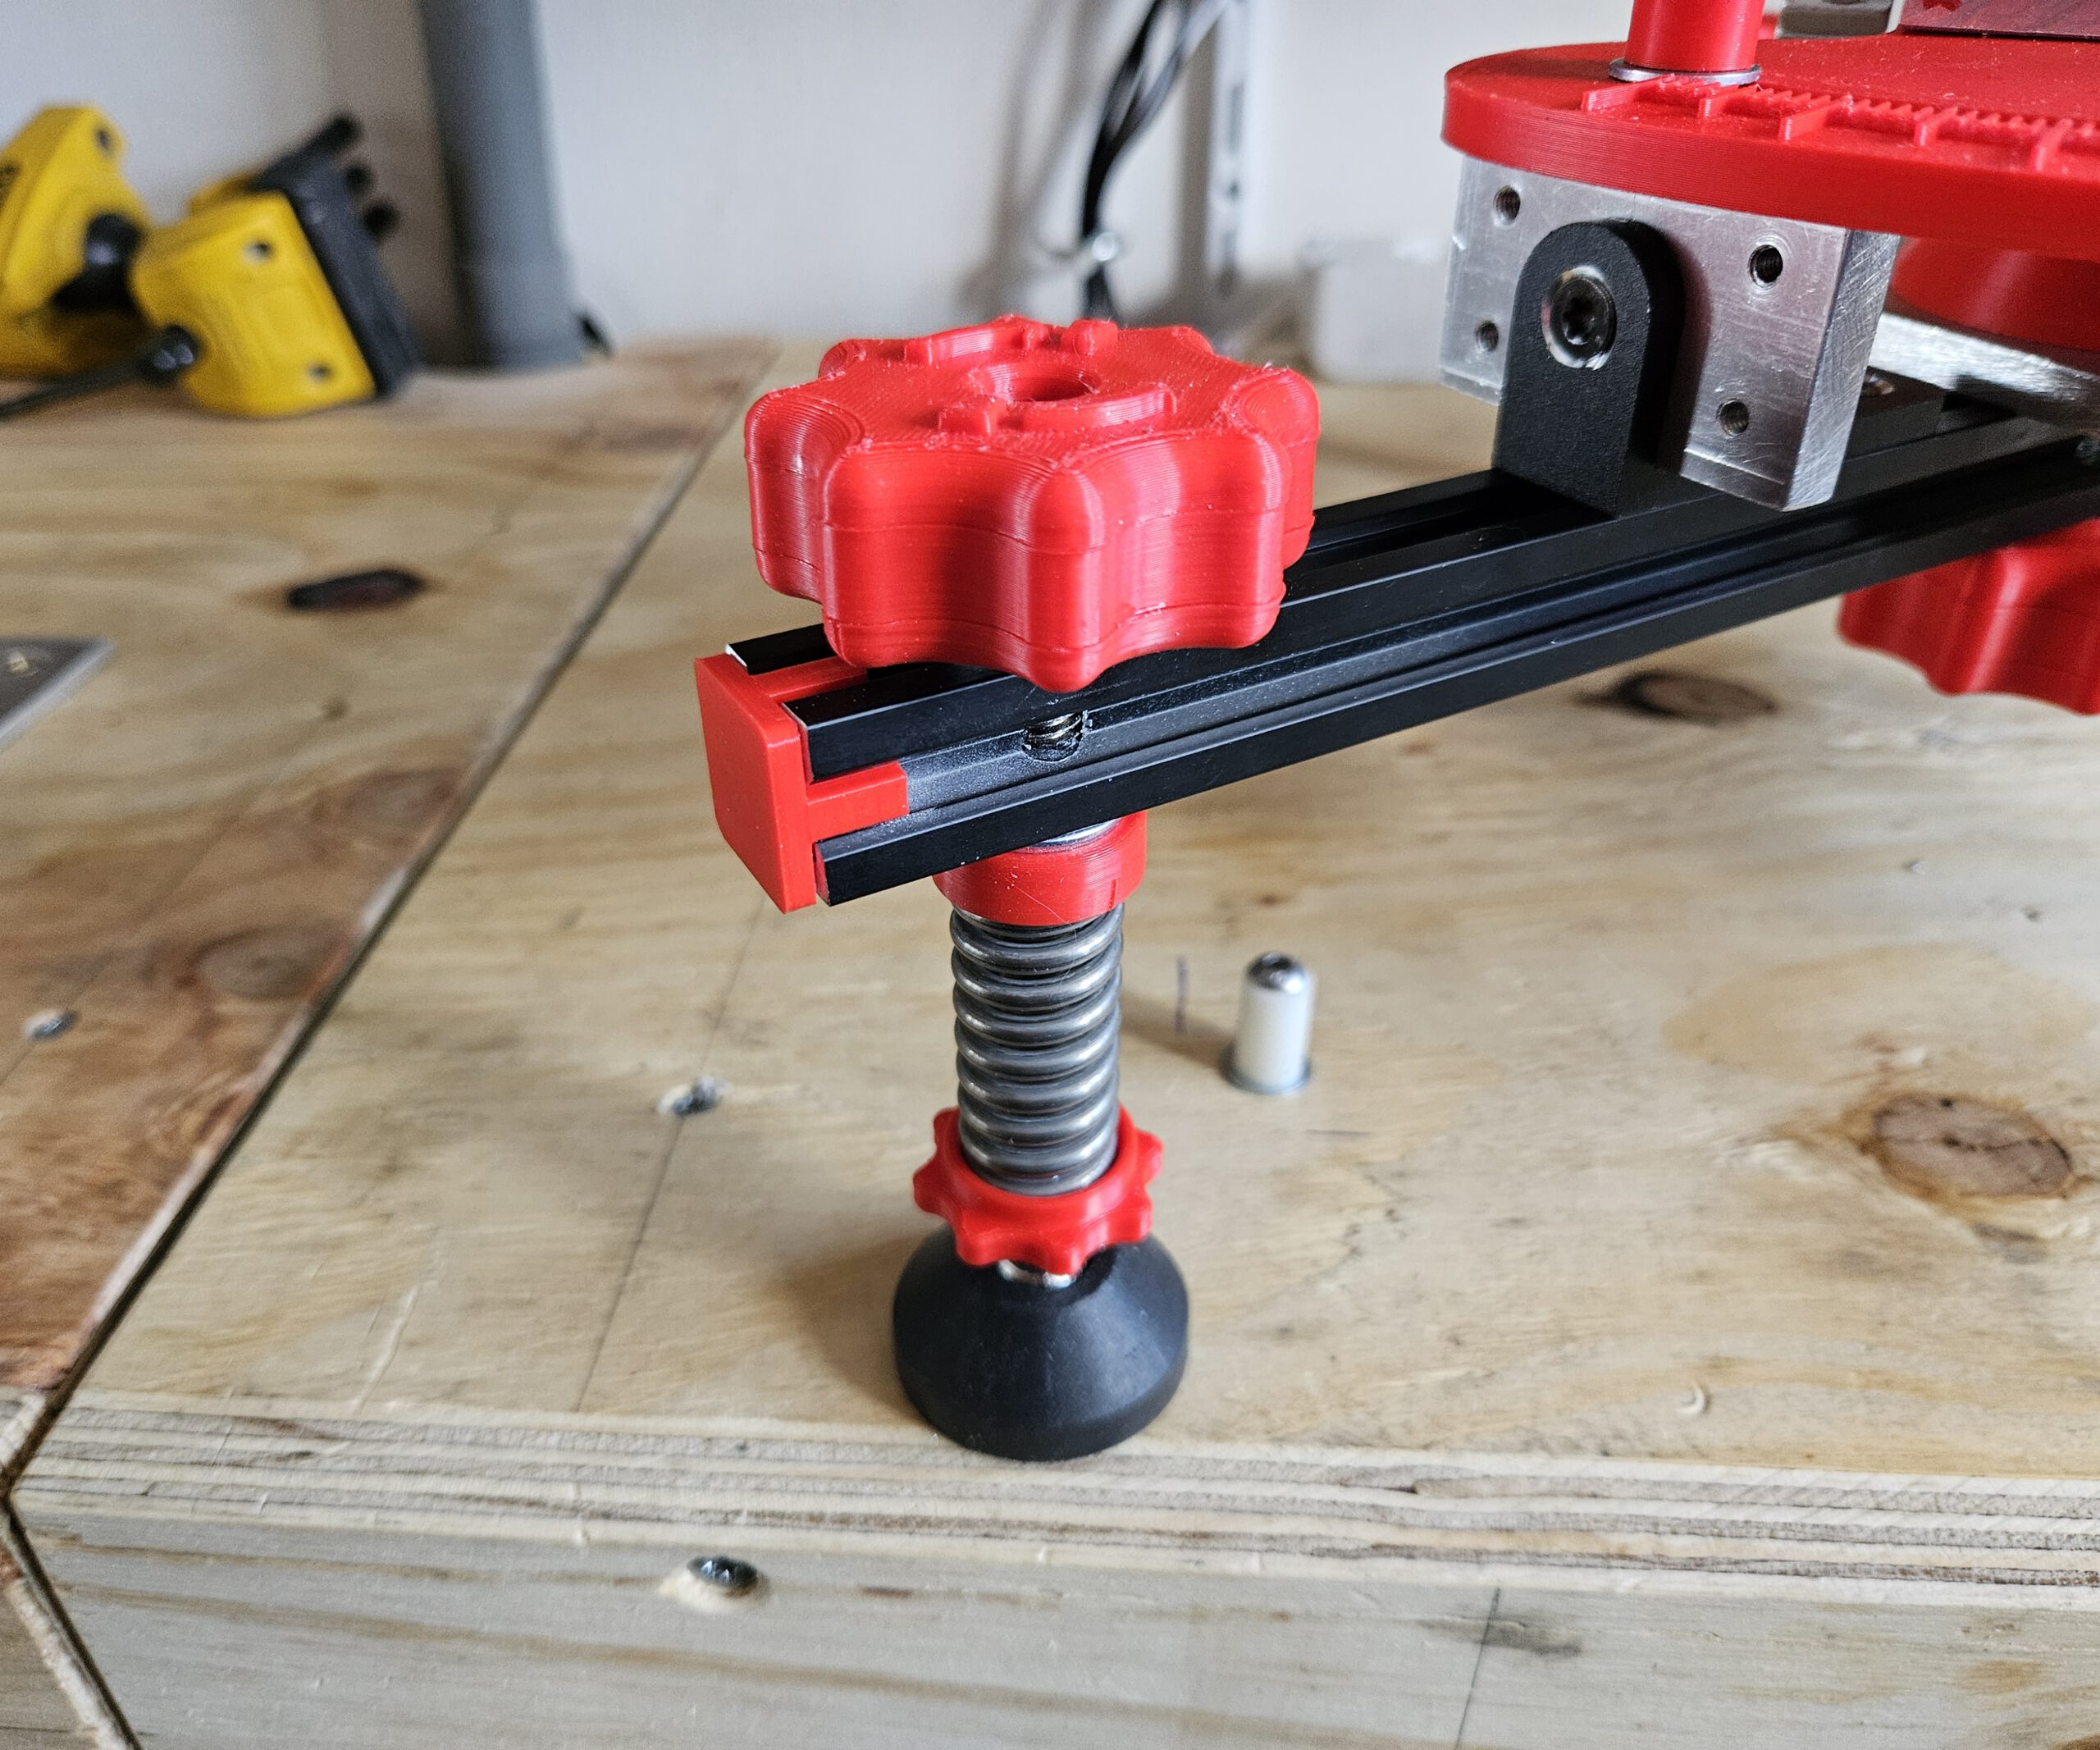
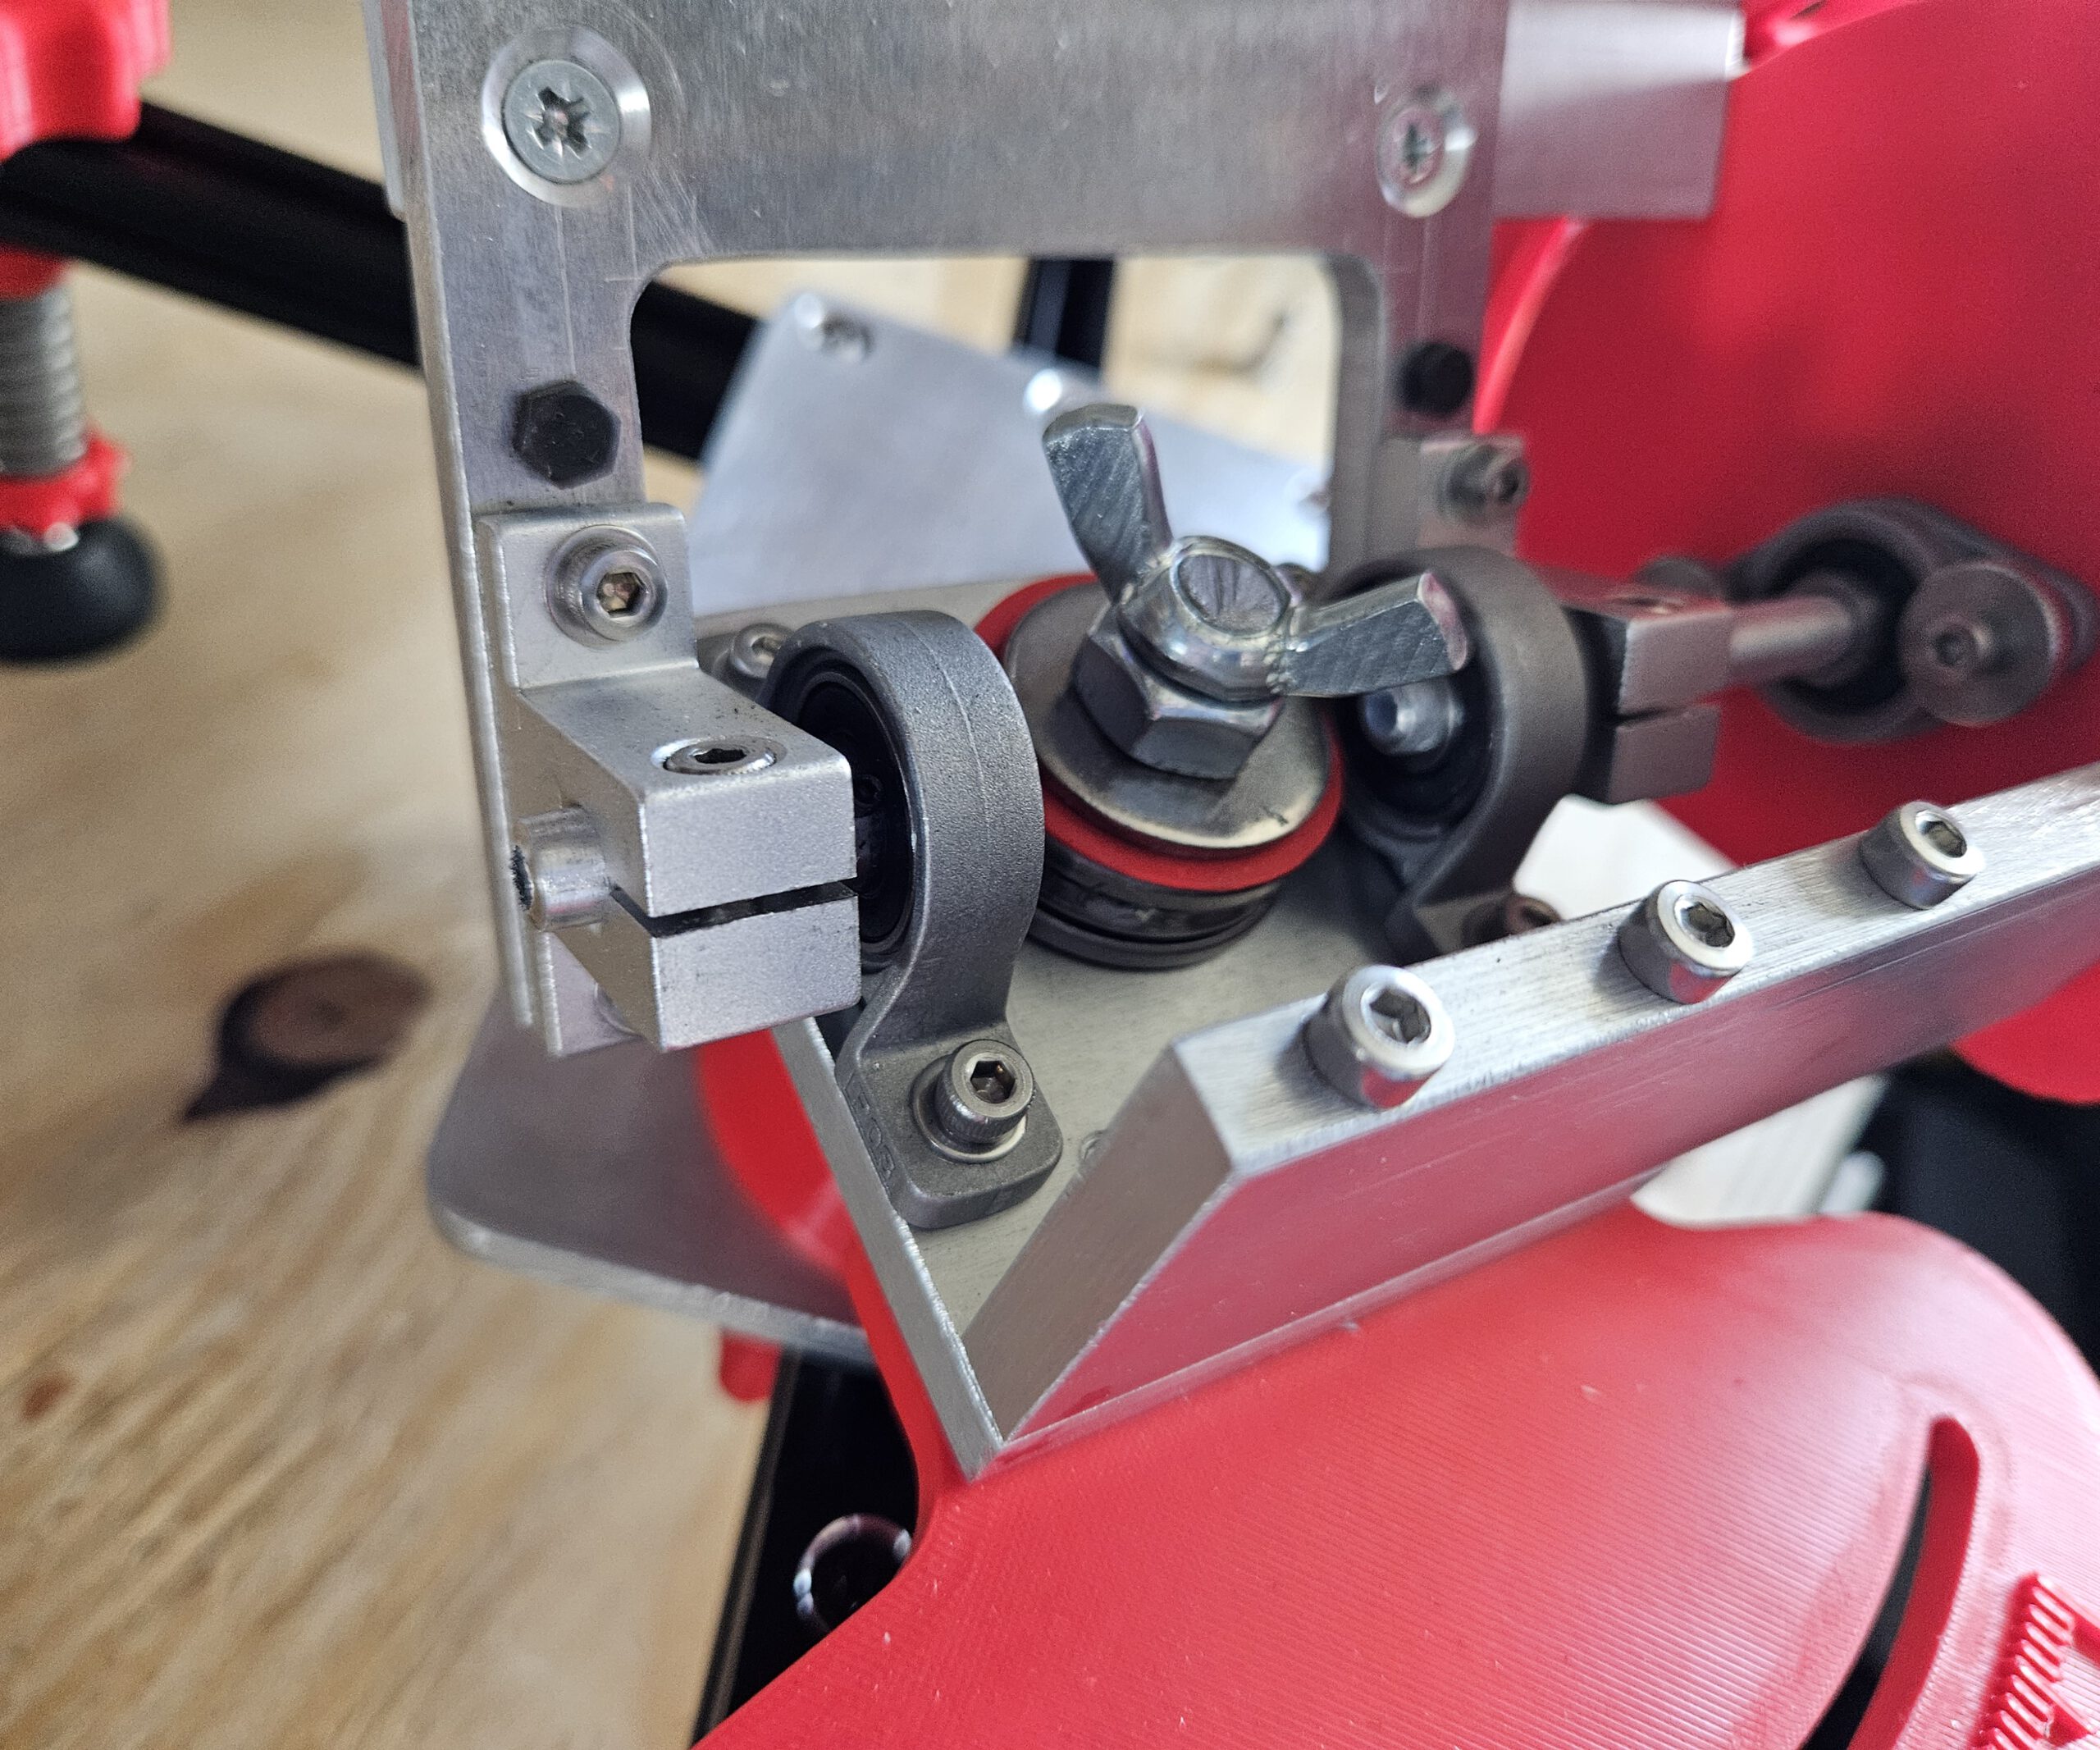
Design drawings for the Aluminium parts
The scales can be printed, but please use ABS or Nylon for stability. The other parts:
- Azimuth Platform
- Equatorial Mount
- Rotaton Plate
Must be made from metal for stability. I used easy to work thick Aluminium plates. Back then I worked it by hand and hand tools. Nowadays I woult put it in mij CNC milling machine. But some old fashion workmanship will do too.
Bill Of Materials (BOM)
Tripod Leg BOM
| Qty | Component | Specification / Notes | 3D printed |
|---|---|---|---|
| 1 | Compression Spring | 3.4 × 20 × 50 mm, 30 kg | n/a |
| 1 | Pivot Head Bolt | M10 × 100 | n/a |
| 1 | Rubber Foot | Weather-resistant | n/a |
| 3 | Washer | M10, OD 12.5 mm | n/a |
| 1 | Nut | M10 | n/a |
| 1 | Spring Cap | n/a | ABS/Nylon |
| 3 | Dowel | n/a | ABS/Nylon |
| 1 | Thumbwheel Bottom | n/a | ABS/Nylon |
| 1 | Thumbwheel Middle | n/a | ABS/Nylon |
| 1 | Thumbwheel Top | n/a | ABS/Nylon |
| 1 | Spring Thumbwheel | n/a | ABS/Nylon |
| 1 | Spring Cap | n/a | ABS/Nylon |
Quantities shown are for one tripod leg. Three identical legs are required for the complete mount.
Base Platform BOM
| Qty | Component | Specification / Notes | 3D printed |
|---|---|---|---|
| 1 | Aluminium Plate | 220 × 100 × 8 mm | n/a |
| 1 | Washer | M10 | n/a |
| 1 | Locknut | M10 | n/a |
| 5 | Flat Head Hex Bolt | M4 × 30 | n/a |
| 1 | Socket Head Bolt | M10 × 120 | n/a |
| 1 | APS Lock | n/a | ABS/Nylon |
| 1 | Top Azimuth Support | n/a | ABS/Nylon |
| 1 | Bottom Azimuth Support | n/a | XABS/Nylon |
Altitude Platform BOM
| Qty | Component | Specification / Notes | 3D printed |
|---|---|---|---|
| 1 | Aluminium Plate | 205.2 × 100 × 8 mm | n/a |
| 1 | Lens Head Bolt | 3/8″-16 × 3/4″ | n/a |
| 1 | External-Tooth Lock Washer | 3/4″ | n/a |
| 2 | Flat Head Hex Bolt | M4 × 30 | n/a |
| 4 | Flat Head Hex Bolt | M4 × 14 | n/a |
| 1 | Hex Bolt | M4 × 15 | n/a |
| 1 | Hex Bolt | M4 × 40 | n/a |
| 1 | Socket Head Bolt | M4 × 30 | n/a |
| 4 | Socket Head Bolt | M4 × 13 | n/a |
| 3 | Hex Nut | M4 | n/a |
| 15 | Washer | M4 | n/a |
| 1 | Steel Axle | Ø8 mm × 100 mm | n/a |
| 1 | Steel Axle | Ø8 mm × 30 mm | n/a |
| 1 | Shaft Collar | ID 8 mm, OD 14 mm, H 8 mm | n/a |
| 1 | Cup Point Hex Set Screw | M4 × 3 | n/a |
| 2 | SK8 Axle Support | 42 × 32 × 14 mm, ID 8 mm | n/a |
| 1 | Adjustable Handle Block Alt | n/a | ABS/Nylon |
| 1 | Alt Grip | n/a | ABS/Nylon |
| 1 | Aluminium Turning Base | n/a | ABS/Nylon |
| 1 | Alt Platform 0 Degree Support | n/a | ABS/Nylon |
| 1 | Scale Pointer | n/a | Any |
| 1 | Thumb Screw | n/a | Any |
| 1 | Placeholder for Lens Head Bolt | n/a | Any |
Azimuth Platform BOM
| Qty | Component | Specification / Notes | 3D printed |
|---|---|---|---|
| 4 | Flat Head Bolt | M4 × 20 | n/a |
| 3 | Roll Bearing Block | 42 × 32 × 14 mm, ID 8 mm | n/a |
| 8 | Socket Head Bolt | M4 × 13 | n/a |
| 8 | Washer | M4 | n/a |
| 2 | Socket Head Bolt | M4 × 13, additional hardware | n/a |
| 2 | Nut | M3 | n/a |
| 2 | SKF 51203 Thrust Bearing | 51203 / S1203 XC | n/a |
| 1 | Azimuth Scale & Lock | n/a | ABS/Nylon |
| 1 | Altitude Lock Plate V5 | n/a | ABS Nylon |
| 1 | Lockable Home Altitude Pointer | n/a | Any |
| 1 | Adjustable Handle Block Azi | n/a | ABS/Nylon |
And then came the ultimate field test: a solar eclipse.
With the mount polar-aligned and the Seestar tracking the Sun, I could leave the telescope to follow the event instead of repeatedly repositioning it by hand. The result was a complete time-lapse of the eclipse — and, more importantly from a maker’s perspective, proof that the design actually worked outside Fusion 360.
Towards the end of the solar eclipse clip, the image starts to shift. This happened because the telescope eventually ran into the window frame without me noticing. A bit unfortunate, but it is what it is. Apart from that, the recording was successful and the mount did exactly what it was supposed to do.